
How To Draw Shiny Hair in Procreate

Creating shiny hair in Procreate can sometimes feel like trying to capture sunlight in a bottle – tricky but mesmerizing when done right.
So, let’s break down this elusive process into manageable steps.
Notice: Take a look at some of the Hair Procreate Brushes, if you want to find pre-made shiny hair brushes. Additionally, exploring how to make a hairbrush in Procreate might offer more customized options for your artwork.
For this tutorial, we used some non-hair brushes to create a shiny effect, from smudge and chalk sketch brush packs.
Step 1 – Lay Down the Base
Start by sketching out the hairstyle. Then, fill it with the base color of the hair. Think of this as laying the groundwork for your shiny masterpiece.
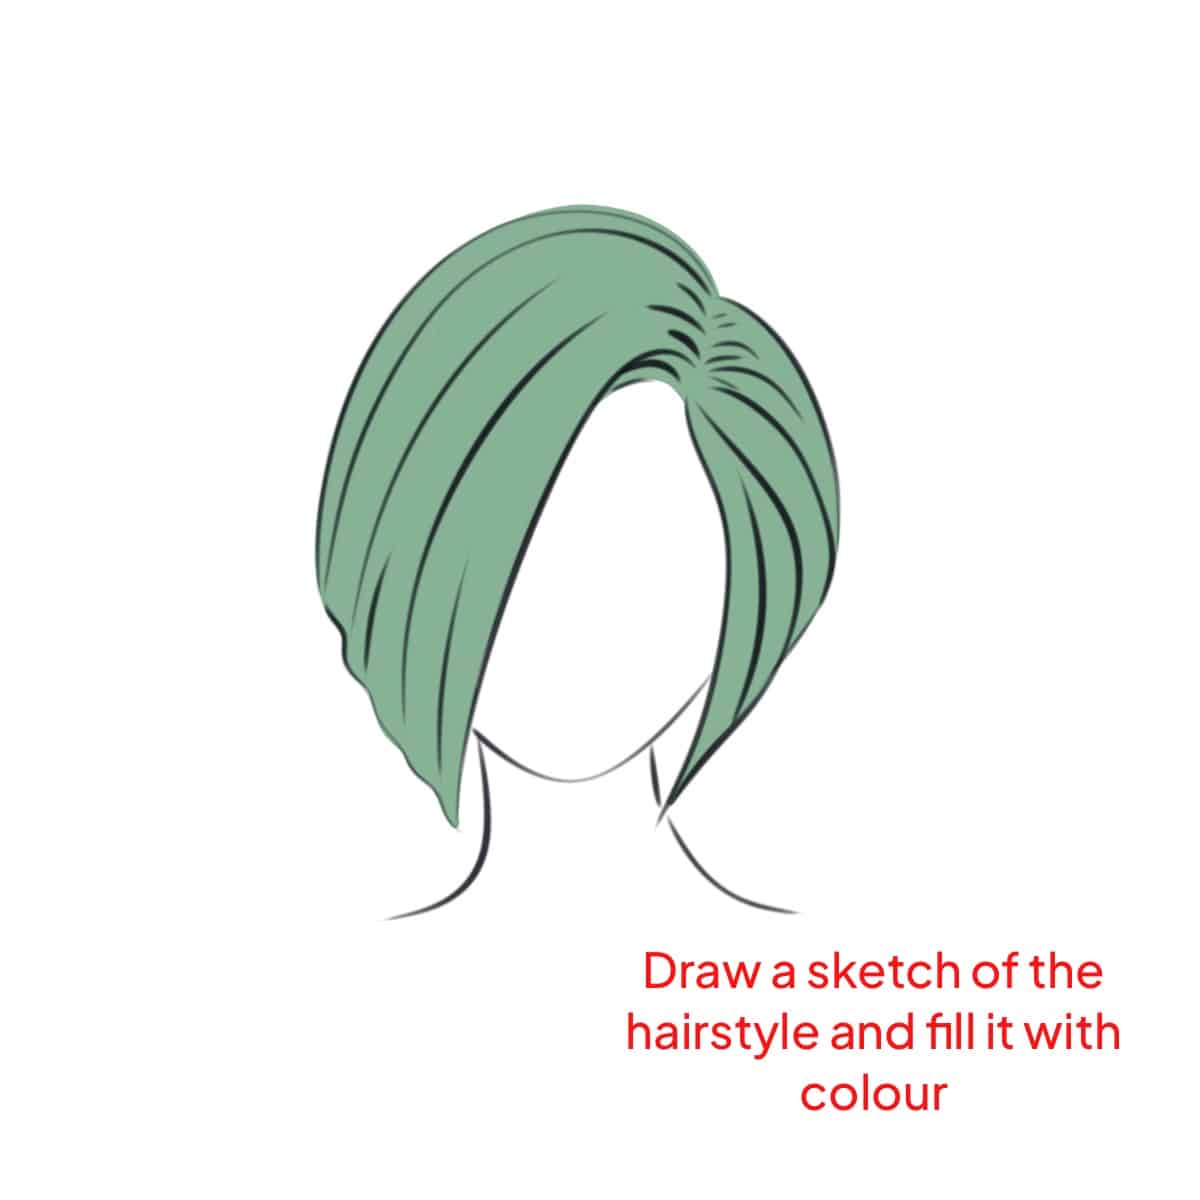
For those looking to enhance their rendering skills, discovering how to render hair in Procreate can provide additional insights.
Step 2 – Determine Your Light Source for Realistic Shine
This step decides where the light hits the hair, which in turn, dictates where your highlights and shine will be. Imagine a spotlight shining down on the hair. Where would it glow the brightest? You’ll focus on adding that luminous shine later on in these areas.
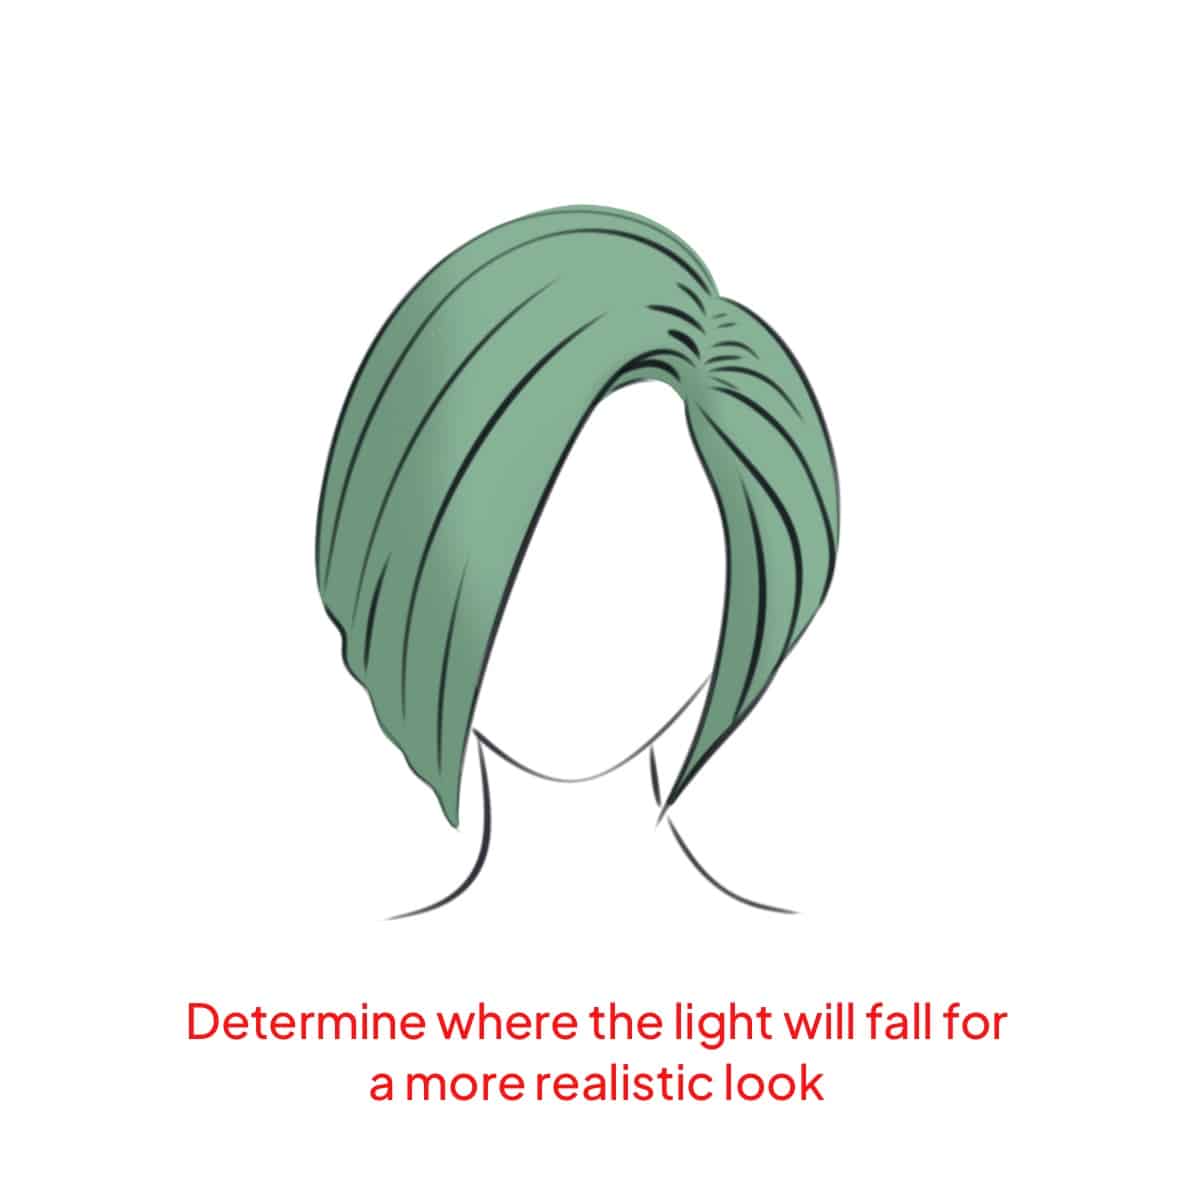
To further understand the impact of lighting, check out shadowing hair process, which explores the nuances of creating depth with shadows.
Step 3 – Build-Up Shadows
Use a slightly darker shade than your base color to add shadows. These should be opposite your light source. Remember, the contrast between light and shadow will make the hair shine.
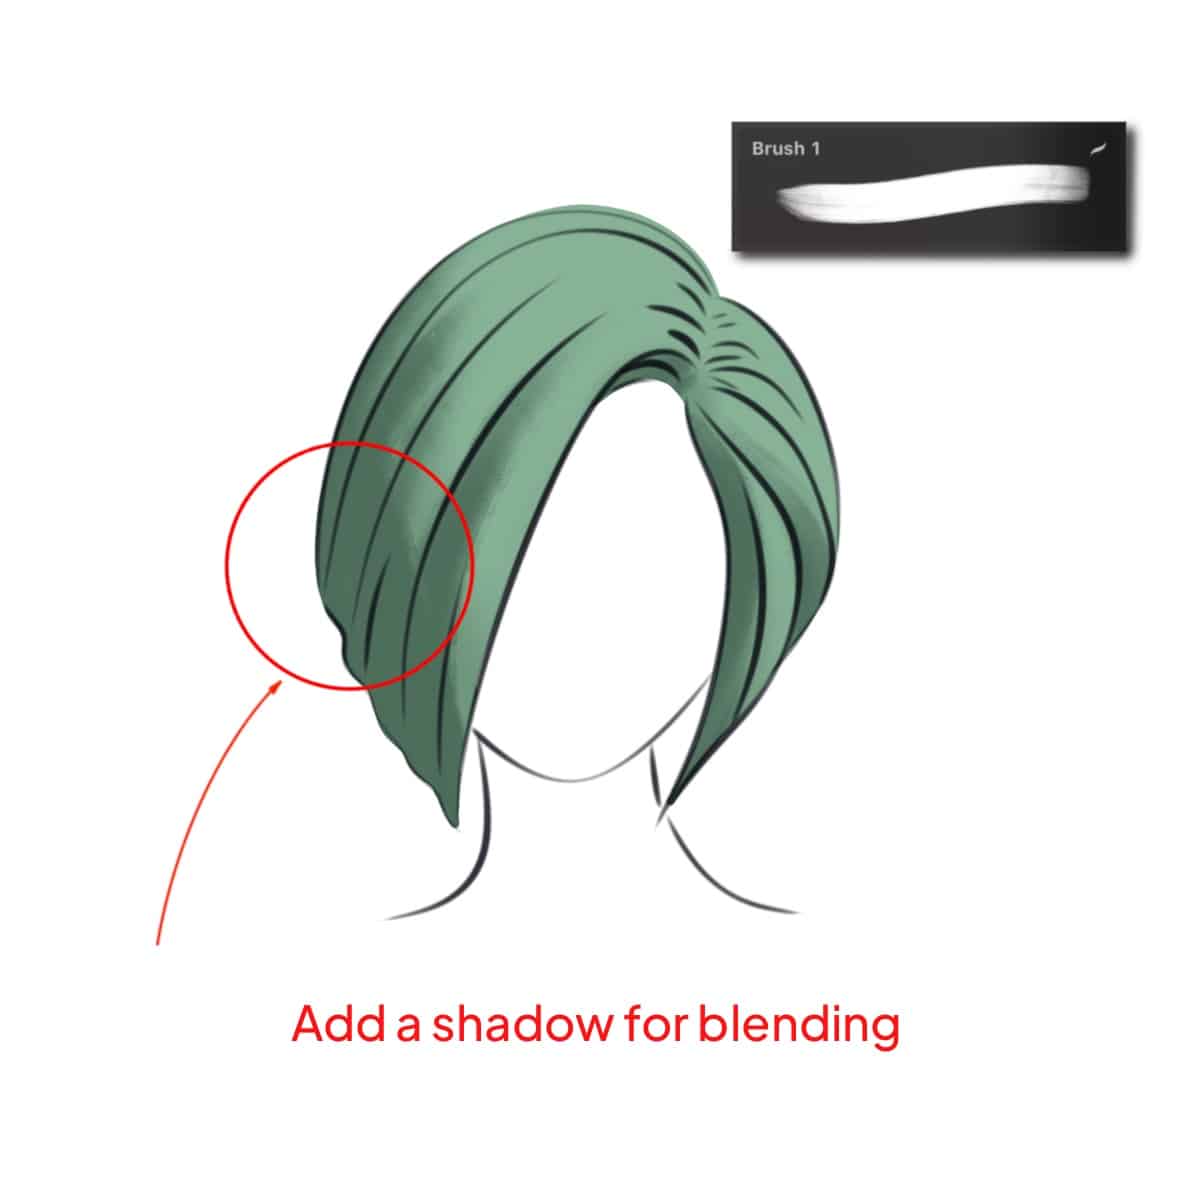
This technique is crucial for achieving a realistic look, much like the methods shared in the fluffy hair tutorial, which also emphasizes the importance of depth and volume.
Step 4 – Add the First Layer of Highlights
Choose a lighter shade than your base color. Gently brush this on areas where the light naturally hits the hair. Keep these highlights soft and diffused.
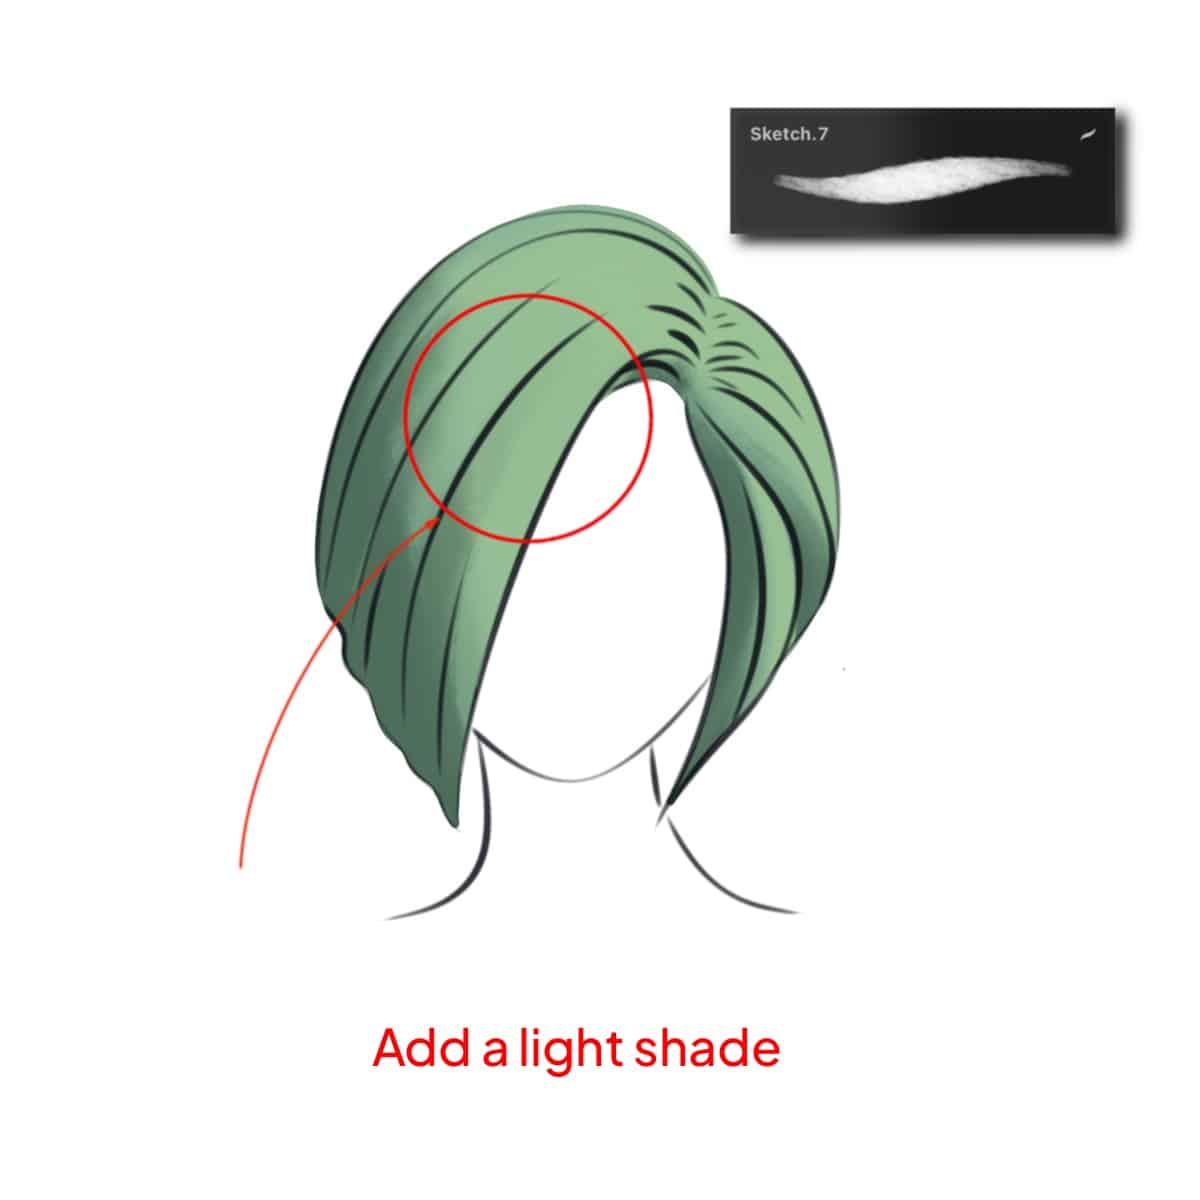
For those interested in creating different hair textures, tutorial on how to draw braids in Procreate in 6 steps offers a detailed guide on adding highlights to braided hair.
Step 5 – Intensify the Shine
Now, for the real shine. Select an even lighter shade, or even white, and apply it sparingly on the very edges of your highlights. These should be thin, concentrated lines to mimic light reflecting off the hair.
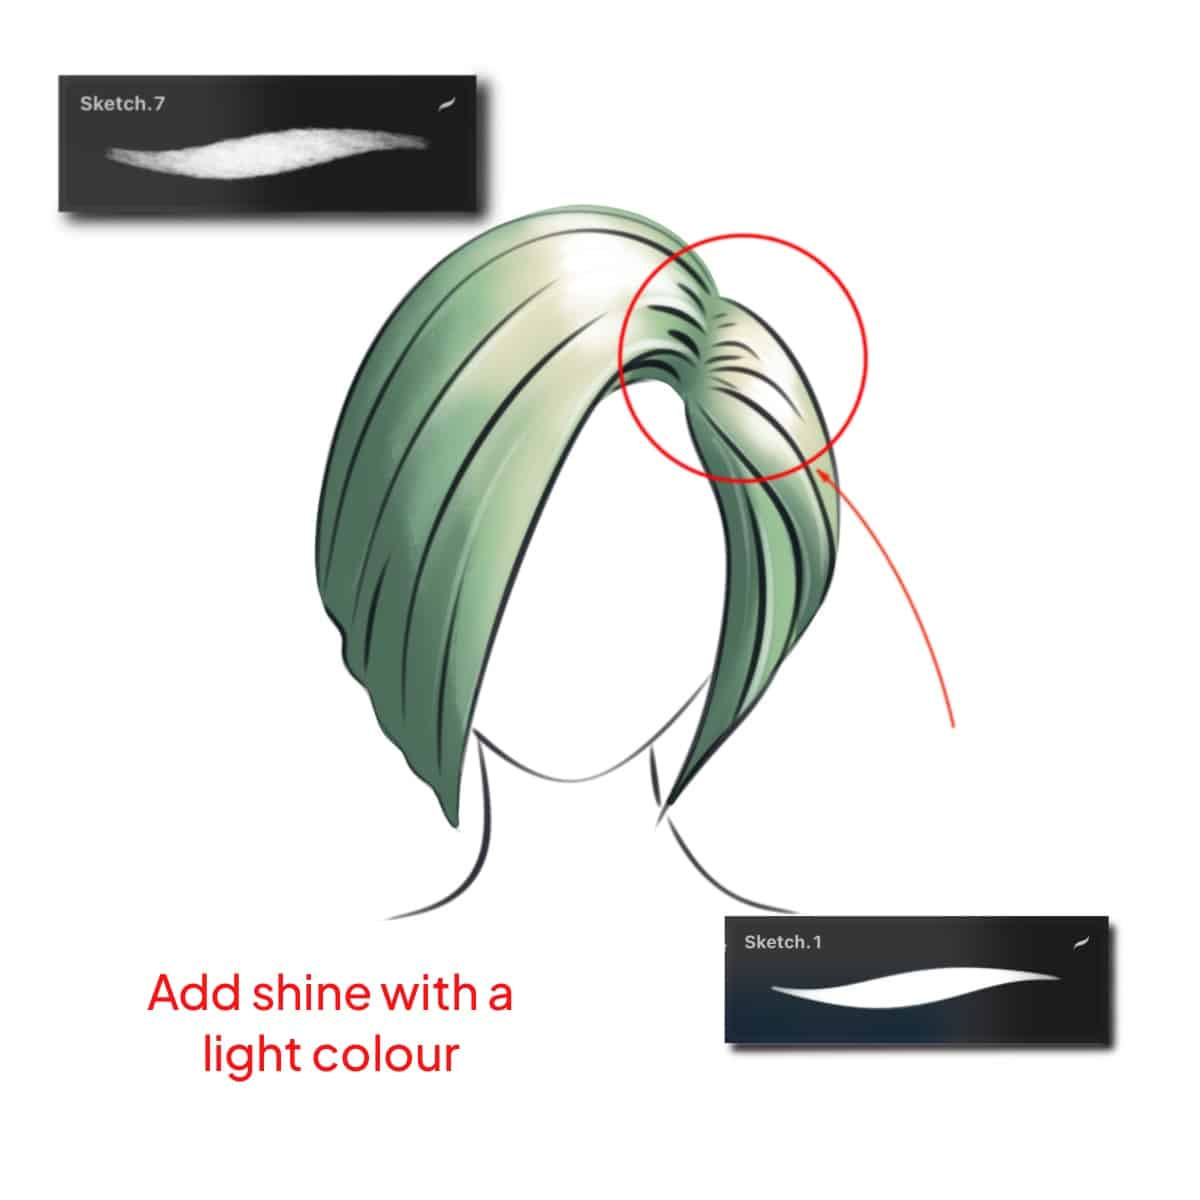
These should be thin, concentrated lines to mimic light reflecting off the hair. Creating a lustrous effect similar to this can also be achieved by learning how to draw shiny hair in Procreate.
Step 6 – Blend for Naturalness
Use the smudge tool to blend the edges of your highlights softly. This step is crucial for making the shine look natural and part of the hair.
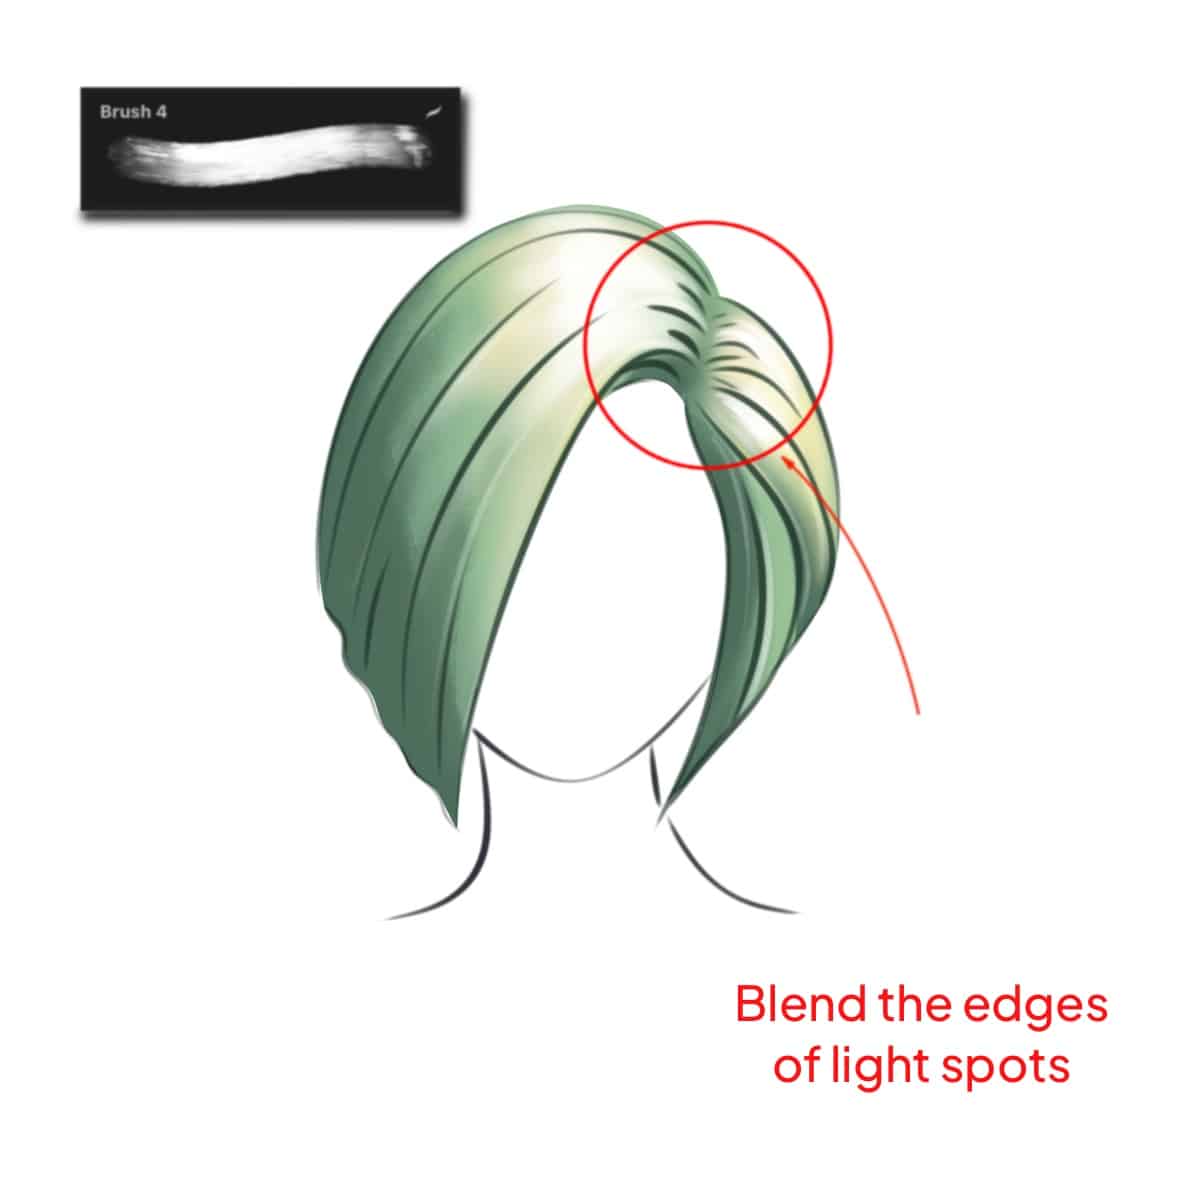
Blending techniques play a significant role in digital painting, as illustrated in blending hair tutorial, which can help refine your skills further.
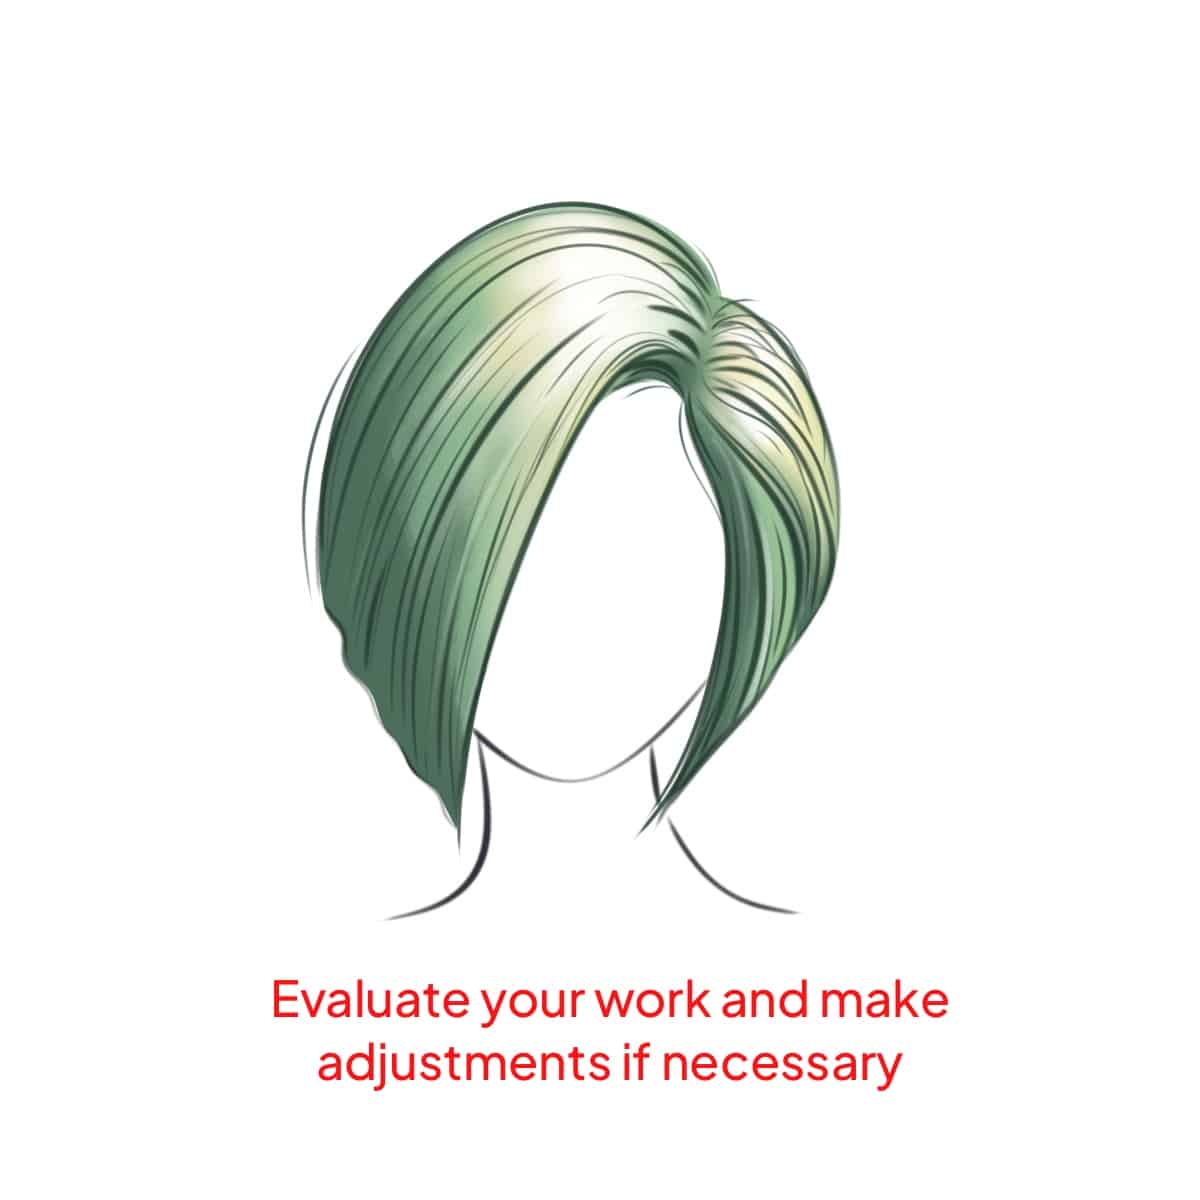
Step 7 – Final Adjustments
Step back and assess your work. Adjust the brightness or saturation if needed to enhance the shiny effect.
For those looking to diversify their skills in hair drawing, exploring how to draw anime hair in Procreate and how to draw cartoon hair in Procreate can provide additional creative insights.
And there you have it, a step-by-step guide to drawing shiny hair in Procreate. With practice and patience, you’ll soon be turning all your digital hairstyles into lustrous, sun-kissed locks!
For those interested in exploring more hair styles and techniques, learning how to make a wavy hair brush in Procreate might offer new perspectives and tools to enhance your digital artistry.


Share this article


