
How To Draw Braids in Procreate in 6 Steps

Many artists view drawing braids in Procreate with a sense of anxiety.
Without proper guidance, your attempts at braiding digital hair might look more like a tangled mess than the intricate, woven pattern you envision.
The complexity of braids, with their intertwined strands and nuanced shadows, can indeed be daunting.
I’m here to demystify the process and provide a step-by-step guide.
With this tutorial, you’ll learn the essentials to master the art of drawing braids, turning a potential digital hairstyle disaster into a triumph of texture and technique.
As a fan of custom-made brushes, I suggest you try Brush Galaxy’s collection of Procreate Hair Brushes.
For this tutorial, I used Chalk Sketch Brushes, and Fur Brush Set Vol 6. Those brushes are not necessary but can certainly help.
In this tutorial, you’ll learn:
- How to start with basic guidelines for the braid’s shape and direction.
- Techniques for drawing individual strands, focusing on their weaving pattern.
- Methods to define the braid by enhancing depth through darkening overlapping areas.
- Adding highlights to give the braid a three-dimensional appearance.
- Refining details for realism, including flyaway hairs and strand edges.
- Making final adjustments for shape, texture, and overall integration with the hairstyle.
How To Draw Realistic Braids in Procreate
Below are the 6 easy-to-follow steps that will help you draw braids in no time.
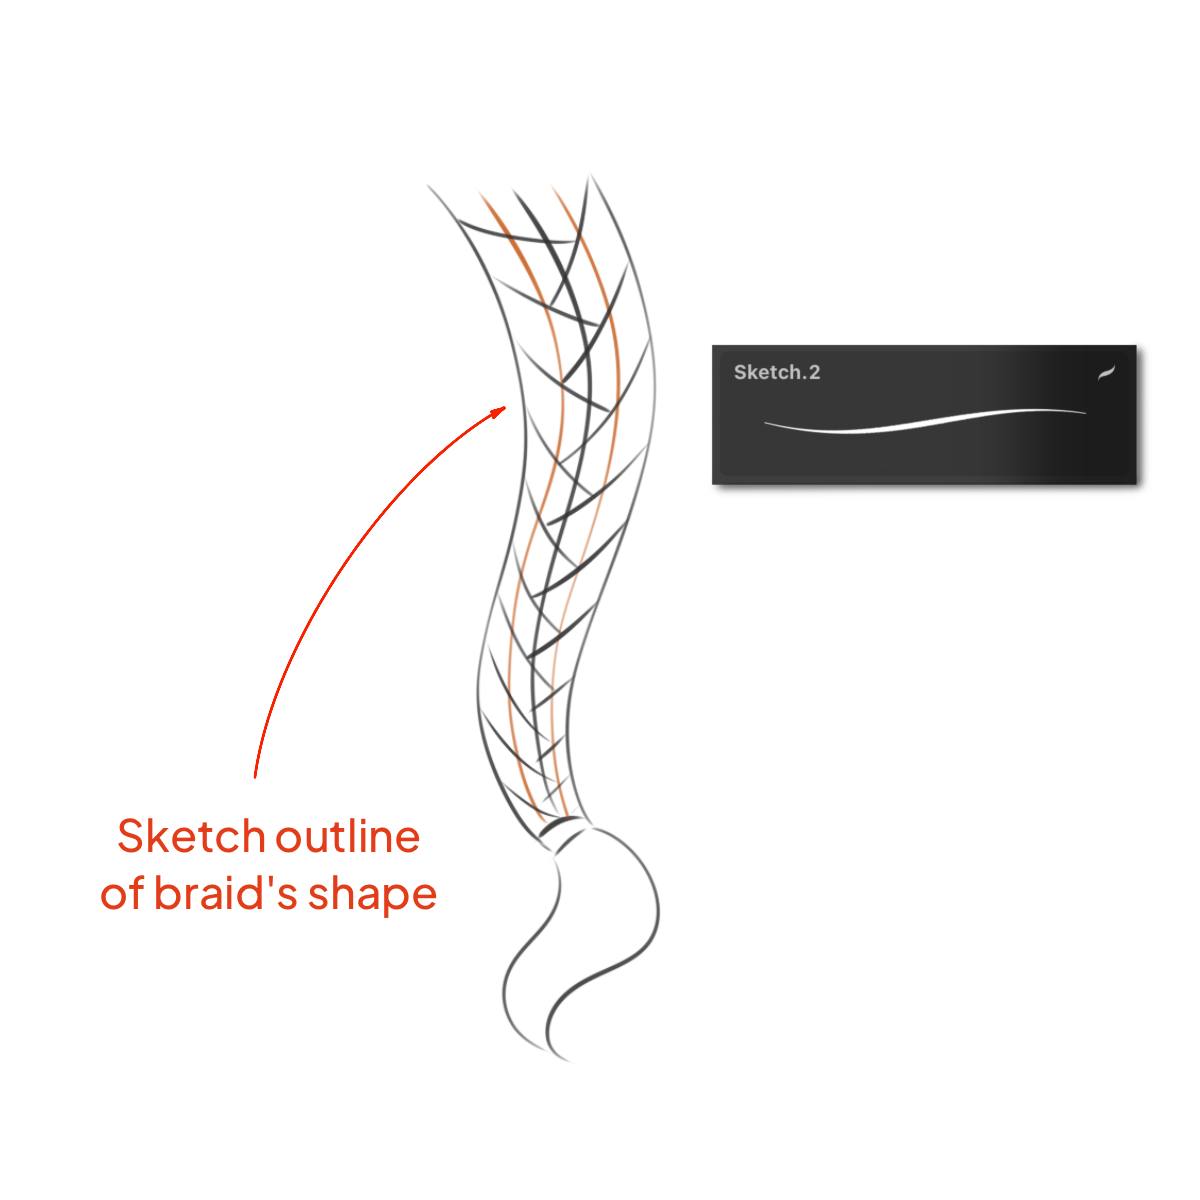
Step 1 – Starting with Guidelines
Begin by sketching a rough outline of the braid’s shape. Think about its direction and how it falls or wraps around the head. This guideline acts as a structural base, helping you visualize the braid’s overall form.
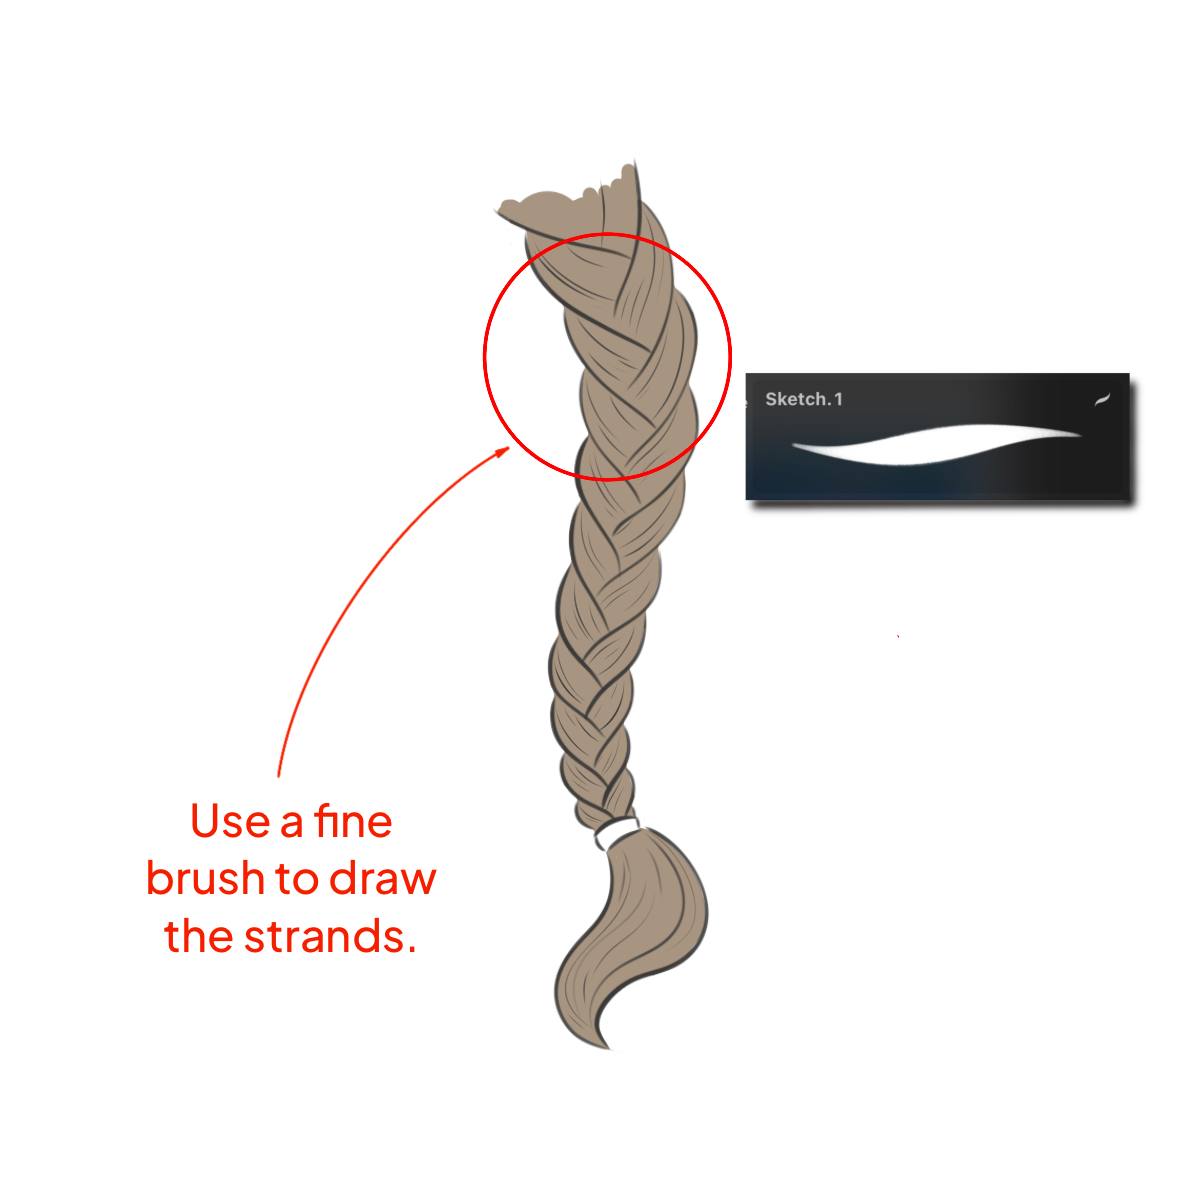
Step 2 – Drawing Individual Strands
Now, use a fine brush to draw the strands. Each strand should weave over and under the others, following the guideline. Focus on the pattern of the braid, ensuring each strand logically overlaps and weaves with its neighbors.
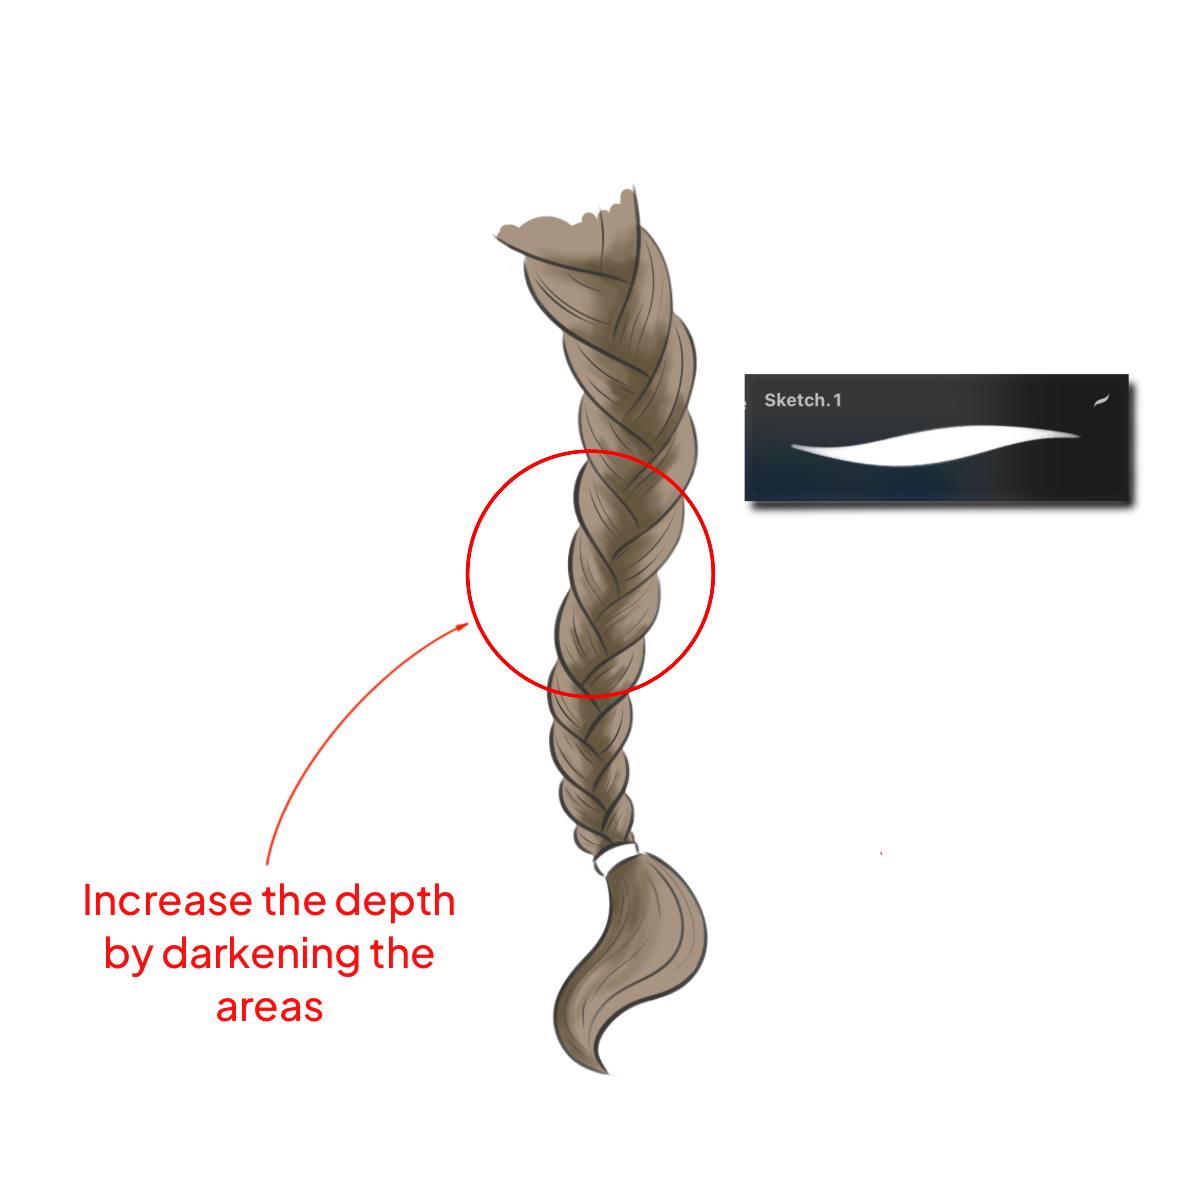
Step 3 – Defining the Braid
After laying down the strands, enhance the depth by darkening the areas where the hair overlaps. This step is crucial for adding dimension to your braid, making it appear more realistic and less flat.
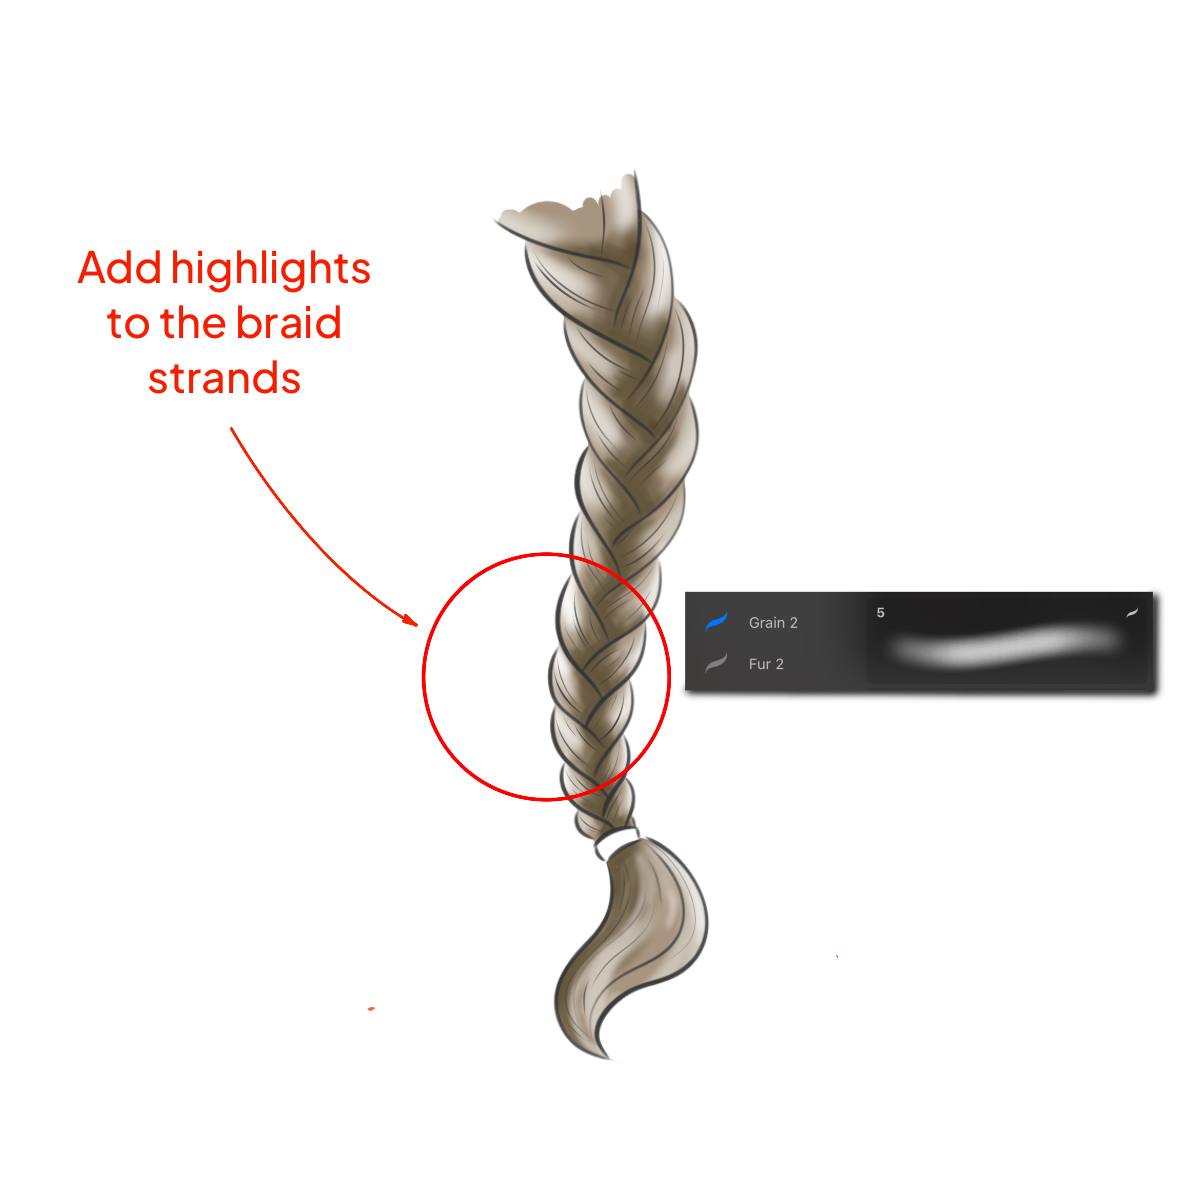
Step 4 – Adding Highlights
Choose a lighter shade to add highlights. Apply them to the areas where light naturally hits the most, like the top of the braid or the edges. These highlights will give the braid a three-dimensional look.
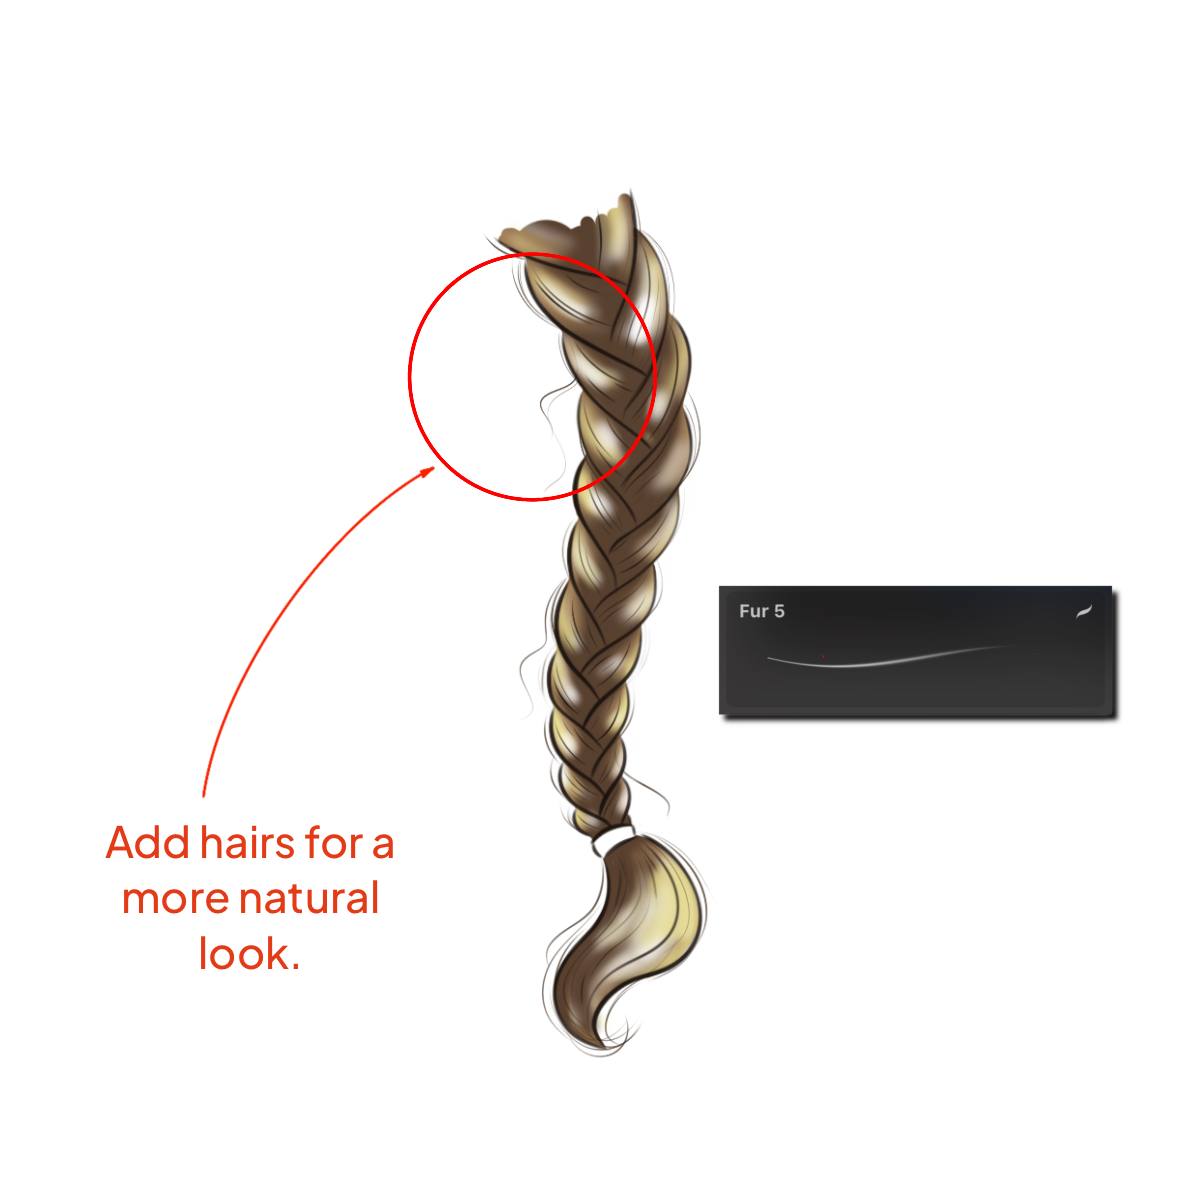
Step 5 – Refining Details
Zoom in to add finer details. This includes refining the edges of the strands and adding any flyaway hairs for a more natural appearance. These small touches can significantly enhance the braid’s realism.
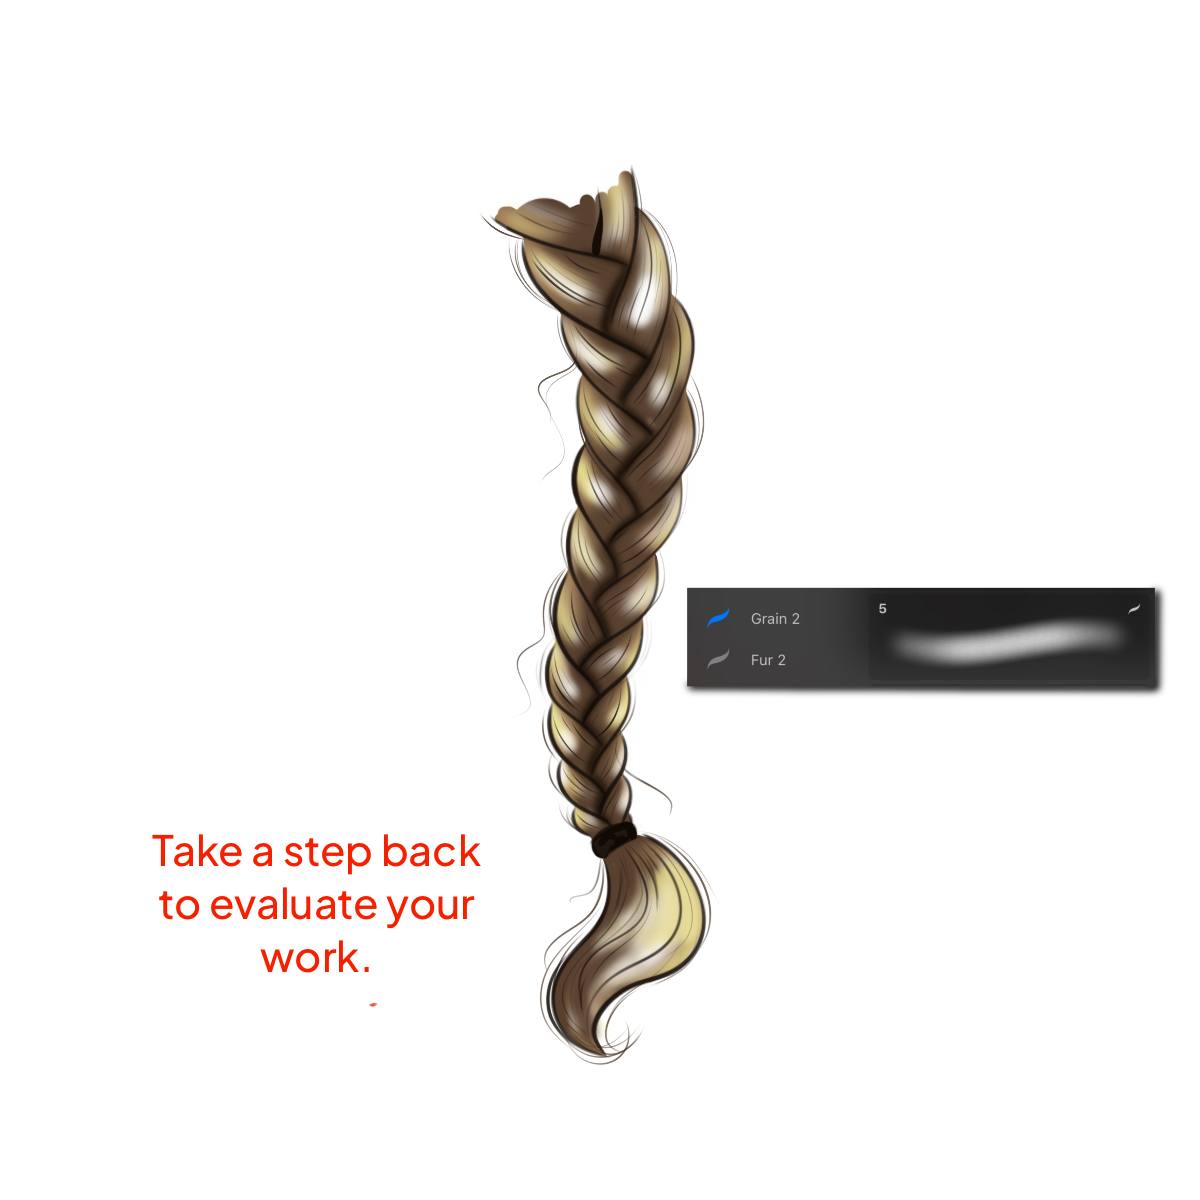
Step 6 – Final Adjustments
Take a step back to review your braid. Make any final tweaks to the shape, texture, or color to ensure it blends seamlessly with the rest of the hair and looks as lifelike as possible.
With practice, drawing braids in Procreate will become second nature, and you’ll add a beautifully complex element to your digital hairstyles. Keep experimenting and have fun with it!


Share this article


