
How To Draw Fluffy Hair in Procreate

Drawing fluffy hair in Procreate can sometimes feel like trying to tame a cloud with a paintbrush. With the right techniques, you can capture that fluffy, airy feel in your Procreate artwork.
Fluffy hair, with its soft, airy look, can add a lively and dynamic element to your digital portraits. In this tutorial, I’ll guide you through each step to achieve that perfect fluffiness.
Procreate Hair Brushes can certainly help you achieve a fluffy hairstyle. If this is your cup of tea, go for it.
This is what you’ll quickly learn:
- Sketching the basic hair shape for volume and flow.
- Applying a base color as a foundation for the hair.
- Adding shadows with a darker shade for depth and volume.
- Creating highlights with a lighter shade for fluffiness.
- Detailing with individual strands to enhance texture.
- Blending shadows and highlights for a soft, airy look.
- Refining with final adjustments for balance and realism.
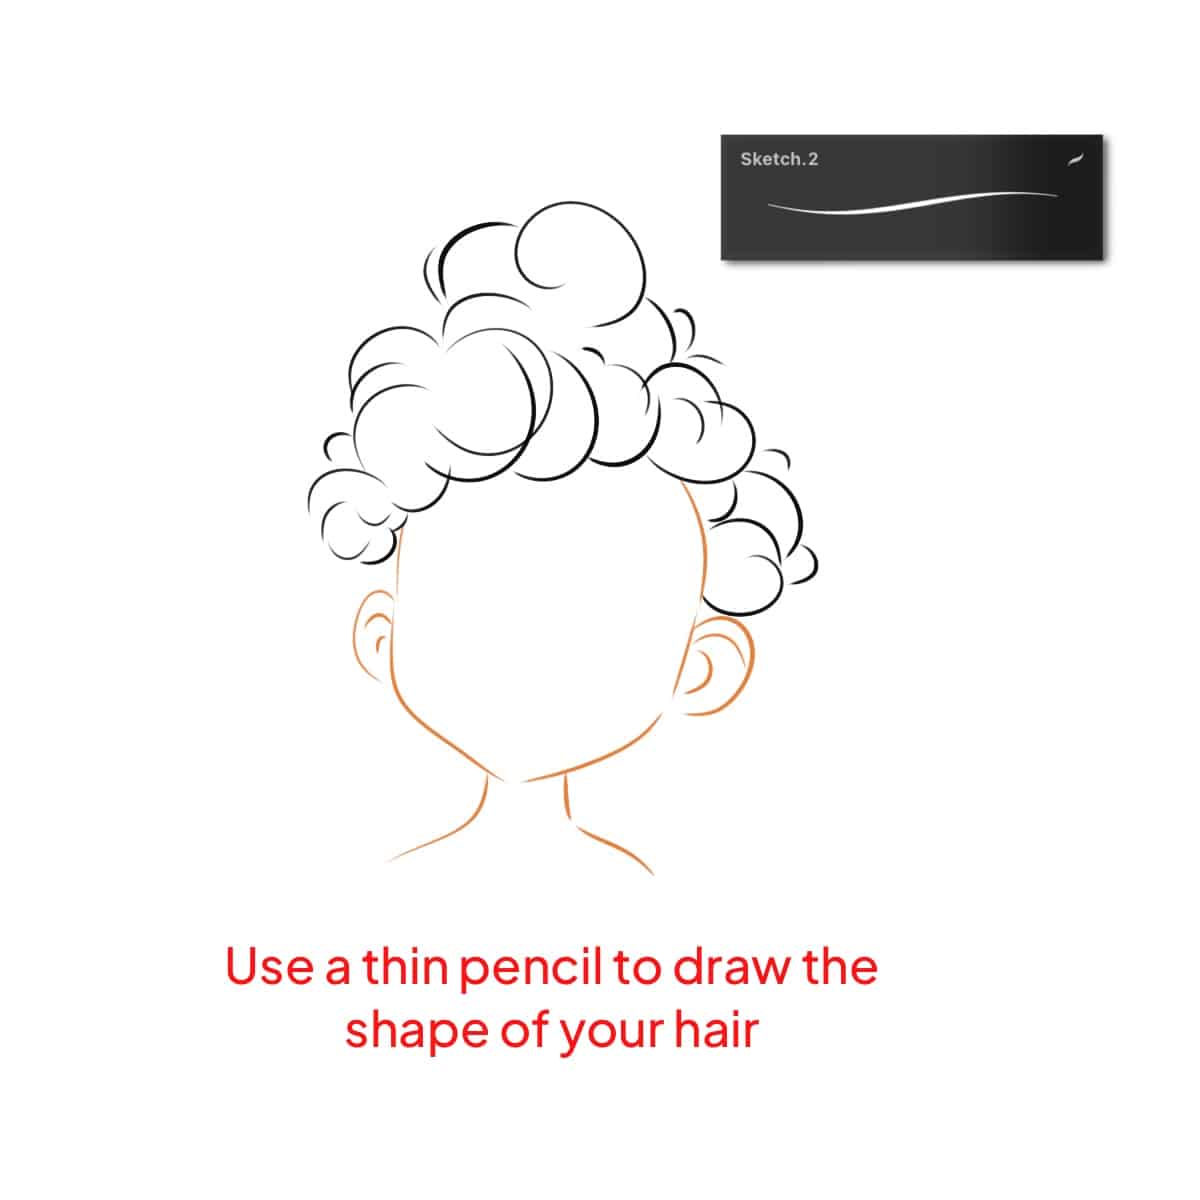
Step 1 – Detailed Sketching
Begin with a light pencil tool to outline the hair’s shape. Consider the hair’s overall volume and how it naturally falls or curls. This initial sketch acts as a framework for your fluffy hair.
For more detailed sketching techniques and anime lovers, see how to draw anime hair in Procreate.
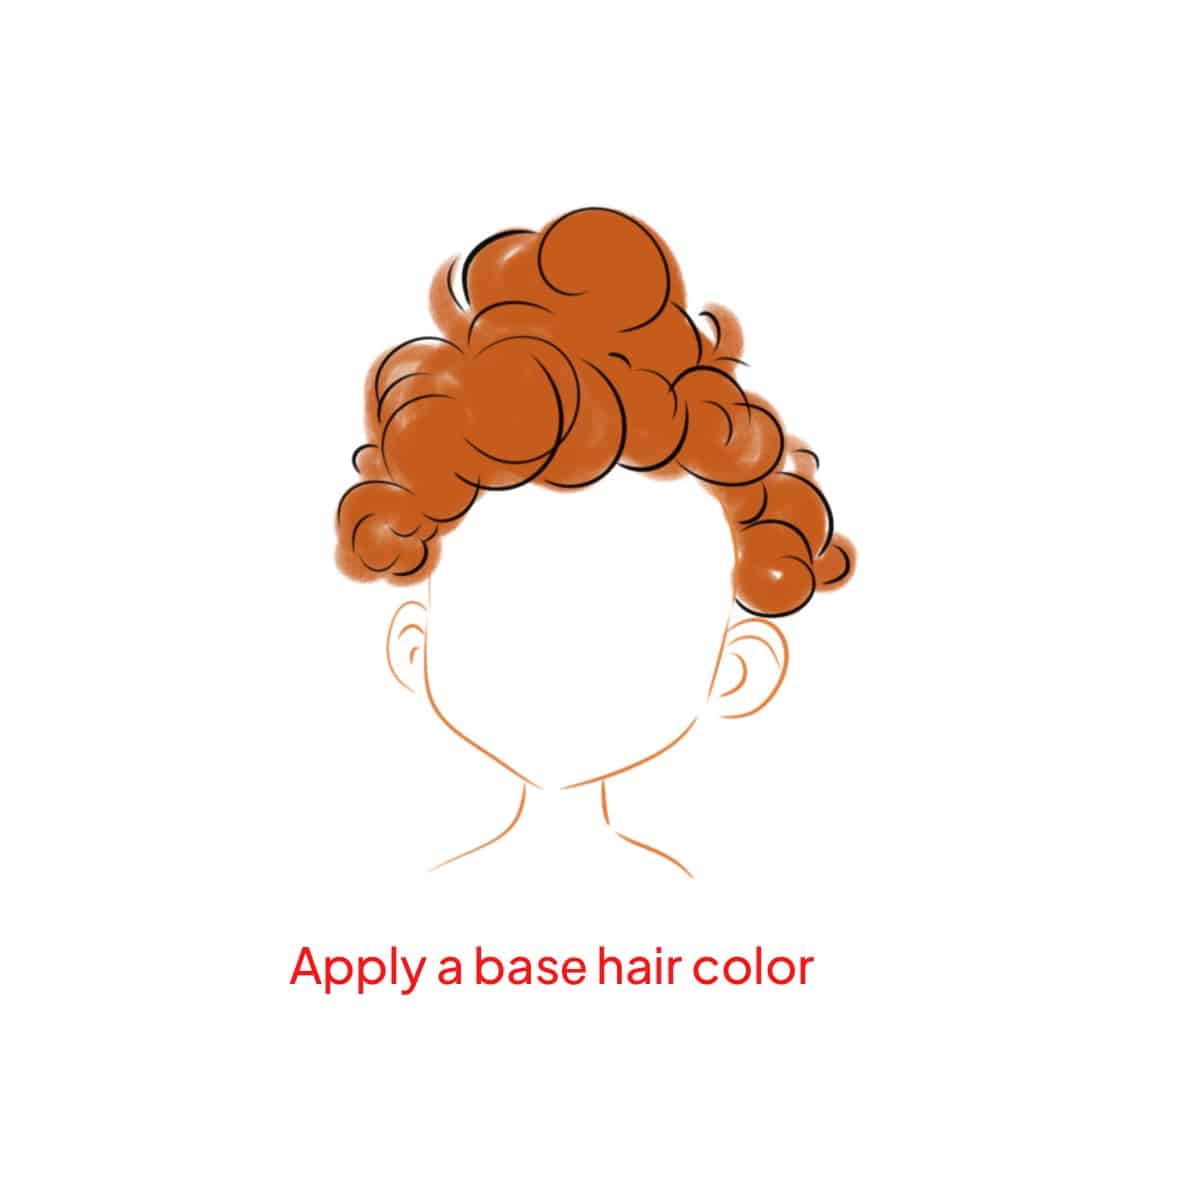
Step 2 – Base Color Application
Select a soft, medium-sized brush to fill in the sketch with your chosen base color. This color is the mid-tone of your hair, serving as a foundation for adding depth and texture later on.
Mastering color application can be further explored in how to effectively color hair.
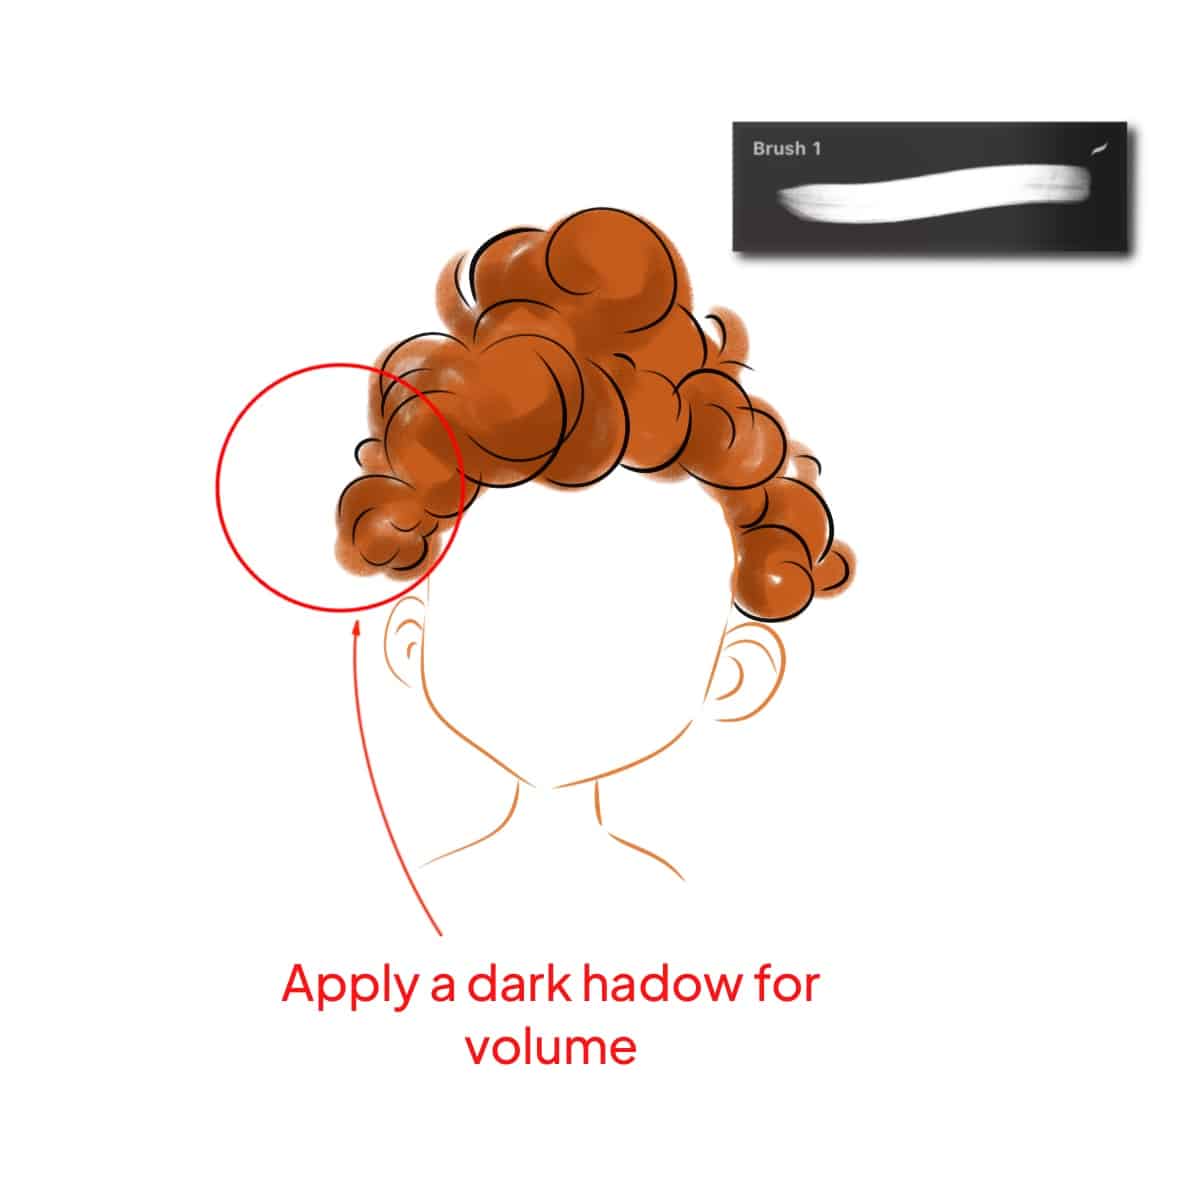
Step 3 – Shadowing for Volume
Choose a slightly darker shade than your base color. Use a soft airbrush to apply shadows underneath layers of hair and at the roots. These shadows should be subtle, focusing on areas where light is less likely to reach, thereby creating an illusion of volume.
For an in-depth look at this technique, consider learning to shadow hair in Procreate.
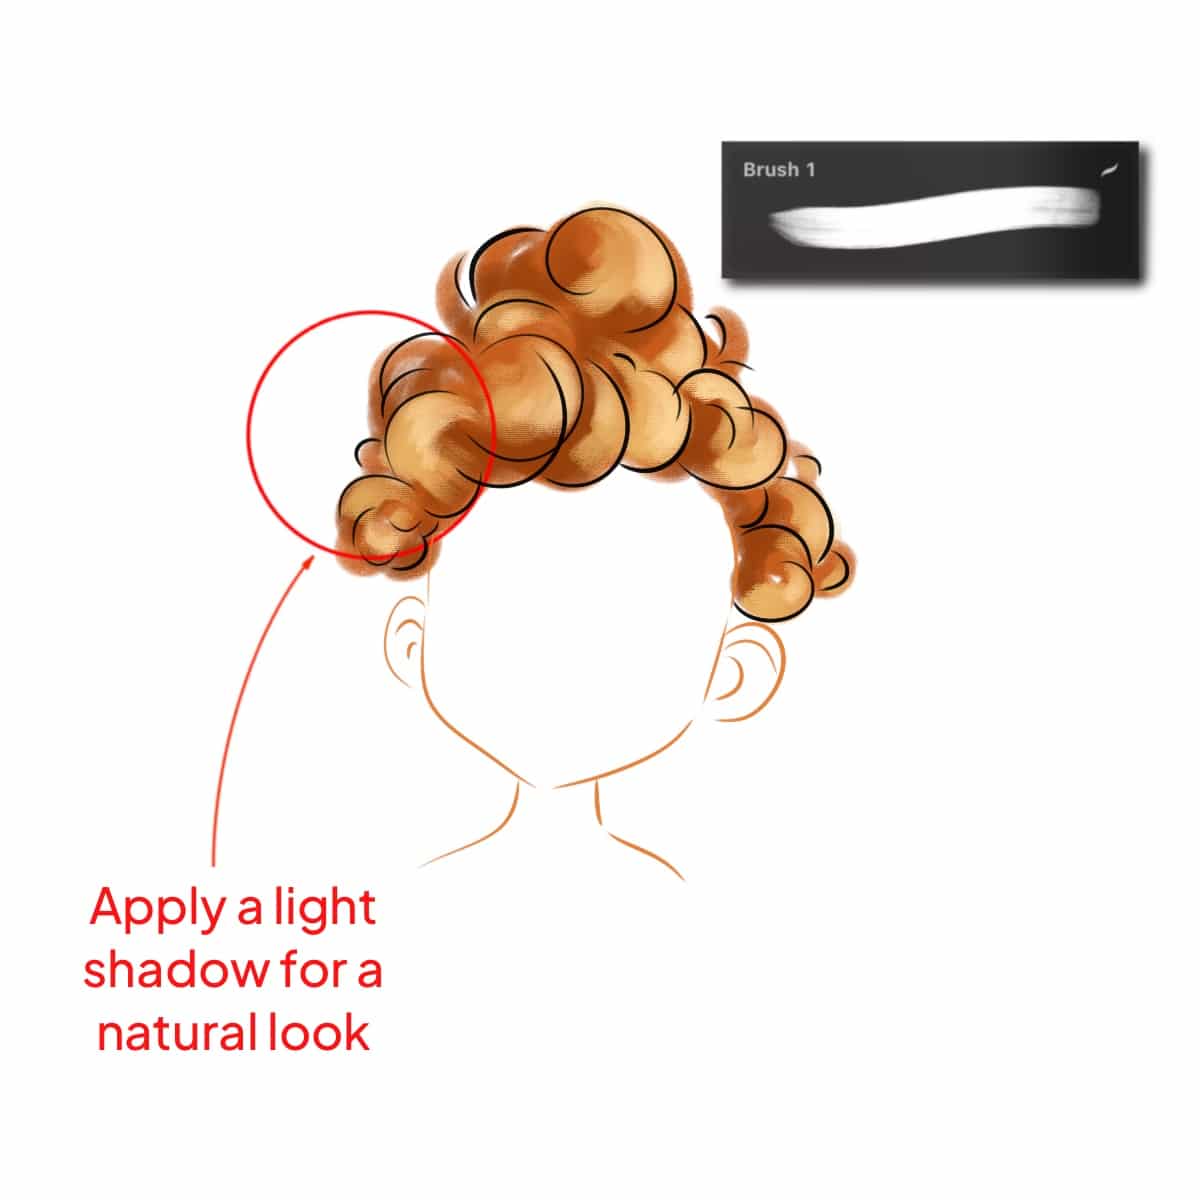
Step 4 – Highlighting for Fluffiness
It’s time to switch to a lighter shade, perhaps with a hint of warmth to mimic sunlight. Gently brush in highlights on the crown and edges where the light naturally hits the most. This contrast between light and dark is crucial for that fluffy look.
Enhance your skills by drawing shiny hair in Procreate.
Step 5 – Individual Strand Detailing
Select a fine-tipped brush to add individual hair strands. These strands should be light, wavy, and somewhat random to enhance the fluffy texture. Remember, the key here is subtlety, as overly defined strands can detract from the softness.
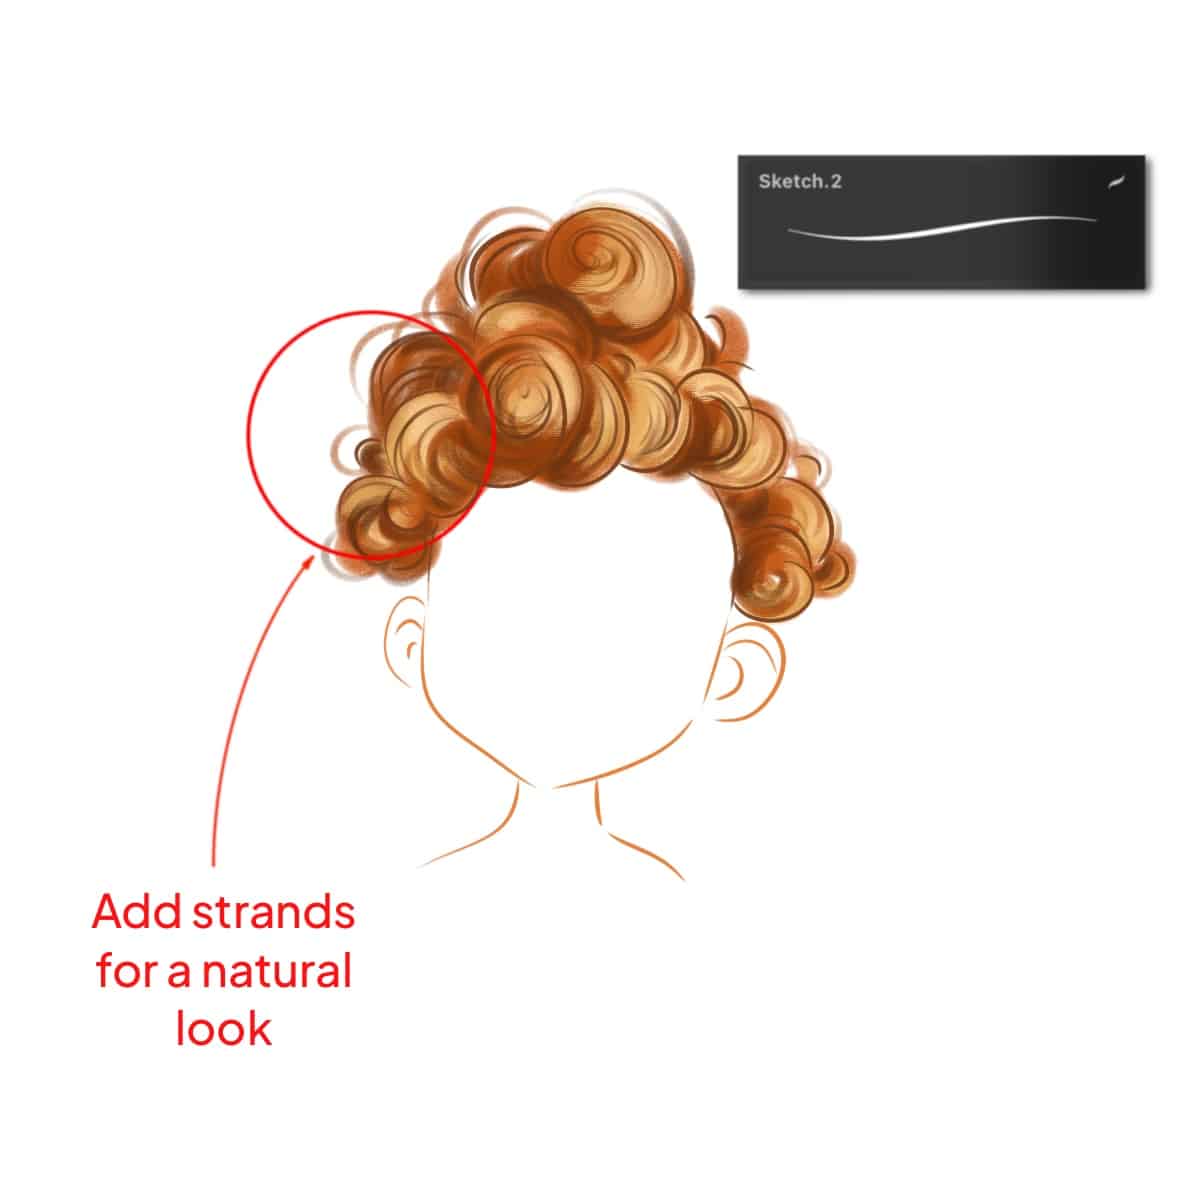
Discover how to make this process easier with a tutorial on how to make a hairbrush in Procreate.
Step 6 – Soft Blending
Now, let’s use the smudge tool or a soft brush with low opacity to gently blend the edges of your shadows and highlights. This step is critical to avoid harsh lines and maintain the soft, airy feel of fluffy hair.
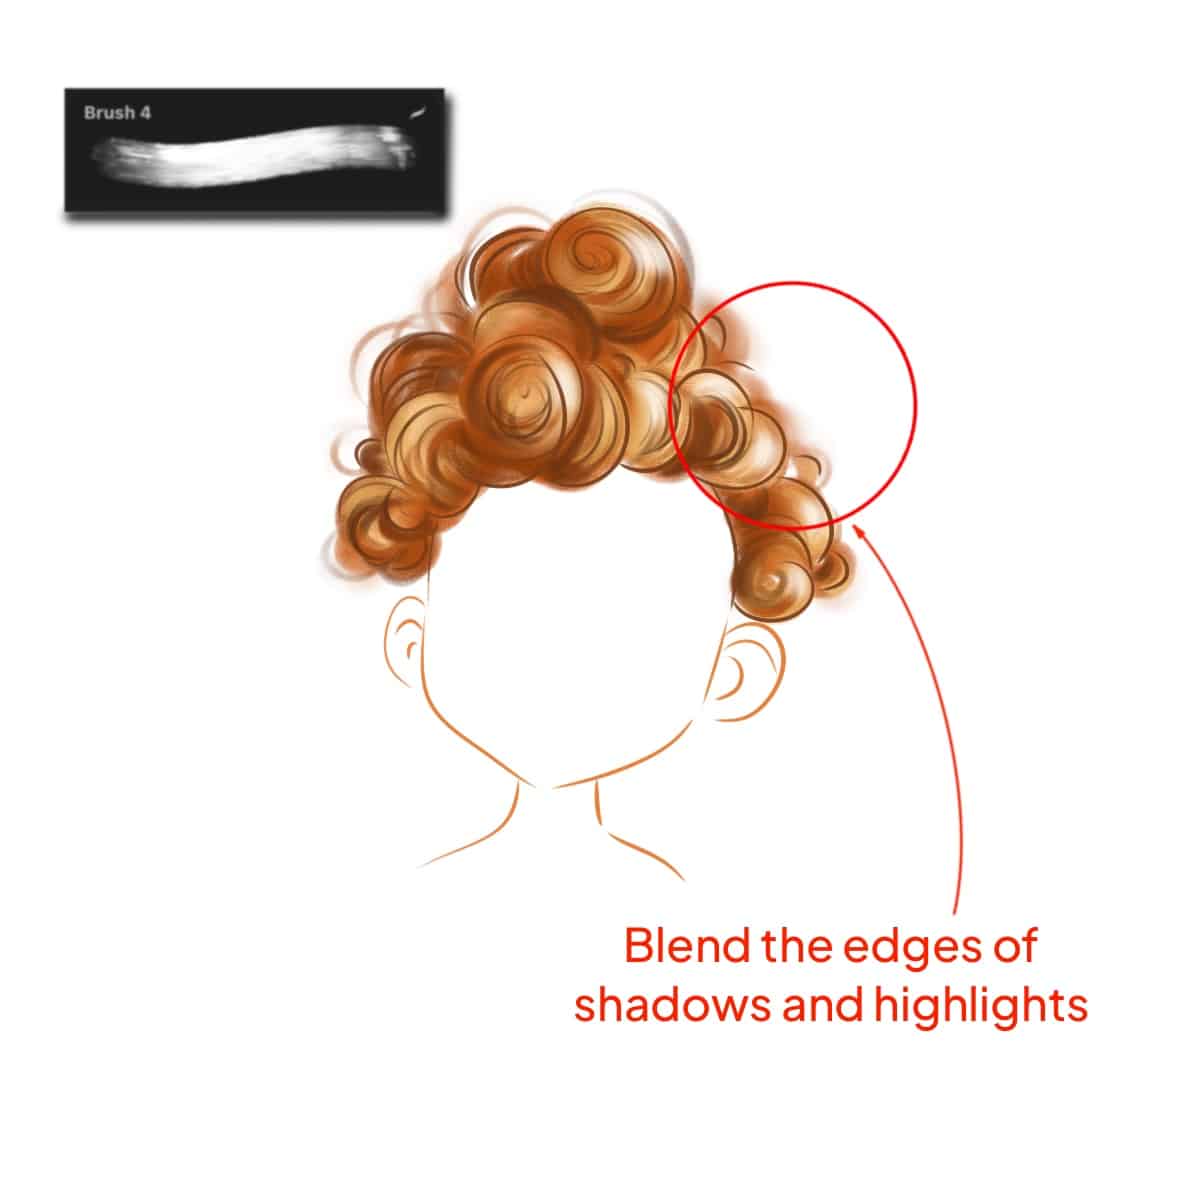
For blending techniques, learning how to blend hair in Procreate can be a great resource.
Step 7 – Refining Final Touches
It’s important to reassess your work by focusing on the overall balance and texture. Adjust brightness, and saturation, or add more fine strands if needed. This final touch ensures your fluffy hair looks as natural and lifelike as possible.
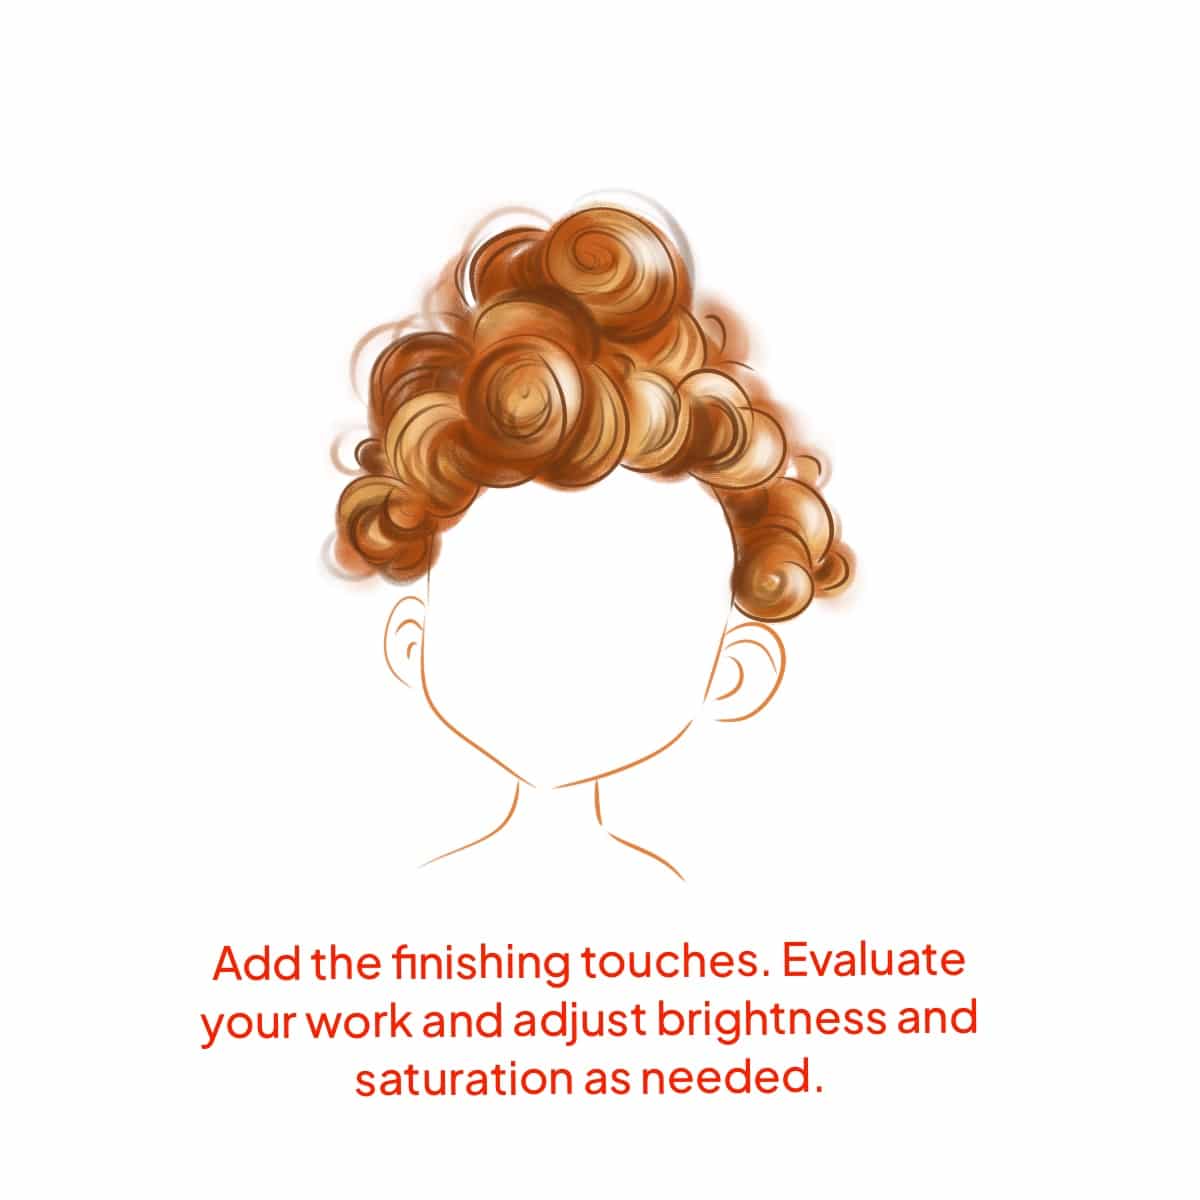
For additional finishing techniques, explore how to effectively render hair.
Each step builds upon the last, culminating in a realistic and beautifully fluffy hairstyle in Procreate. Patience and attention to detail are key to achieving this delightful hair texture.


Share this article


