
How To Use Onion Skin in Procreate?

Have you ever found yourself staring at your iPad, Procreate app open, and wondering why on earth we’re talking about onions in digital art? No, this isn’t a cooking class gone wrong, nor is it a tear-inducing art session.
I’m here to demystify the curious world of ‘onion skinning’ in Procreate. Trust me, it’s less about cooking and more about creating some amazing animations! As we explore this, remember that creating beautiful animations often starts with mastering the basics, such as creating detailed and realistic textures with tools like Procreate skin brushes.
The Core of the Onion: Understanding the Basics
First things first, let’s peel back the layers (pun intended!) and understand what onion skinning in Procreate really is.
Onion skinning is a technique used in creating animations. It allows you to see several frames at once, with the previous and next frames appearing translucently behind your current frame. This gives you a ghost-like reference, helping you create smoother, more consistent animations.
It’s essential for seeing the ‘past and future’ of your artwork, and making intricate animations, such as those requiring detailed skin textures that can be achieved by learning how to airbrush skin in Procreate.
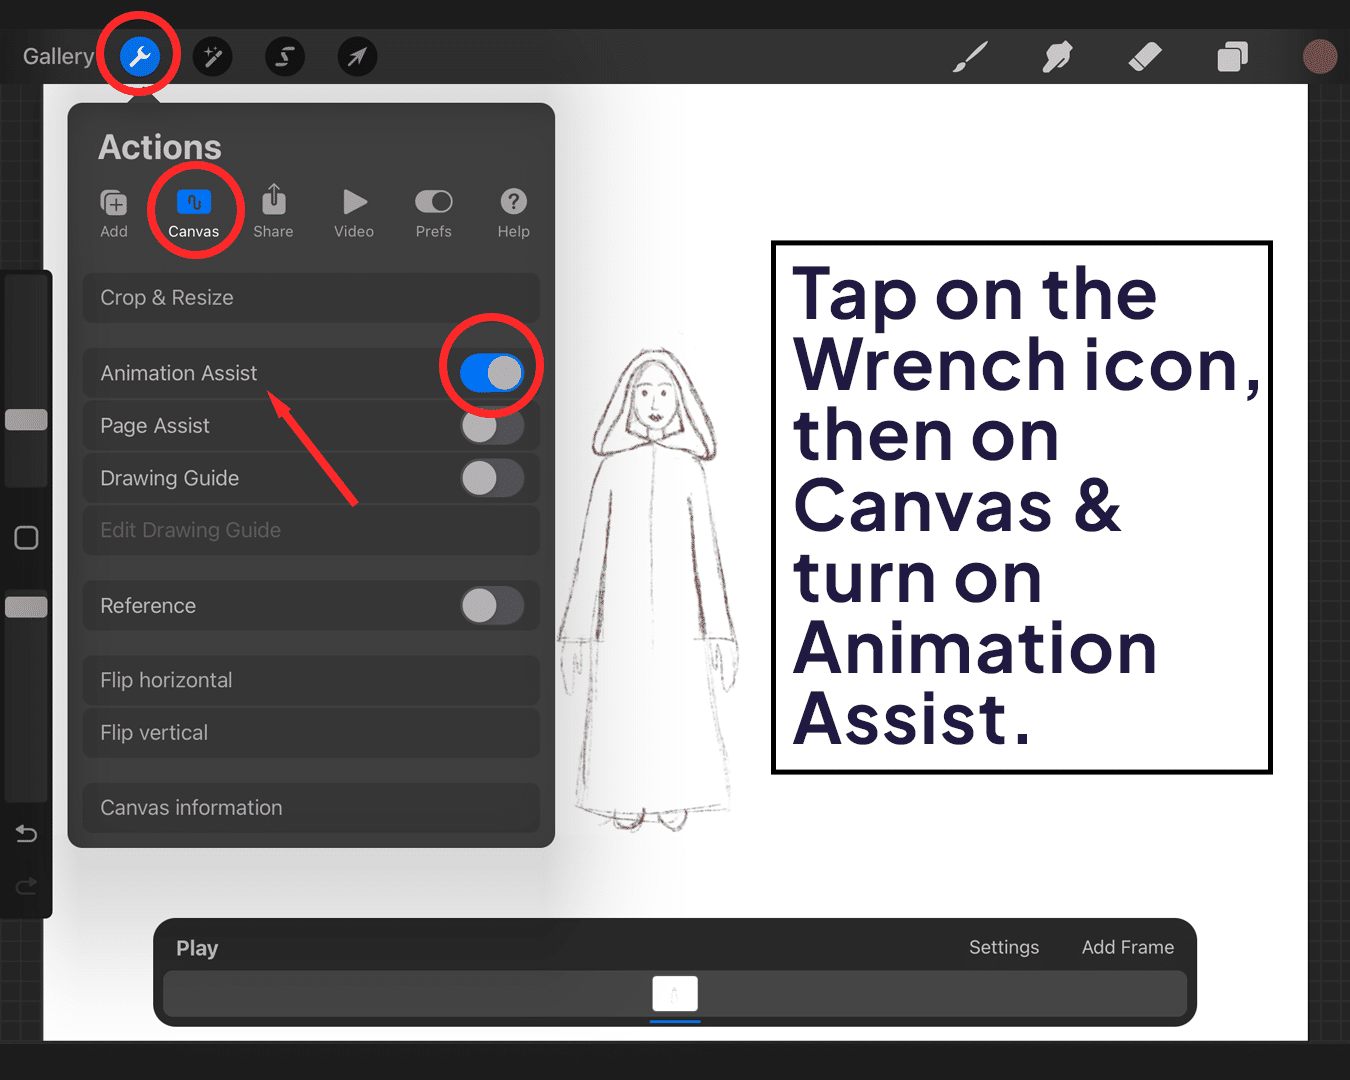
Getting Started with Onion Skinning
Tap on the wrench icon in the top left corner, then select ‘Canvas’ and turn on ‘Animation Assist’. This is your gateway to the animation features in Procreate, including onion skinning.
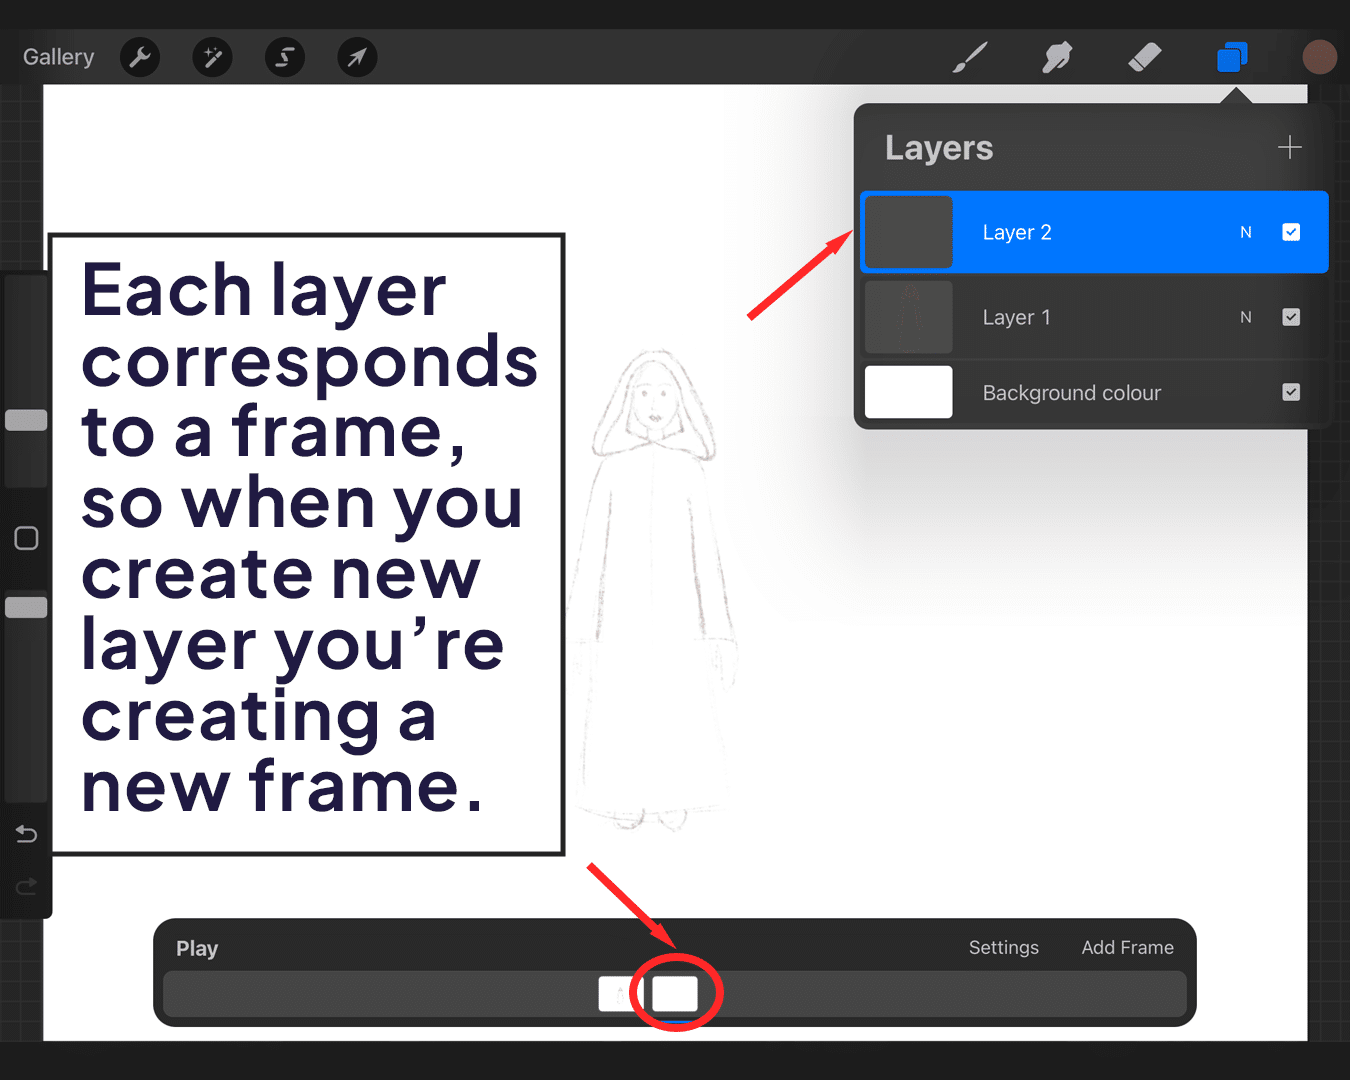
Understanding Frames and Layers
Each layer corresponds to a frame in your animation, emphasizing the importance of texture and consistency across frames, which can be refined by techniques covered in how to blend skin in Procreate.
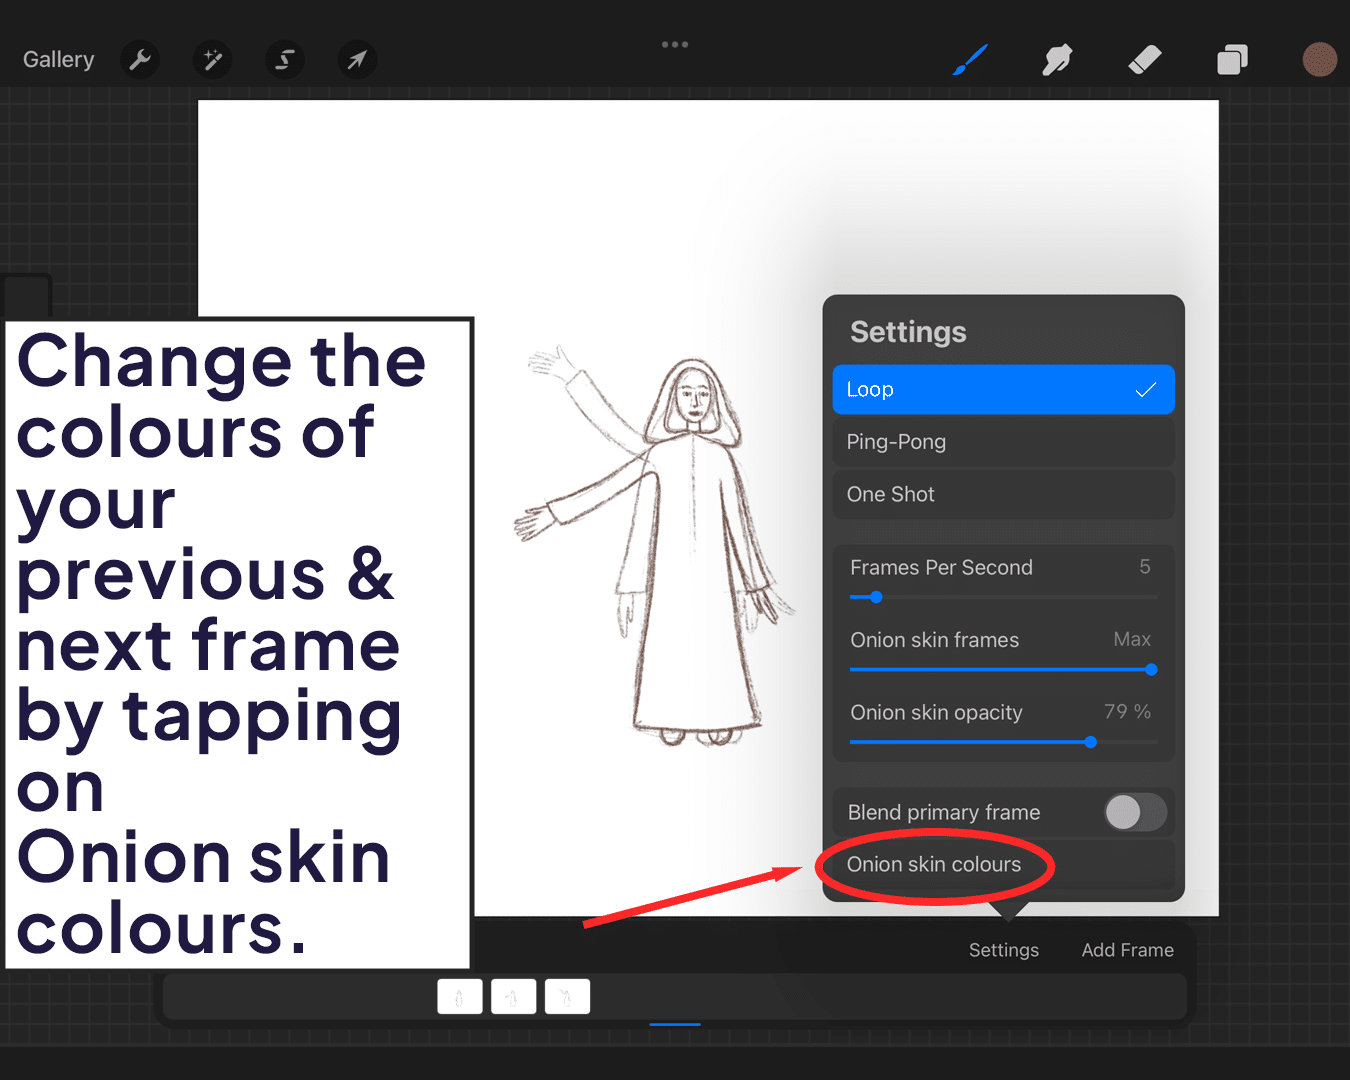
Enabling Onion Skins
Once you have multiple layers (frames), you’ll notice a timeline appearing at the bottom. Here, tap on the ‘Settings’ icon. This is where the magic happens! You’ll see an option for ‘Onion Skin Opacity’ – this controls how visible your previous and next frames are.
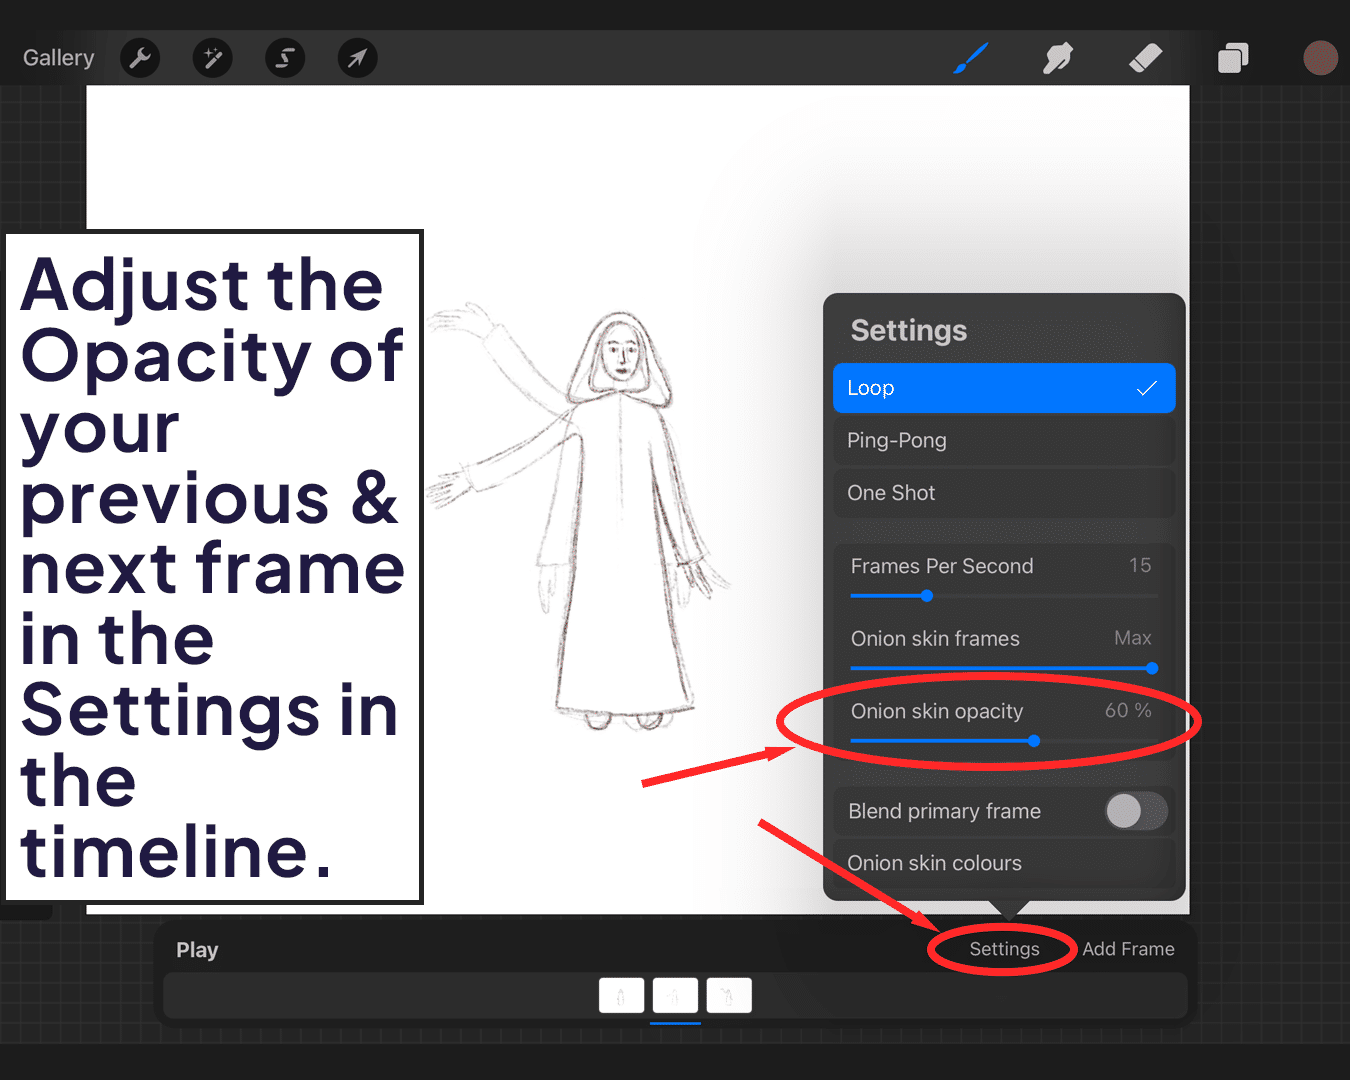
Adjusting the Onion Skin Settings
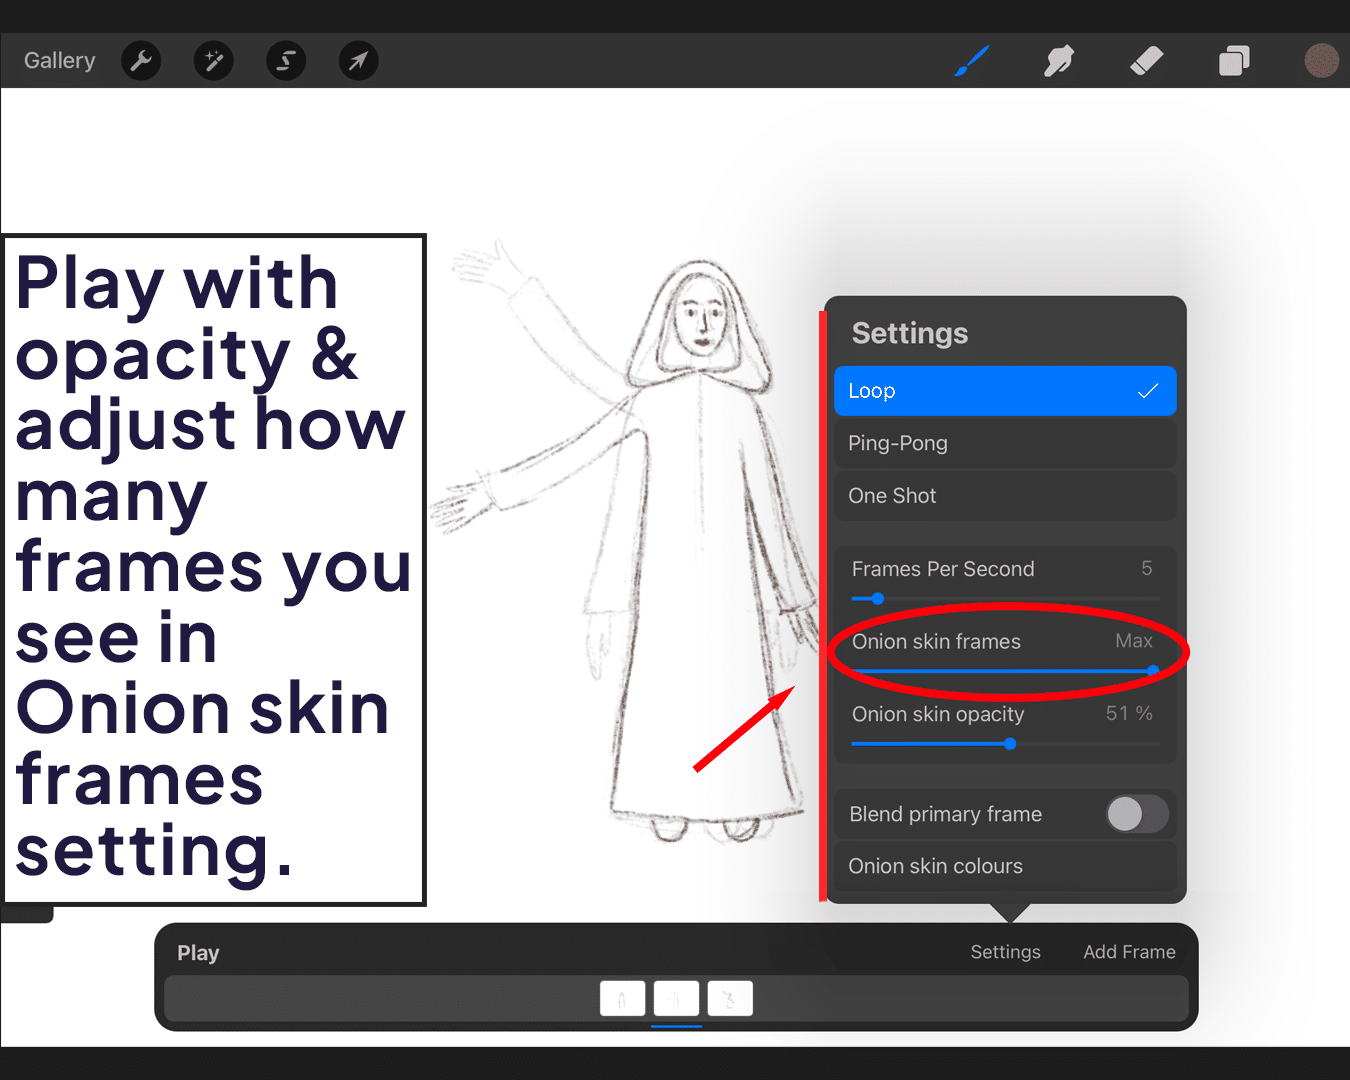
Play around with the opacity to find what works best for you. You can also adjust how many frames you want to see by changing the ‘Frames to Preview’ setting.
Tips and Tricks for Using Onion Skins Effectively
Maintaining consistency, especially in character animations, is crucial. Techniques for creating consistent skin tones, such as those found in how to match skin tone in Procreate, can be particularly helpful.
Play with Opacity
Don’t be afraid to adjust the opacity frequently. Sometimes you need a faint reference, and other times, a more pronounced guide.
Use Layers Wisely
Remember, each layer is a frame. Organize them well to avoid confusion.
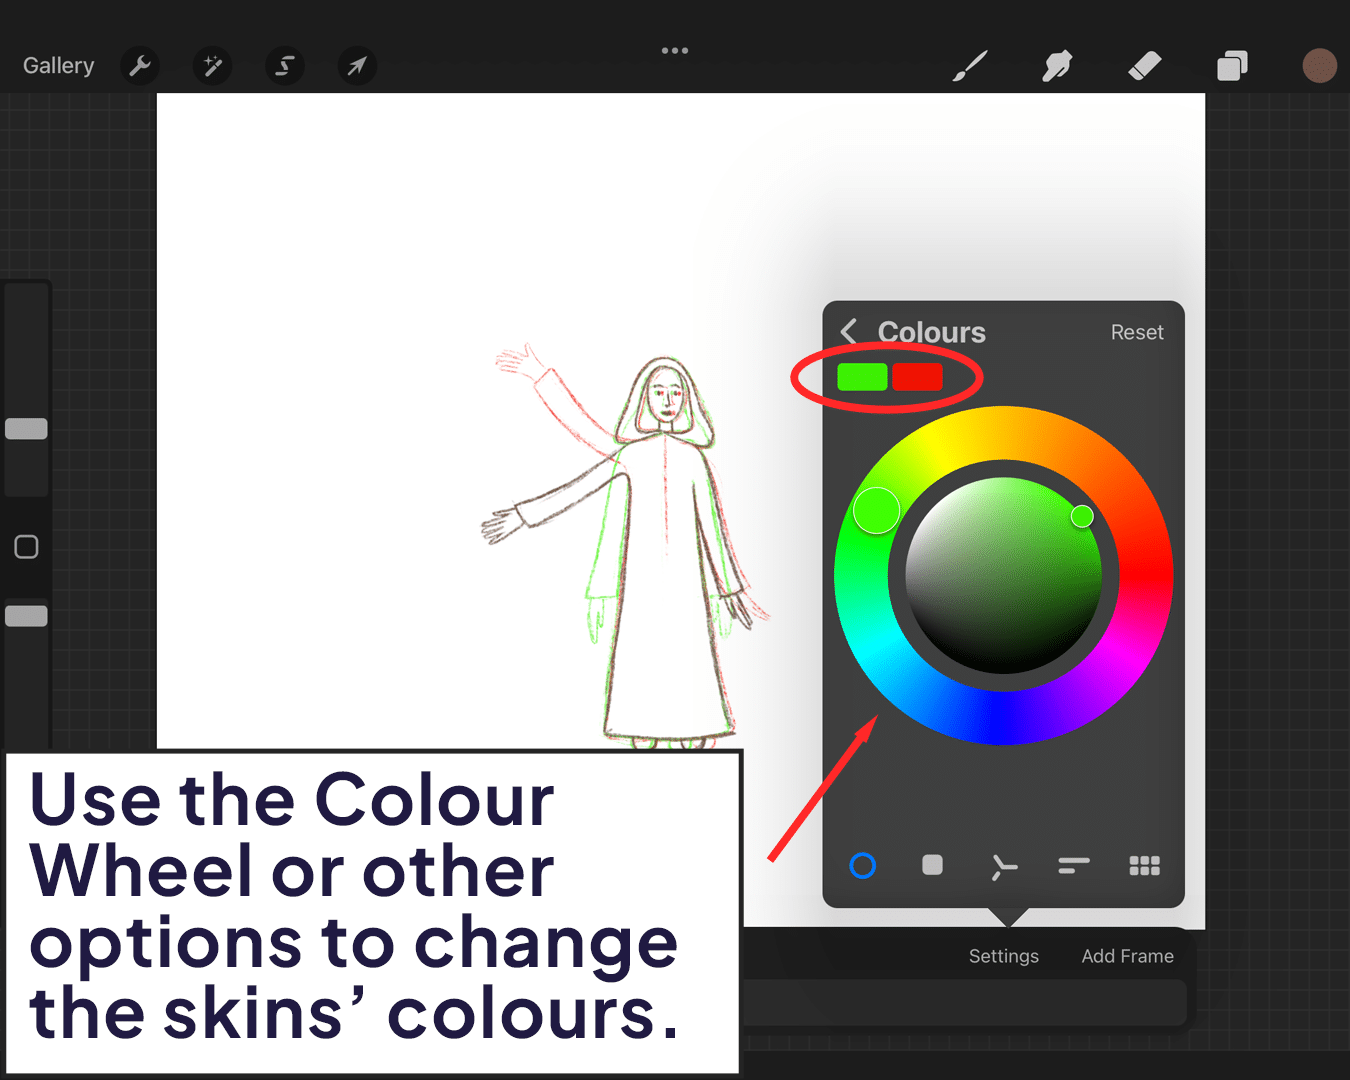
Experiment with Colors
Sometimes changing the color of your onion skin frames can help differentiate past and future frames more clearly.
Conclusion
Onion skinning might sound bizarre at first, but it’s a powerful tool for animators, especially when combined with detailed texturing techniques like making skin glow, as explained in how to make skin glow in Procreate.
It bridges the gap between traditional frame-by-frame animation and digital ease. So, the next time you open Procreate, give onion skinning a try. You might just find that it adds a whole new layer of depth (and fun!) to your animation projects.
Happy animating, and remember, no onions were harmed in the making of this guide!


Share this article


