
How To Match Skin Tone in Procreate

Picture this: You’re painting a portrait in Procreate, and you’ve captured the eyes’ twinkle, and the hair’s flow, but the skin tone? It’s looking more like a sunburnt lobster than a natural flush. We’ve all been there. Getting skin tones right can feel like solving a Rubik’s Cube blindfolded.
But don’t worry, I’m here to guide you through the maze of matching skin tones in Procreate, turning that frustrating puzzle into a satisfying click of pieces falling into place. To get started, having the right tools is essential. Enhance your artwork with a variety of Procreate skin brushes designed to help you achieve more natural and realistic skin textures.
Understanding Skin Tones
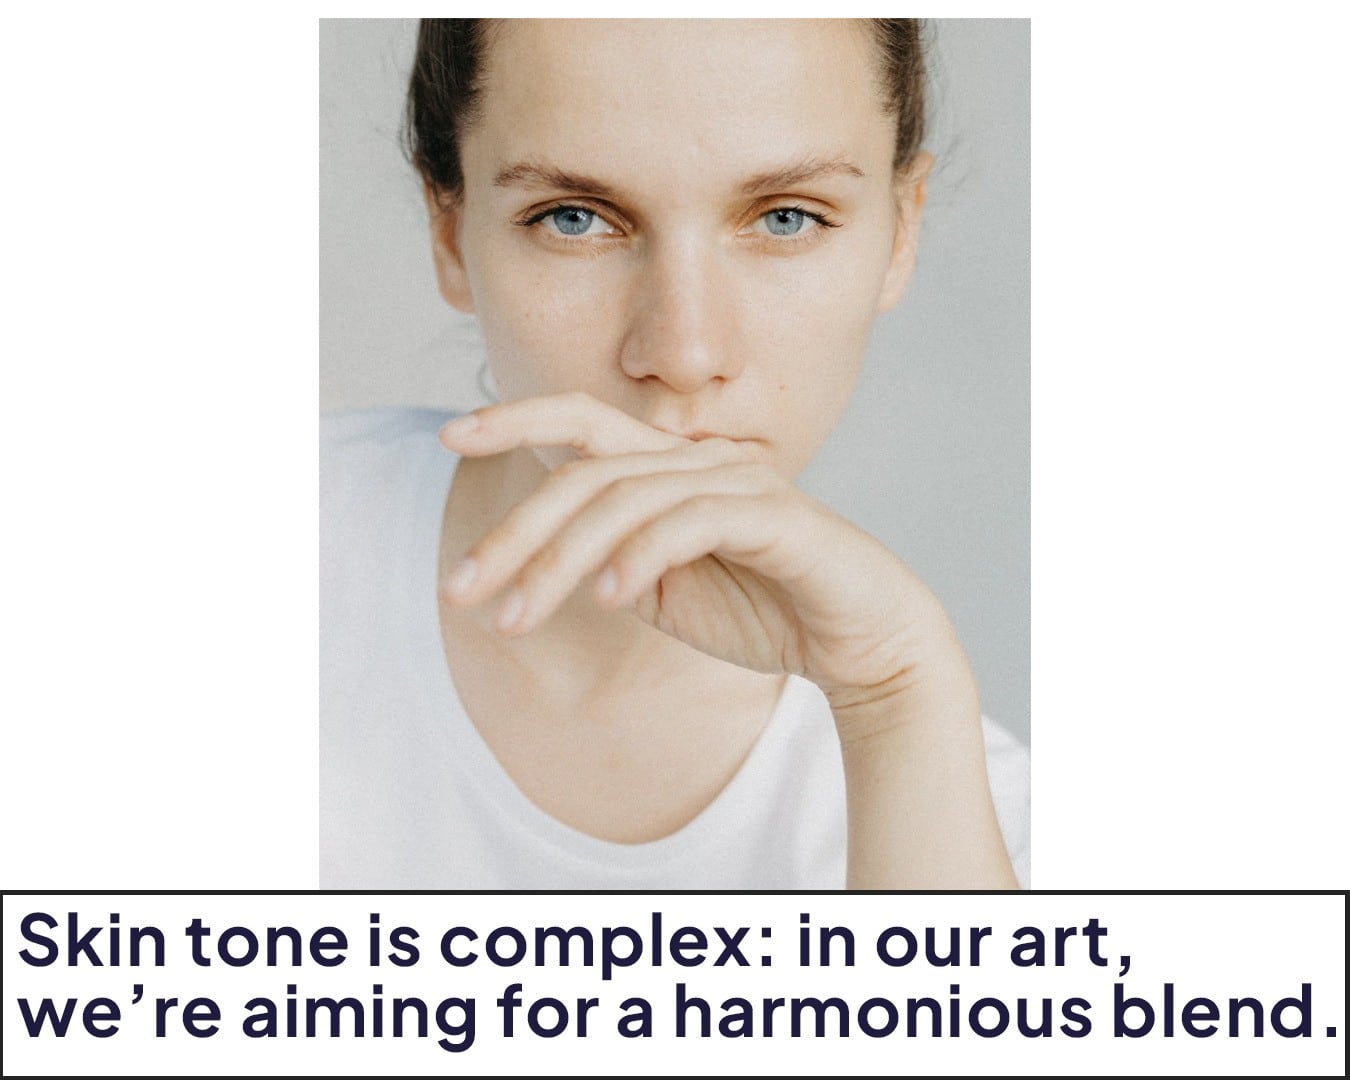
Before diving into Procreate, let’s pause and consider what makes up a skin tone. Skin isn’t just one flat color; it’s a symphony of hues, influenced by undertones, lighting, and even blood flow.
So, when matching skin tones, we’re aiming for a harmonious blend rather than a single note.
Starting with a Base Color
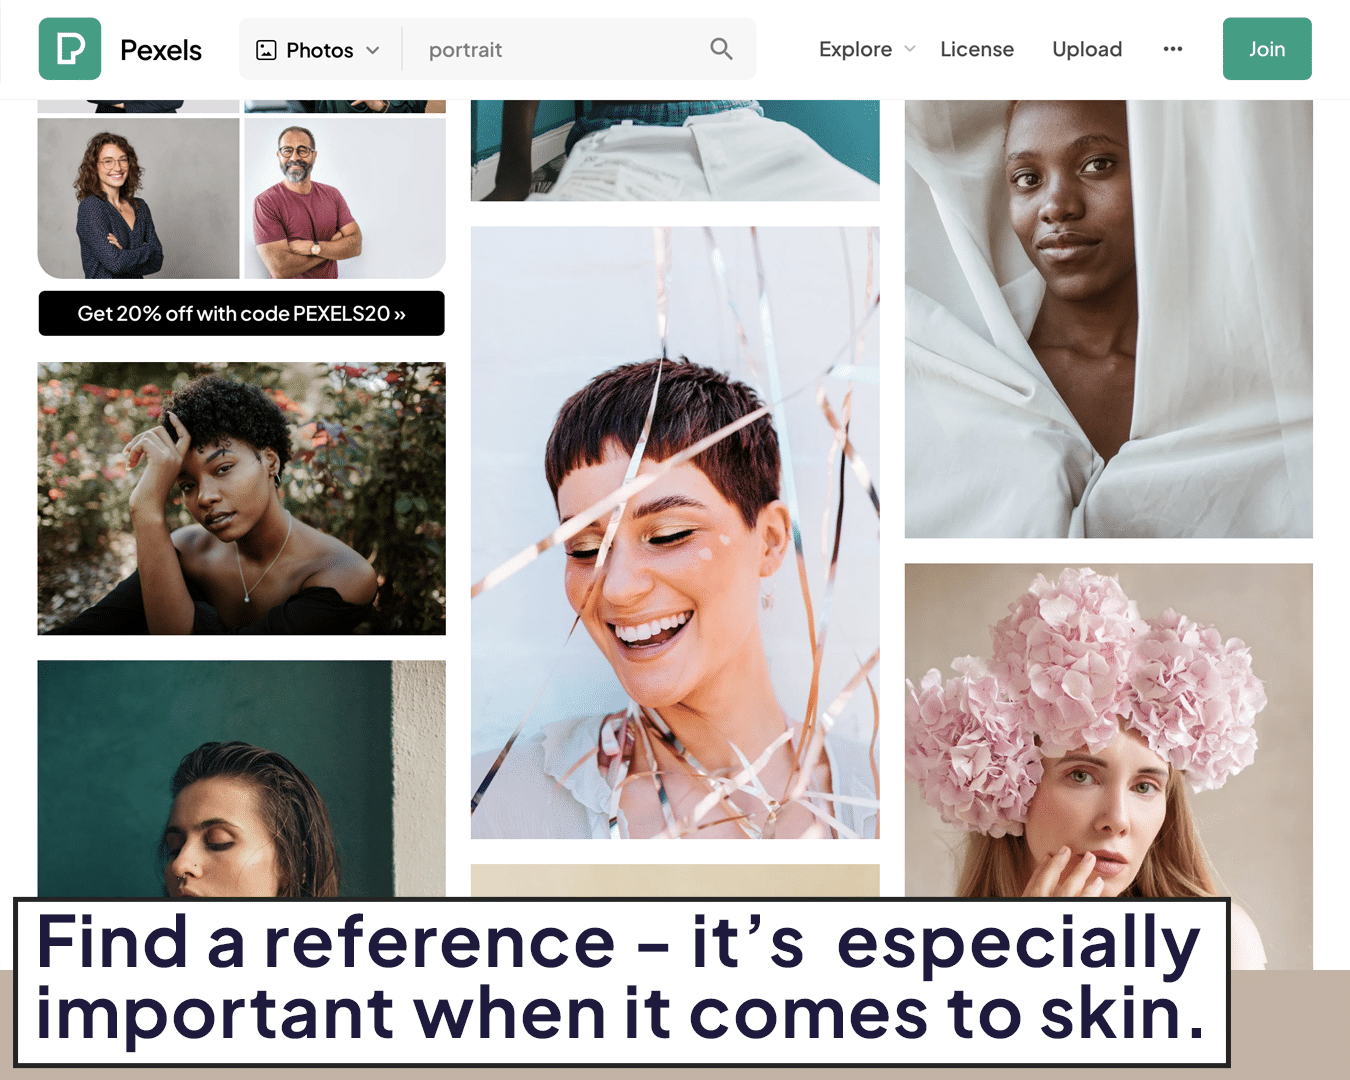
Finding a reference: If you’re matching a specific skin tone, start with a reference photo. Good references are key to getting the colors right.
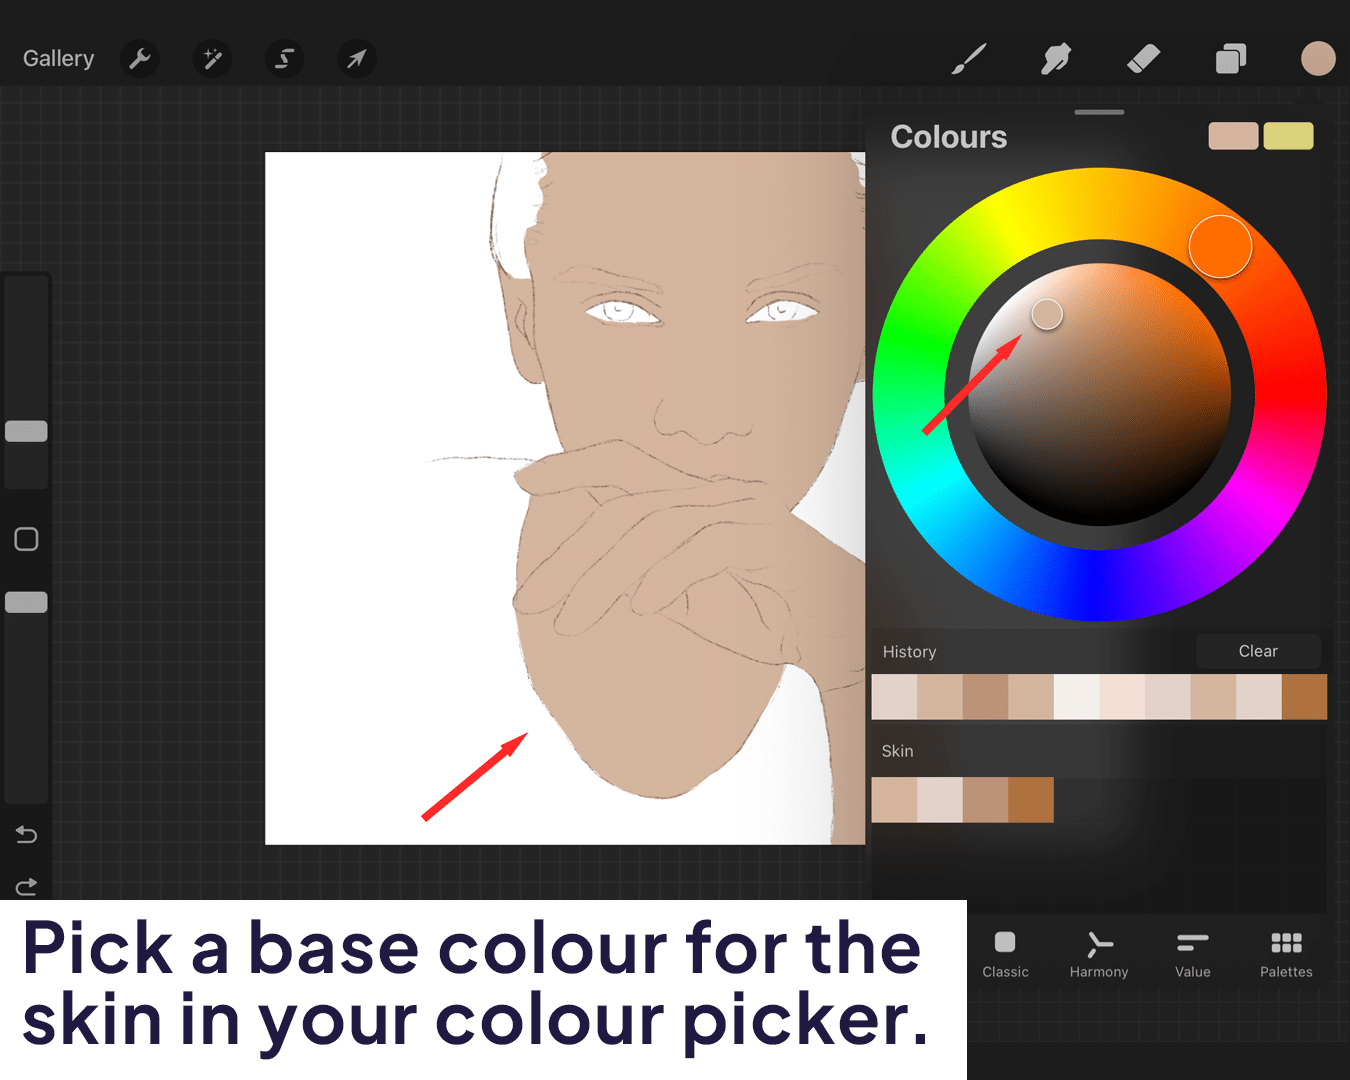
Choosing the Base
In Procreate, open the color picker and start with a hue that’s closest to your reference. This will be your base. Skin tones typically fall into warm (yellow or peach-based) or cool (pink or olive-based) categories.
Discover how to further refine your technique with tutorials on how to airbrush skin in Procreate for a flawless finish.
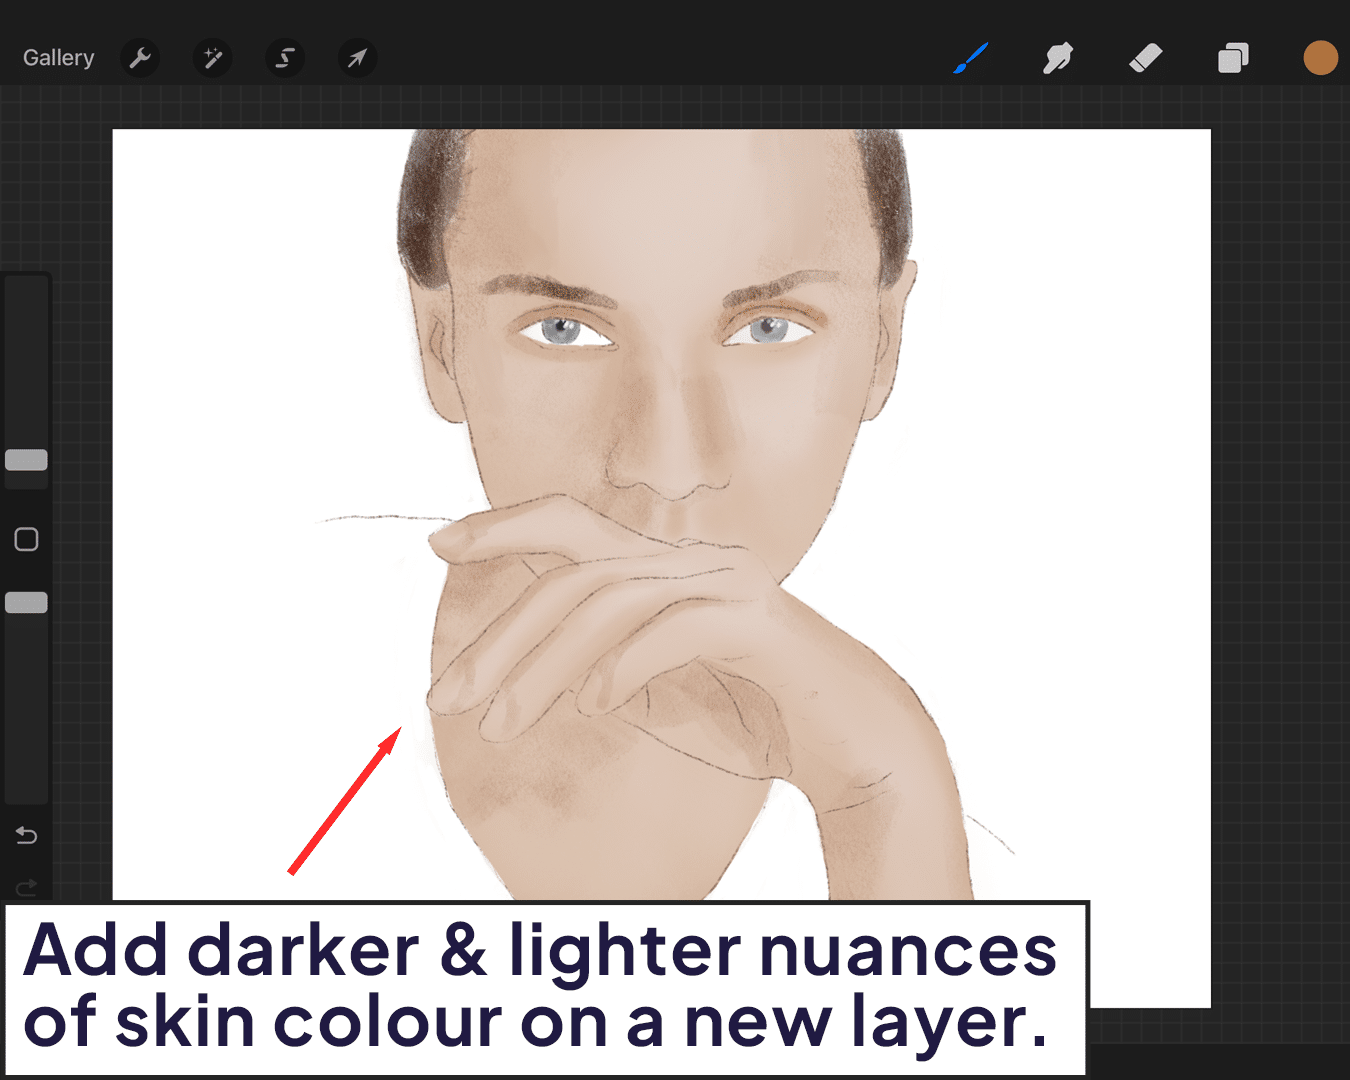
Building the Tone
Adding Depth: Skin tones are not flat. Add lighter and darker shades to your base color to create depth. Use the color picker’s sliders to adjust the brightness and saturation.
Consider the Undertone
Is the skin more yellow, red, or olive? Adjust your base color accordingly by adding subtle hints of these colors. For techniques on blending these shades seamlessly, check out how to blend skin in Procreate.
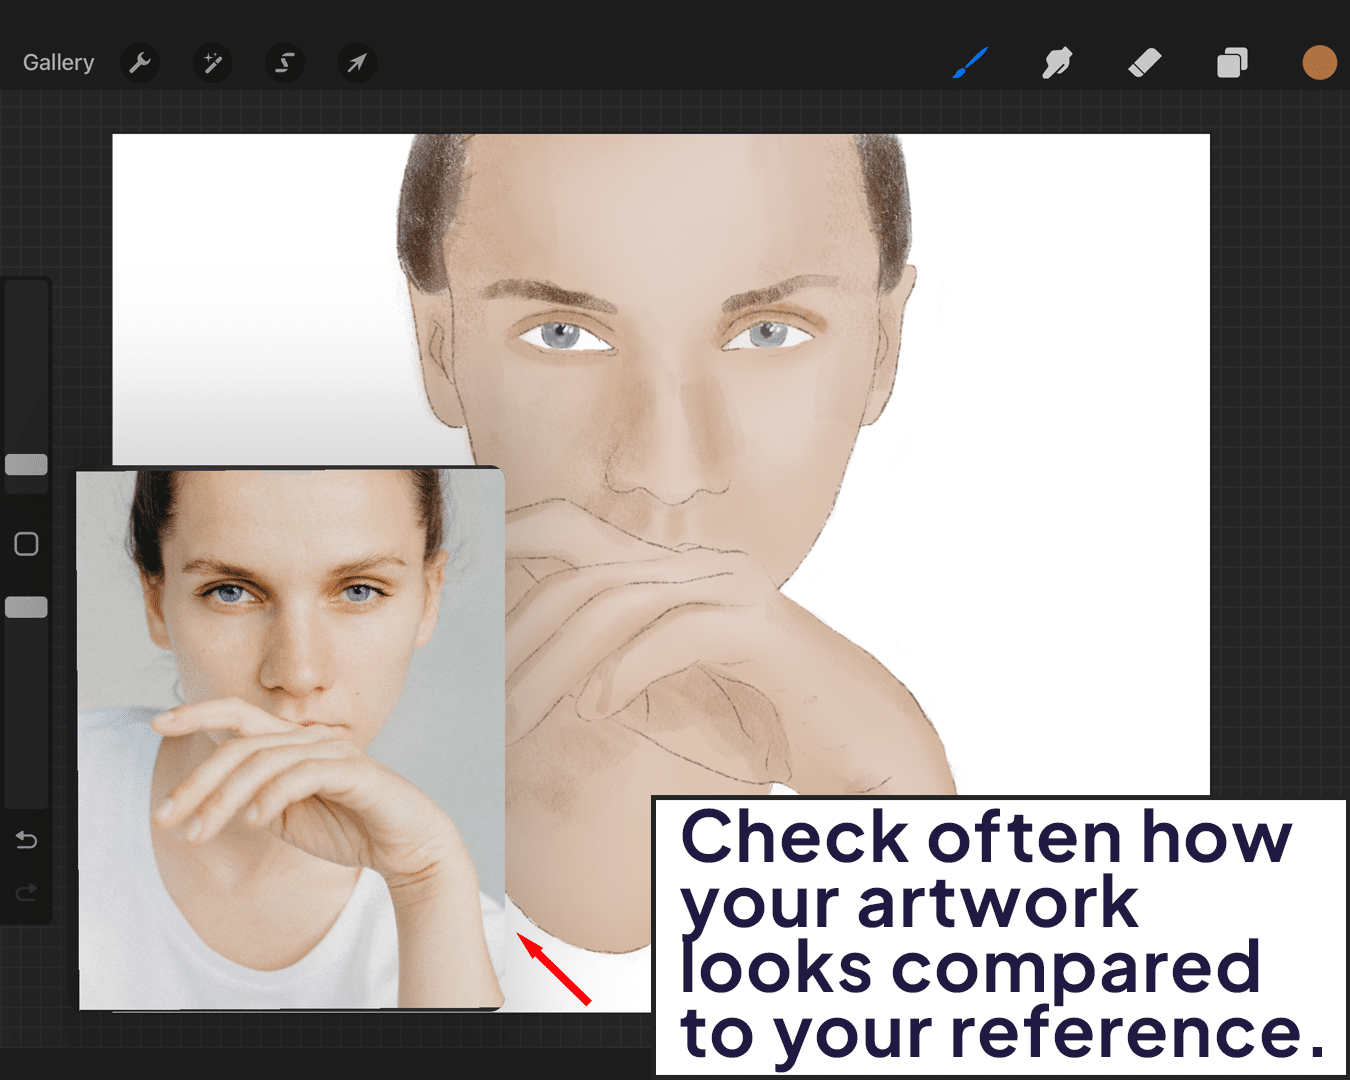
Checking Against Your Reference
Comparing Colors: Continuously compare your color with the reference. You can even bring the reference photo into Procreate for direct comparison.
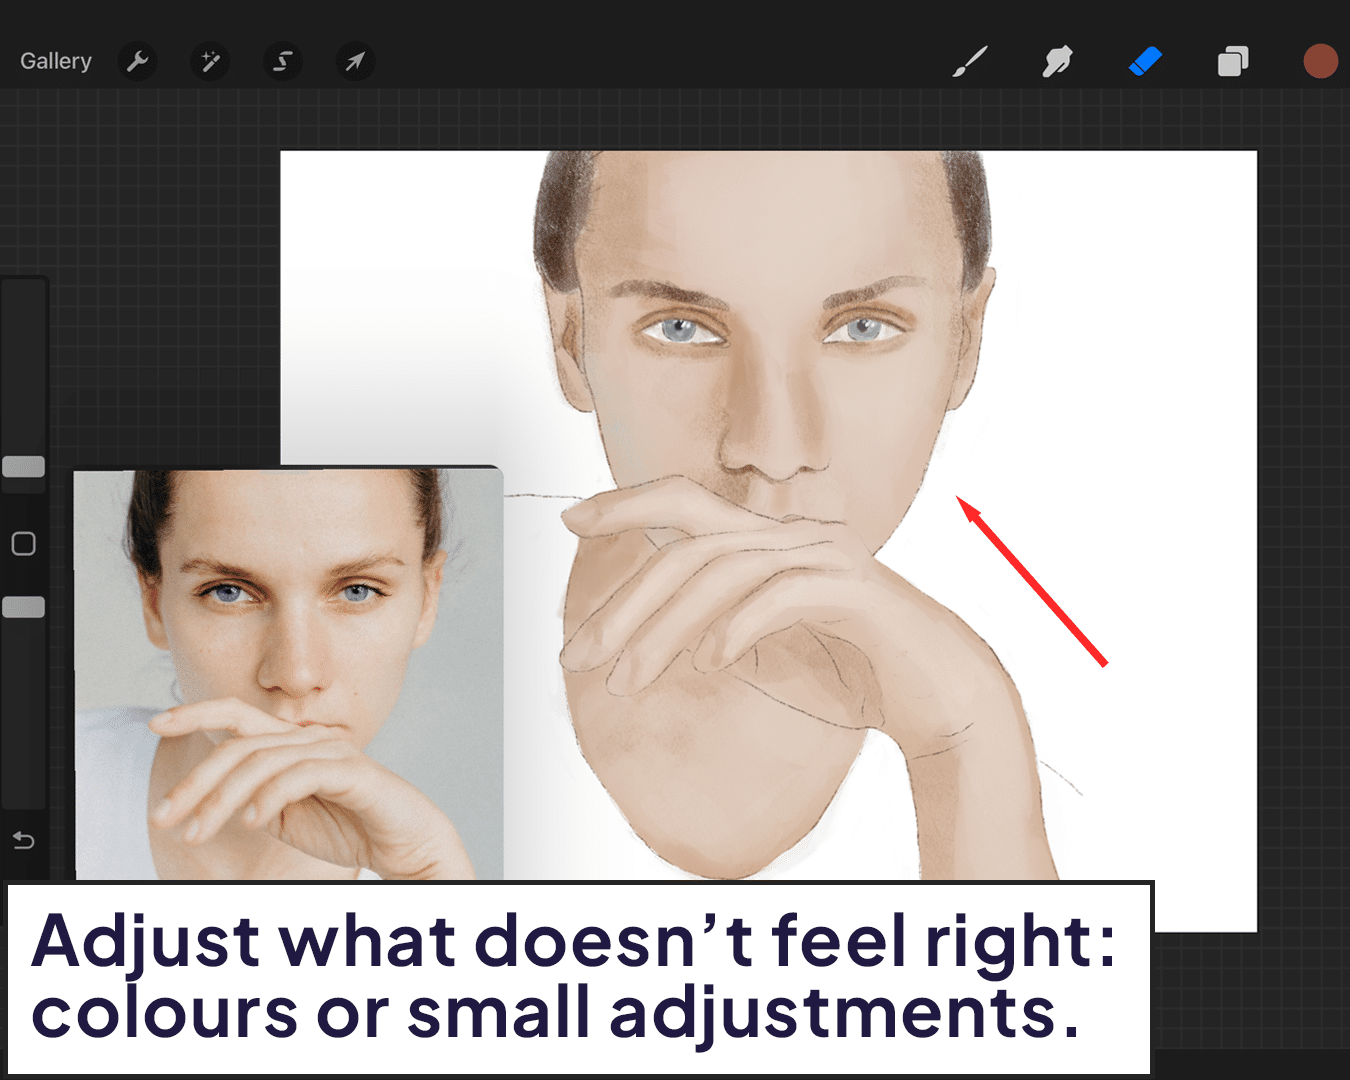
Adjust as Needed
If something looks off, don’t hesitate to tweak the colors.
More often than not, minor adjustments make a big difference. Incorporate the how-to-use onion skin in Procreate guide to assist with ensuring accuracy in your adjustments.
Testing on Your Canvas
Applying on your artwork: Start applying your matched colors onto your artwork. Observe how they interact with each other and the overall painting.
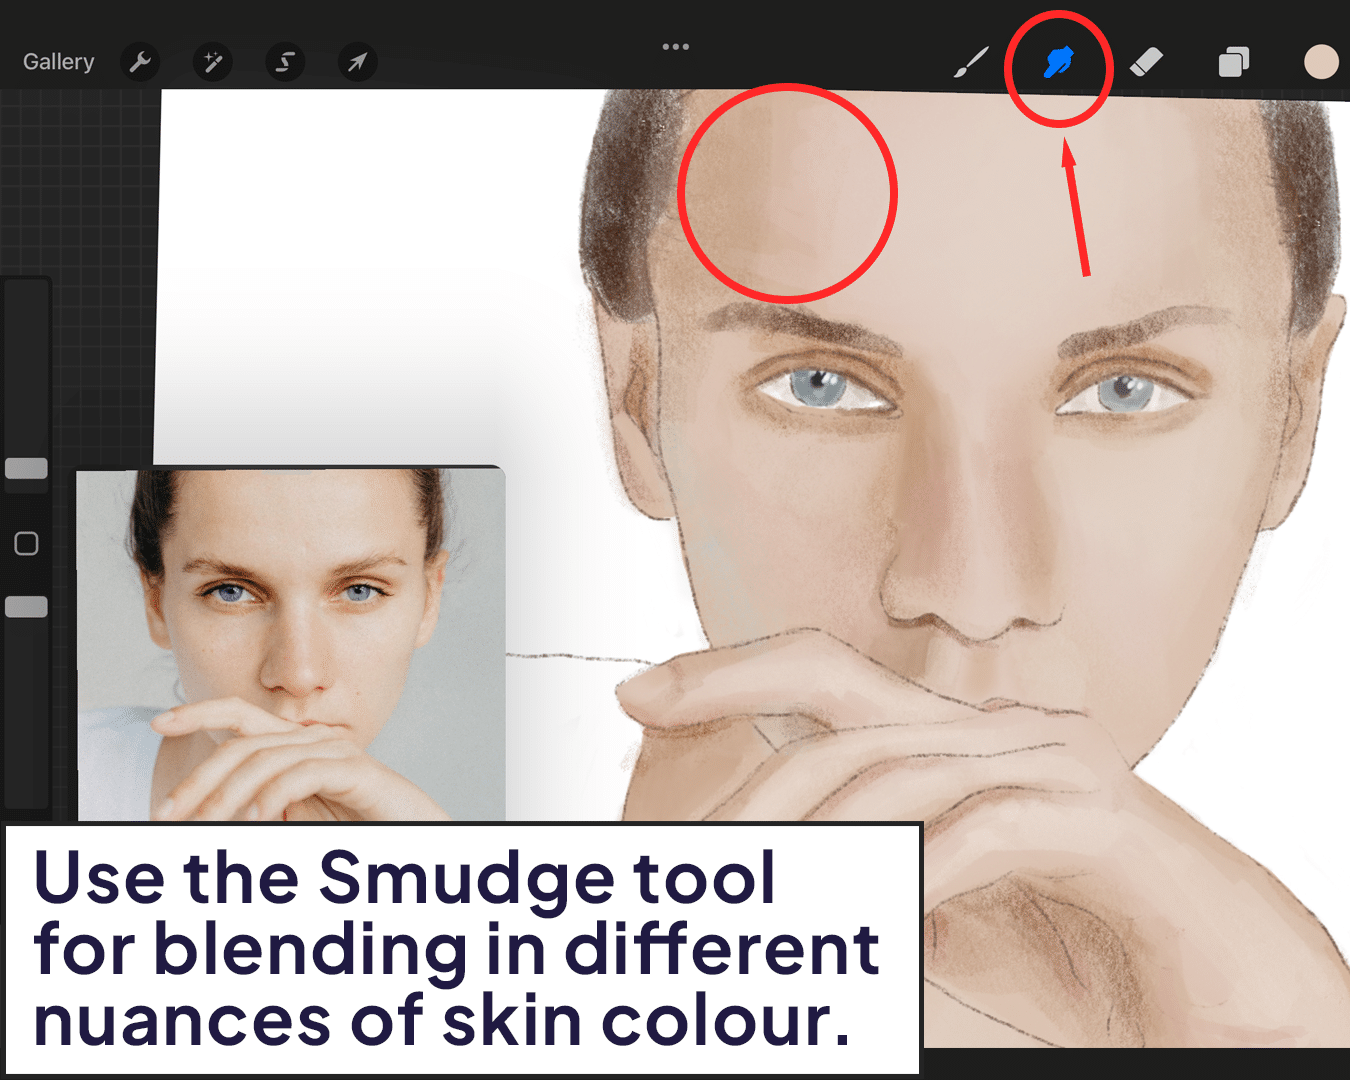
Blend and Adjust
Use Procreate’s blending tools to smooth transitions between different skin tones. Remember, skin is a blend of various colors.
Learn to enhance the luminosity of your portrait with the tutorial on how to make skin glow in Procreate.
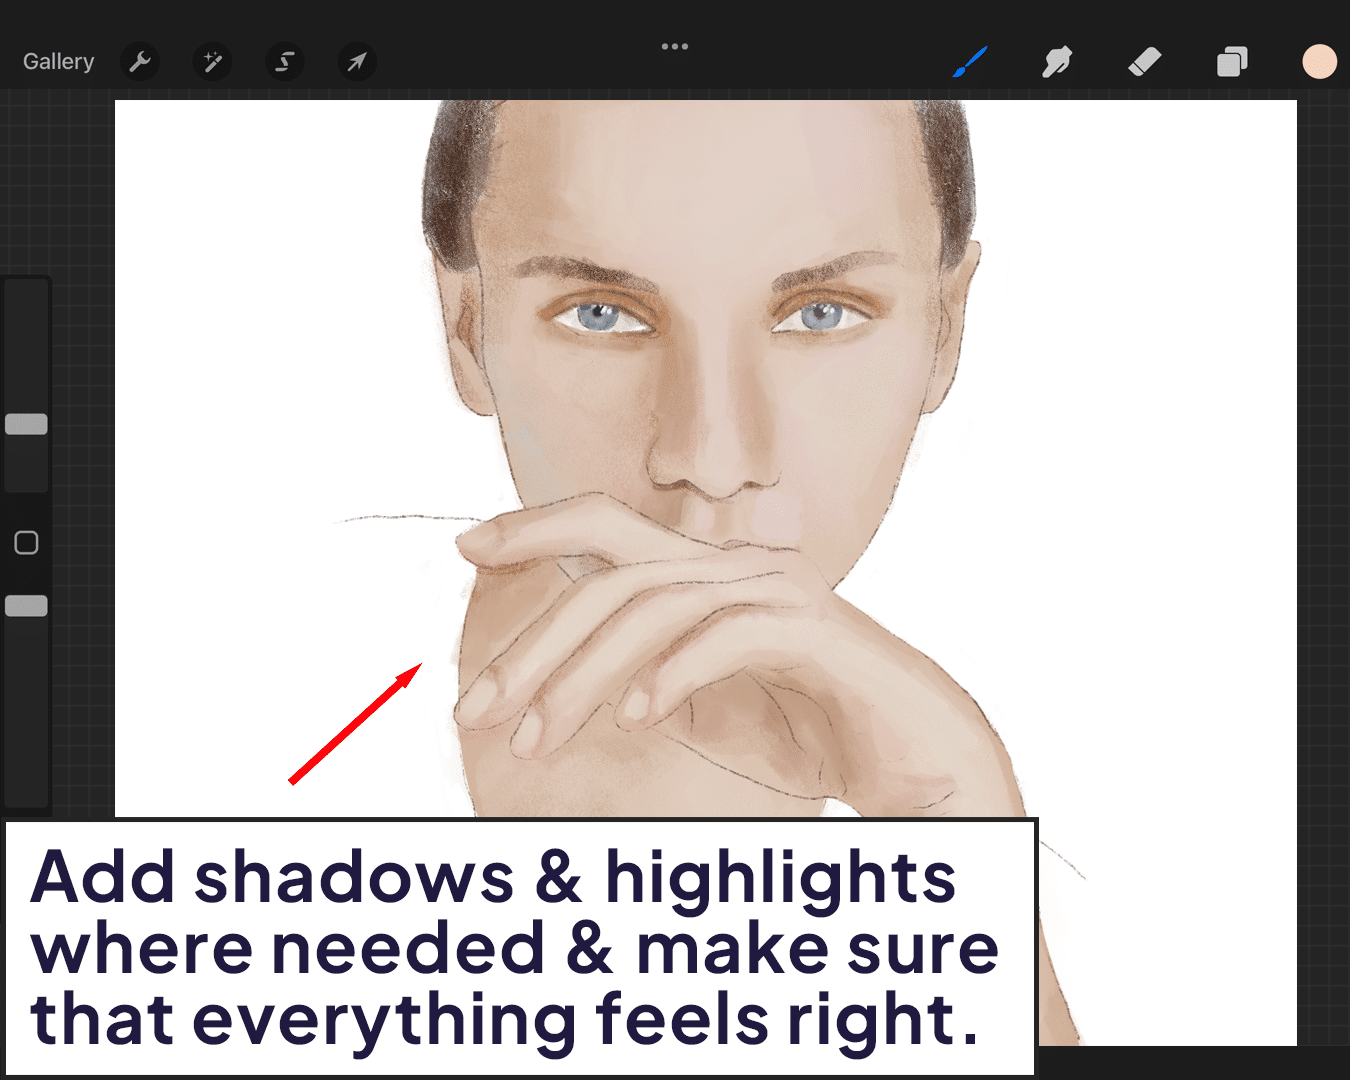
Adding the Finishing Touches
Add highlights to areas hit by light and shadows where light is blocked. This adds realism to the skin tone.
Colors can look different in various lighting conditions. Review your artwork under different light settings in Procreate to ensure it looks natural.
Conclusion
Matching skin tones in Procreate is an art that celebrates the beautiful diversity of human skin. It requires patience, practice, and a keen eye for detail. Remember, every person you paint has a unique skin tone, a unique story. By mastering this skill, you’re not just becoming a better artist; you’re learning to portray the rich tapestry of humanity with respect and accuracy.
So go ahead, embrace the challenge, and may your portraits glow with life and realism!
Happy painting, and may your digital canvas reflect the world’s beautiful spectrum! 🎨🌍✨
P.S.: Keep experimenting with colors and techniques in Procreate, and stay tuned for more tips to enhance your digital art journey! 🖌️👩🎨🌈


Share this article


