
How To Save Pixel Art in Procreate Without Blurring

Introduction
Hey there, pixel warriors! Ever felt the frustration of crafting a pixel-perfect masterpiece in Procreate, only to save it and end up with a blurry, unrecognizable mess? It’s like baking a beautiful cake and then watching it deflate – heartbreaking!
Today, I’m here to guide you through the maze of saving your pixel art in Procreate, ensuring it remains as crisp and clear as a starry night. No more blurs, no more tears – just pixel perfection!
Start with the Right Canvas Size
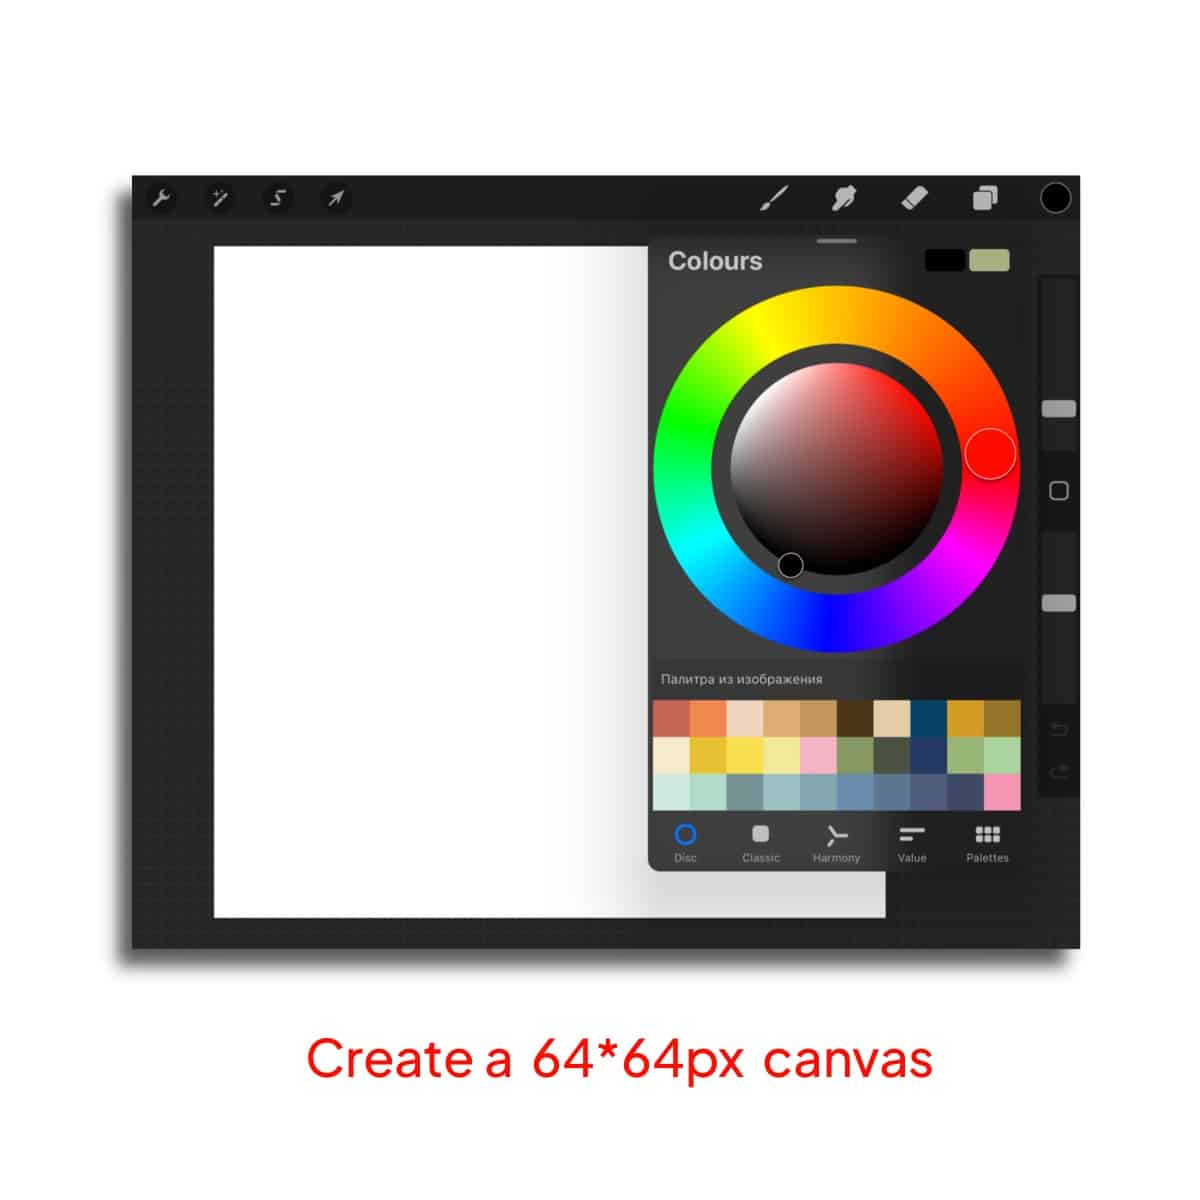
Pixel art thrives on small, controlled spaces. Start with a canvas size that matches your intended pixel art size. Think small – a canvas size of 32×32, 64×64, or 128×128 pixels is ideal. To get started, you might want to explore our Procreate pixel brushes for the perfect tools.
When working on your art, zoom in to ensure you’re placing each pixel precisely where you want it. For those looking to add a soft touch or explore the other side of pixel art, discovering how to add pixel blur in Procreate can offer a unique perspective.
Creating Pixel Art
Procreate offers a pixel brush under the ‘Retro’ brush set. This brush ensures each stroke is a distinct pixel.
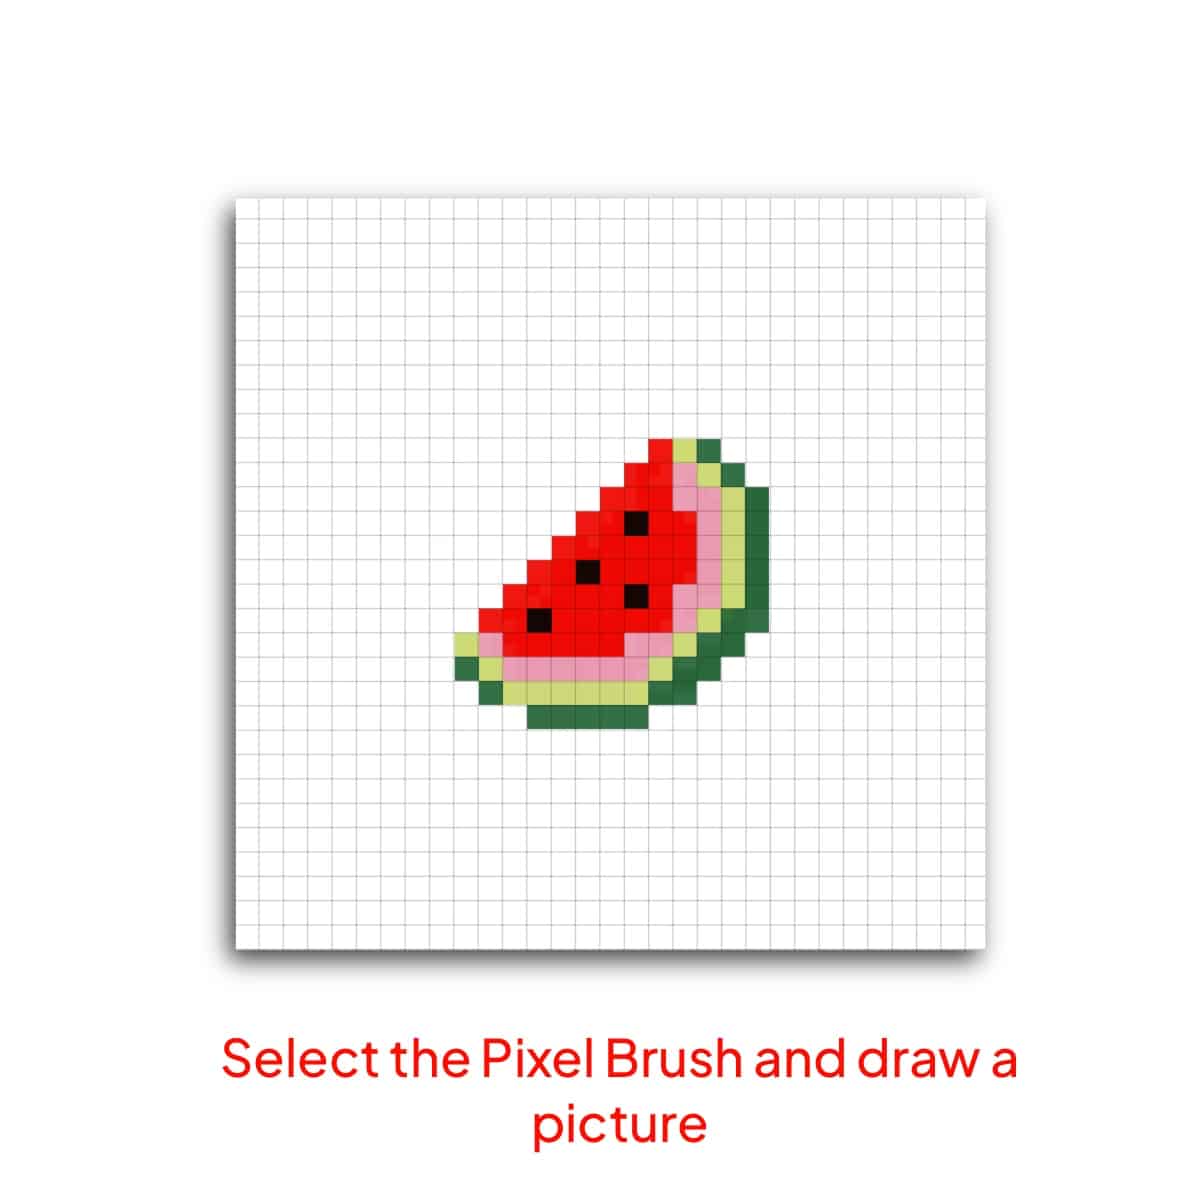
Make sure to use brushes that don’t have anti-aliasing, as this can create semi-transparent edges and lead to blurring.
Unsure of what to create? Dive into inspiration with our guide on what should I draw for pixel art in Procreate. Curious about what else you can create with Procreate’s tools? Find out if you can do pixel art in Procreate and expand your digital artistry.
Saving Your Masterpiece
Change the canvas size to 2000*2000px.
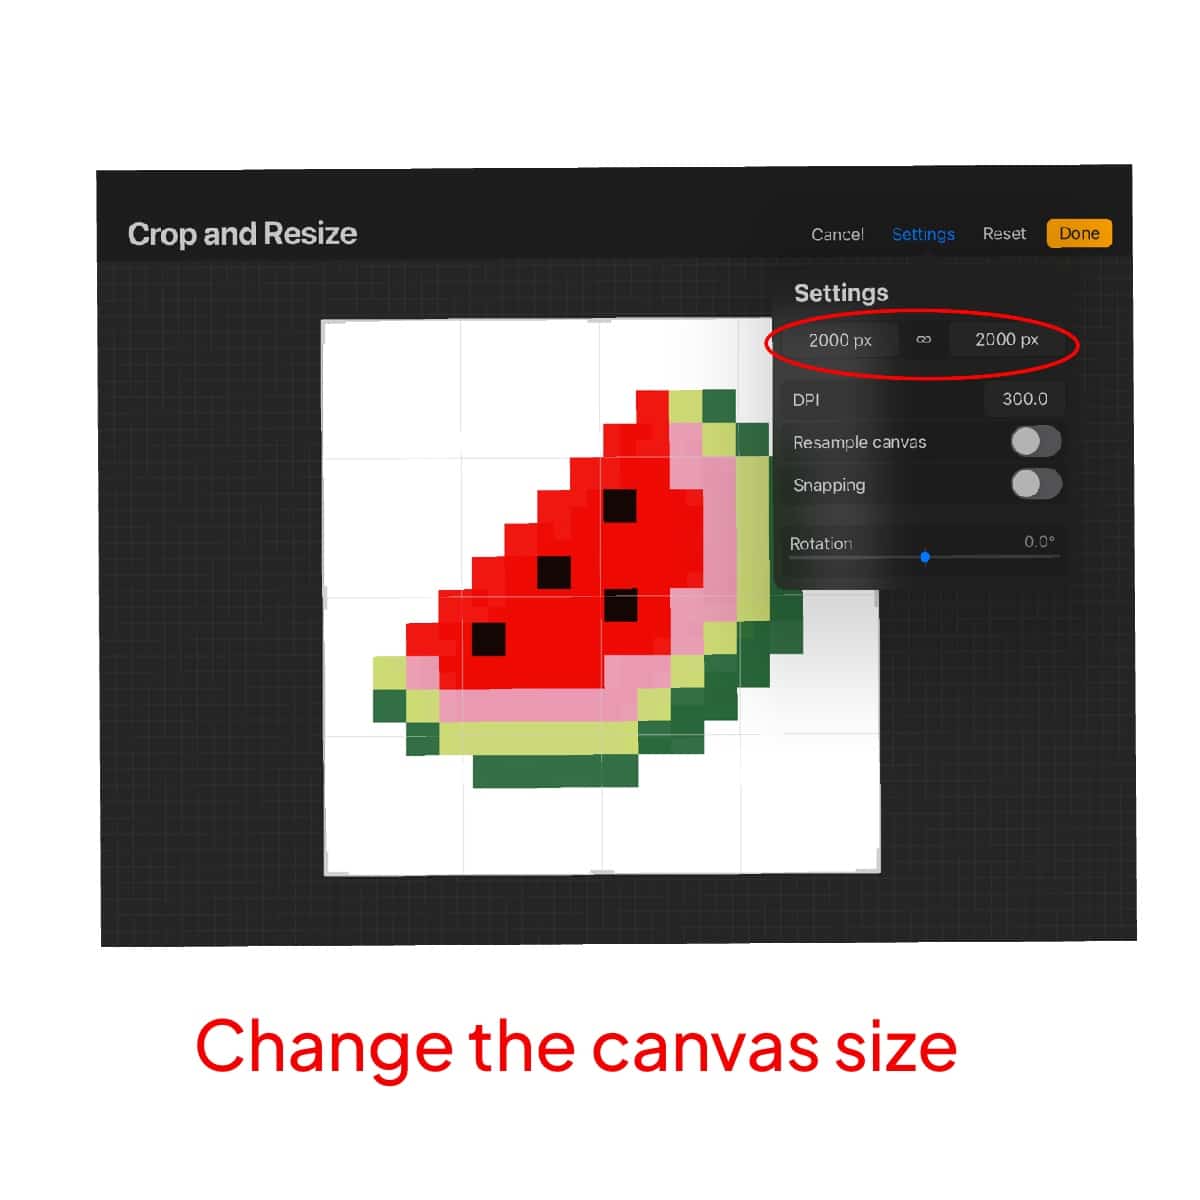
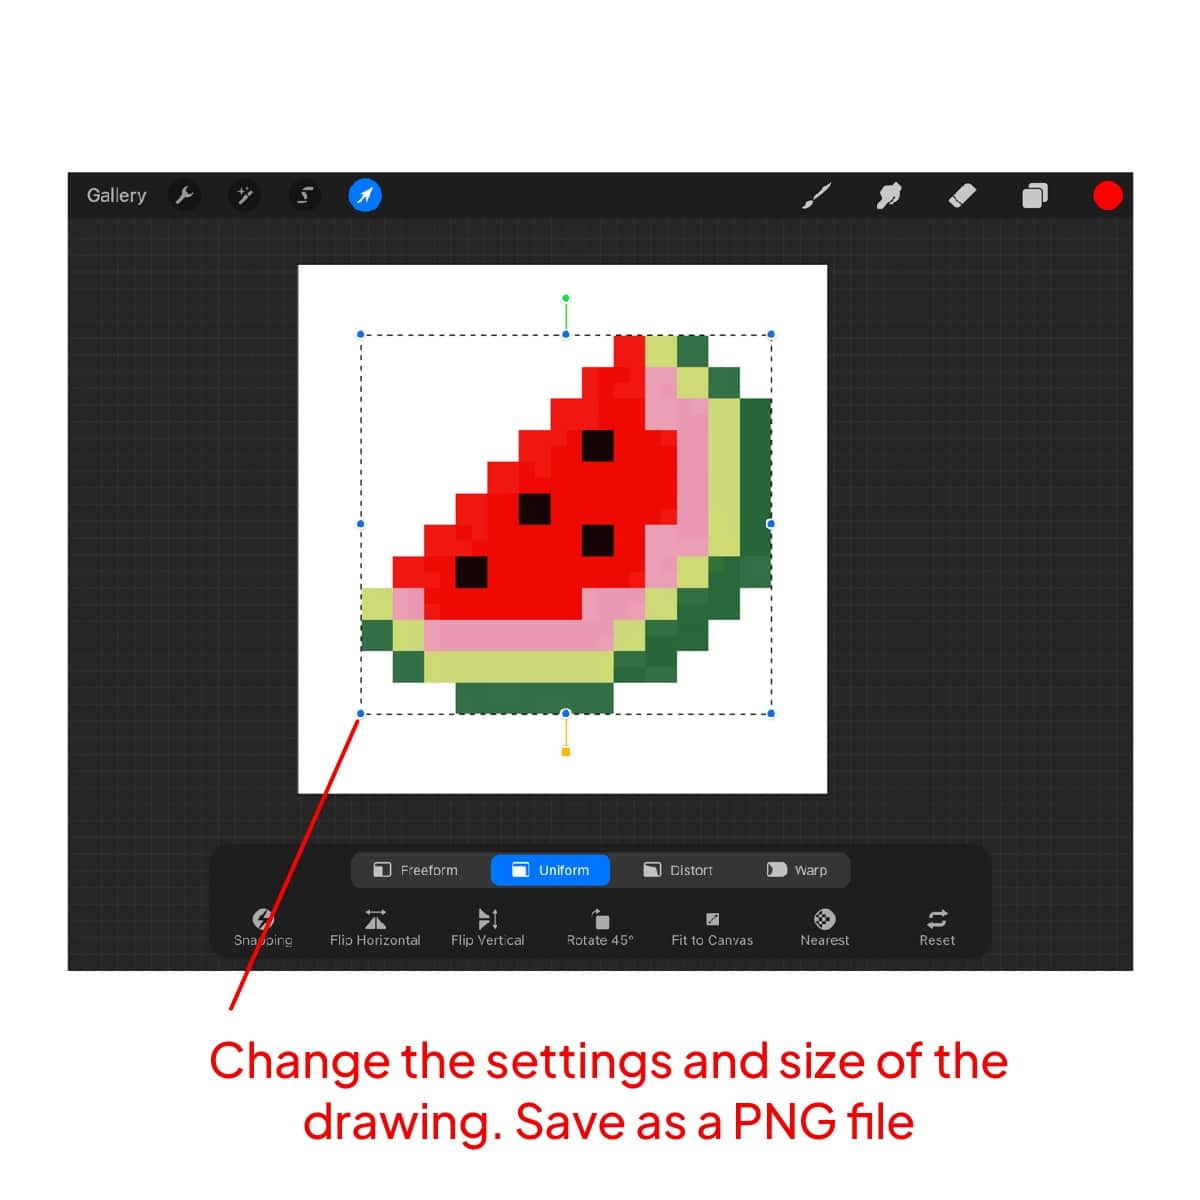
In the interpolation settings, select the “nearest neighbor”.

Save the finished picture in PNG format. Selecting the right color palette is crucial; learn how to make your pixels pop with our tutorial on how to choose a color palette for pixel art.
Uploading or Sharing
Some platforms automatically resize images, which can blur pixel art. Always check the platform’s image requirements.
When sharing online, opt for platforms that support pixel art and don’t automatically apply image compression or resizing.

Conclusion
Saving your pixel art in Procreate without it turning into a blurry mess isn’t just a dream – it’s entirely achievable with the right approach.
Remember, the devil is in the details: small canvas size, pixel-specific brushes, correct exporting, and mindful sharing.
Follow these steps, and you’re on your way to showcasing pixel art that’s as sharp and clear as your creative vision. Now go forth and pixelate the world – one crisp, clear pixel at a time!


Share this article


