Tracing Into Your Faceless Portrait in Procreate
Tracing can be a helpful technique, especially if you’re just starting out or want a more precise base for your faceless portraits.
Here’s a step-by-step guide to using tracing in Procreate to create these unique portraits, using the right Procreate Portrait brushes for the best effects.
Step 1.
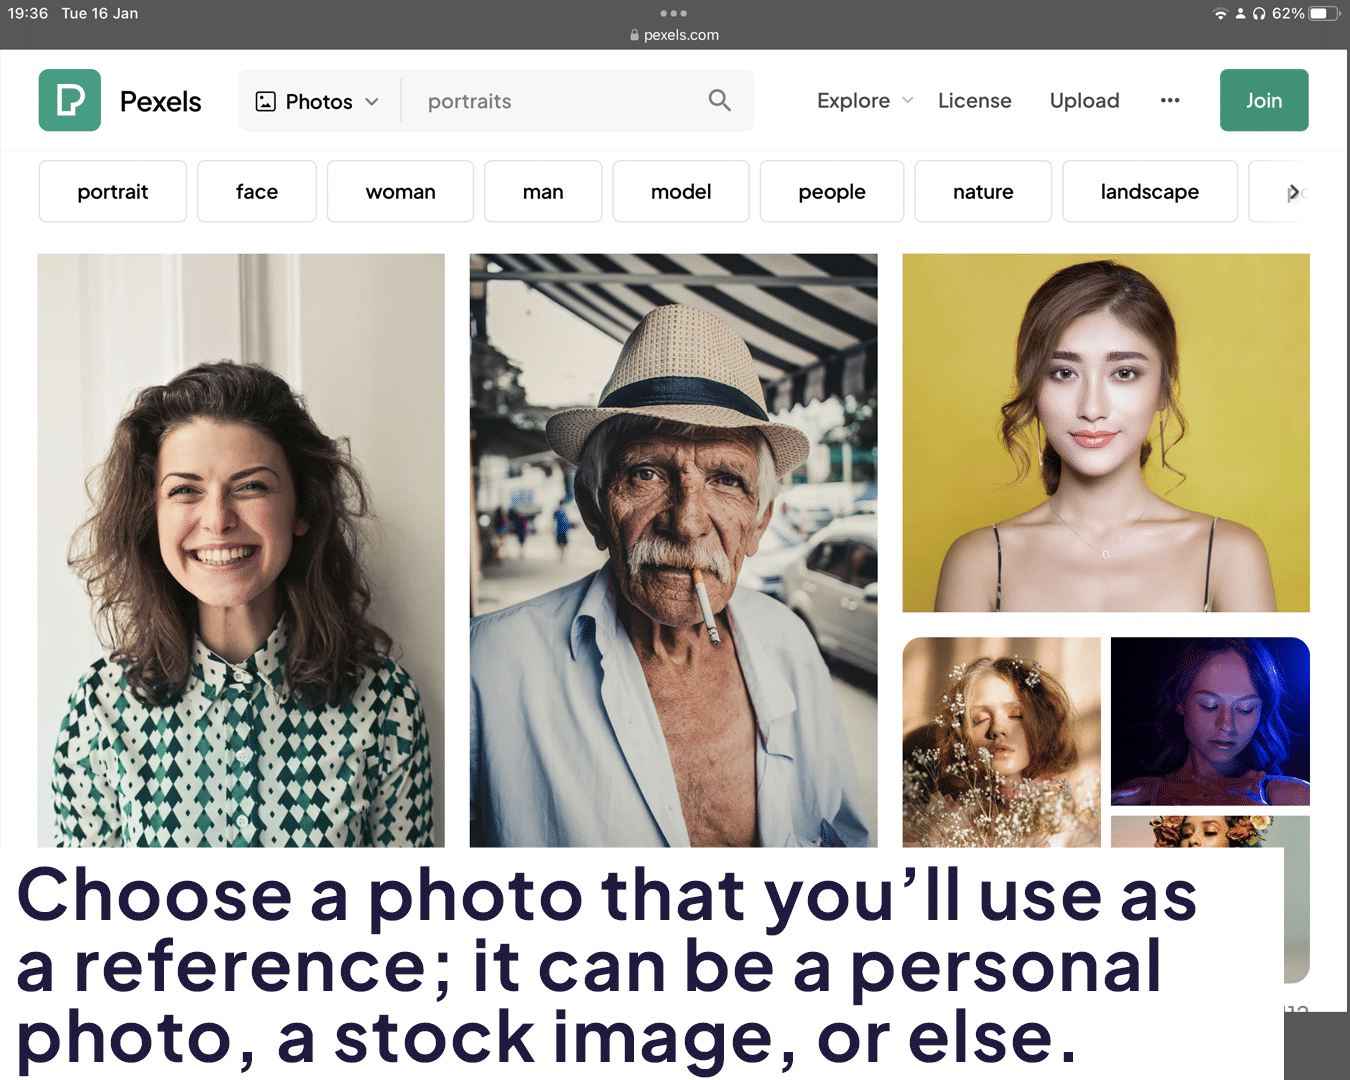
Select Your Reference Image: Choose a photo that you want to use as a reference for your portrait. This could be a personal photo, a stock image, or any portrait that inspires you.
Step 2.
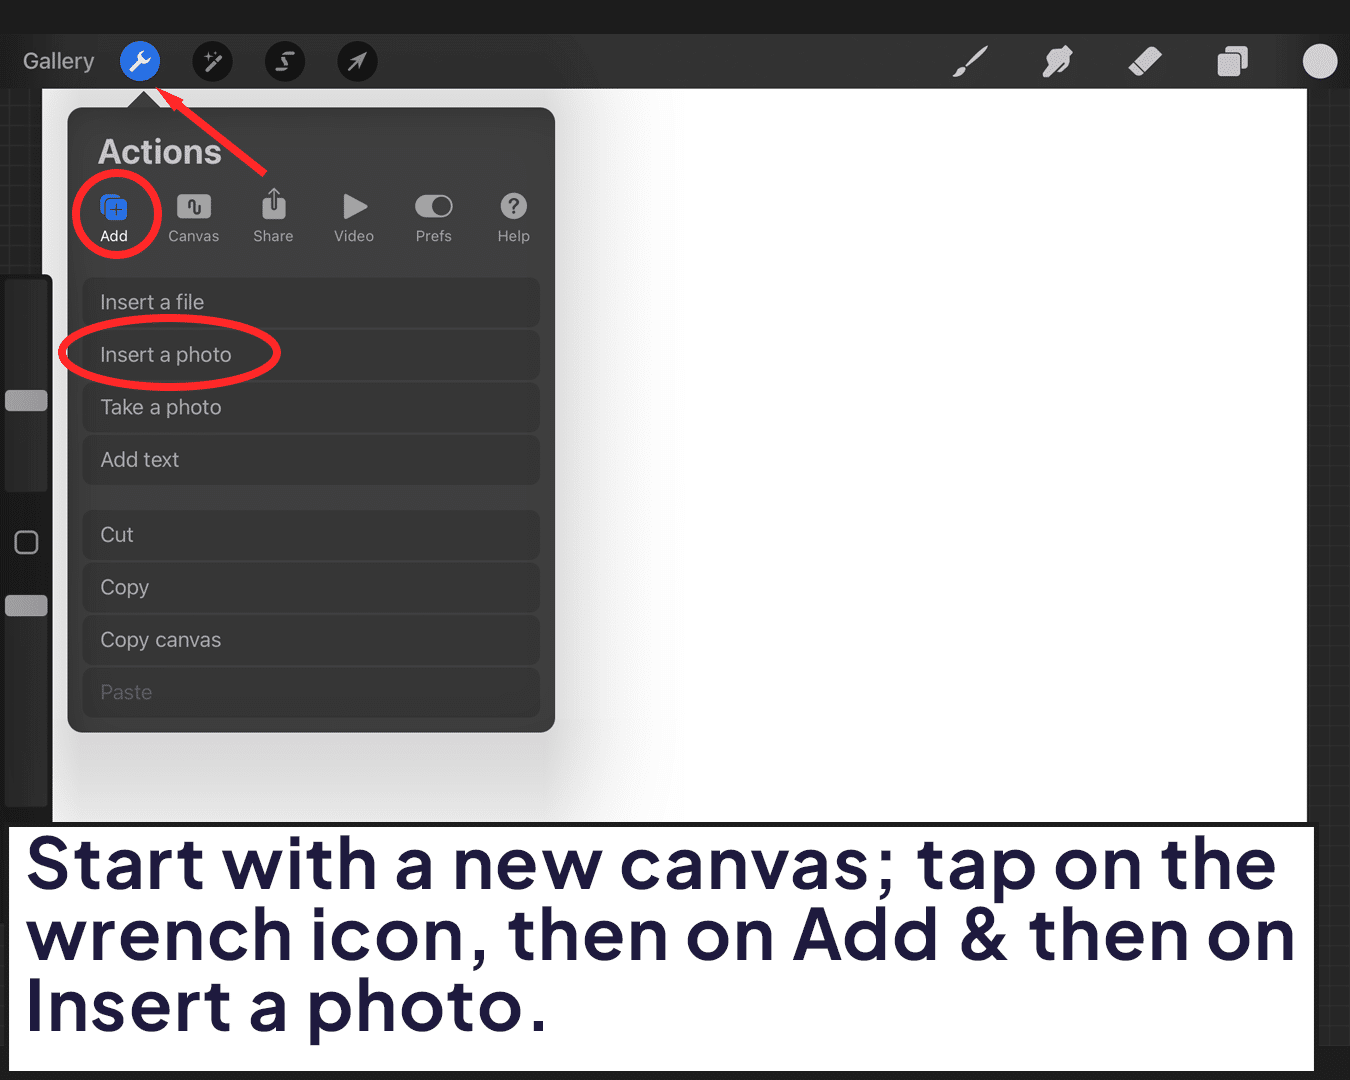
Import the Reference into Procreate: Open Procreate and start with a new canvas. Import your chosen reference image by tapping on the wrench icon at the top left, selecting ‘Add’, and then ‘Insert a photo’. Place the photo on your canvas.
Step 3.
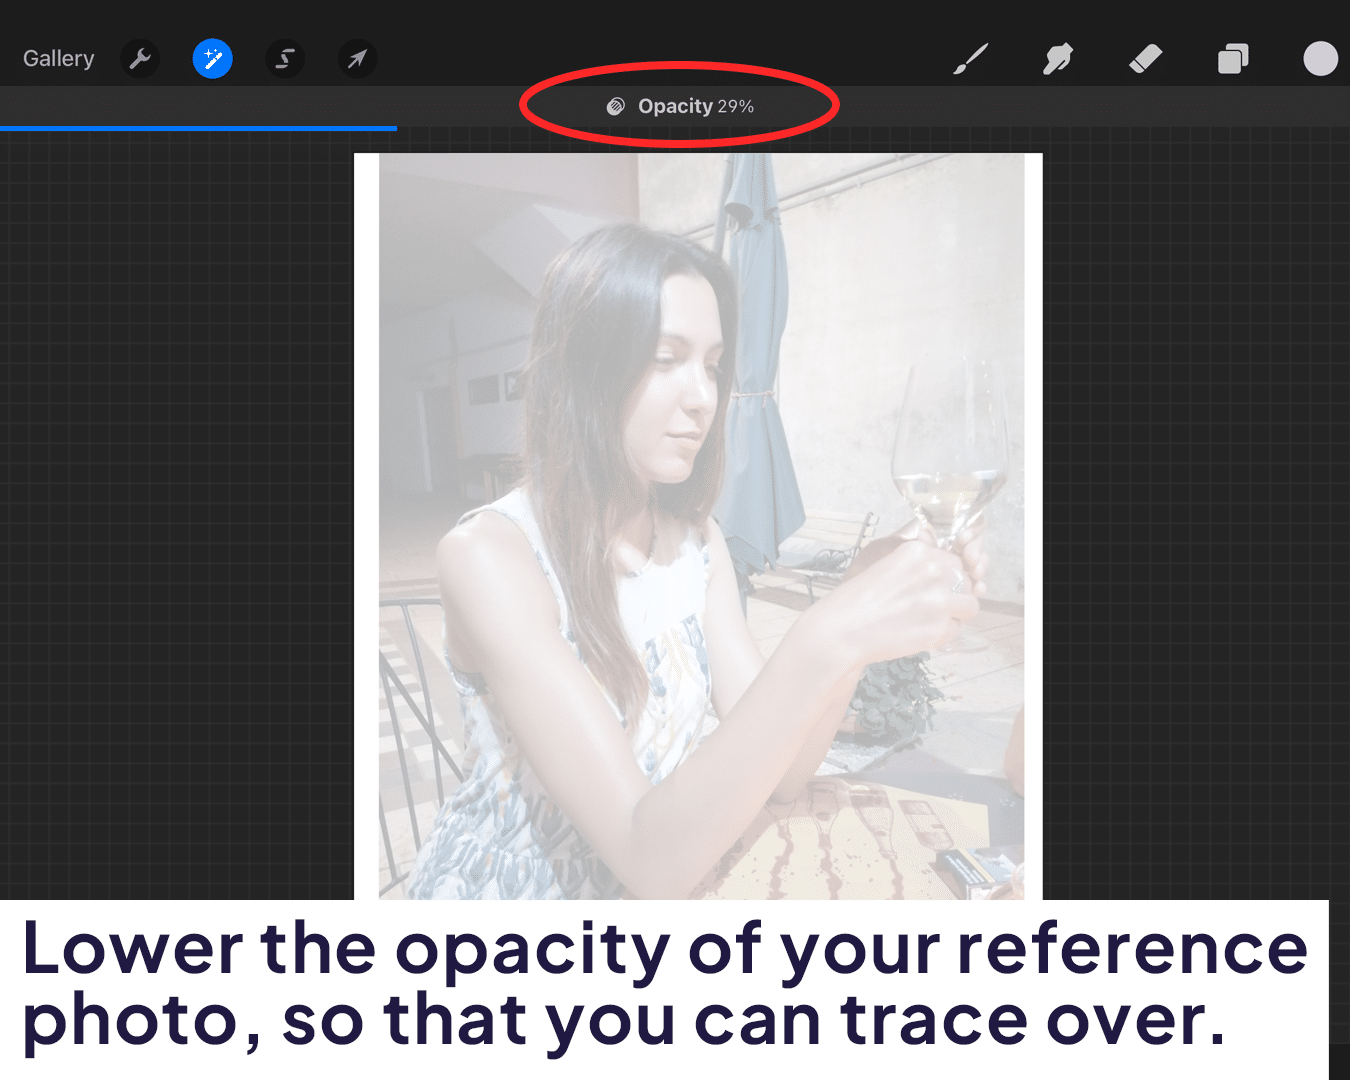
Adjust the Opacity for Tracing: Tap on the layer containing your reference photo. Reduce its opacity using the opacity slider in the layers panel, making it faint enough to serve as a guideline without overpowering your drawing.
Step 4.
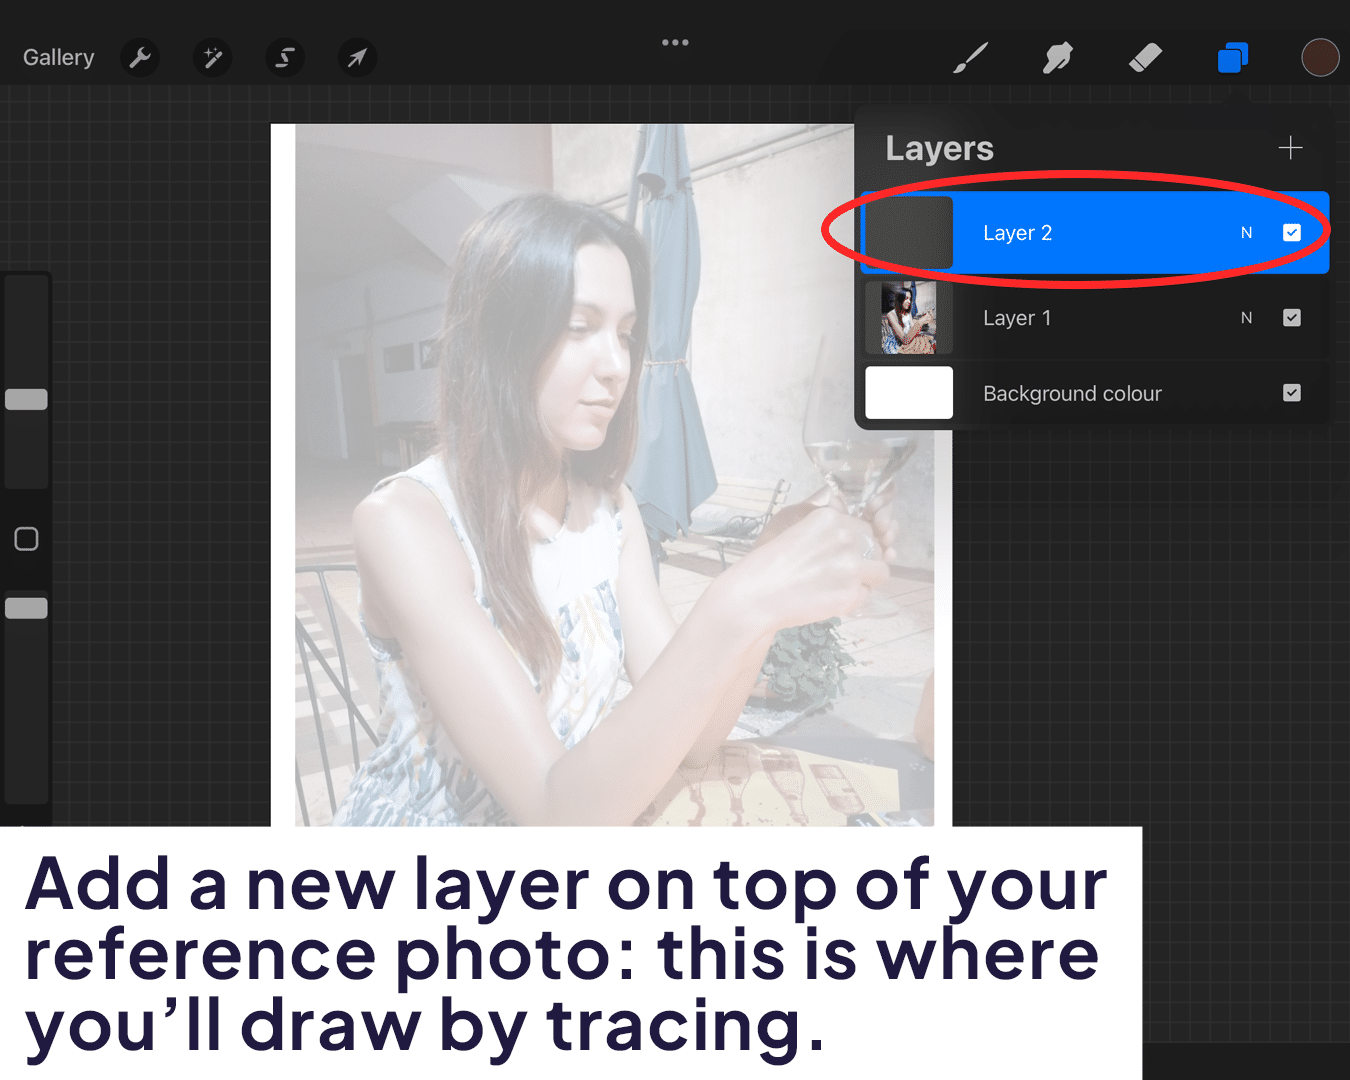
Create a New Layer for Tracing: Add a new layer on top of your reference photo. This is where you’ll do your tracing.
Step 5.
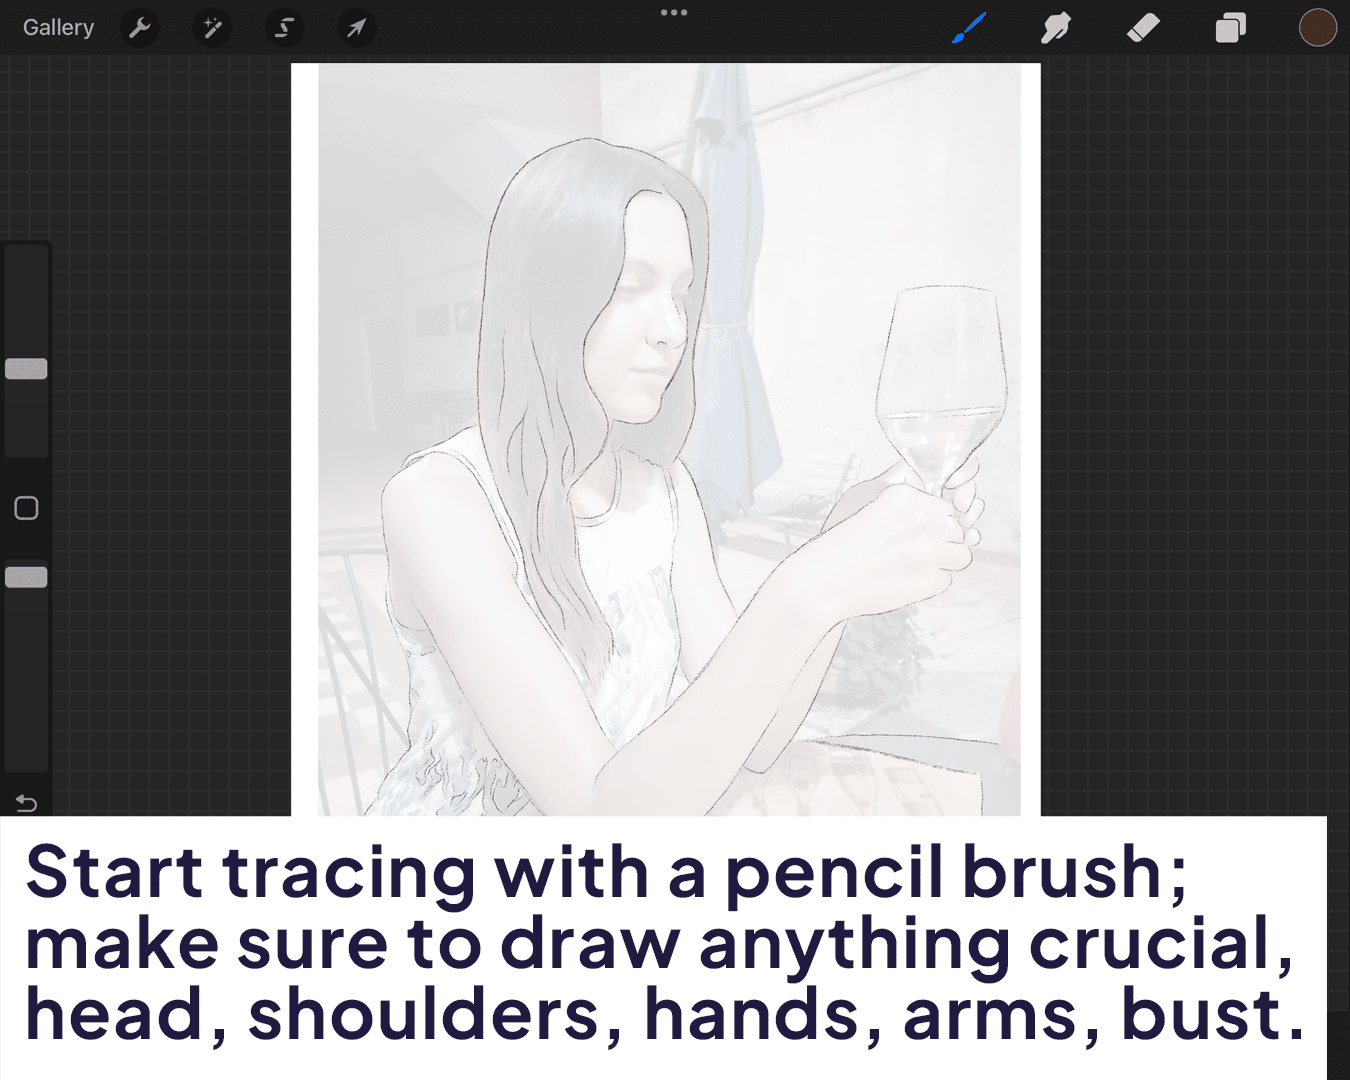
Start Tracing the Outline: Using a suitable brush for sketching, trace the outline of the head, shoulders, and any significant clothing or hair on the new layer. Remember, the focus is on capturing the pose and form, not the facial details.
Step 6.
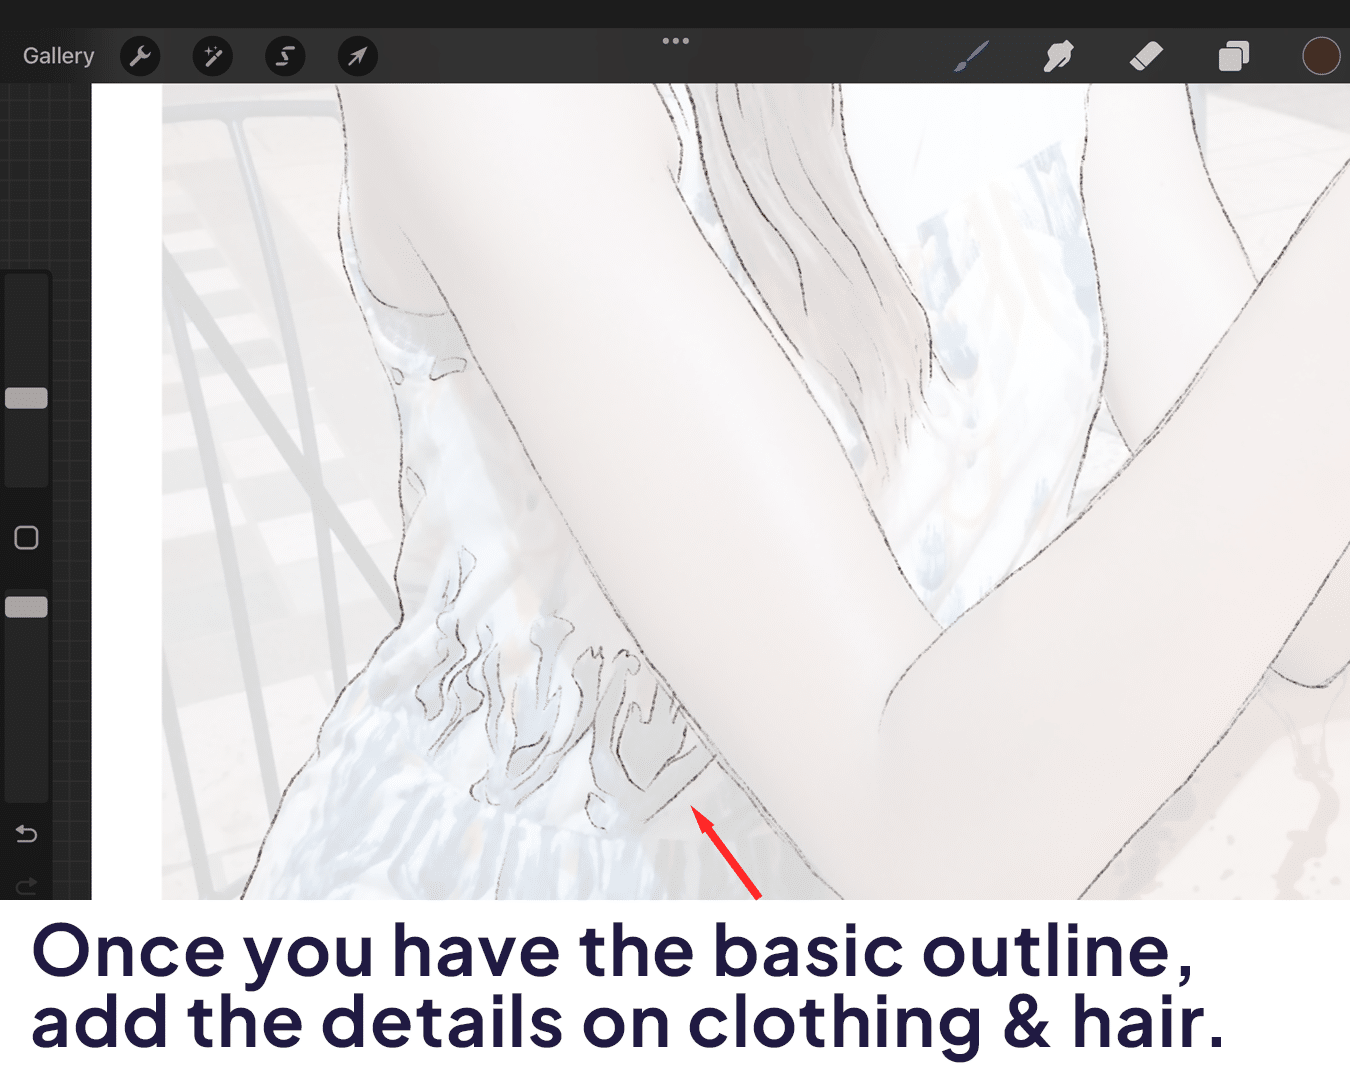
Refine Your Tracing: Once you have the basic outline, you can add more details to your tracing, like the flow of the hair or the folds of the clothing. Keep the facial area blank or vaguely outlined, as the essence of a faceless portrait lies in its anonymity.
Step 7.
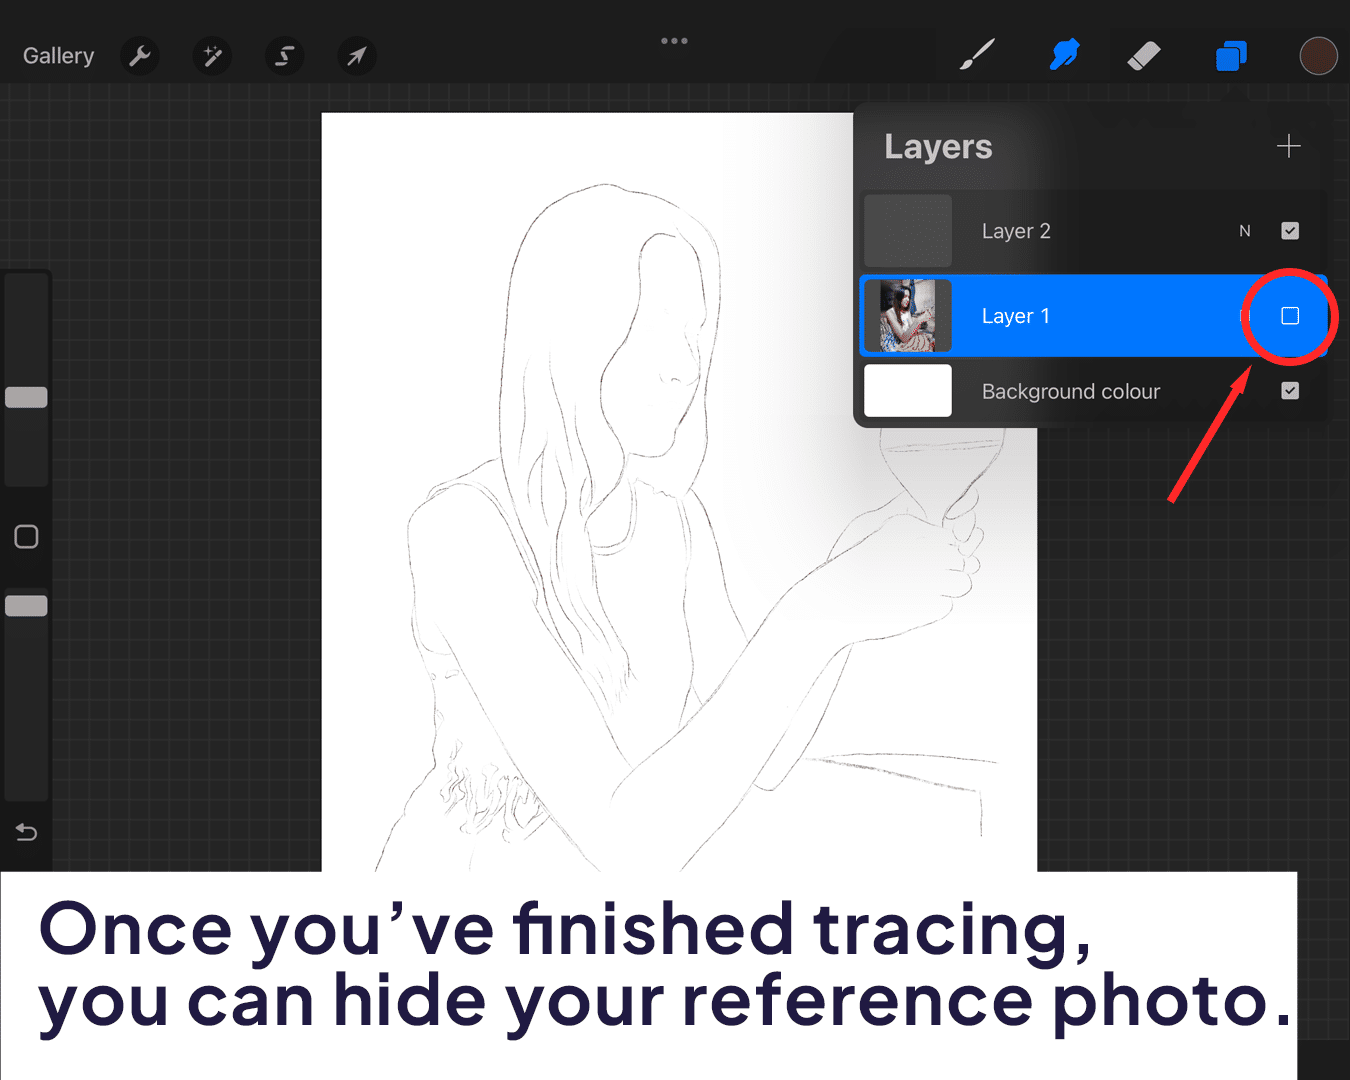
Remove the Reference Photo: After you’re satisfied with your tracing, you can hide or delete the reference photo layer. You should now have a clear outline of a faceless portrait to work with.
Step 8.
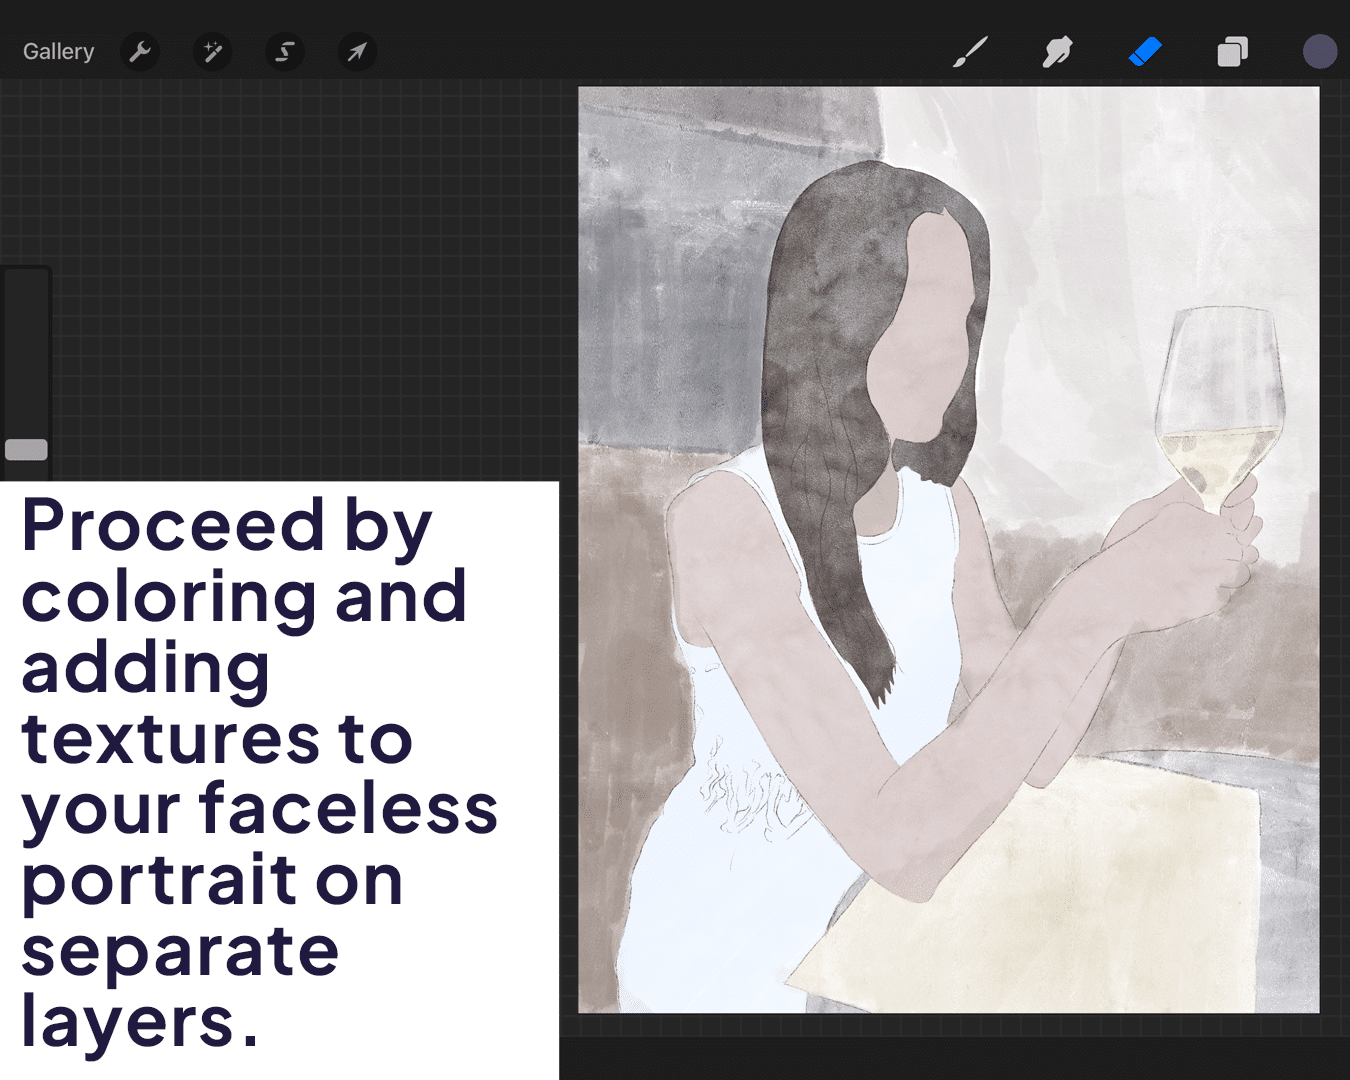
Add Colors and Details: On separate layers, add colors, textures, and any additional details to bring your portrait to life. This is where your creativity comes into play, as you can experiment with different styles and techniques to make your portrait unique.
Discover more about adding life to your portraits with How to draw faceless portrait in Procreate.
Step 9.
Final Touches: Review your artwork, adding final touches such as shadows, highlights, or background elements to complete your faceless portrait.
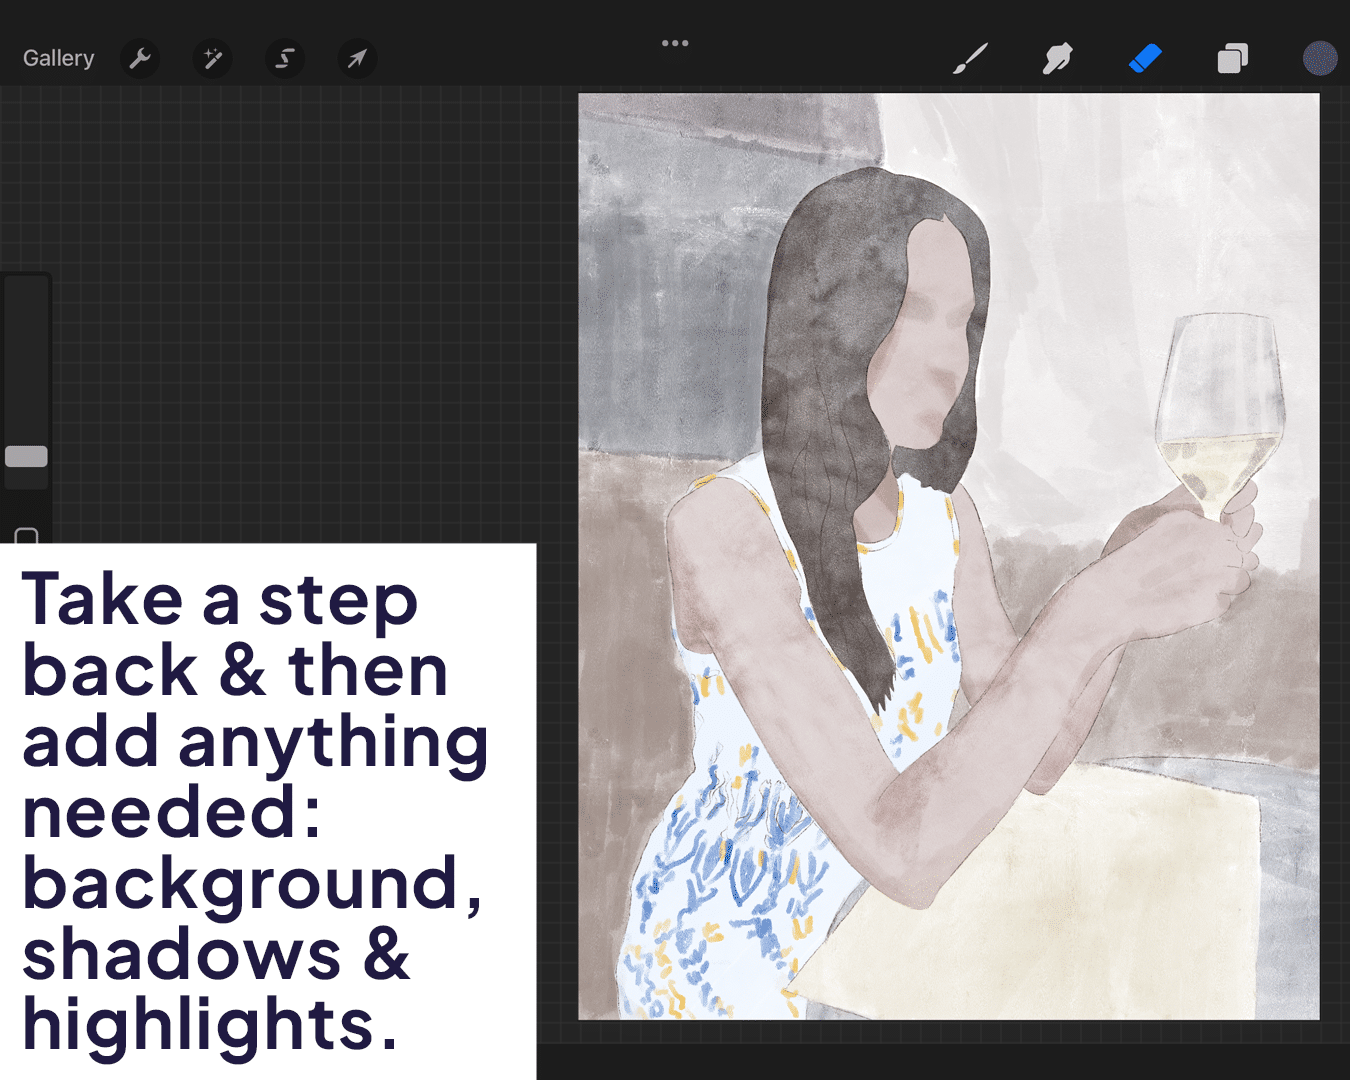
Remember, tracing is just a tool to assist you in getting the proportions and pose right. The real artistry comes in how you interpret and fill in the rest of the portrait, making it uniquely yours.
Explore additional techniques with How to draw digital portraits on Procreate.
Conclusion: Beyond the Face
Faceless portraits are a bold exploration into the power of unsaid stories. They challenge both the artist and the viewer to find emotion and narrative beyond the traditional canvas of the face. In Procreate, the tools at your disposal make this journey both fascinating and rewarding.
So, open Procreate and let your creativity run wild. Let the stories unfold through the unsung heroes of body language, posture, and environment. Remember, sometimes the most compelling stories are those left untold.
Happy creating, and may each stroke on your canvas add depth to the stories you weave! 🎨✨🖌️
P.S.: Keep exploring and pushing the boundaries of your art in Procreate. Stay tuned for more tips and techniques to enhance your digital art journey! 🌟👩🎨🌈


