
How To Make Outline Brush in Procreate

Hey there, fellow digital artist and Procreate enthusiast! Are you tired of scrolling through endless brush libraries, searching for that perfect outline brush that seems as elusive as a unicorn in a city park? Well, fear no more! I’ve been there, done that, and let me tell you, it’s like looking for a needle in a haystack.
But guess what? Today, I’m going to share a little secret with you – how to create your very own outline brush in Procreate. That’s right, no more settling for brushes that are ‘almost right.’ It’s time to tailor-make a brush that fits your artistic vision like a glove! So, grab your iPads, fire up Procreate, and let’s dive into the magical world of custom brush creation, and don’t forget to explore our Procreate monoline brushes for more inspiration.
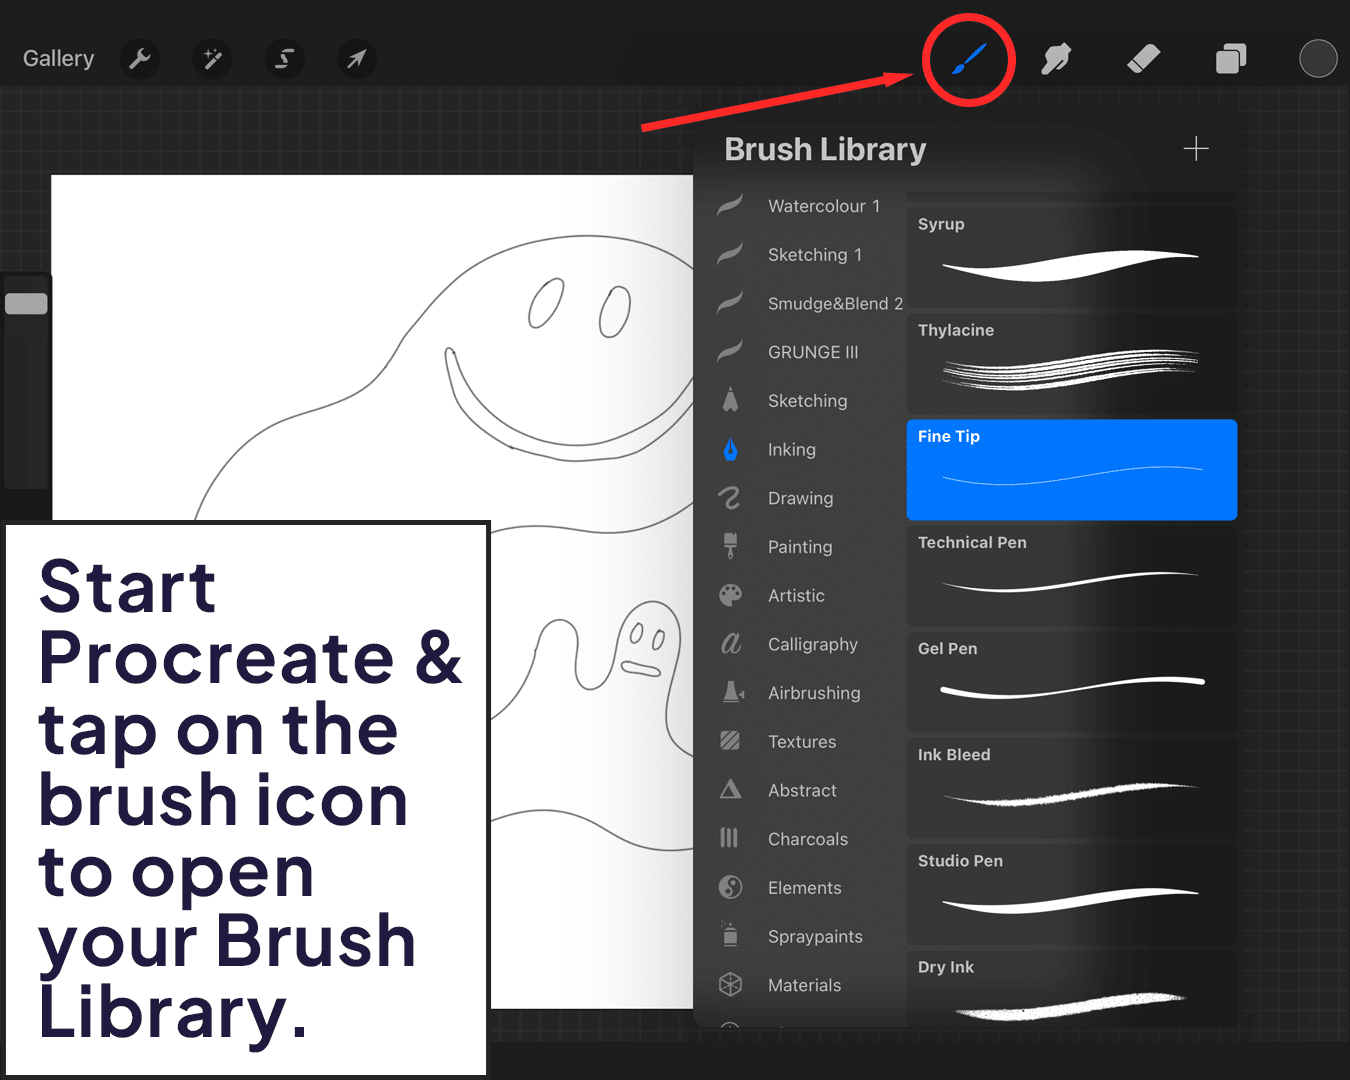
Open Brush Library
Start Procreate and tap on the brush icon to open your Brush Library.
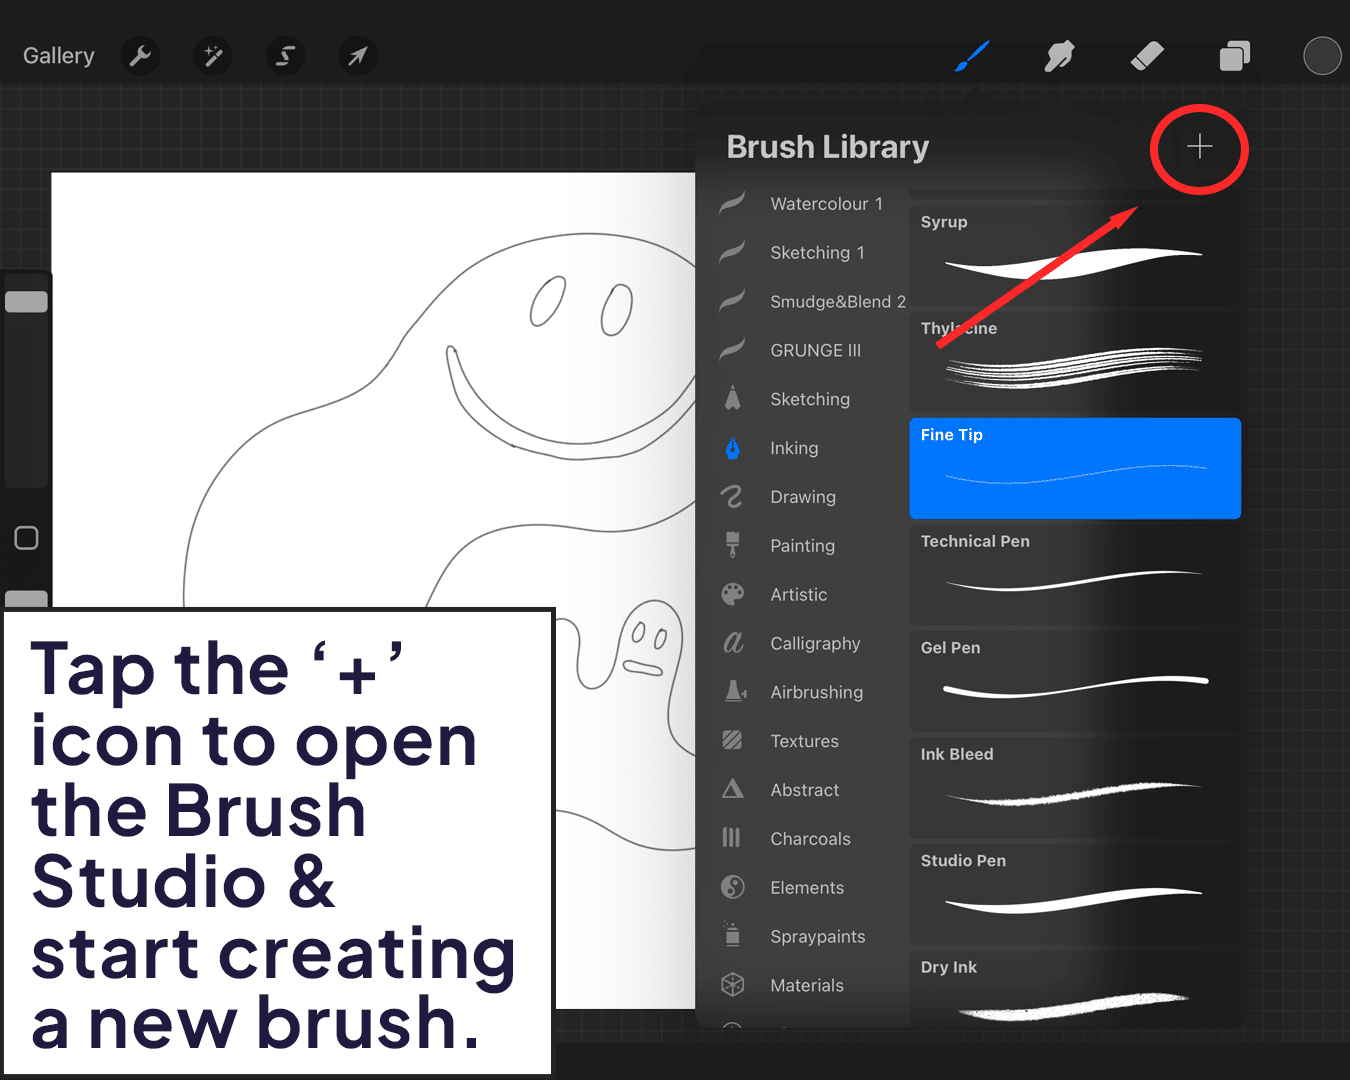
Create a New Brush
Tap the ‘+’ icon in the top right to start creating a new brush. This will open the Brush Studio.
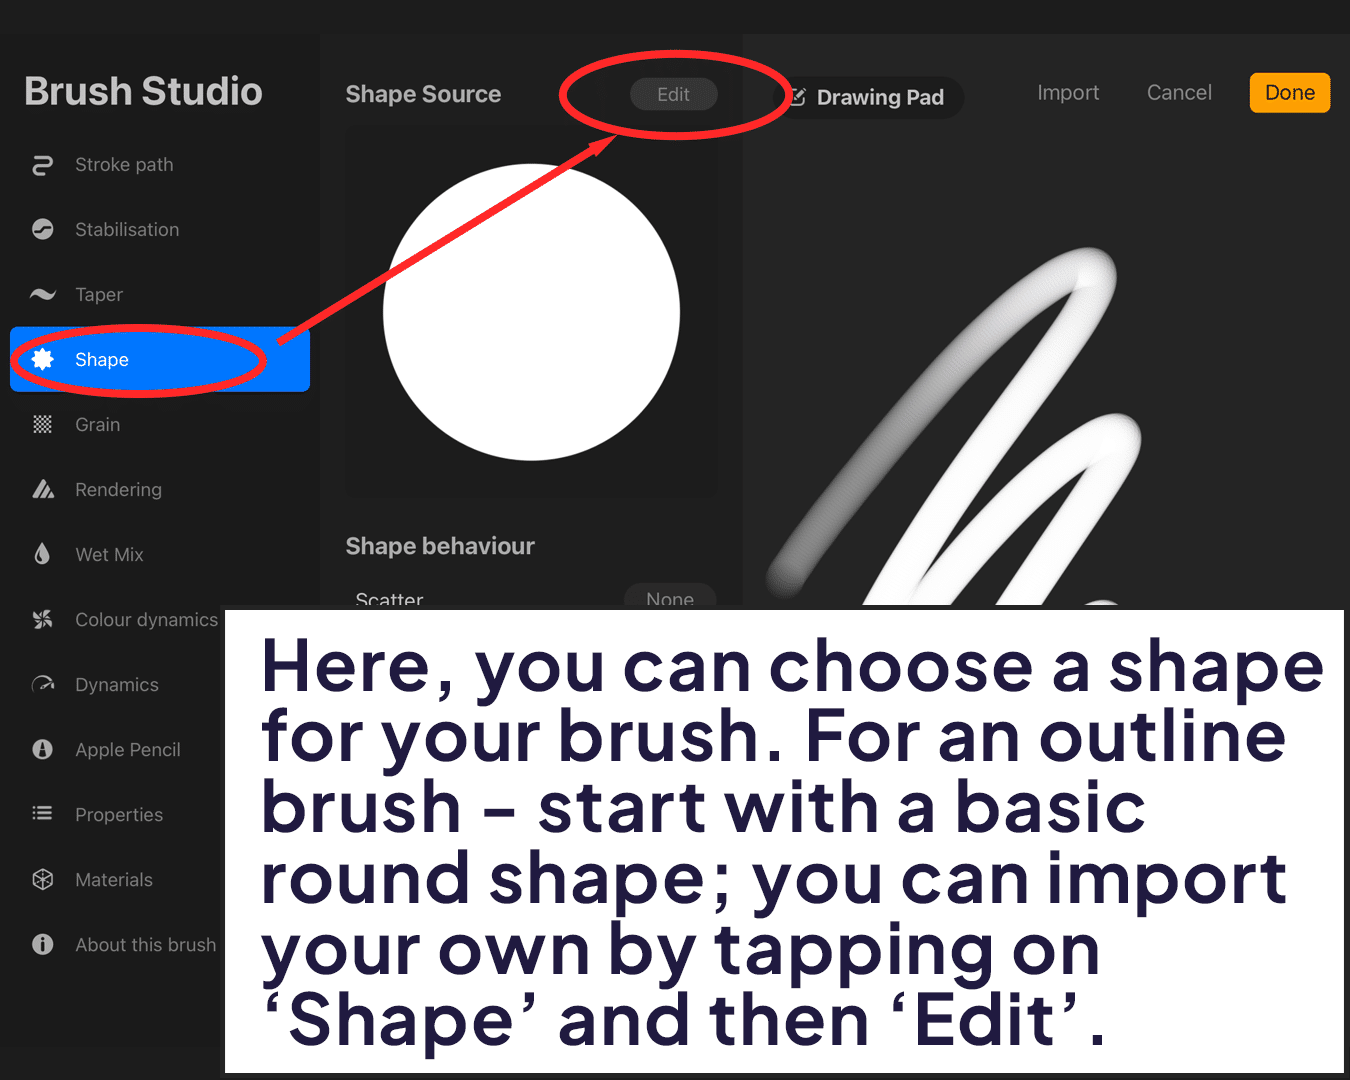
Brush Shape and Source
Here’s where the fun begins. You can choose a shape for your brush. For an outline brush, I recommend starting with a basic round shape. You can either select a pre-existing shape or import your own by tapping on ‘Shape’ and then ‘Edit.’
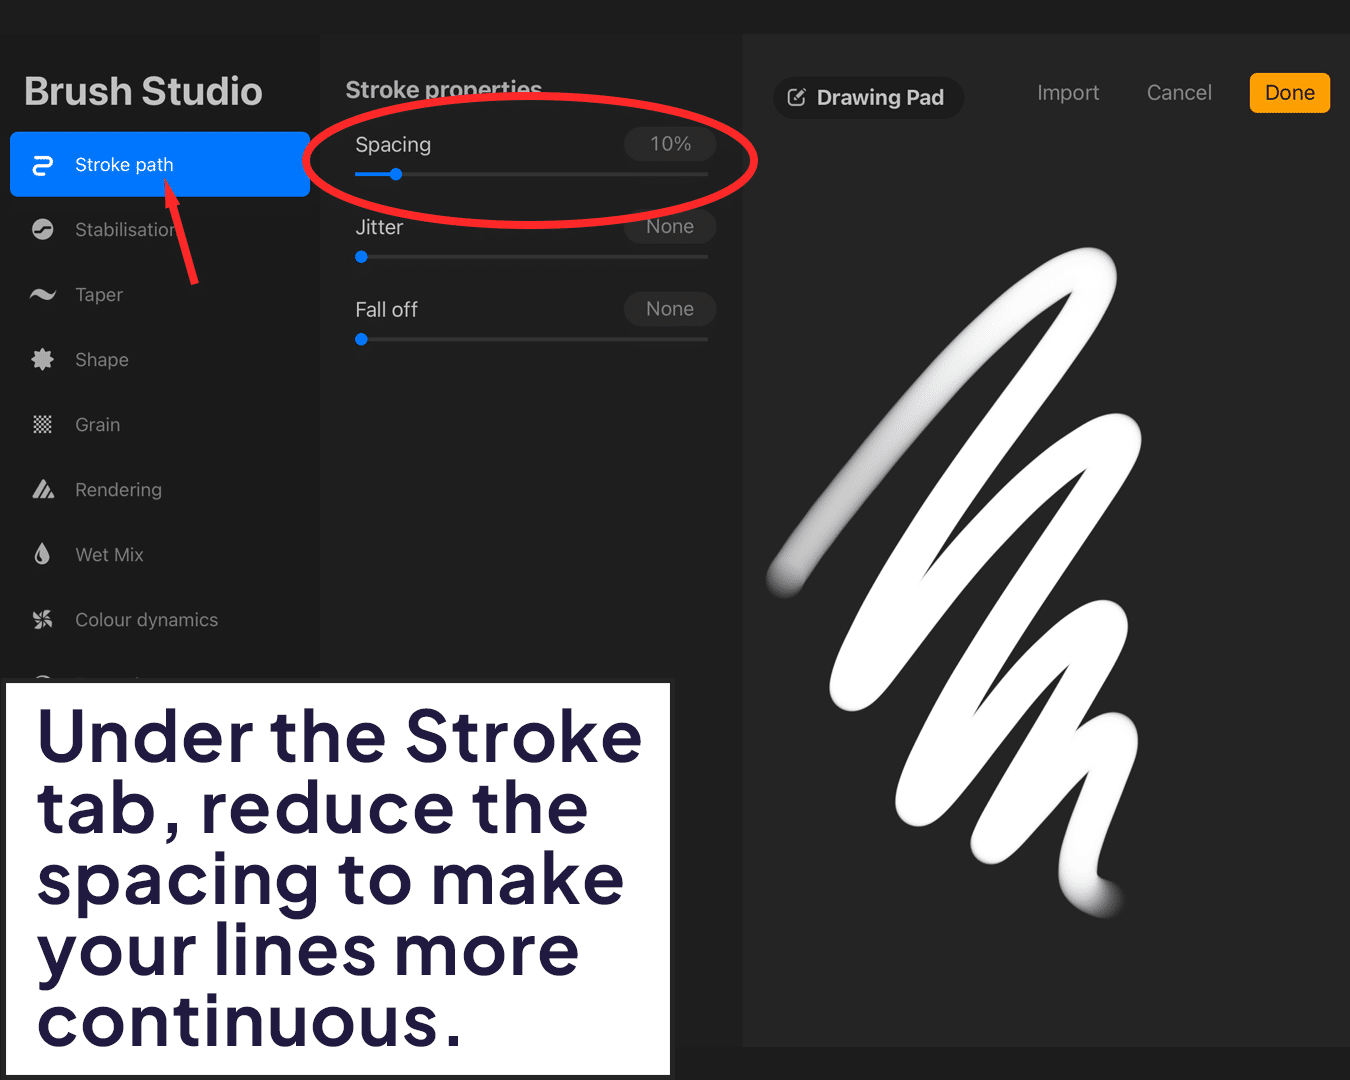
Adjust the Spacing
Under the ‘Stroke’ tab, reduce the spacing to make your lines more continuous and smooth. This is crucial for a consistent outline.
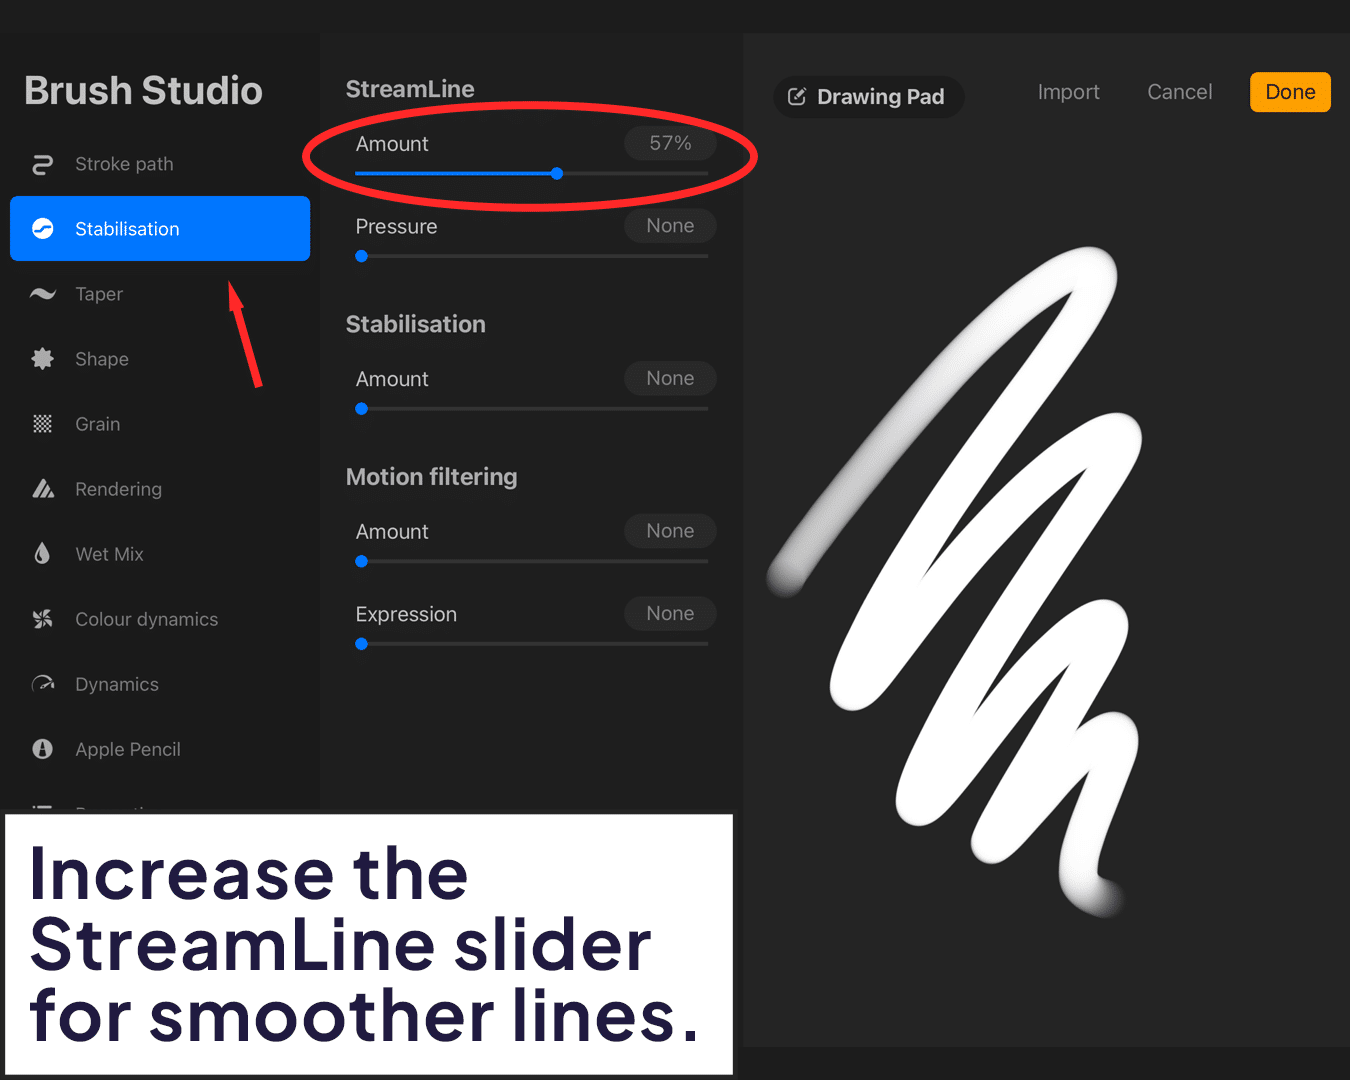
Streamline for Smoothness
Increase the streamline slider if you want smoother, more controlled lines. This is especially useful for intricate outlines.
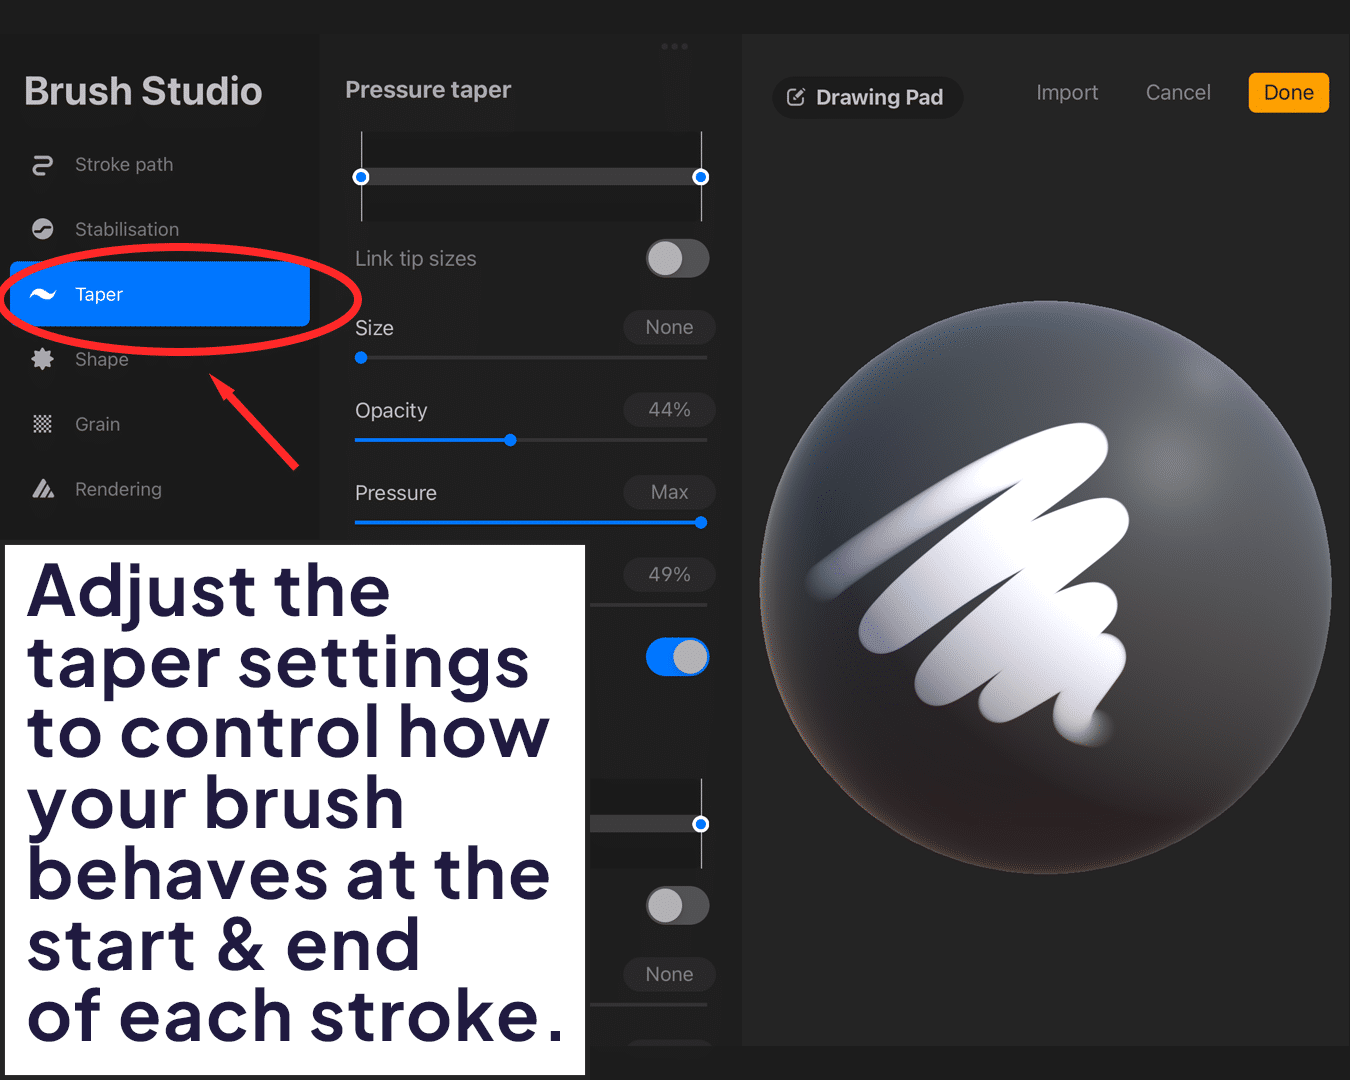
Taper Settings
Adjust the taper settings to control how your brush behaves at the start and end of each stroke. This can add a professional touch to your outlines.
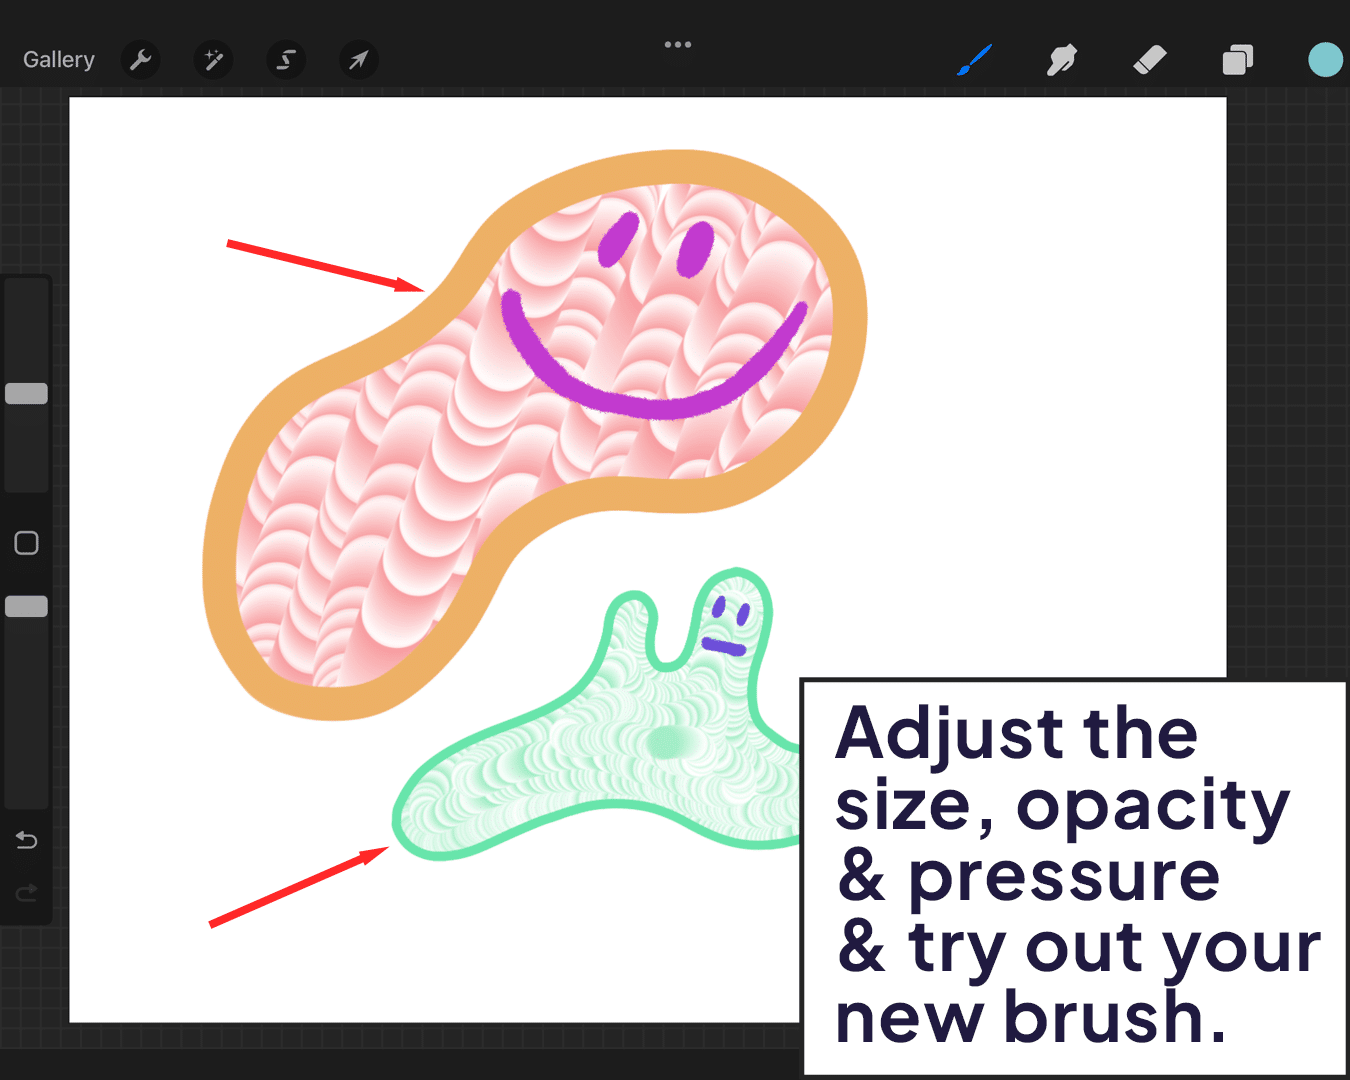
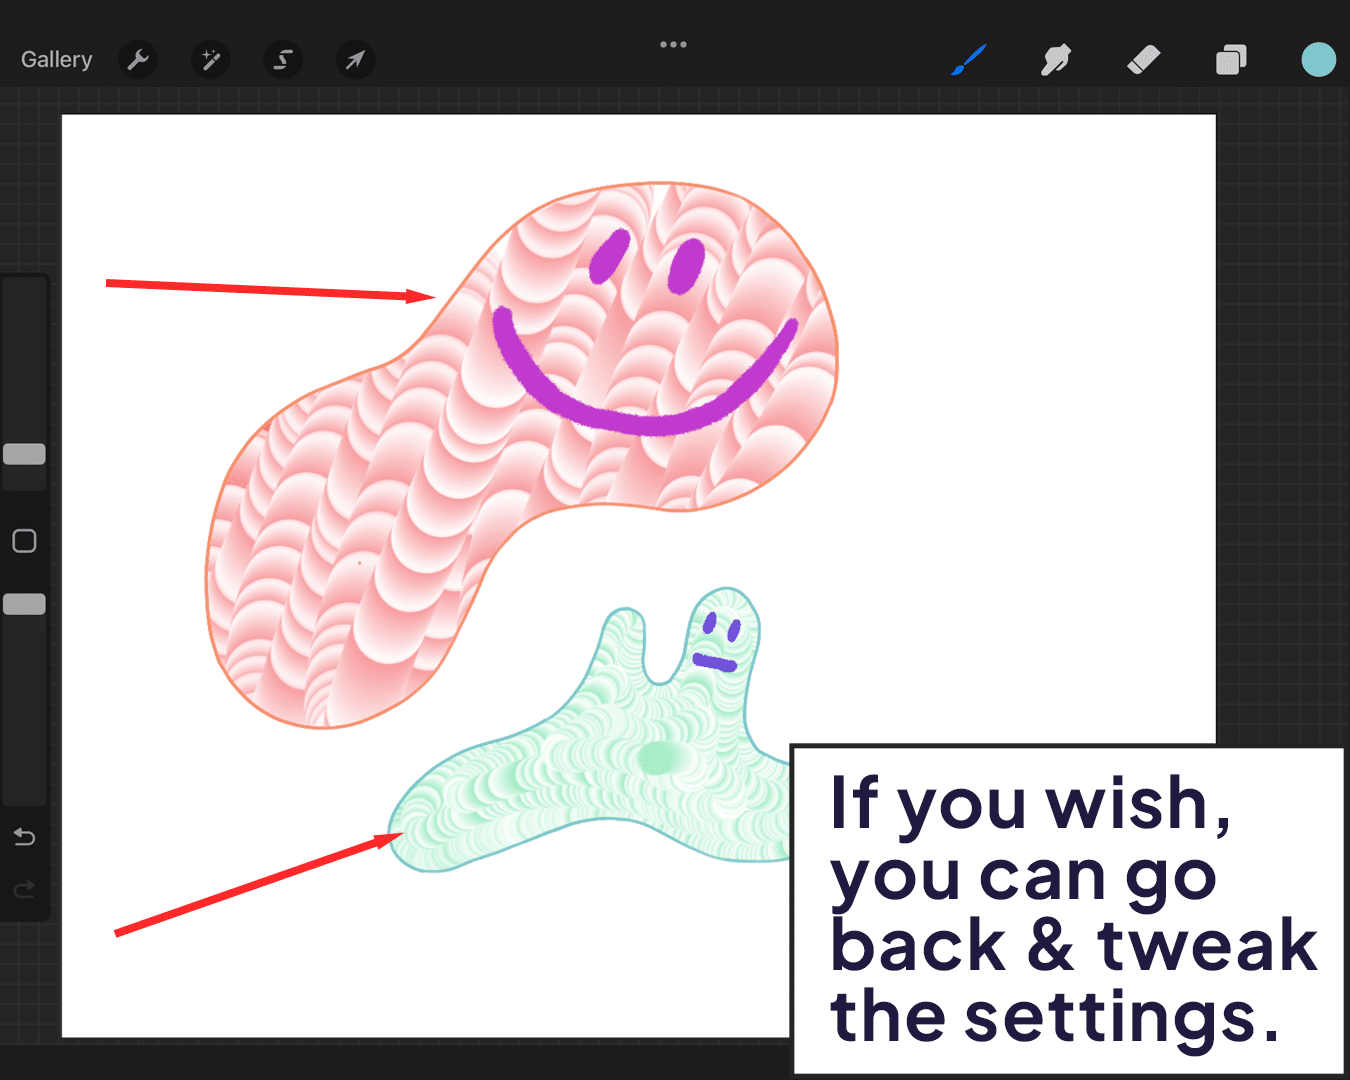
Test Your Brush
Draw with your new brush. Adjust the size, opacity, and pressure settings to see how it performs. Don’t be afraid to go back and tweak the settings. Understanding the importance of these features can be enhanced by learning how to make a monoline brush thinner or thicker in Procreate.
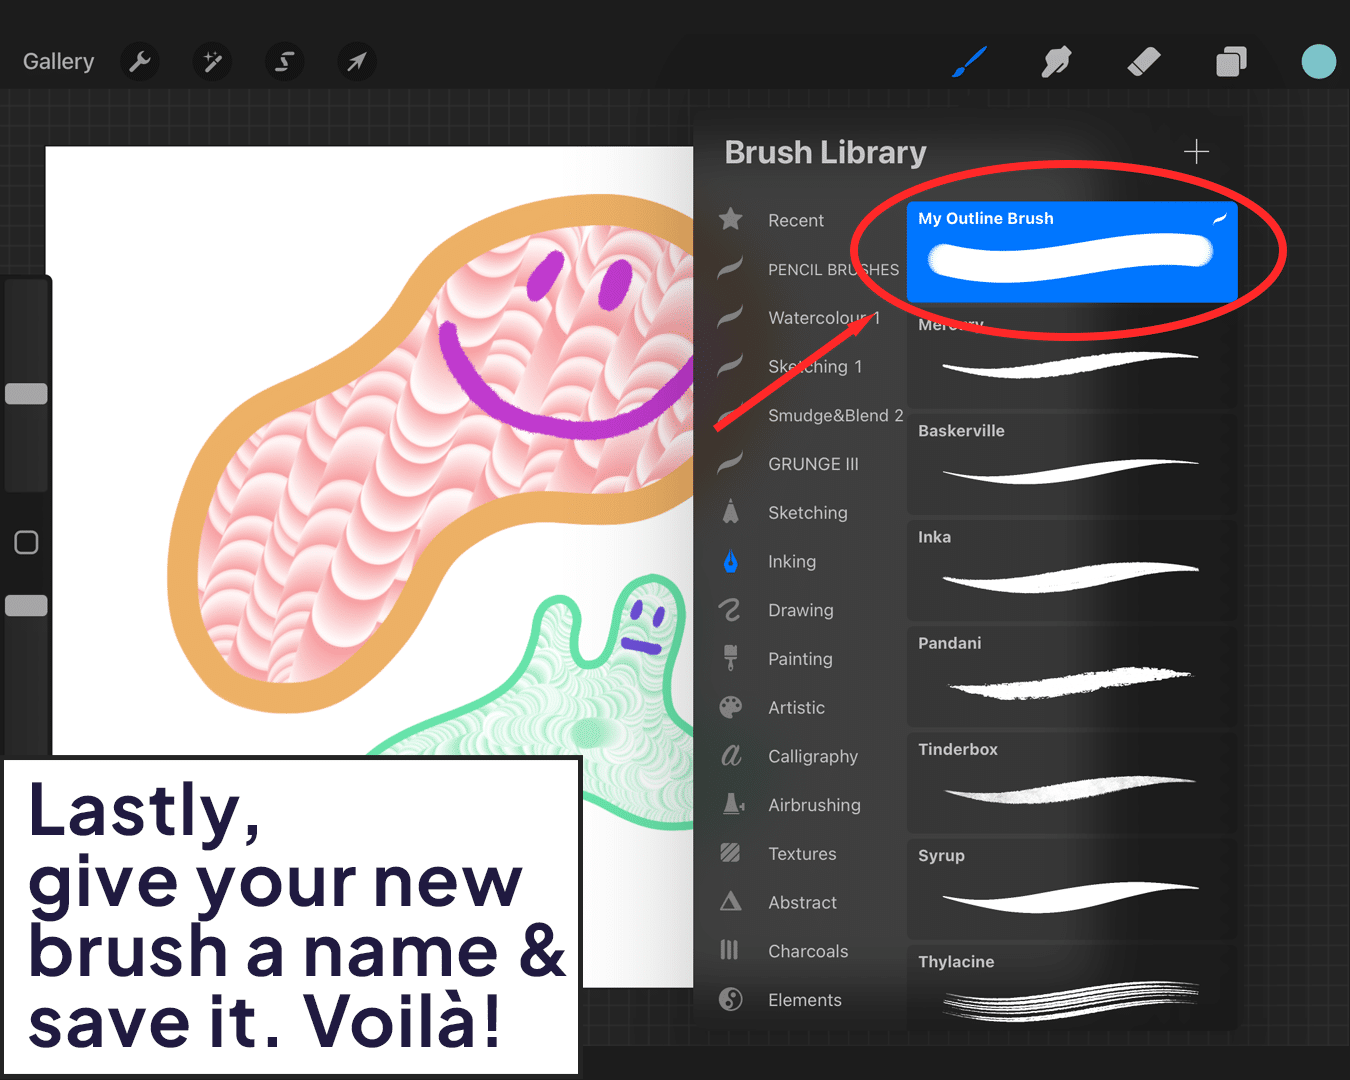
Save Your Masterpiece
Once satisfied, give your new brush a name and save it. Voilà! You now have a custom outline brush!
Tips and Tricks
- Experiment: Play around with different settings. The Brush Studio in Procreate is incredibly versatile.
- Take Inspiration: Look at your favorite brushes and try to understand what makes them work for you. Use these insights in your creation. For further reading on getting your lines just right, check out how to make lines neater in Procreate.
- Share and Learn: Join online communities of Procreate users. Sharing your creations and learning from others is incredibly enriching.
FAQ
Do I need any special skills to create my own outline brush in Procreate?
No special skills are required. Basic familiarity with Procreate’s interface is helpful, but the process is user-friendly for artists of all levels.
Can I use any shape for my outline brush?
Yes, you can use any shape. A basic round shape is often recommended for beginners, but feel free to experiment as you become more comfortable. For a deeper understanding of brush dynamics, exploring what a monoline pen is might provide additional insights.
What is the importance of adjusting the spacing in the brush settings?
Adjusting the spacing ensures your lines are smooth and continuous, crucial for creating consistent outlines.
How does the streamline feature affect my brush?
Streamline feature smoothens your strokes, making them more controlled and precise, ideal for detailed or intricate outlining.
Can I share the custom brush I create with others?
Yes, Procreate allows you to export and share your custom brushes with others, including friends, fellow artists, or online communities.
Is it possible to edit my custom brush after I’ve saved it?
Absolutely. You can always go back and edit your custom brush’s settings to refine it further or adjust it for different uses.
How can I import a shape into Procreate to use for my brush?
Import shapes by tapping ‘Shape’ in the Brush Studio, then ‘Edit,’ and use the import option to bring in an image or shape from your device.
Are there any resources to help me learn more about brush creation in Procreate?
Yes, you can check out everything regarding Procreate on the Brush Galaxy blog and you can also download already-made brushes from our platform.


Share this article


