
How To Make a Monoline Brush Thinner in Procreate

Before we tweak its thickness, let’s understand the monoline brush. A favorite in the Procreate community, the monoline brush is part of the ‘Calligraphy’ category. It’s known for its uniform weight and pressure, which makes it a go-to for clean lines and crisp lettering. It’s very easy to use and it’s very popular amongst beginners.
For a wide selection, explore our Procreate monoline brushes. Monoline brush keeps the same width regardless of the pressure put on the screen while drawing, to change this, follow the tutorial below and adjust the thickness in a few simple steps:
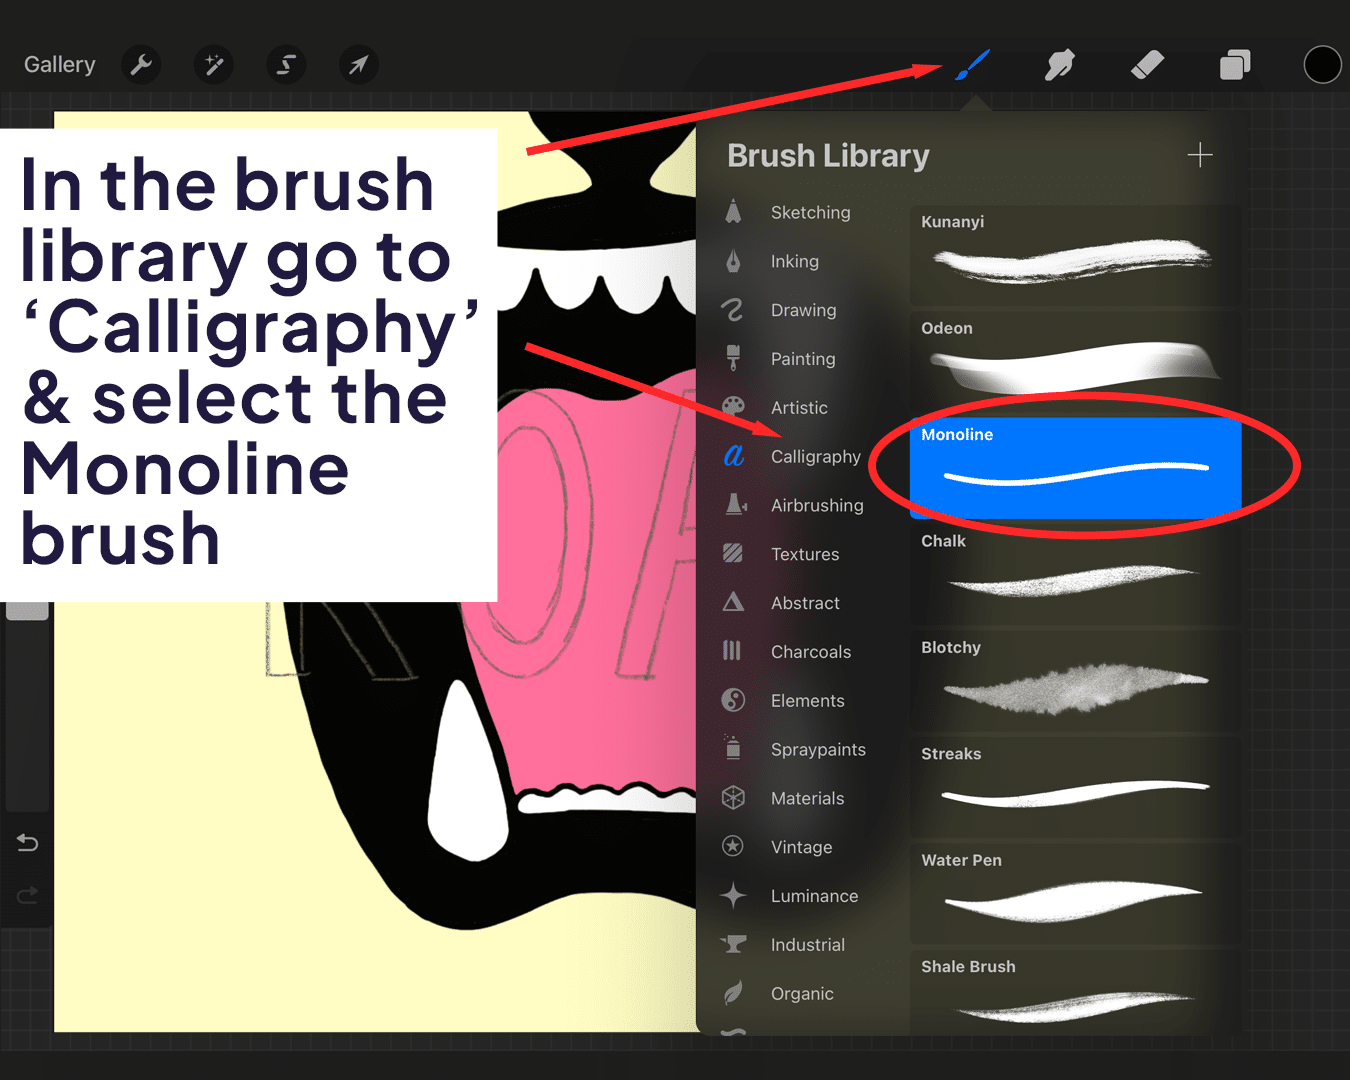
Select Your Brush
Open Procreate and tap on the brush library. Navigate to ‘Calligraphy’ and select the monoline brush. To understand more about this type of tool, you might want to read about what a monoline pen is.
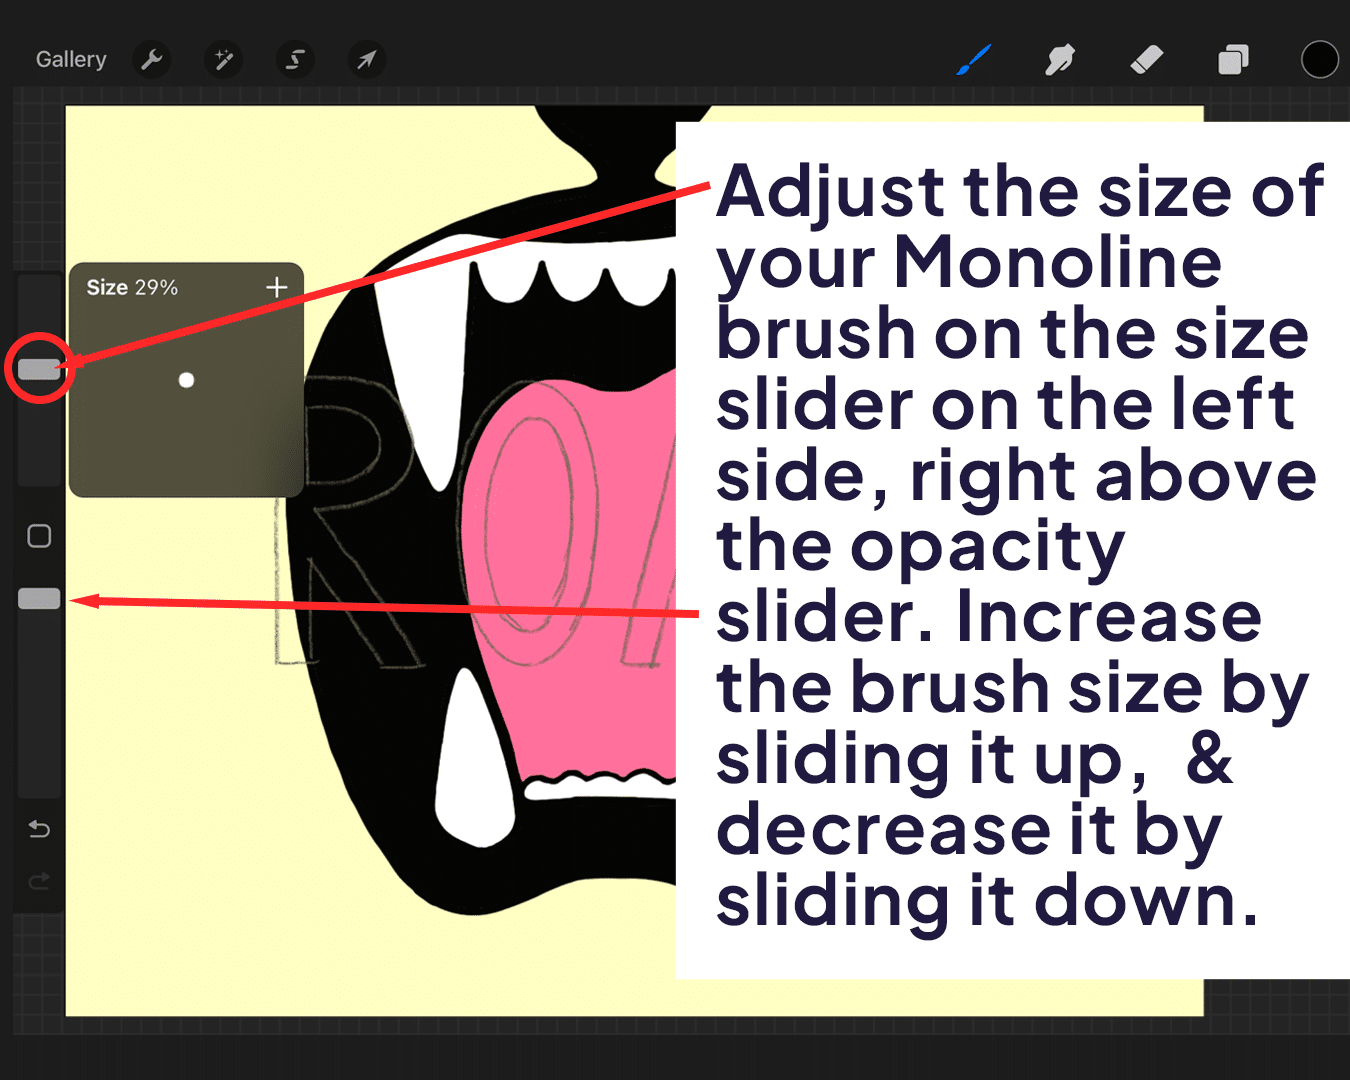
Adjusting the Size
On the left side of your canvas, you’ll find the size and opacity sliders. Drag the top slider up to increase the brush size (thickness) and down to decrease it.
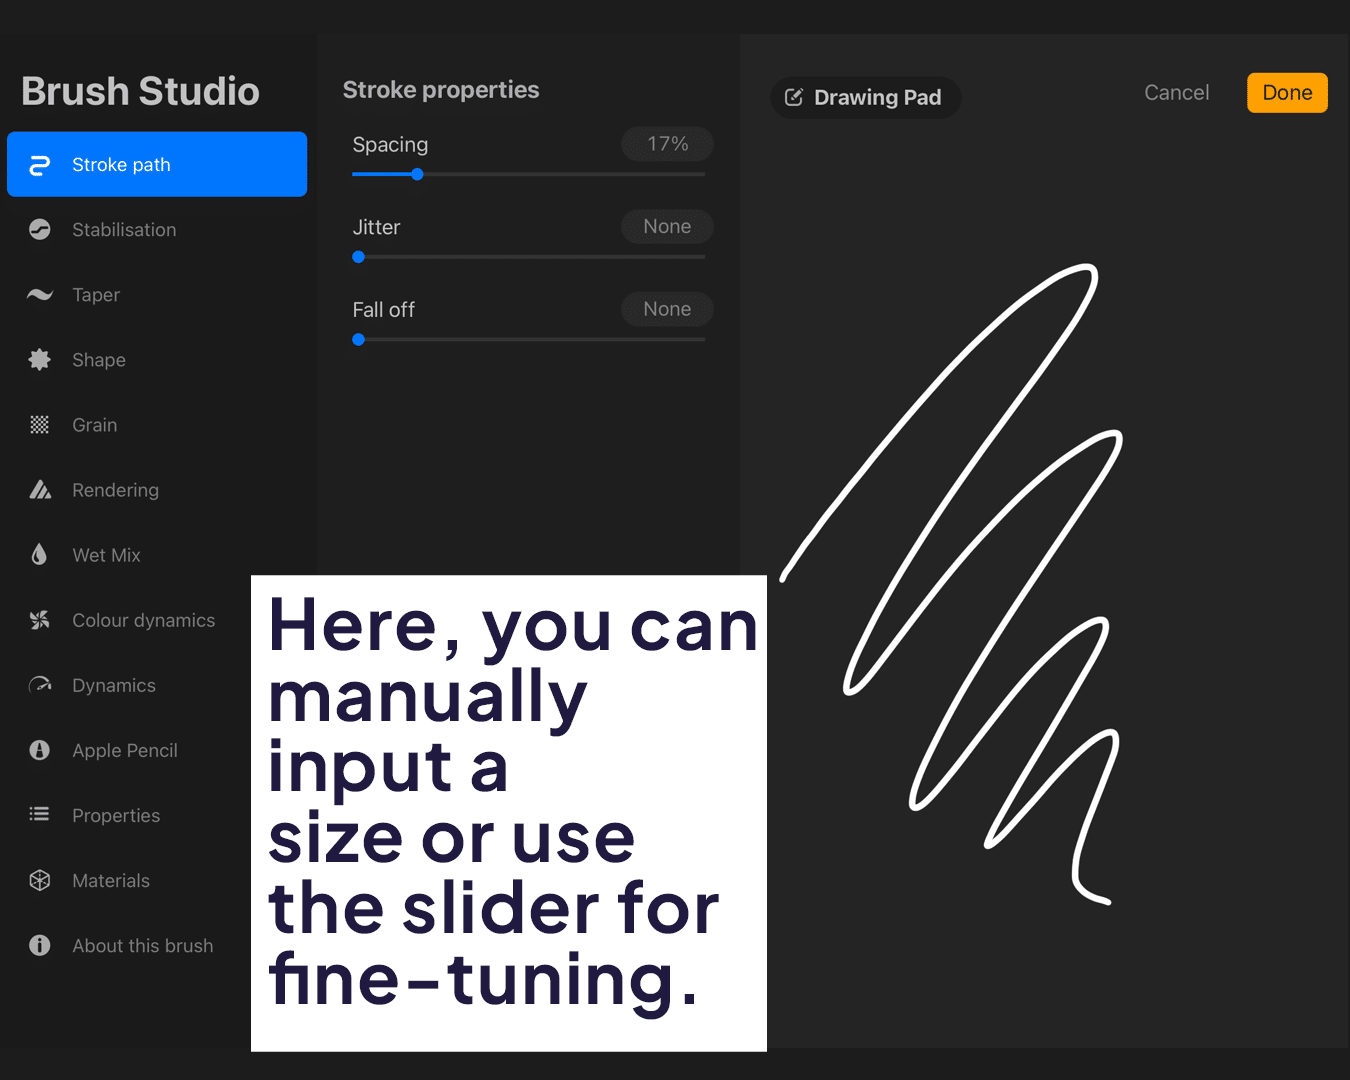
For more precision, tap on the brush icon at the top right to enter the brush settings. Here, you can manually input a size or use the slider for fine-tuning.

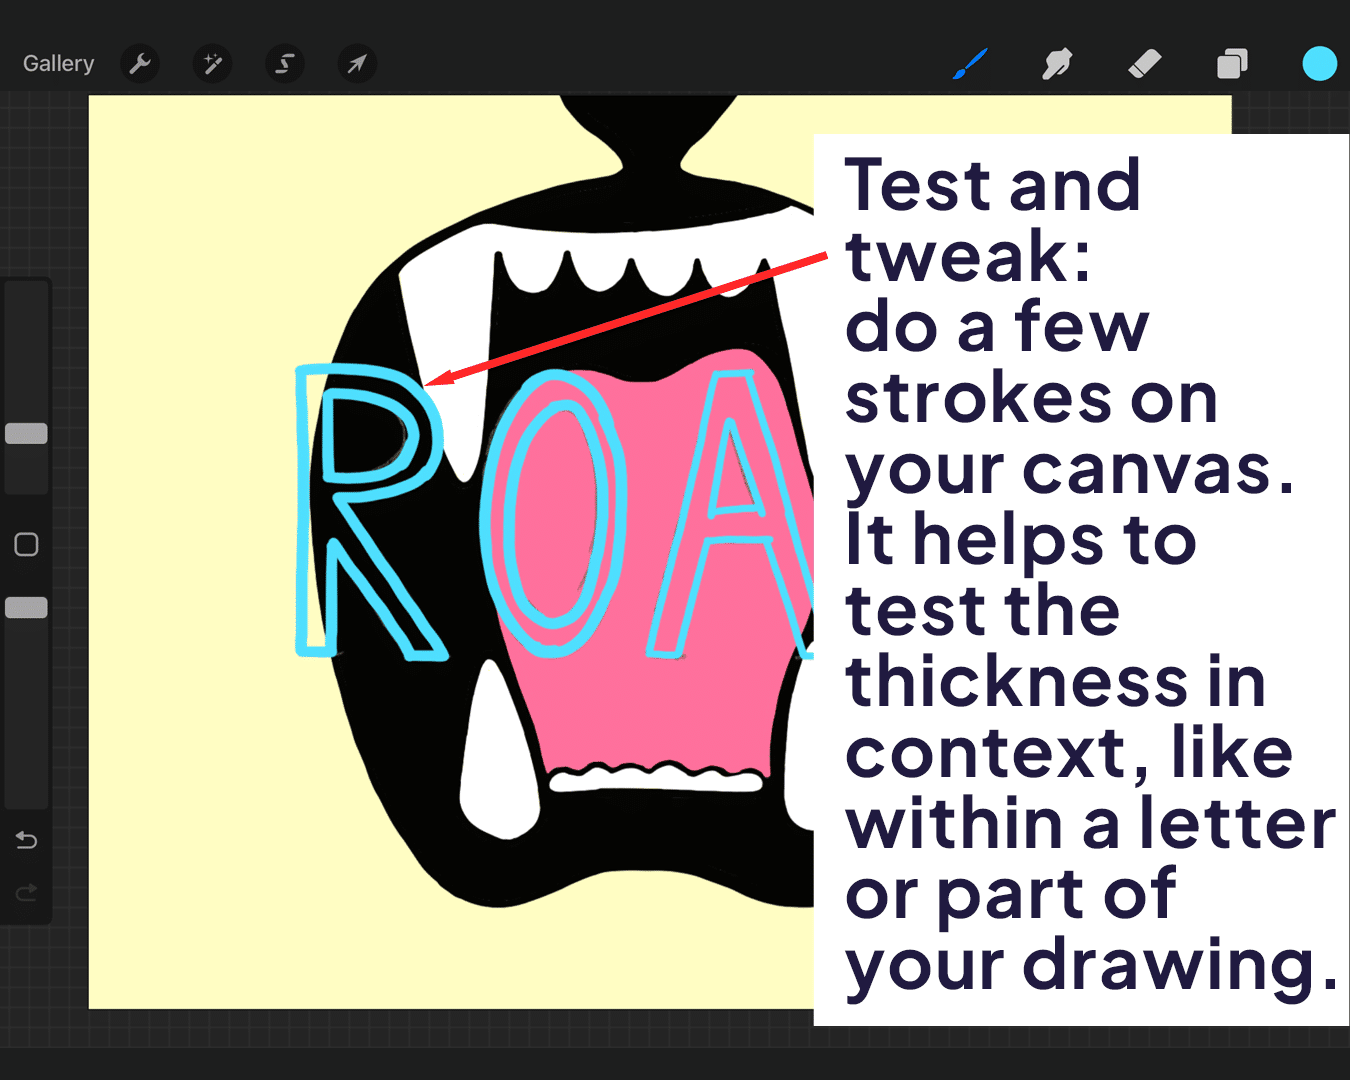
Test and Tweak
After adjusting, do a few strokes on your canvas. It helps to test the thickness in context, like within a letter or part of your drawing. For additional tips on achieving neat lines, check out how to make lines neater in Procreate.
Customizing and Saving:
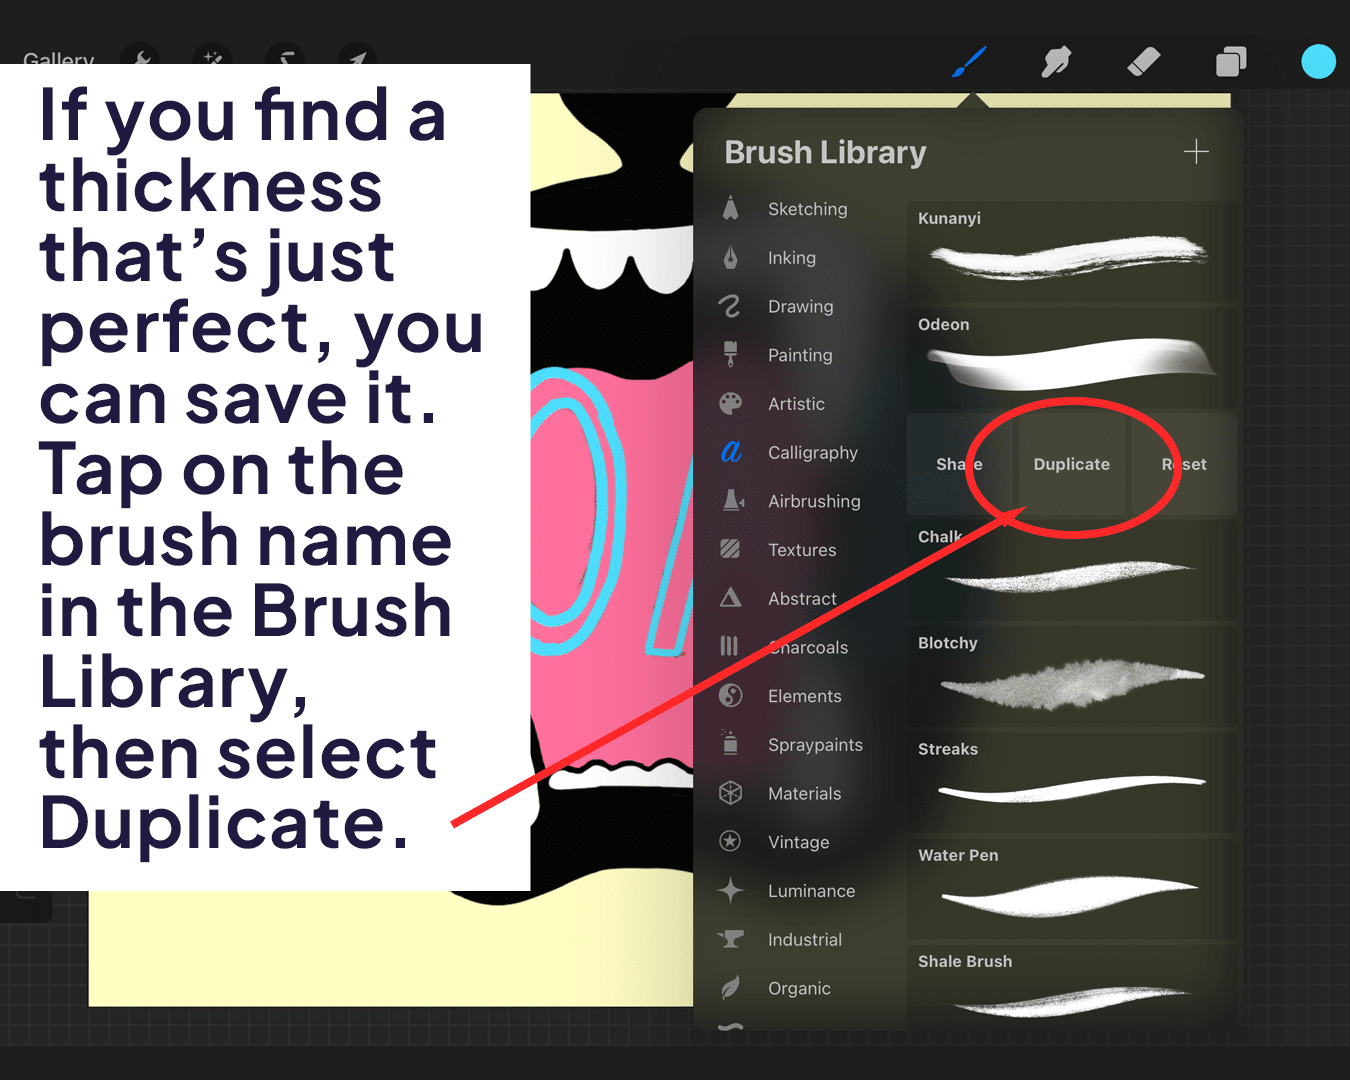
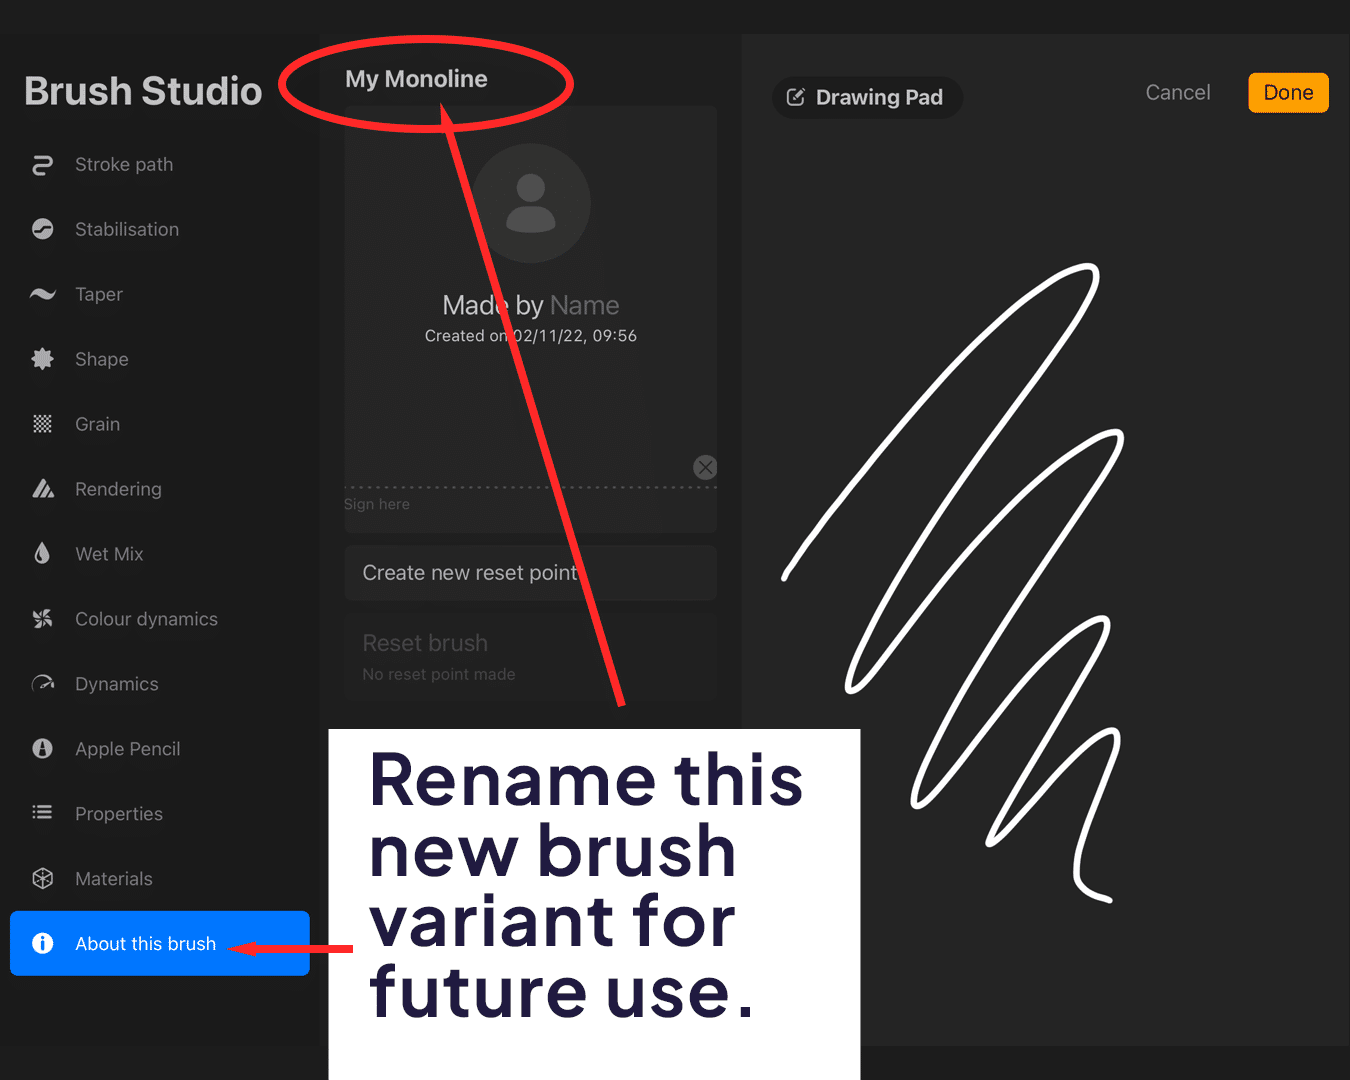
If you find a thickness that’s just perfect, consider saving it. Tap on the brush name in the brush settings, then select “Duplicate.” Rename this new brush variant for future use. Additionally, learn how to make an outline brush in Procreate to expand your Procreate artistry tools knowledge.
Rename this new brush variant for future use.
And there you go. Thanks for stopping by and best of luck on your next project!


Share this article


