
How To Make a Realistic Watercolor Brush in Procreate

Creating a custom brush in Procreate is an interesting process, but sometimes it can get tricky and the final results might, well…suck.
Alright, so we hear that you want to create a watercolor brush in Procreate that’s so lifelike it could fool a traditional painter? Today, we’re going to do just that. Roll up your digital sleeves because we’re diving deep into the nitty-gritty of brush creation. By the end of this, you’ll have a watercolor brush that not only looks real but feels real too!
In this tutorial, I’ll teach you how to:
Select Your Base Brush
Customize Brush Settings
Adjust Dynamics for Realism
Play with Color Dynamics
Utilize Wet Mix
Test and Refine Your Brush
Save and Name Your Custom Brush
Create Your Watercolor Brush
Starting Point: Selecting Your Base Brush
Initial Selection:
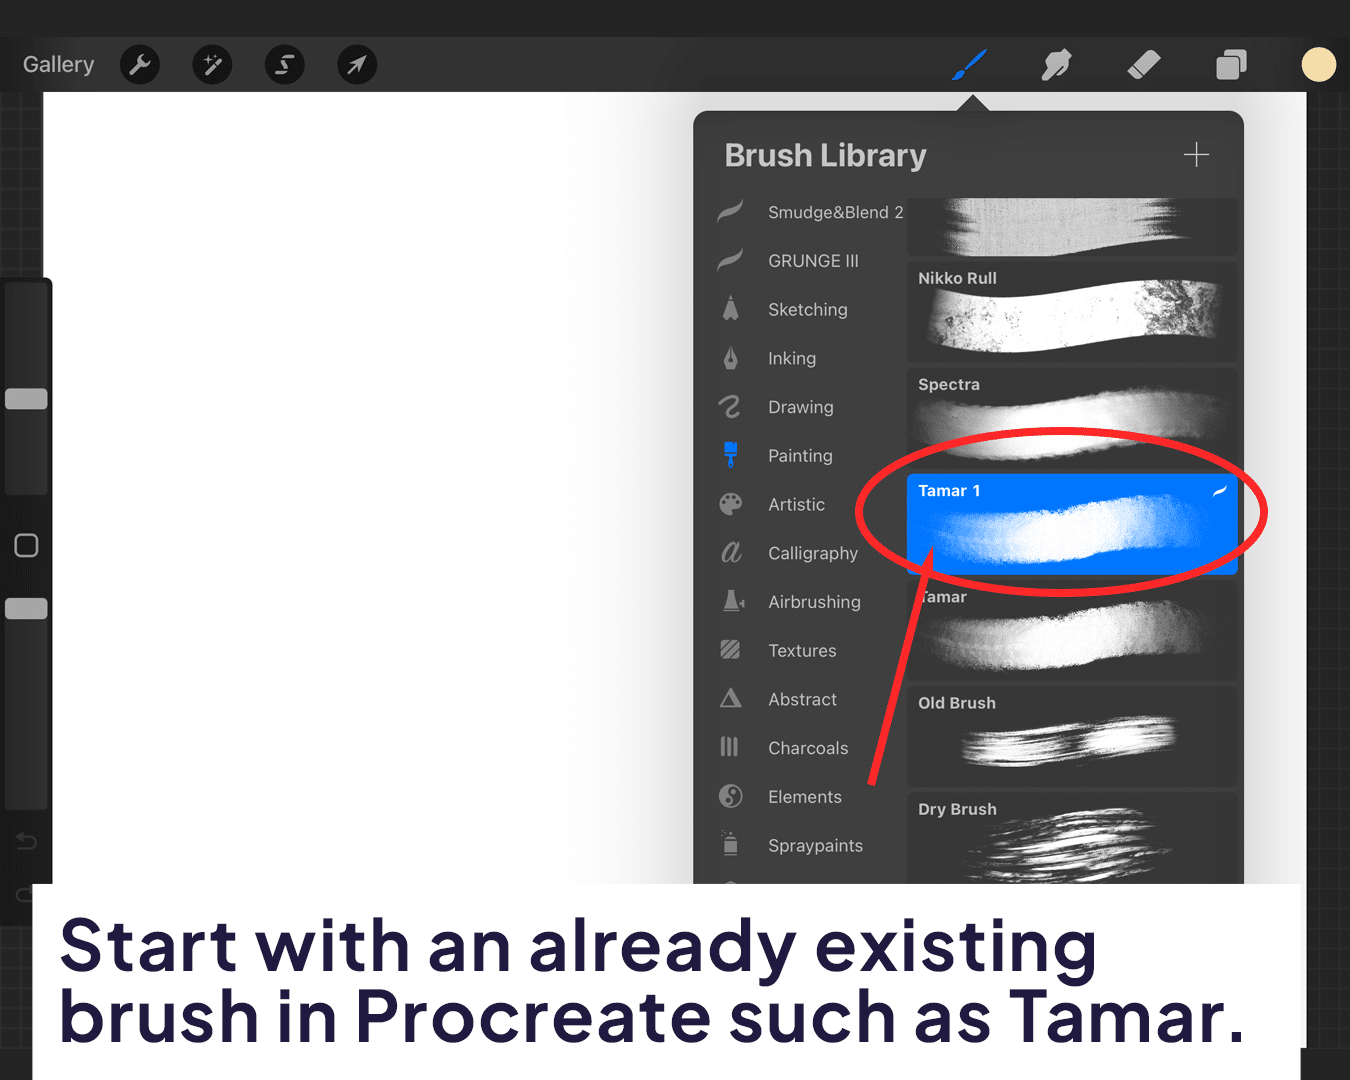
Open Procreate and head to the Brush Library. I suggest starting with a brush that already has some watercolor qualities. The ‘Tamar’ brush under the ‘Painting’ category is a great candidate.
Why This Brush:
It has a nice flow and a texture that resembles watercolor pigment dispersion.
Customizing the Brush Settings
Accessing Settings:
Tap on your chosen brush to open its settings. This is where you’ll transform the brush.
Streamline Adjustment:
In the ‘Stroke’ tab, adjust the ‘Streamline’ setting to around 50% to start with. This helps in smoothing out your brush strokes, giving that fluid watercolor stroke feel.

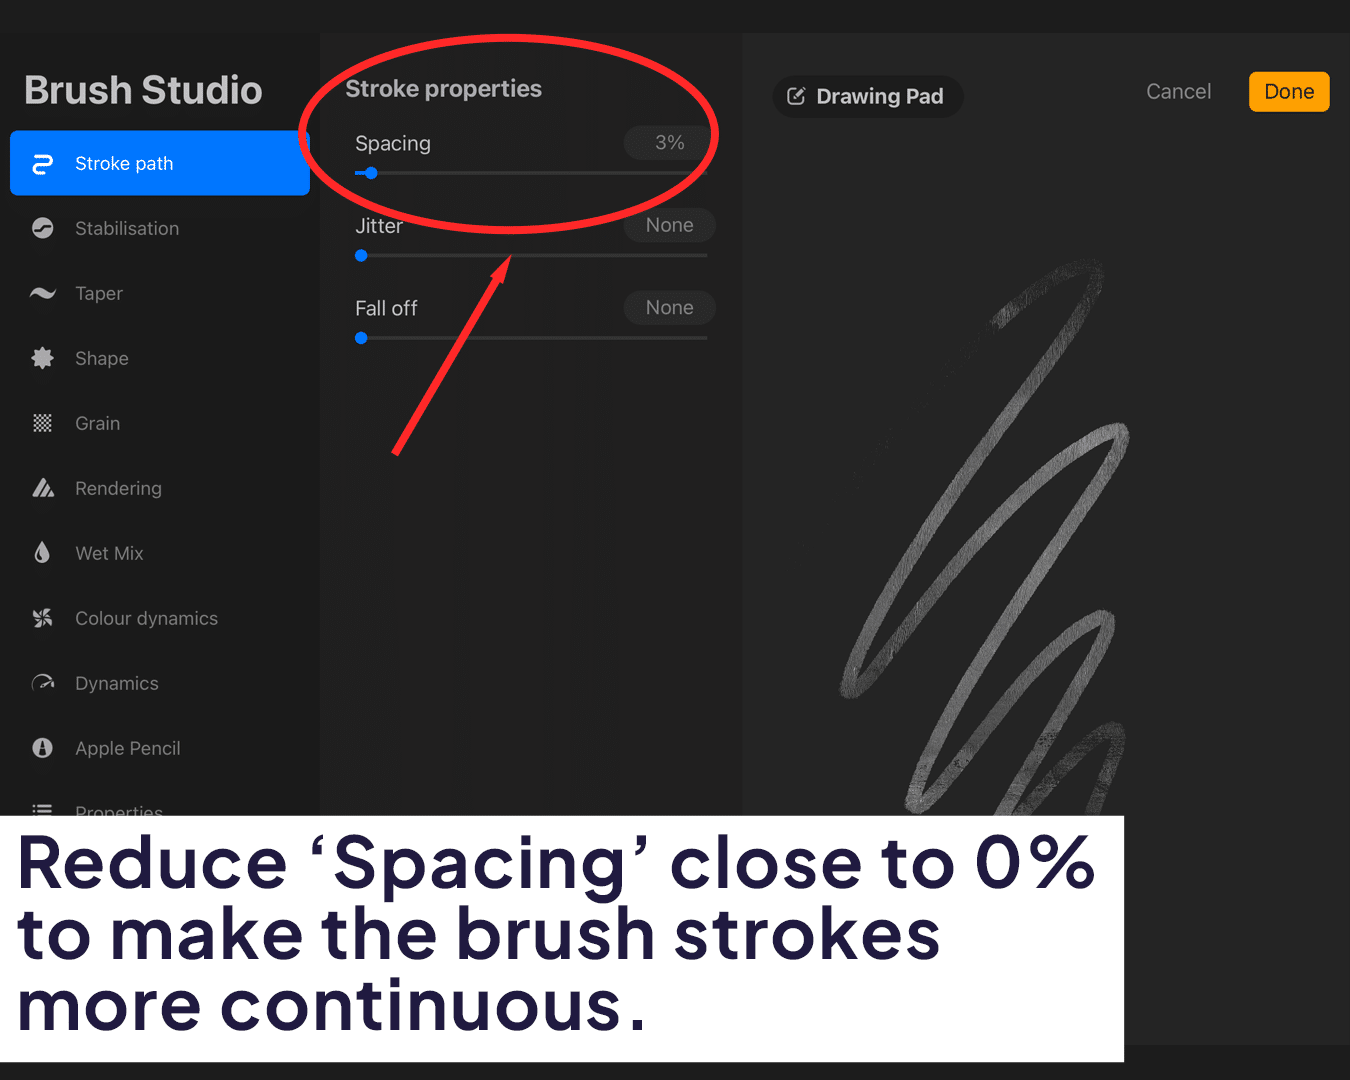
Spacing Tweaks:
Under the same tab, reduce ‘Spacing’ close to 0%. This makes the brush strokes more continuous, eliminating gaps that can break the illusion of a watercolor stroke.
Dynamics for Realism
Flow and Jitter:
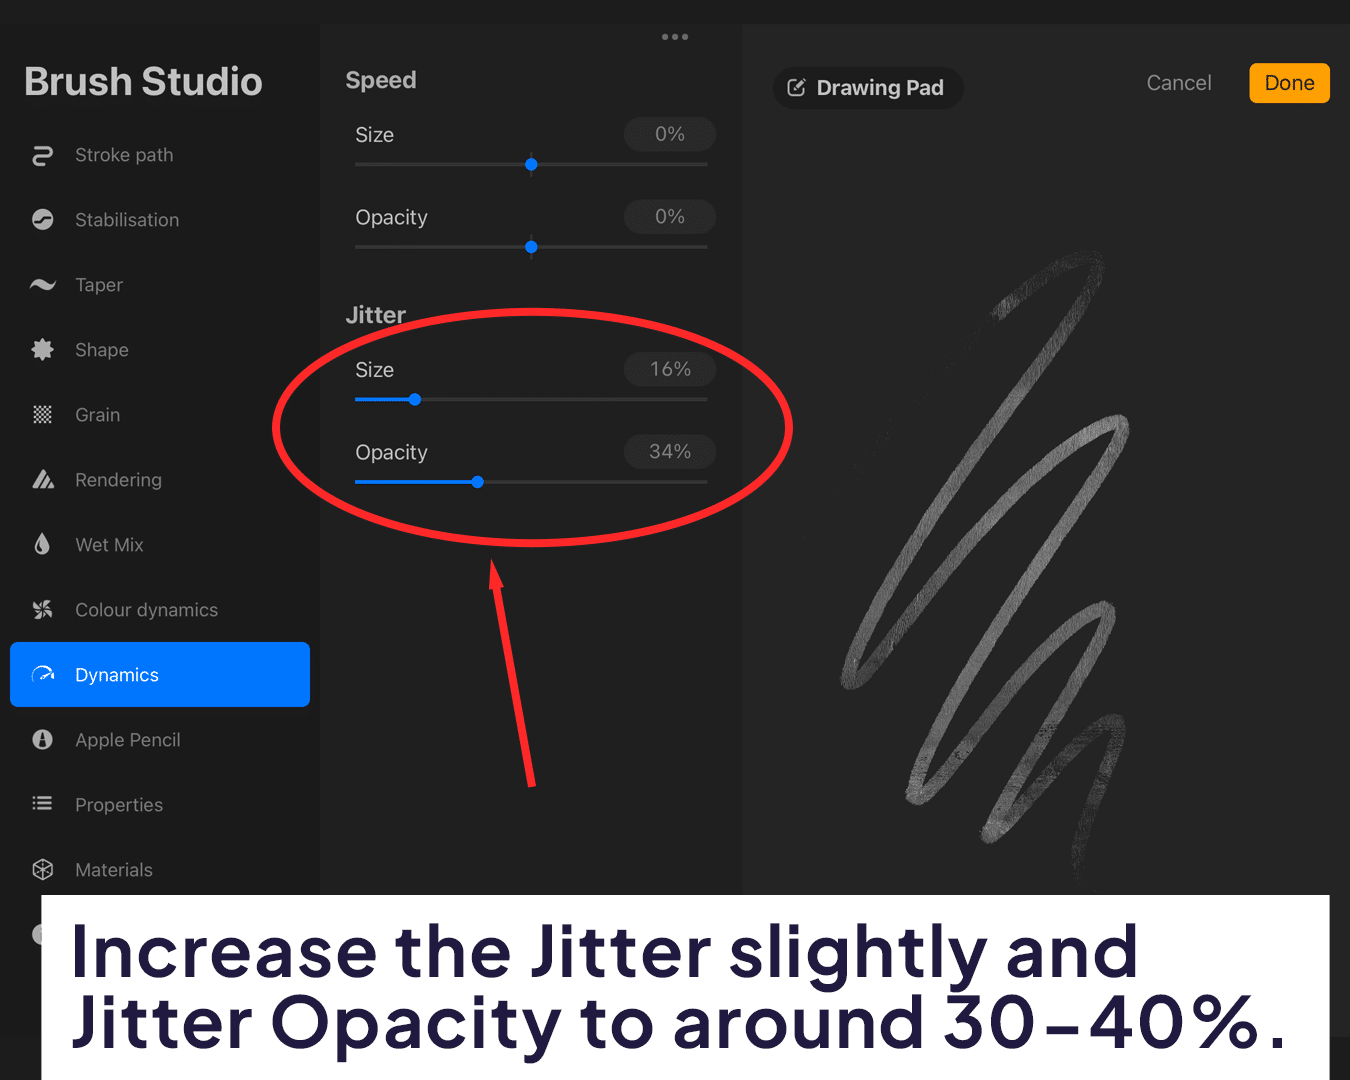
In the ‘Dynamics’ tab, set the ‘Flow’ to a medium value and increase ‘Jitter’ slightly. This introduces a bit of unpredictability in each stroke, much like actual watercolor.
Opacity Variation:
Adjust the ‘Opacity Jitter’ to around 30-40%. This variation mimics how watercolor paint deposits more pigment in some areas and less in others, creating a natural look.
The Magic of Color Dynamics
Hue and Saturation:
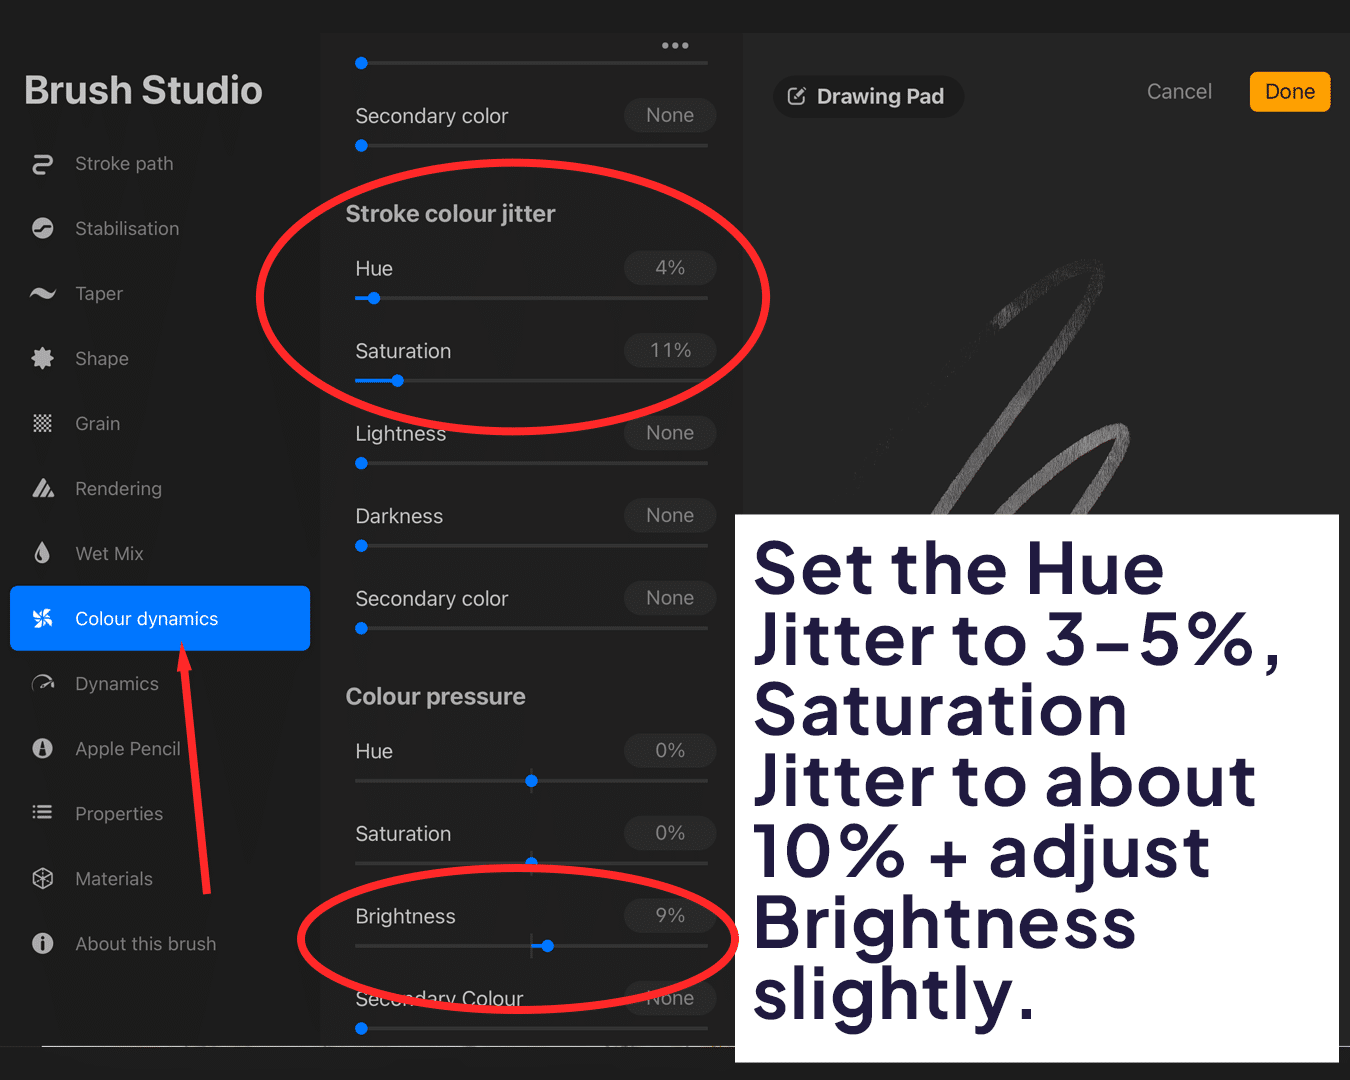
Within ‘Color Dynamics,’ play with ‘Hue Jitter’ and ‘Saturation Jitter.’ I recommend setting ‘Hue Jitter’ to around 2-5% and ‘Saturation Jitter’ to about 10%. This subtly changes the color with each stroke, akin to how different amounts of water can alter the saturation of watercolor paints.
Brightness Jitter:
A slight adjustment in ‘Brightness Jitter’ can also add to the realism, giving some strokes a slightly lighter appearance.
Wet Mix for Watercolor Feel
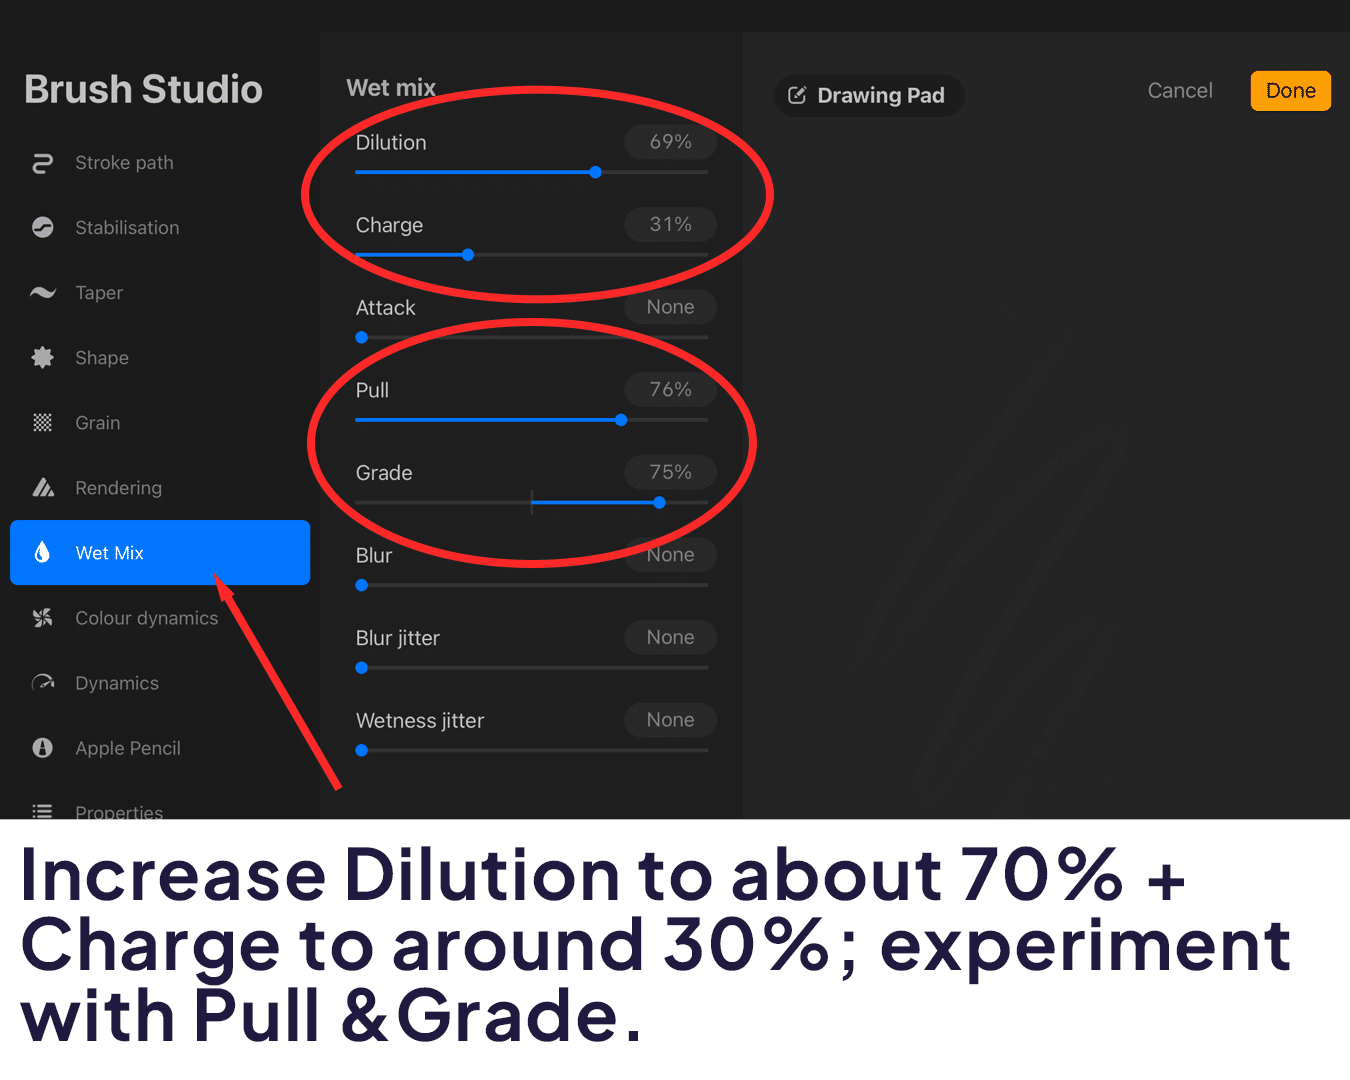
Dilution and Charge:
In the ‘Wet Mix’ tab, increase ‘Dilution’ to around 70% and ‘Charge’ to about 30%. These settings allow the brush to interact with existing colors on the canvas, creating a blending effect typical of wet watercolor paints. For further refinement of your technique, consider exploring how to paint watercolor in Procreate on iPad.
Pull and Grade:
Experiment with ‘Pull’ and ‘Grade’ to adjust how the paint flows and spreads on your digital paper, further enhancing the watercolor effect.
Fine-tuning Through Testing
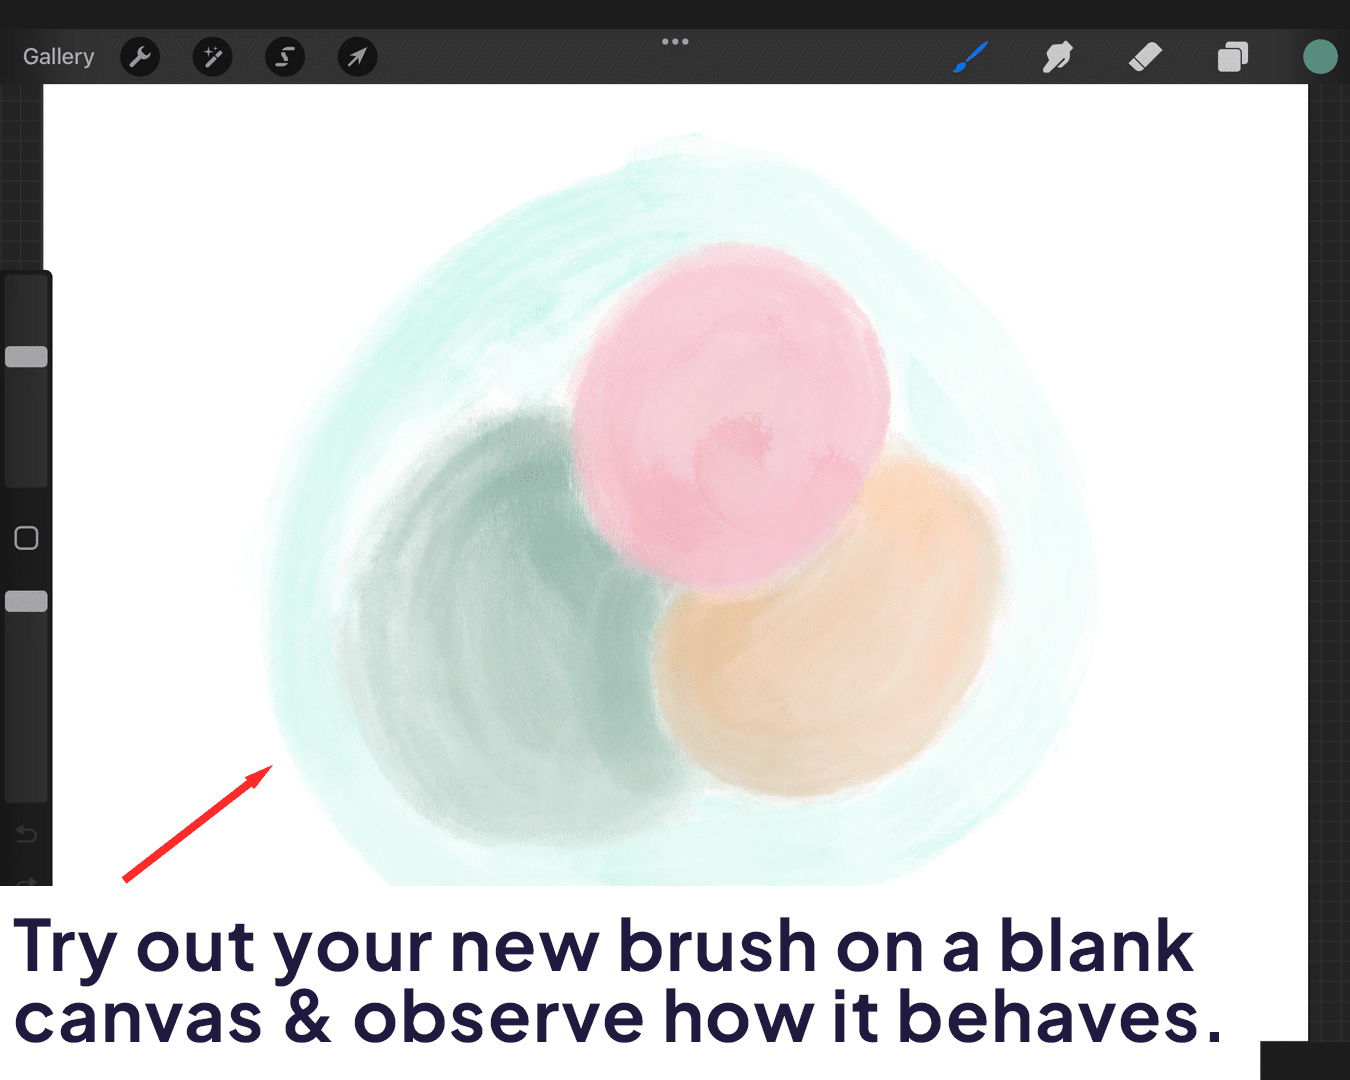
Testing Phase:
Try out your new brush on a blank canvas. Make note of how the brush behaves – does it spread like real watercolor? Do the colors blend naturally?
Refinement:
Based on your observations, go back and tweak the settings. Perhaps increase ‘Dilution’ for more blending, or adjust ‘Jitter’ settings for more variation in strokes.
Saving and Naming Your Brush
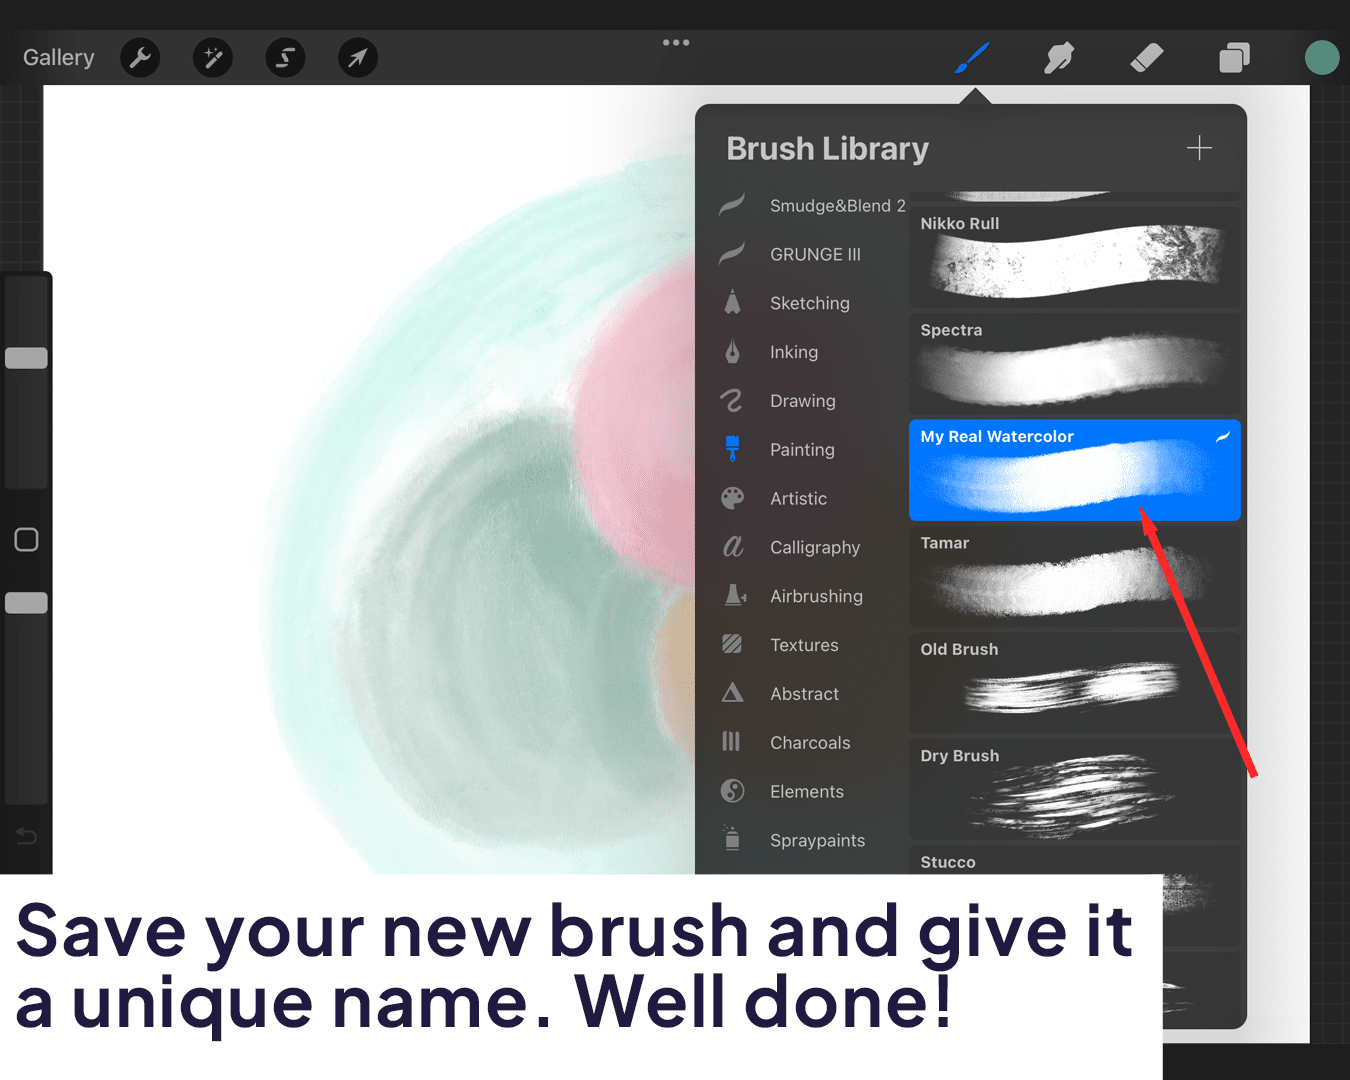
Saving:
Once you’re satisfied with the brush, tap on it in the Brush Library and select ‘Duplicate’ to save your customized version.
Naming:
Give your new brush a unique name. Something like ‘My Real Watercolor’ will remind you of the effort you put into creating this digital masterpiece!
Conclusion:
And there you have it – your very own, custom-made realistic watercolor brush in Procreate! This brush will not only enhance your digital art but also bring a touch of traditional watercolor authenticity to your work. Since you stayed this far, I guess you liked the post, didn’t you? If so, we prepared some other tutorials in the Watercolor section. Check out our tutorials on how to create watercolor paper in Procreate and how to draw watercolor flowers in Procreate. Don’t forget to enhance your creations with our comprehensive collection of Procreate watercolor brushes.


Share this article


