
How To Create Watercolor Paper In Procreate

You probably experienced situations where your art was coming along beautifully, but the texture felt too polished and too digital. I was there and I thought maybe a watercolor paper look would help me out.
After some experimenting in Procreate, I finally cracked it – a method to create that perfect watercolor paper texture. And today, I’m excited to walk you through this simple technique. Let’s get started!
What you’ll learn how to:
Set Up Your Canvas
Create the Base Watercolor Texture
Add Depth and Grain
Fine-tune the Texture
Experiment with Layer Effects
Save Your Custom Texture
Step-by-Step Guide to Creating Watercolor Paper in Procreate
Setting Up Your Canvas
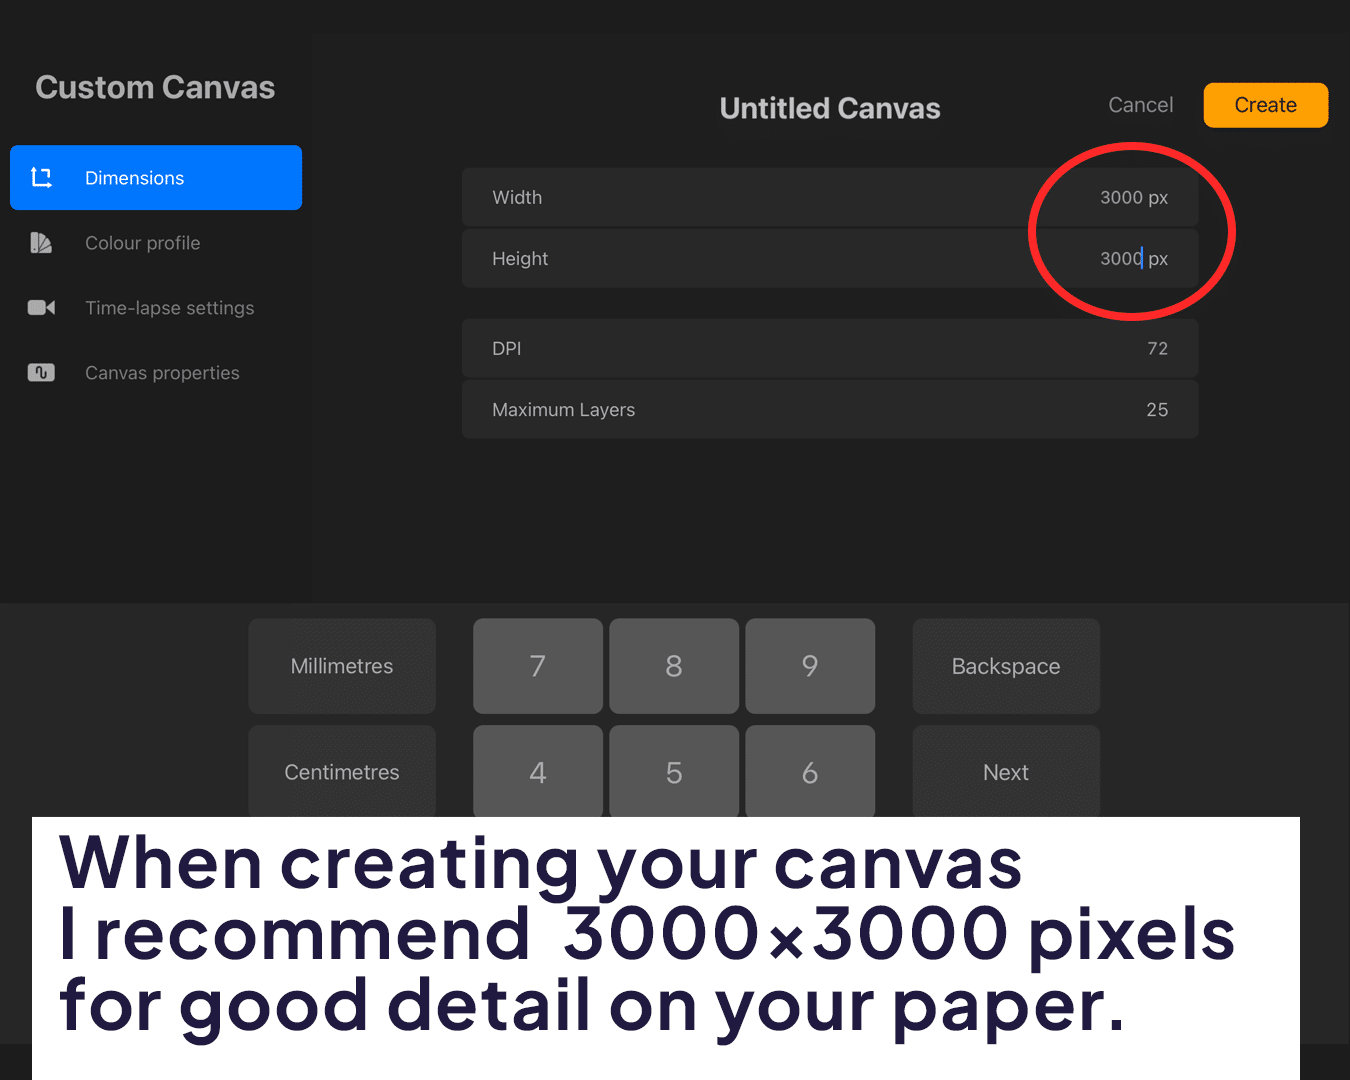
Launch Procreate and tap the ‘+’ to start a new canvas. I recommend a size like 3000×3000 pixels for good detail.
Under the ‘Canvas’ settings, choose a texture that resembles watercolor paper. If you don’t have one, don’t worry, we’ll create it manually!
Creating the Base Texture
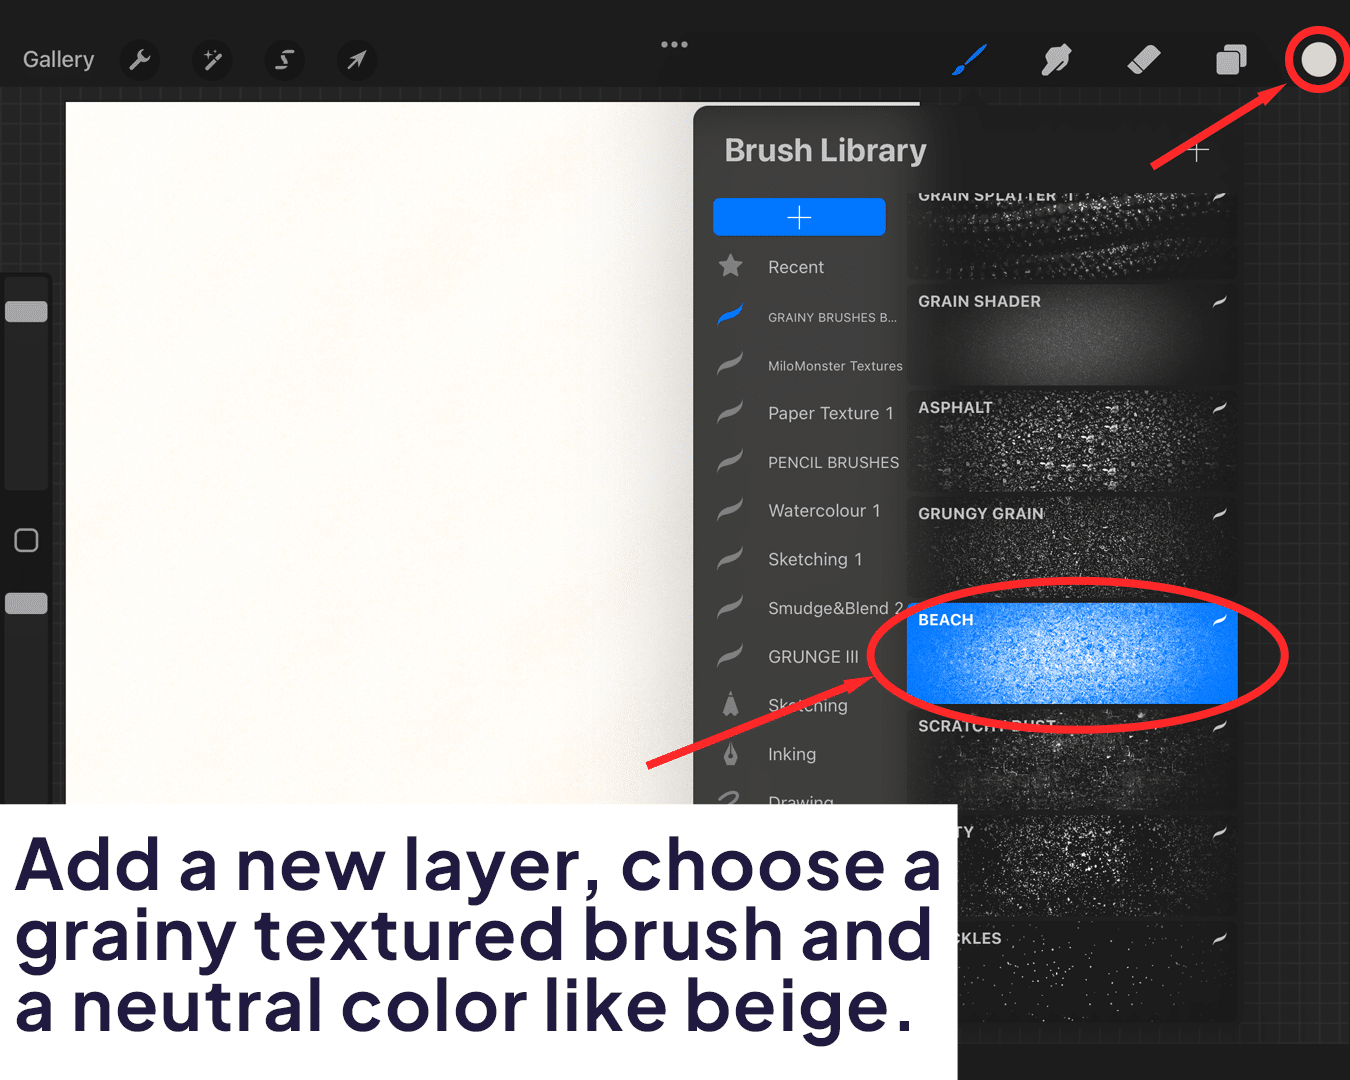
Add a new layer on top of your canvas to create the watercolor paper texture.
Choose a brush with a grainy texture. The ‘Turbulence’ brush under ‘Textures’ works well.
Select a neutral color like light grey or beige. Paint over the entire canvas to form a base texture. This is a great opportunity to explore procreate watercolor brushes for adding unique textures to your artwork.
Adding Depth and Grain
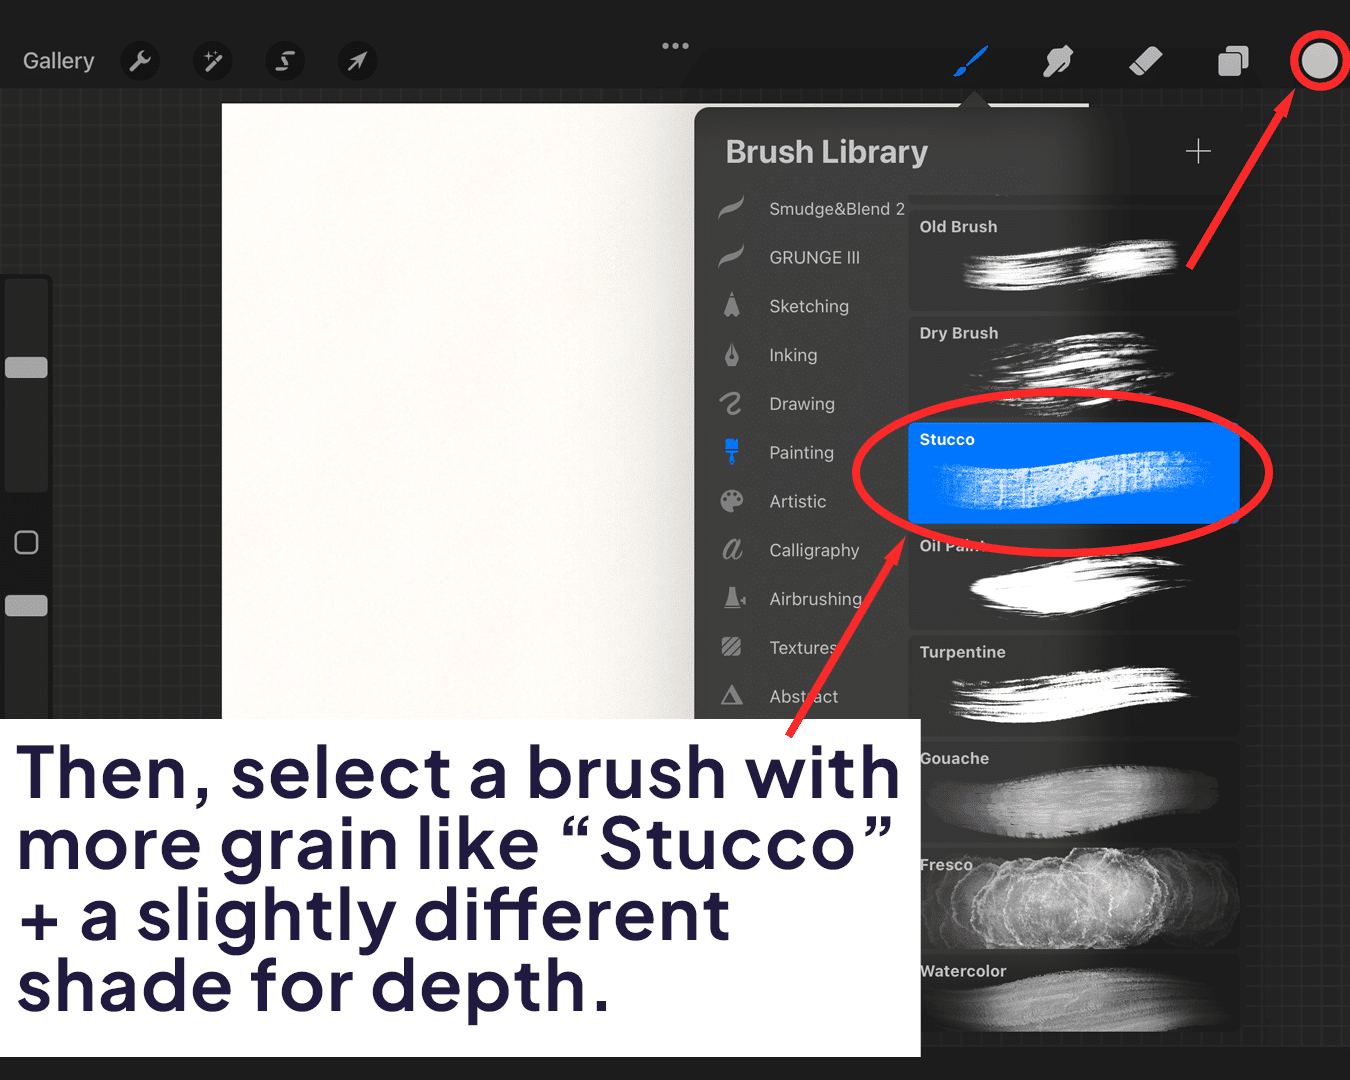
Add another layer on top. This time, select a brush with more pronounced grain, like ‘Stucco’ or ‘Noise’ under ‘Textures.’ For artists looking to enhance their technique further, discovering how to make a realistic watercolor brush in Procreate can be incredibly beneficial.
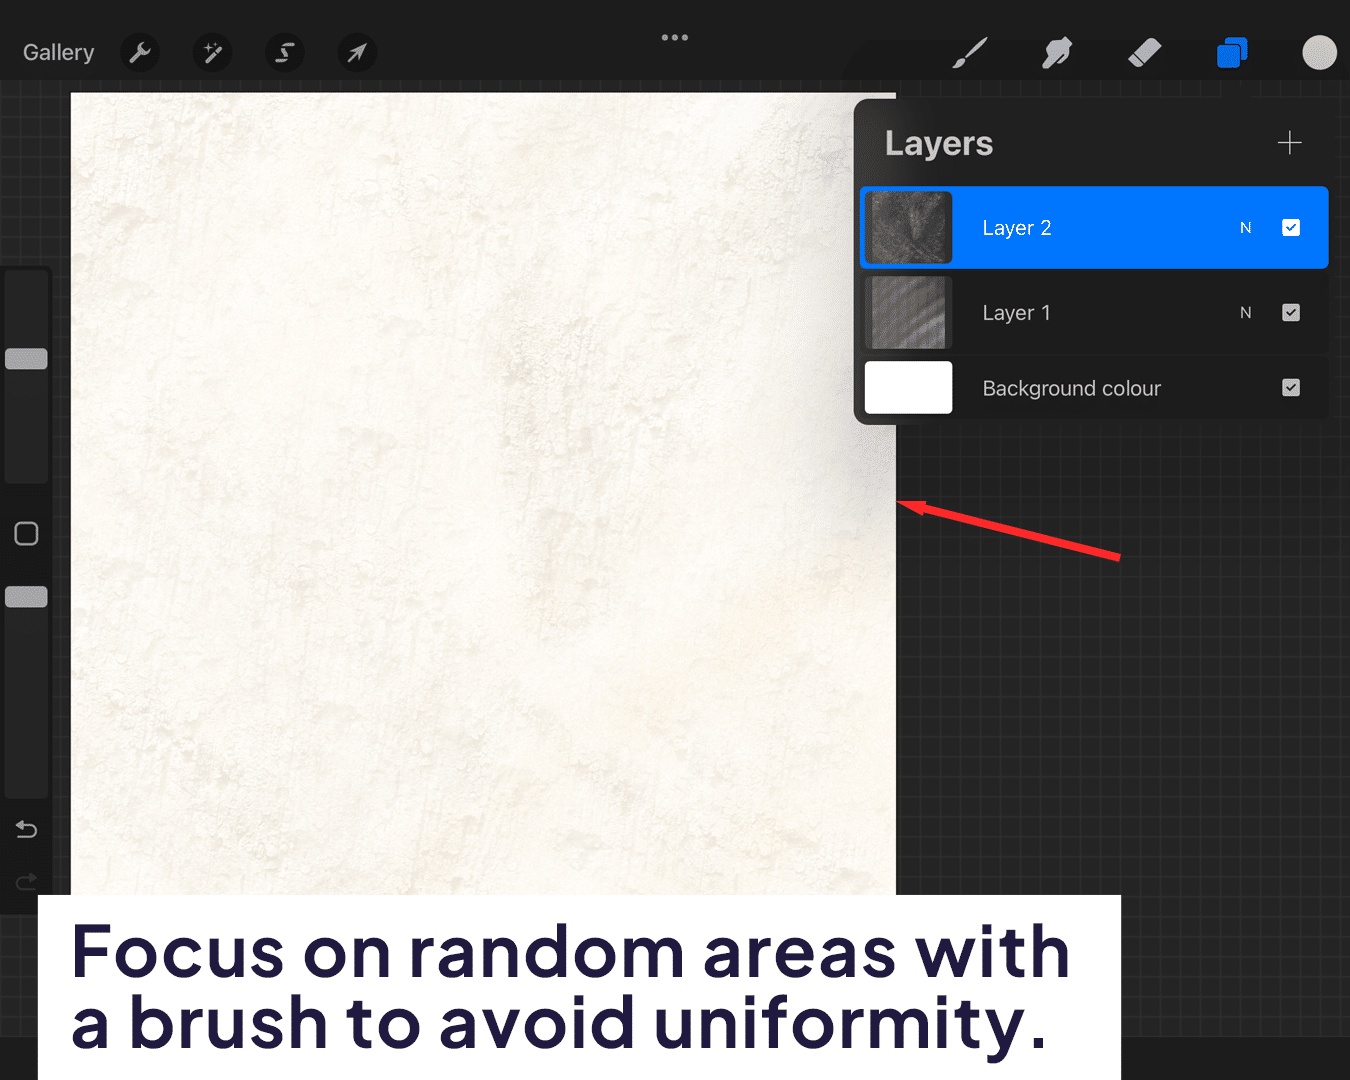
Use slightly different shades of your base color to create depth. Lightly brush over the canvas, focusing on random areas to avoid uniformity.
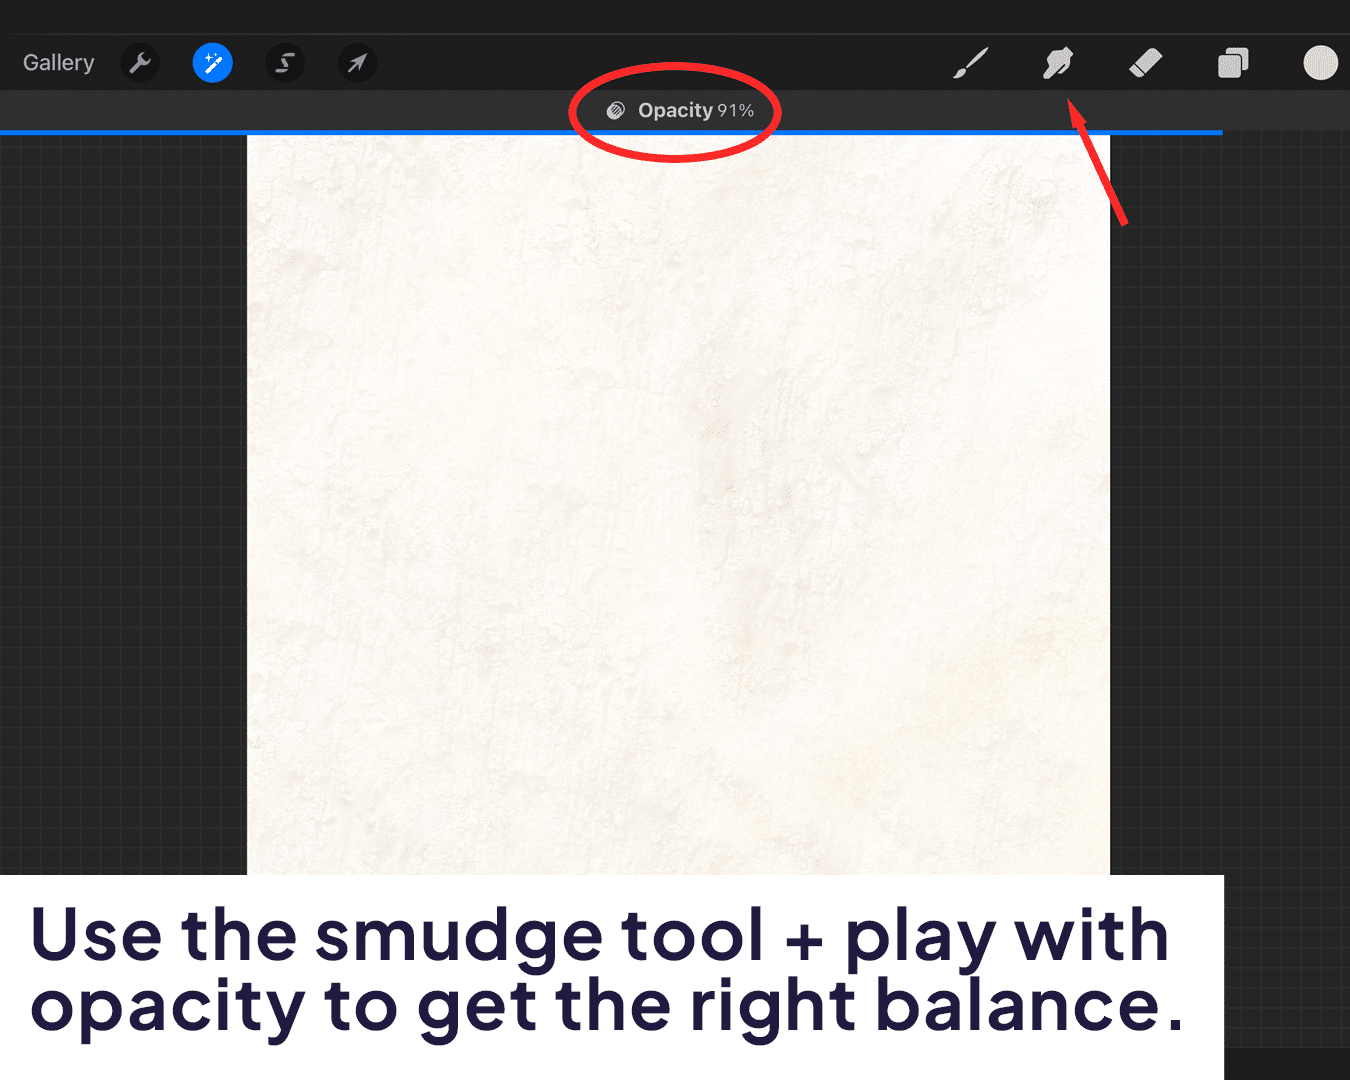
Fine-tuning the Texture
Use the ‘Smudge’ tool with a textured brush to blend the grains subtly. This gives a more natural, less digital look.
Play with the layer’s opacity to get the right balance of texture and color.
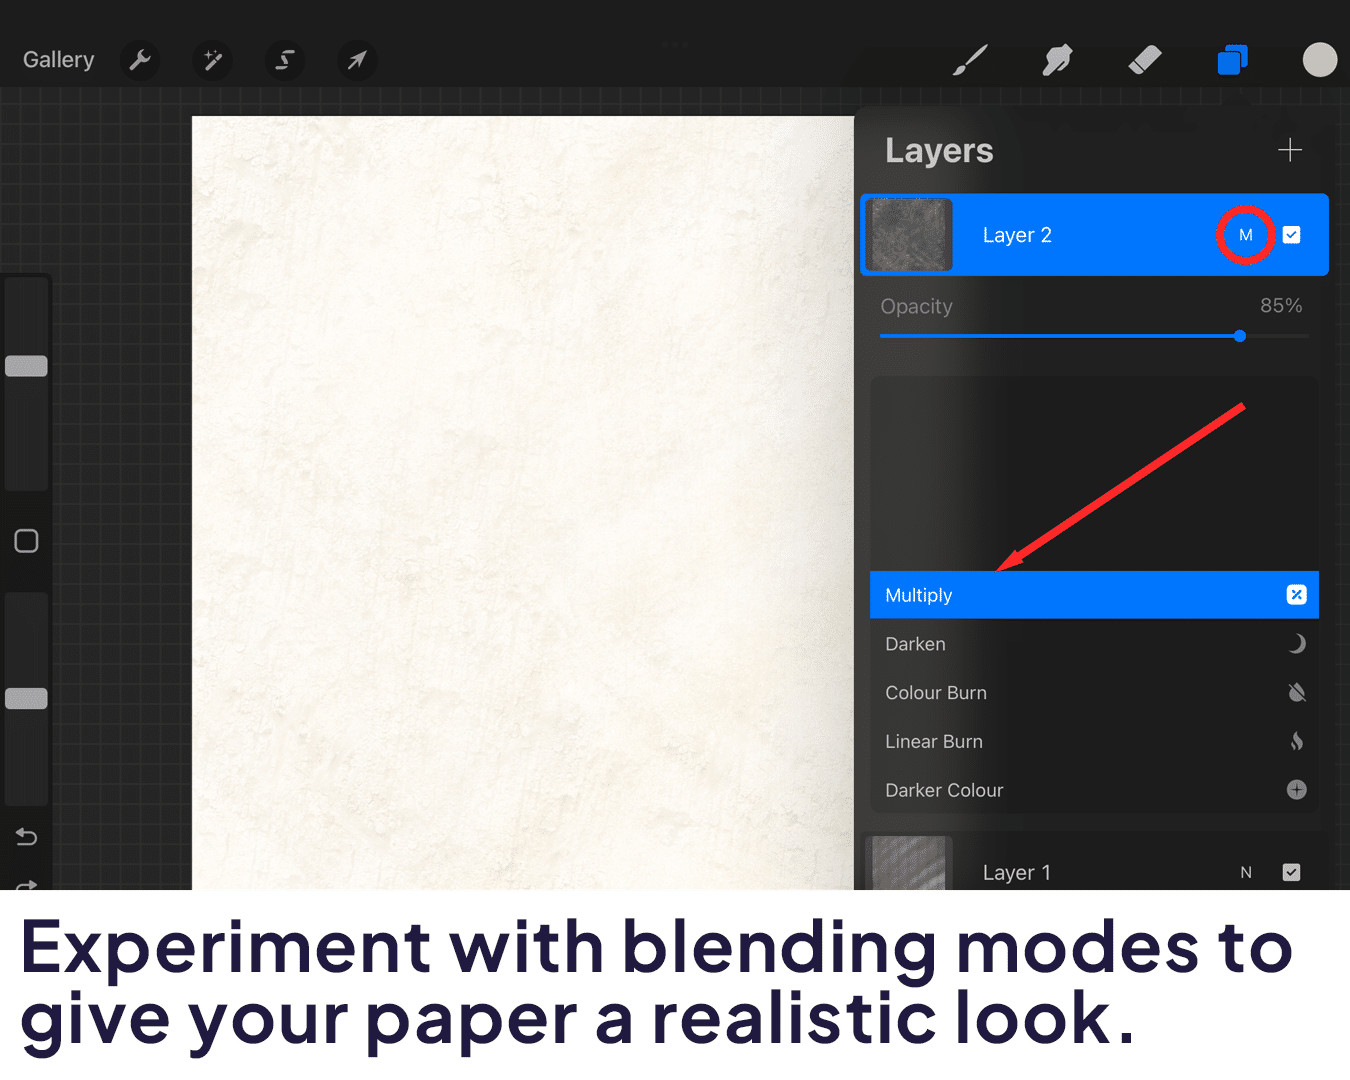
Using Layer Effects for Realism
Experiment with layer blending modes like ‘Multiply’ or ‘Overlay’ to see how they interact with your base texture.
The goal is to achieve a realistic paper look without overpowering your artwork. For those interested in applying their new skills to create complete works, how to paint watercolor in Procreate on iPad provides additional insights and techniques.
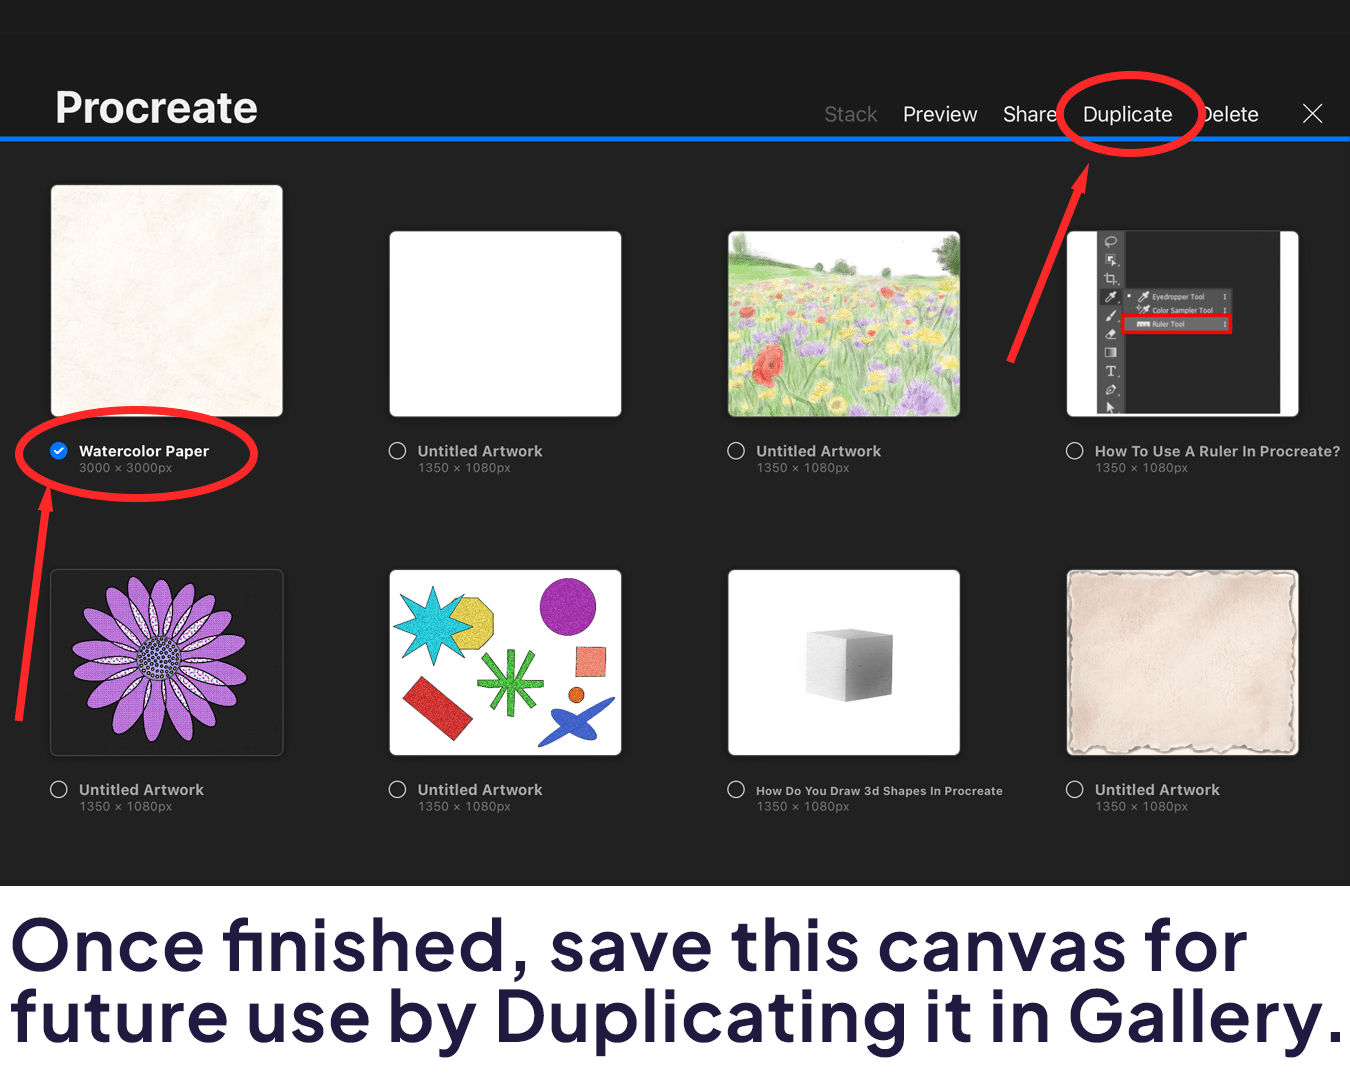
Saving Your Watercolor Paper Texture
Once you’re happy with your texture, you can save this canvas as a swatch for future use. Simply go to your gallery, swipe left on the canvas thumbnail, and select ‘Duplicate.’ For more artistic inspiration, consider learning how to draw watercolor flowers in Procreate, perfecting your ability to create stunning floral compositions on your newly crafted watercolor paper texture.


Share this article


