
How To Make a Chalk Brush in Procreate

Creating a custom chalk brush in Procreate can transform your digital artwork, offering a unique texture that bridges the gap between traditional and digital art forms.
In this tutorial, I’ll guide you through the steps to design a chalk brush that adds a new dimension to your Procreate toolkit.
Before we continue:
I know some of you would prefer to skip all the steps and download a pre-made Procreate chalk brushes. This is fine, I believe in the power of choice, so if this is your thing, go for it! You can start by exploring our comprehensive collection of Procreate chalk brushes.
Creating Chalk Brush in Procreate (Step-By-Step)
Are you ready to transform your digital canvas with the rustic charm of chalk? As a seasoned Procreate user, I’m excited to guide you through crafting your very own chalk brush. Let’s dive in!
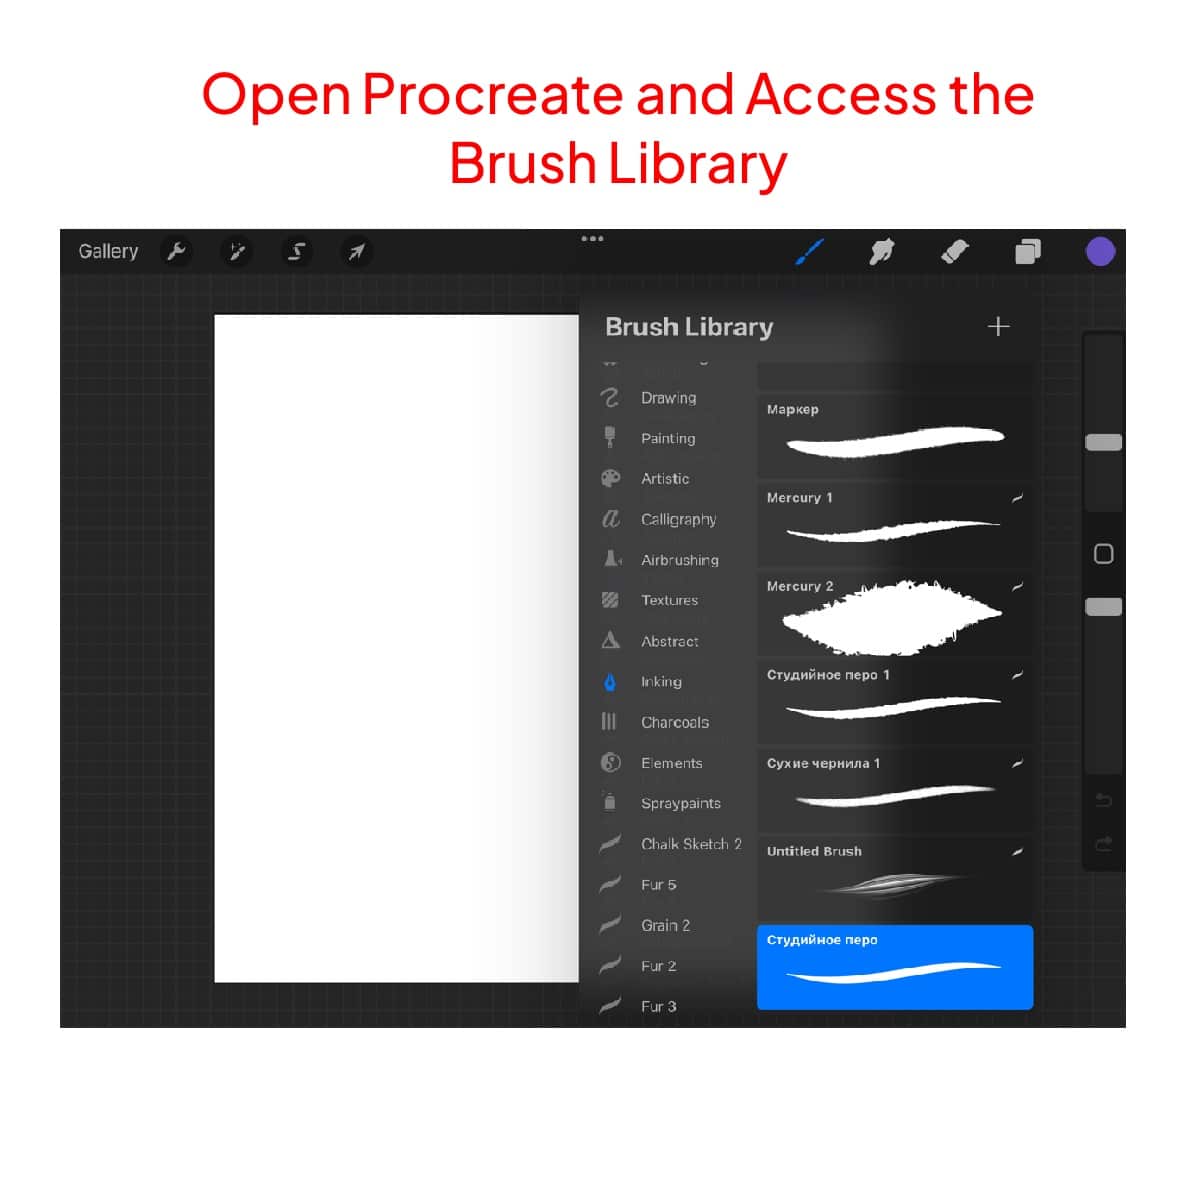
Open Procreate and Access the Brush Library
Open Procreate on your iPad. Tap the brush icon, located in the top right of the screen, to enter the Brush Library. This is where your brush creation journey begins.
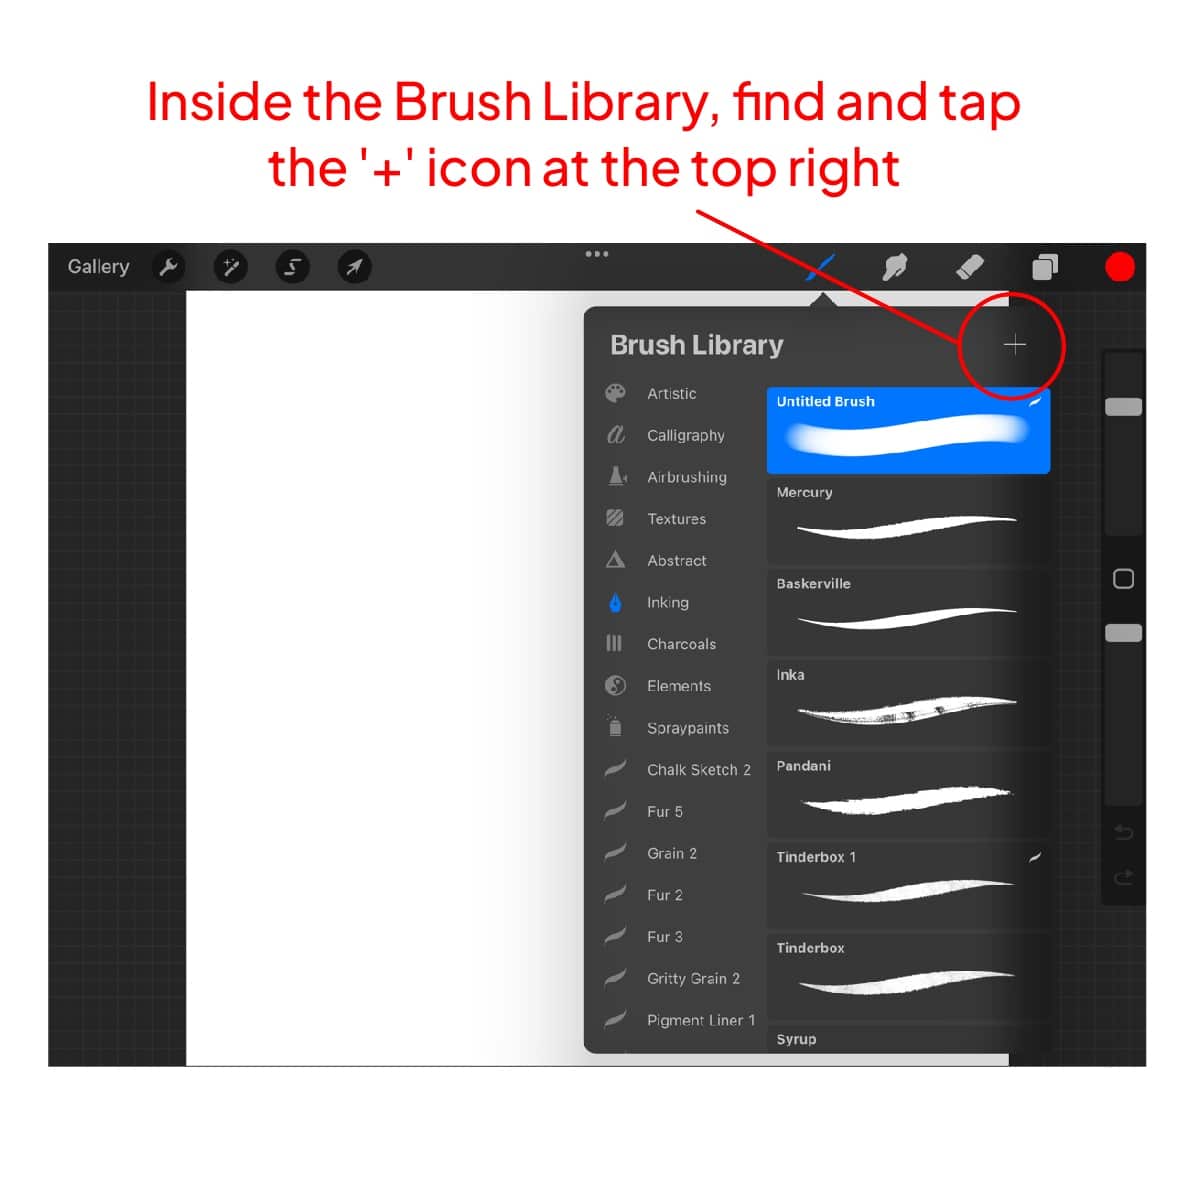
Start with a New Brush
Inside the Brush Library, find and tap the ‘+’ icon at the top right. This action opens a new page where you’ll design your custom brush. Think of this as the blank canvas for your brush creation.
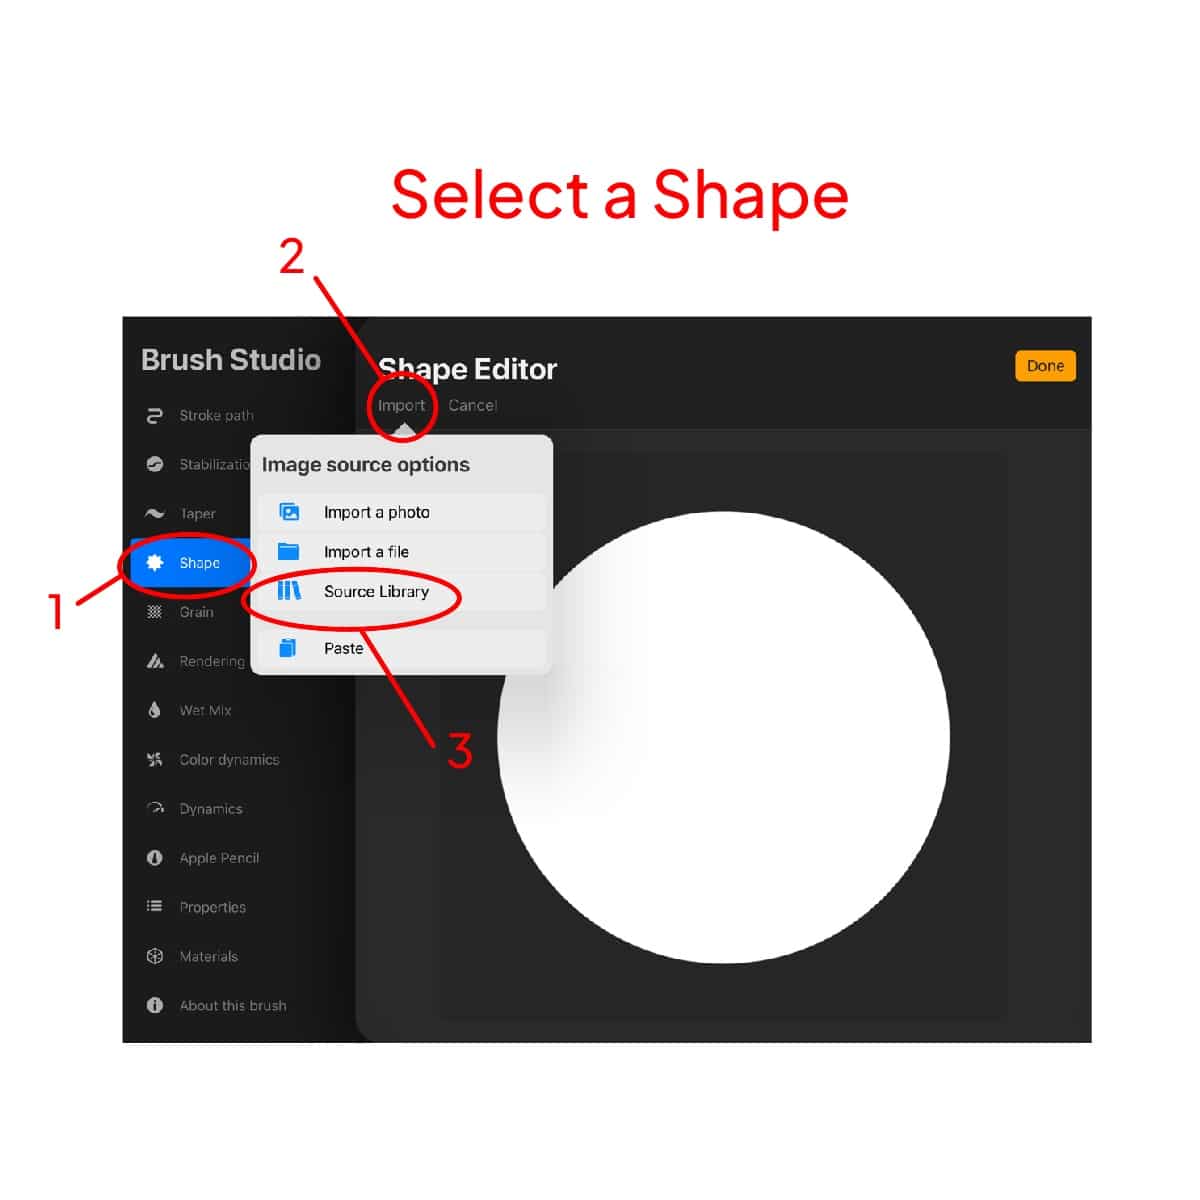
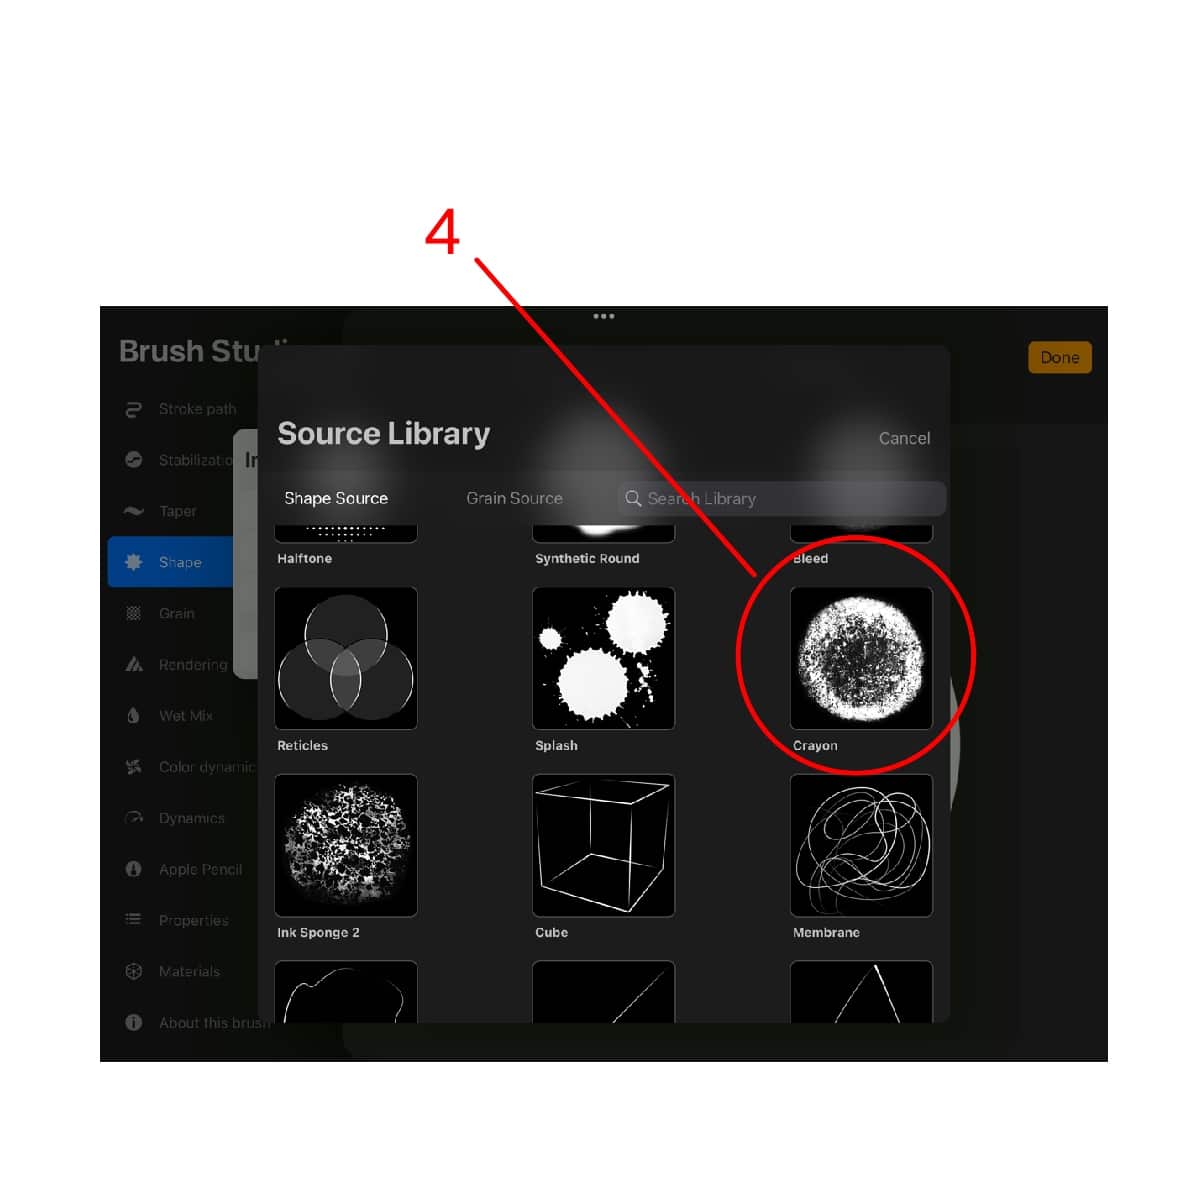
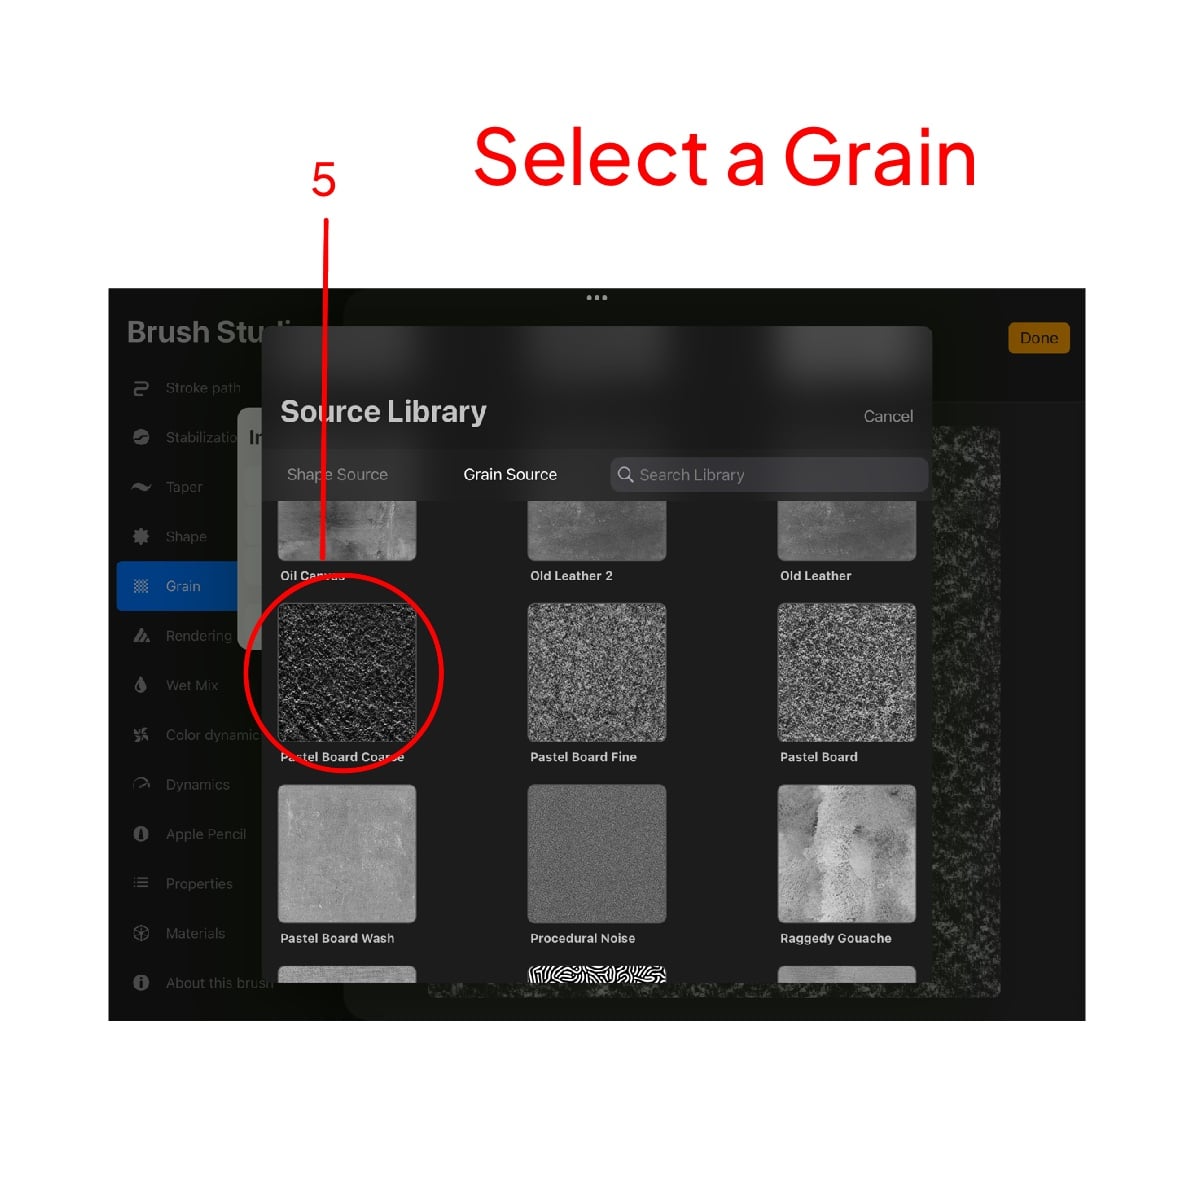
Select a Shape and Grain
Shape Selection:
Tap on ‘Shape’ to choose the base shape of your brush. For a chalk effect, select a shape that has some irregularity or texture, like a splattered or speckled pattern. This will mimic the uneven lines of actual chalk.
Grain Selection:
Next, tap on ‘Grain.’ Here, choose a texture that resembles chalk dust. A grain with a gritty, uneven pattern works best. This texture will be applied along the length of your strokes, giving that authentic chalk look.
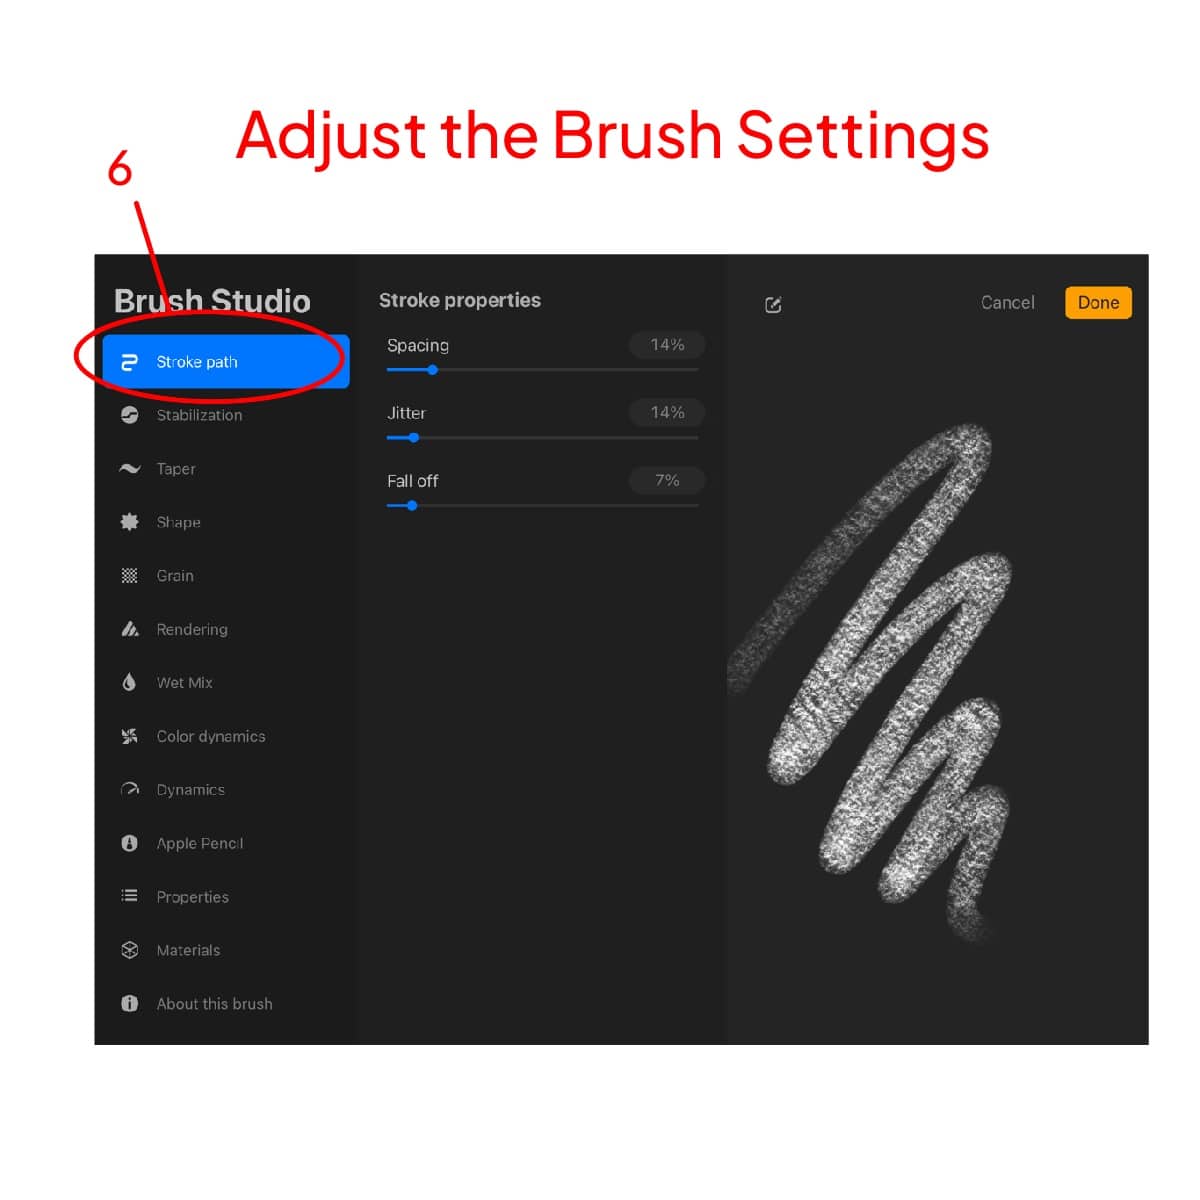
Adjust Brush Settings
Spacing:
Go to the ‘Stroke’ settings and increase the ‘Spacing’ slider. More spacing will create gaps in your stroke, emulating the break-up effect seen in real chalk lines.
Scatter:
Under the same section, adjust the ‘Scatter’ slider. Adding a bit of scatter makes the strokes appear more random and natural, like chalk on a rough surface.
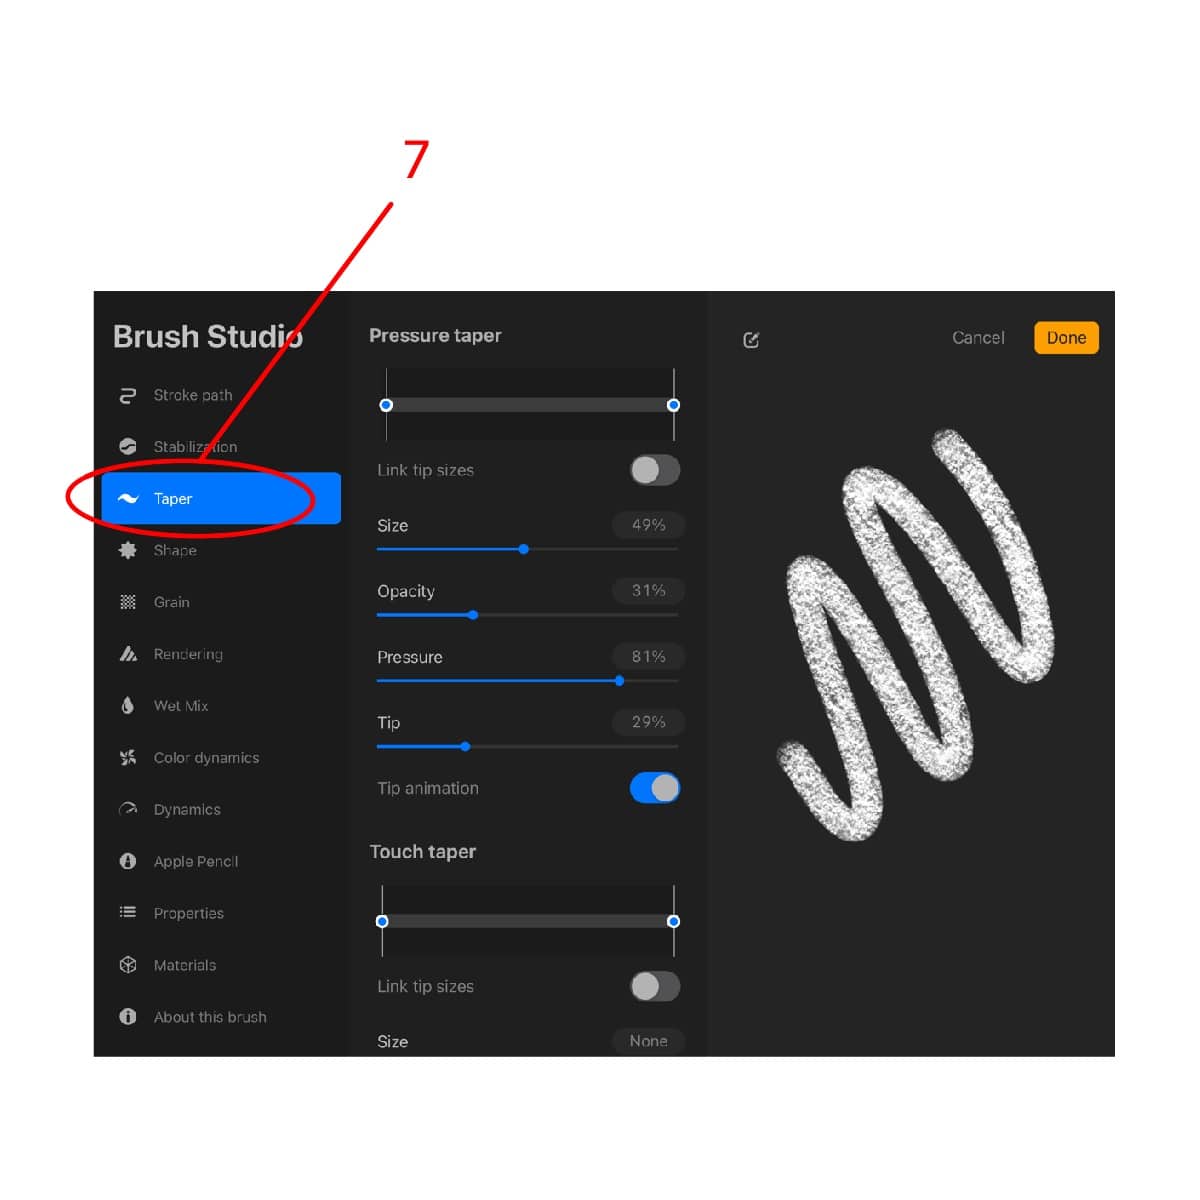
Taper Settings:
In the ‘Taper’ settings, control how the brush behaves at the start and end of each stroke. For a chalk brush, you might want a slight taper for a more natural look.
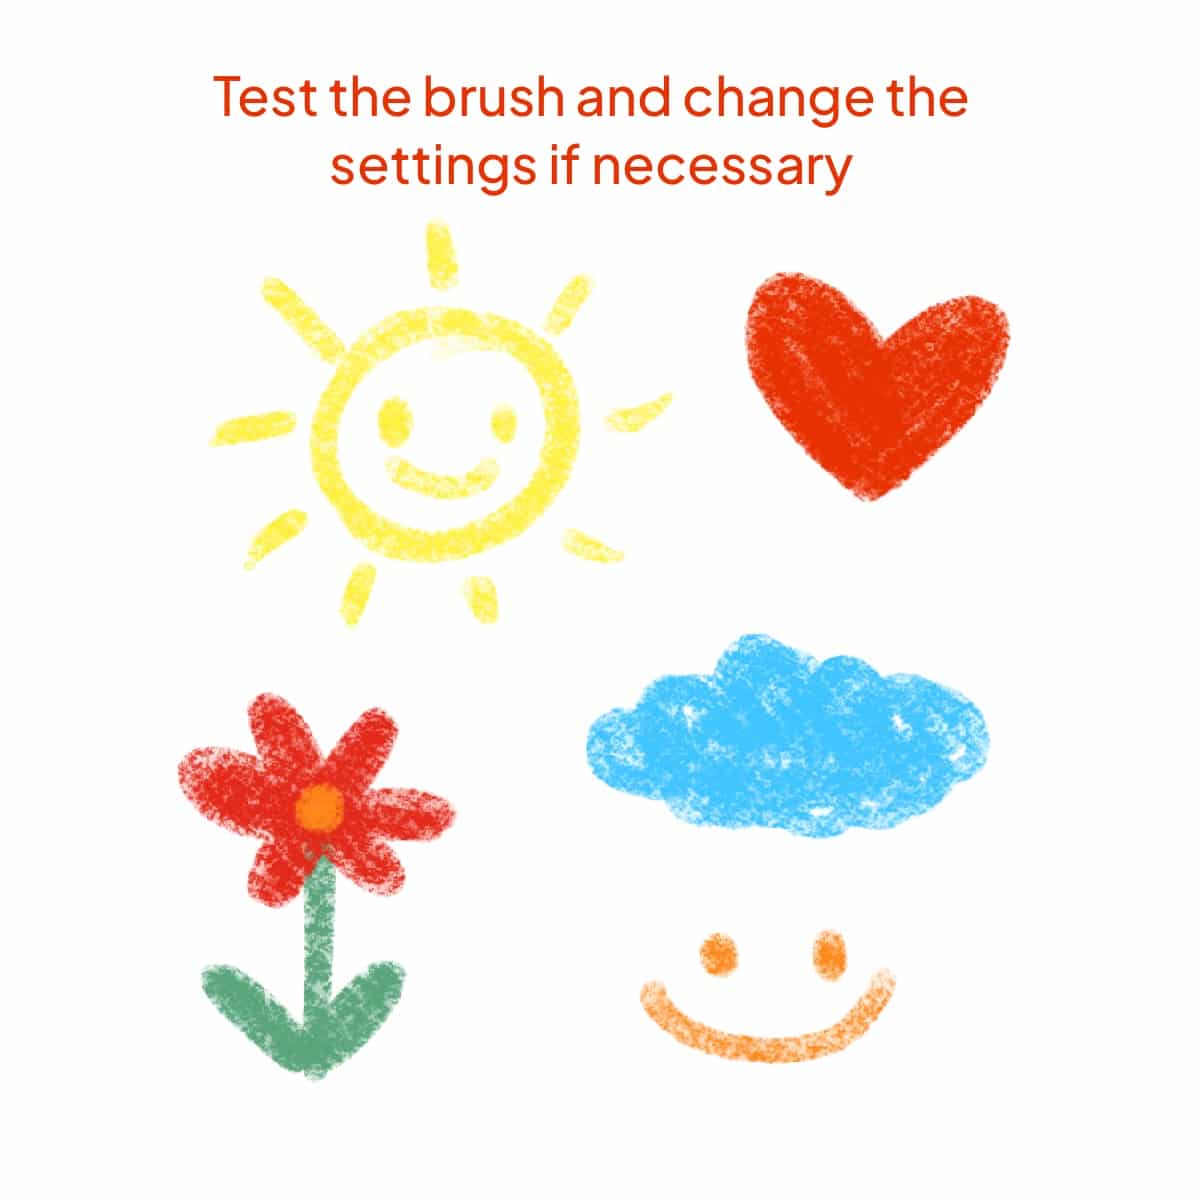
Test and Fine-Tune Your Brush
After adjusting your settings, it’s crucial to test your brush. Draw on a new canvas to see how it performs. If it doesn’t quite resemble chalk, go back and tweak the settings. Pay attention to how the brush responds to pressure and adjust the ‘Pressure Sensitivity’ settings if needed.
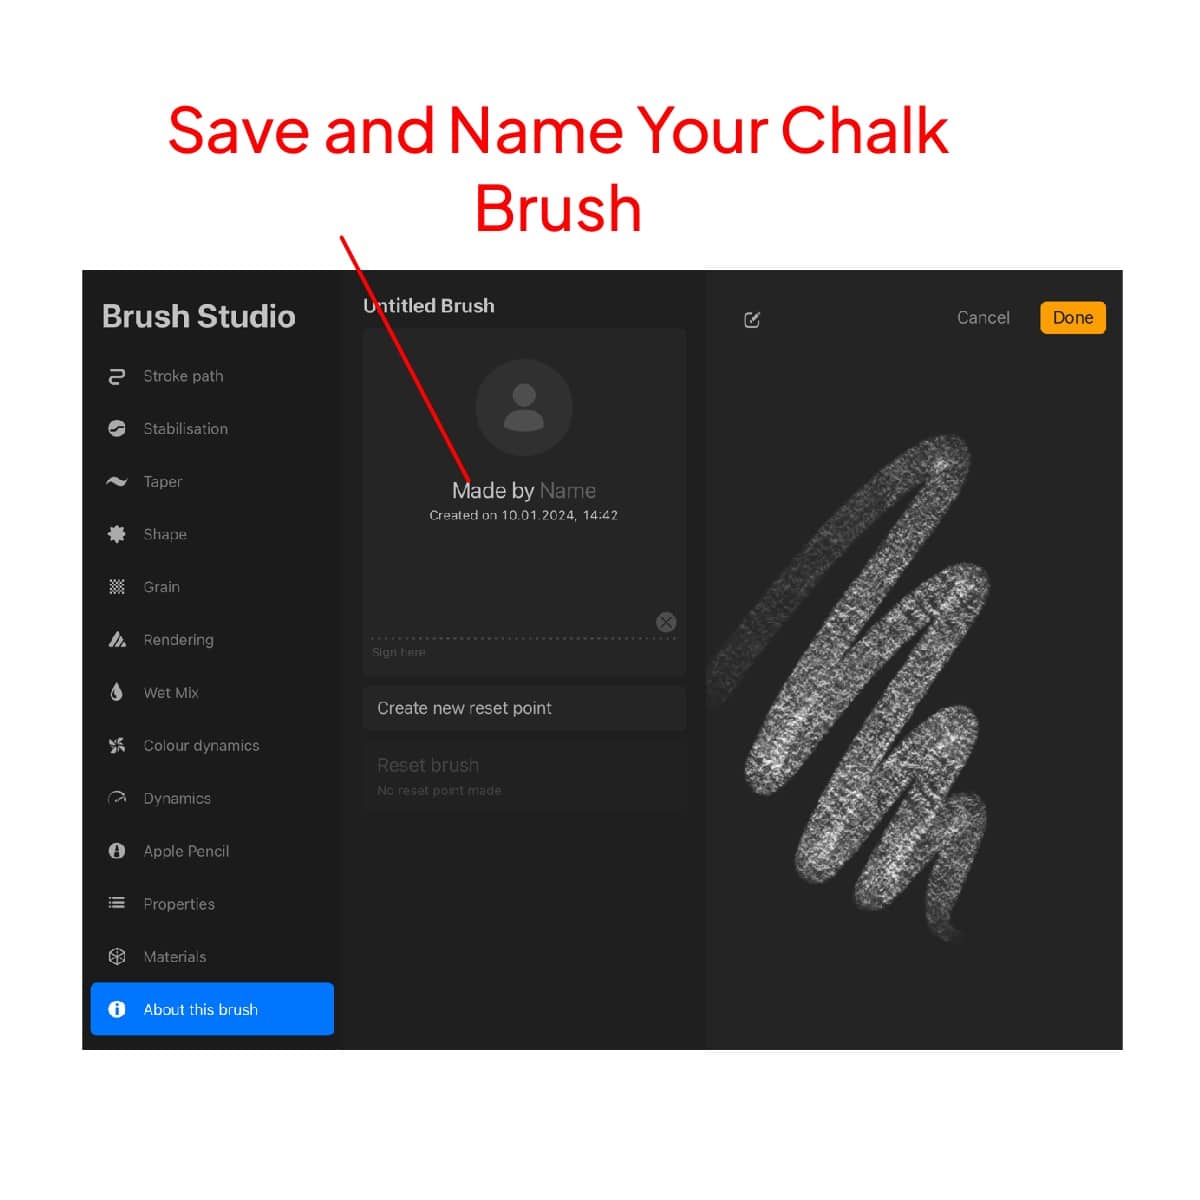
Save and Name Your Chalk Brush
Once you’re satisfied with the brush, tap on the ‘About this brush’ option. Here, you can name your brush. Choose a name like “My Pro Chalk” or anything that you’ll remember. Then, tap ‘Done’ to save your creation.
Creating a chalk brush in Procreate is a blend of art and technique. Each adjustment brings you closer to that perfect chalk effect, tailor-made for your unique artistic style. Enjoy the process and let your digital art flourish with your new tool!
If you’re curious about the default tools Procreate offers, discover how to find a chalk brush in Procreate, and for those wondering about other textures, find out if Procreate has a crayon brush and does Procreate have Copic markers.”


Share this article


