
How To Draw 3D Shapes in Procreate

Have you ever found yourself deeply immersed in your Procreate canvas, crafting flat shapes and thinking, “If only these could pop out like a jack-in-the-box”?
Well, your wish is about to be granted! I’m here to take you on a thrilling journey from the flatlands of 2D to the exciting peaks and valleys of 3D in Procreate. No more flat tires on this artistic road; it’s time to inflate your art with some three-dimensional magic!
Since you are here, feel free to check out our awesome Procreate shape brushes!
Laying the Groundwork
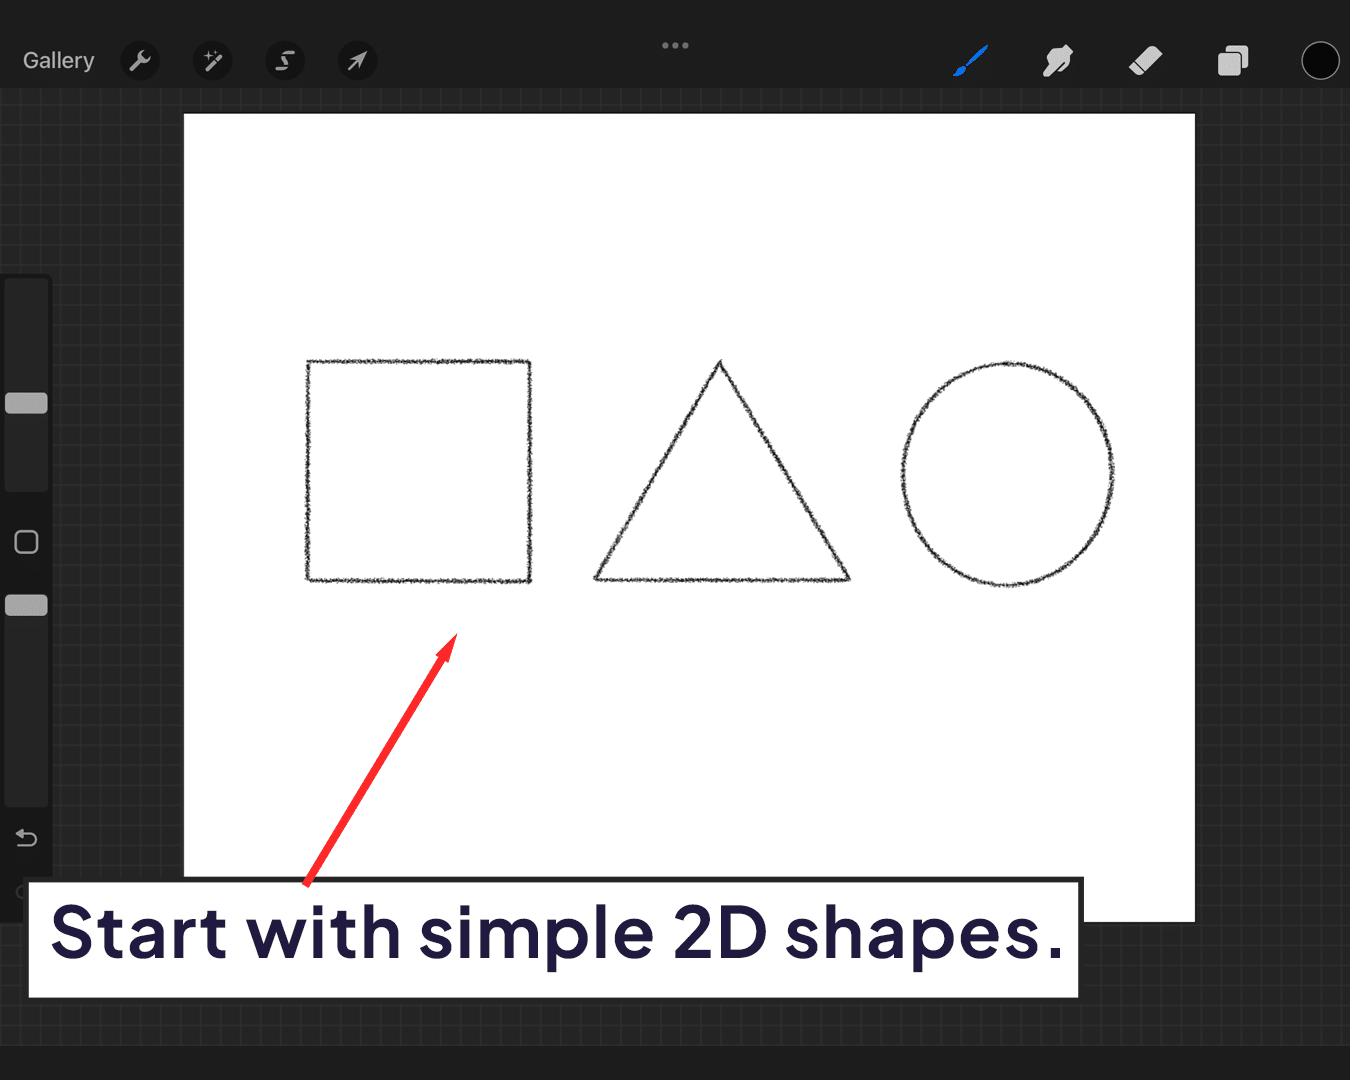
Start with Basic Shapes: Begin by drawing simple 2D shapes. Circles, squares, triangles – these are your building blocks.
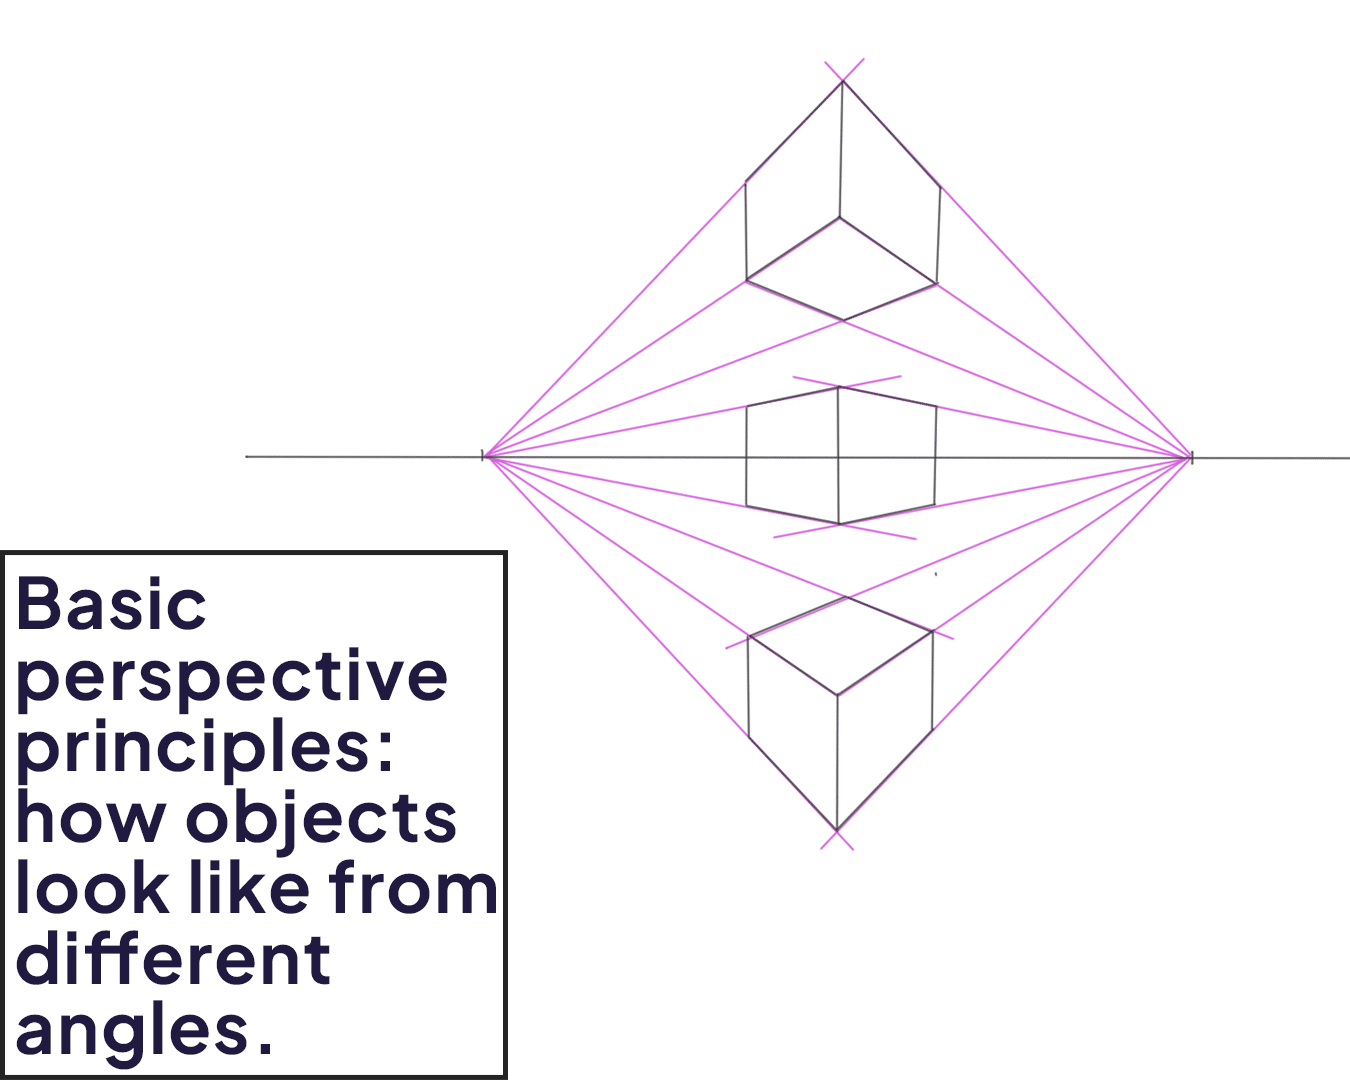
Understand Perspectives: Familiarize yourself with basic perspective principles. It’s all about how you view the shape in a three-dimensional space.
Sketching in 3D
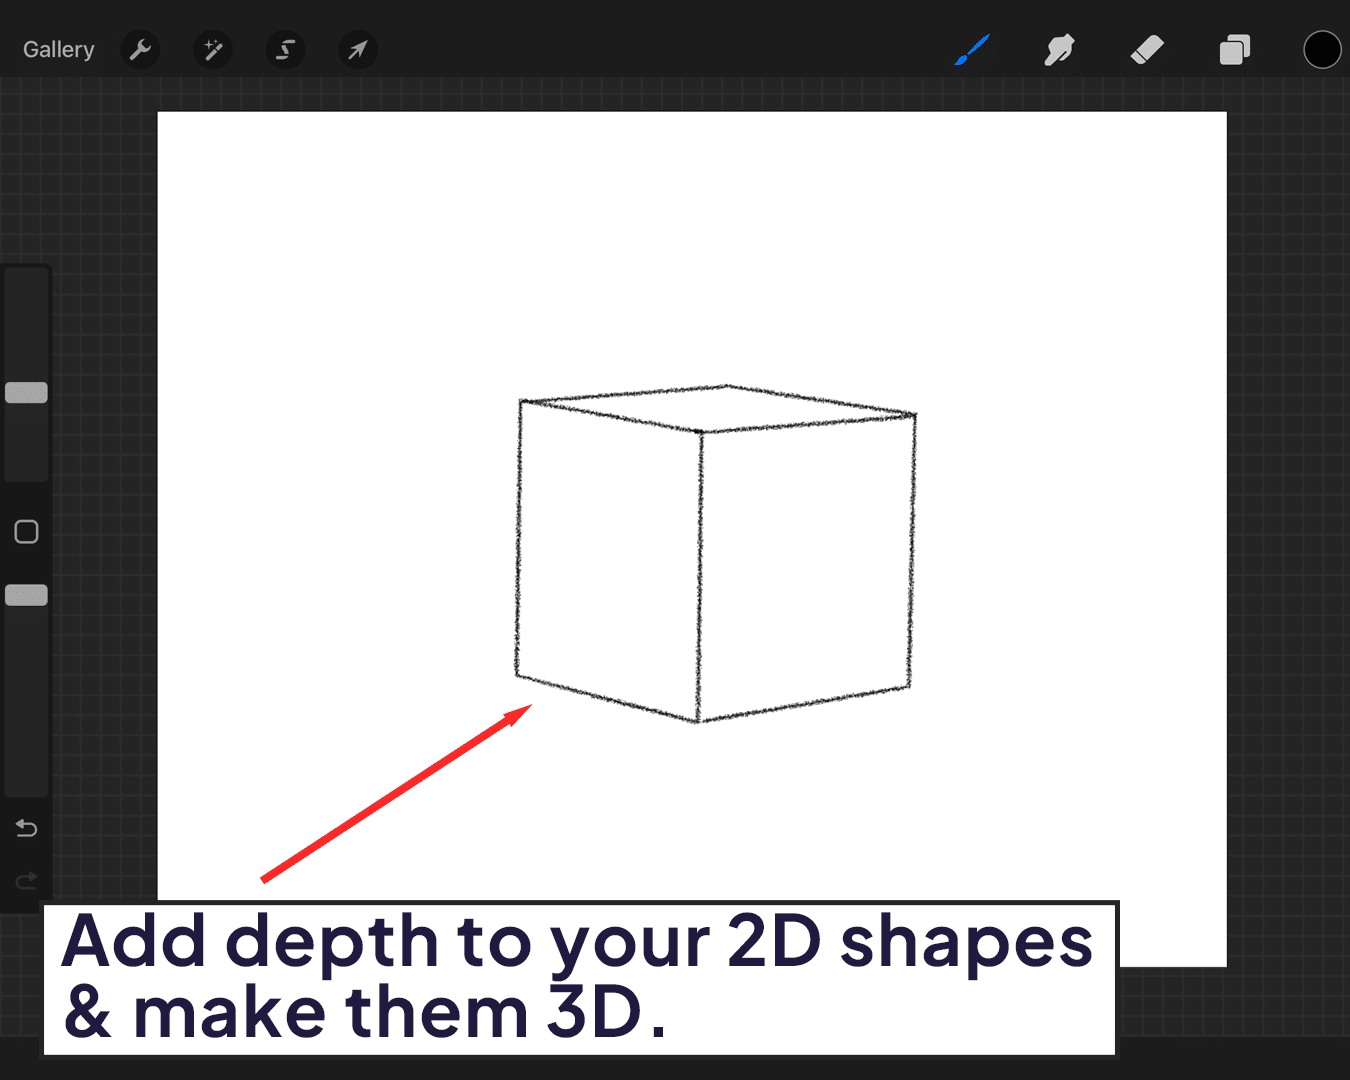
Add Depth: Transform your 2D shapes into 3D by adding depth. For a cube, extend lines from the square’s corners and connect them.
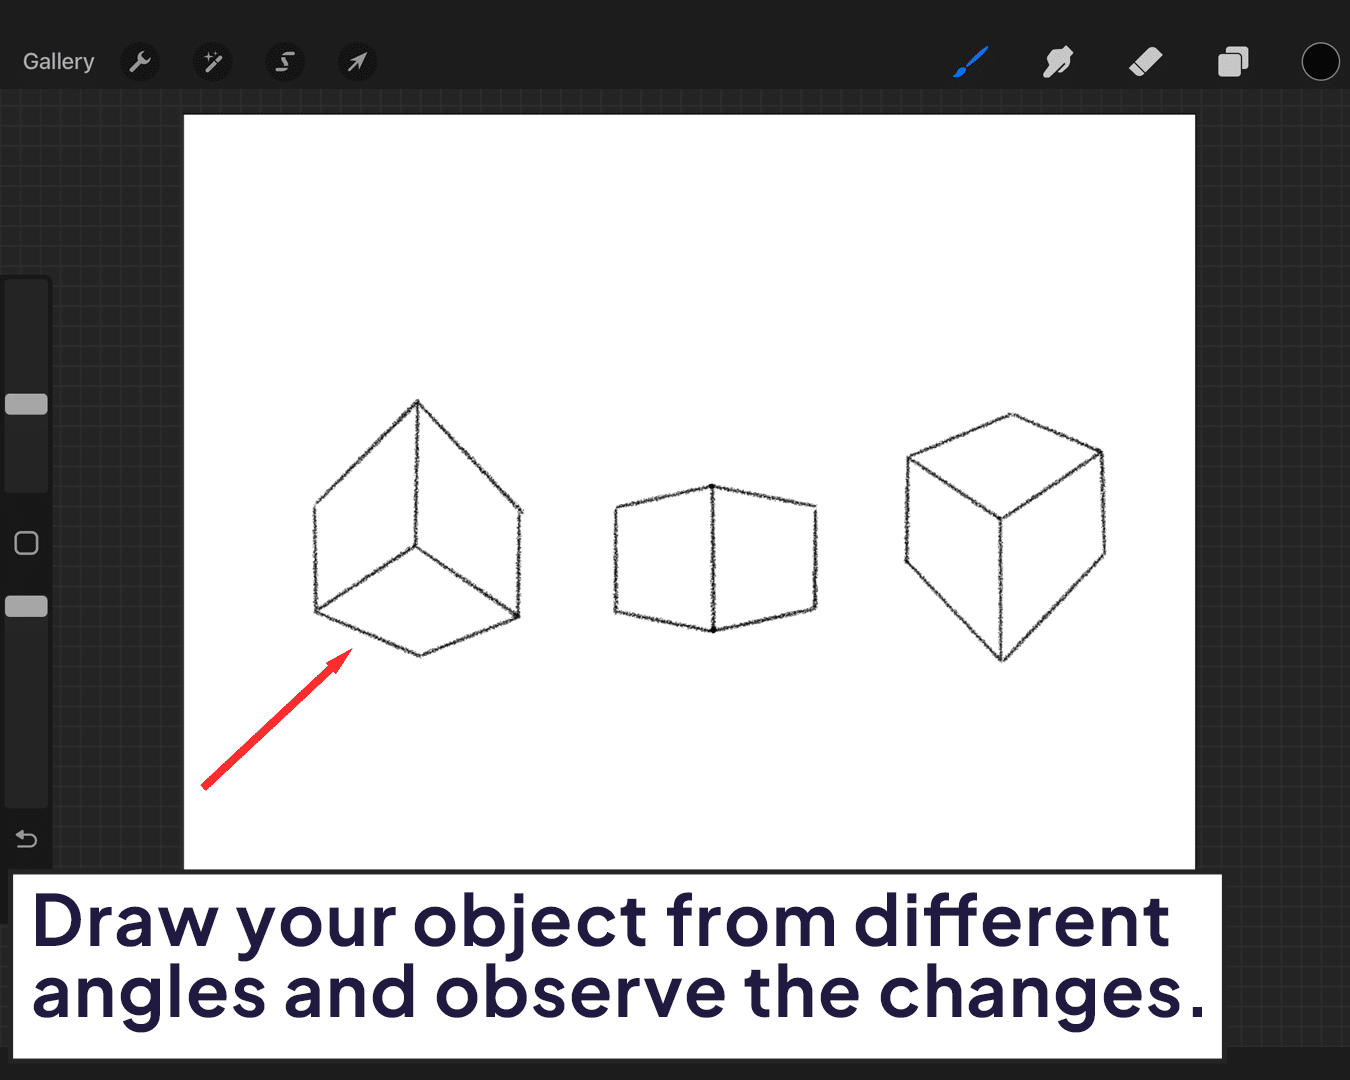
Play with Angles: Experiment with different angles to see how they affect the perception of depth.
Shading and Lighting
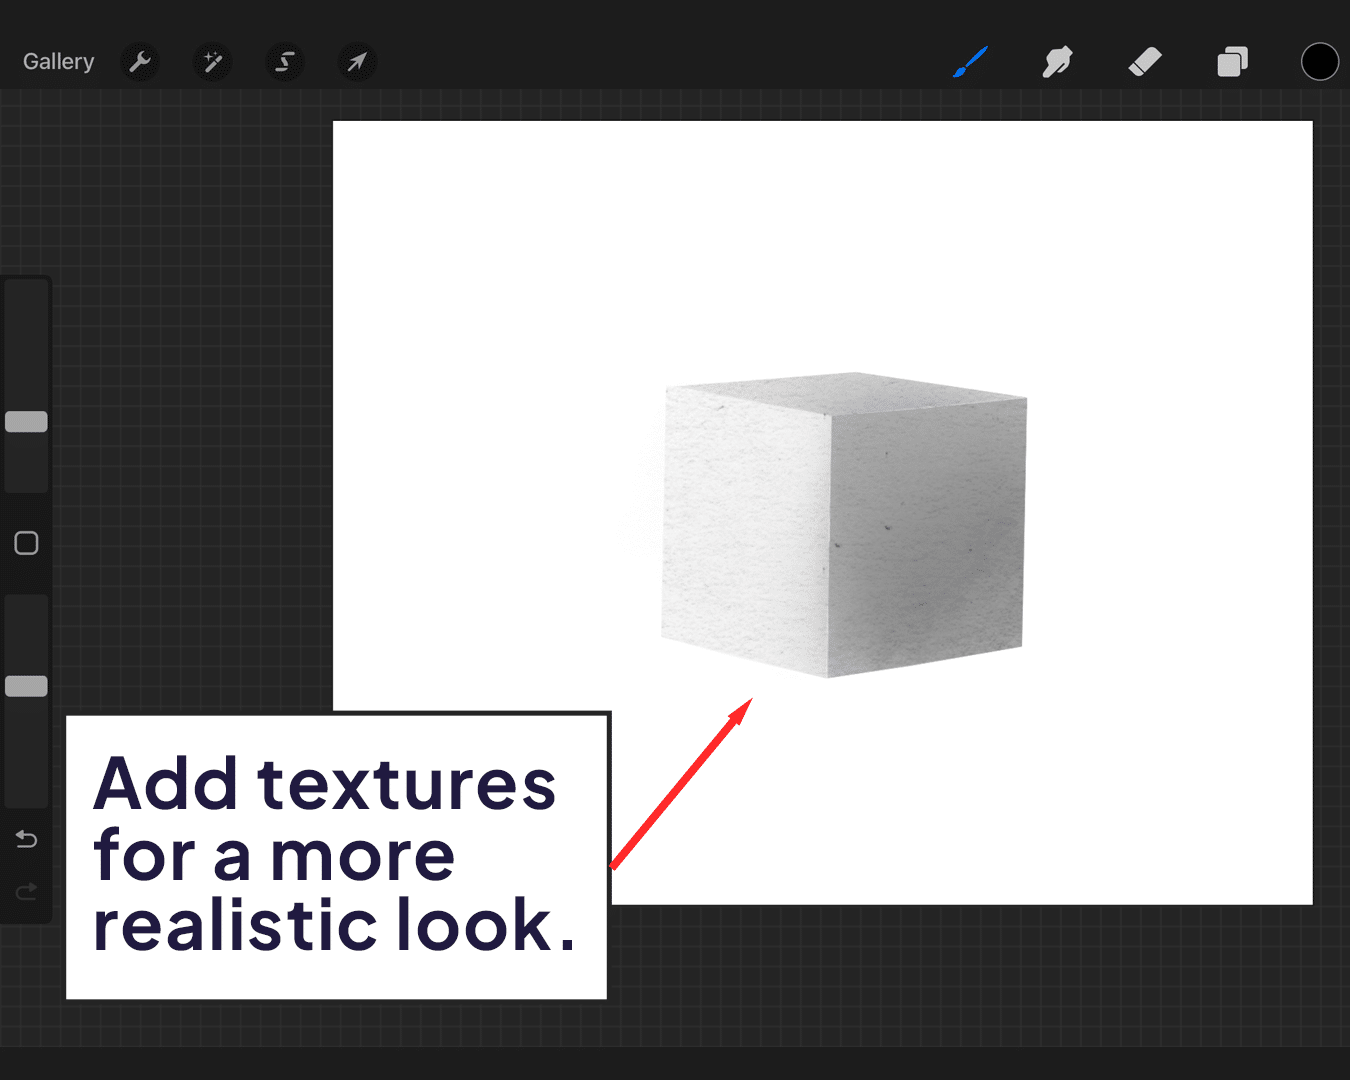
Realistic Textures: To add realism, apply textures to your shapes. Think about how the material of your object would interact with light.
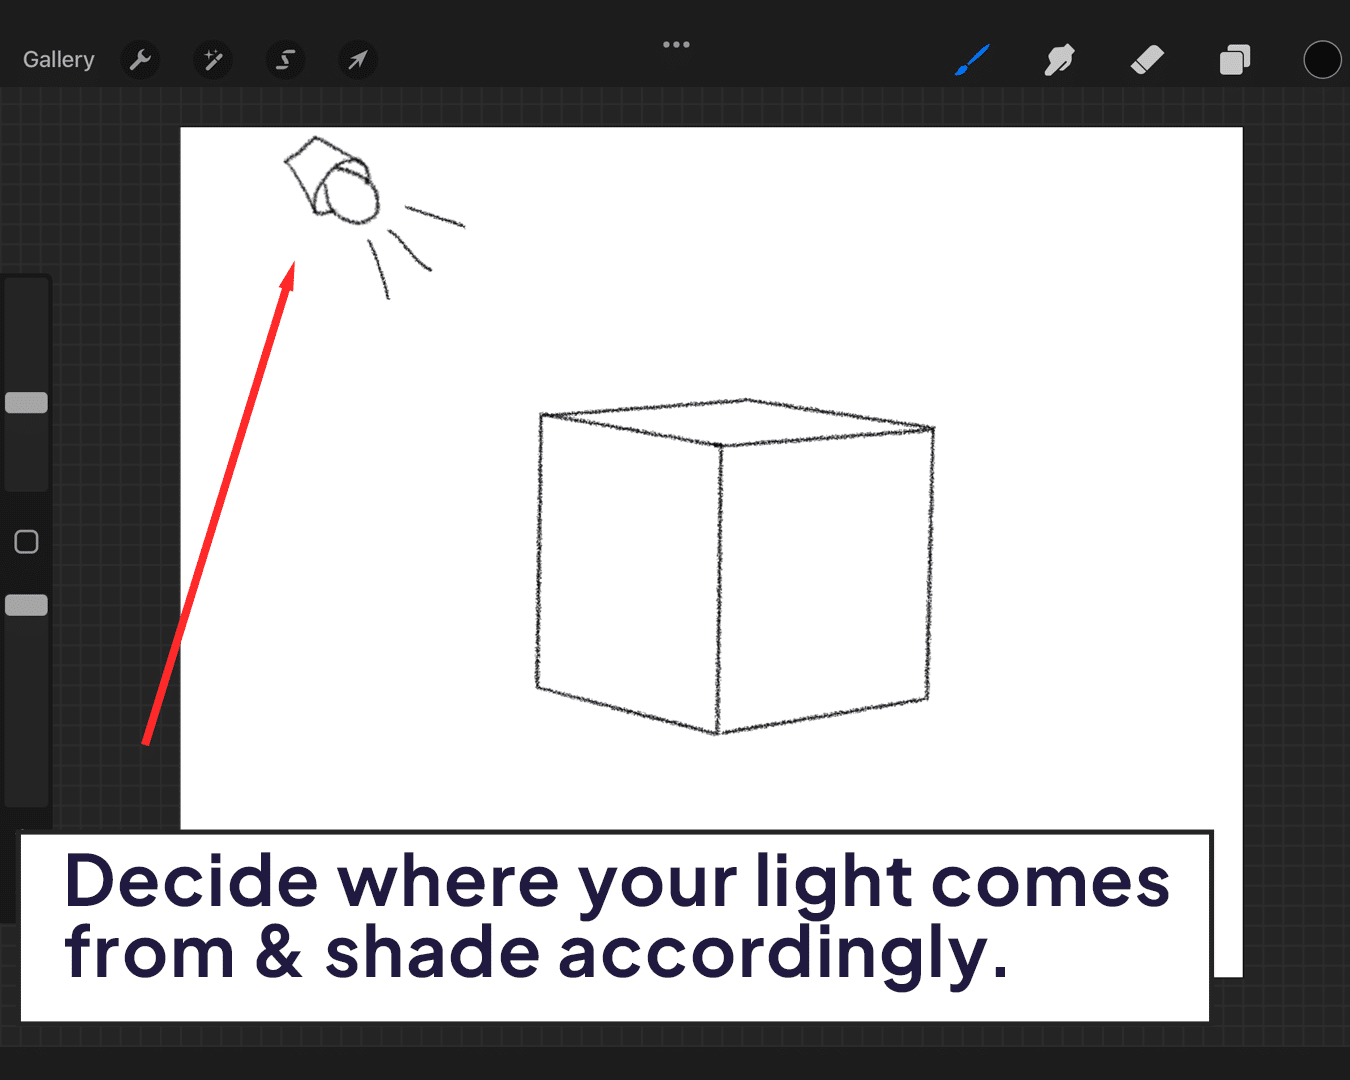
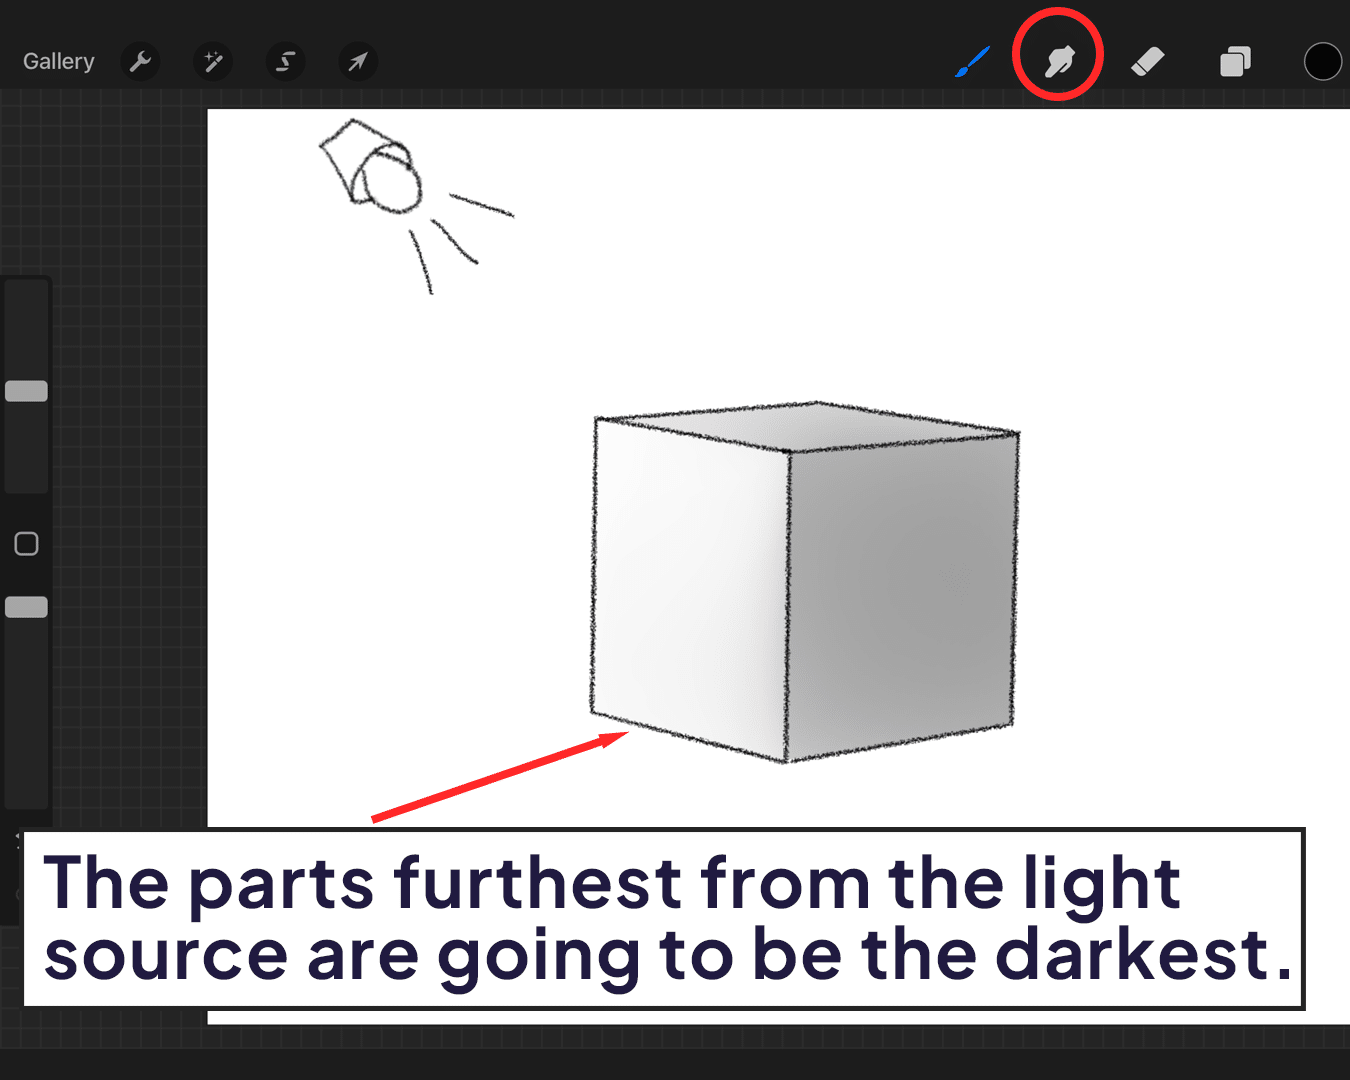
Shade Accordingly: Shade the parts of your shape that are furthest from the light source. Use a soft brush for a gradual transition.
Adding Details and Textures
Realistic Textures: To add realism, apply textures to your shapes. Think about how the material of your object would interact with light.
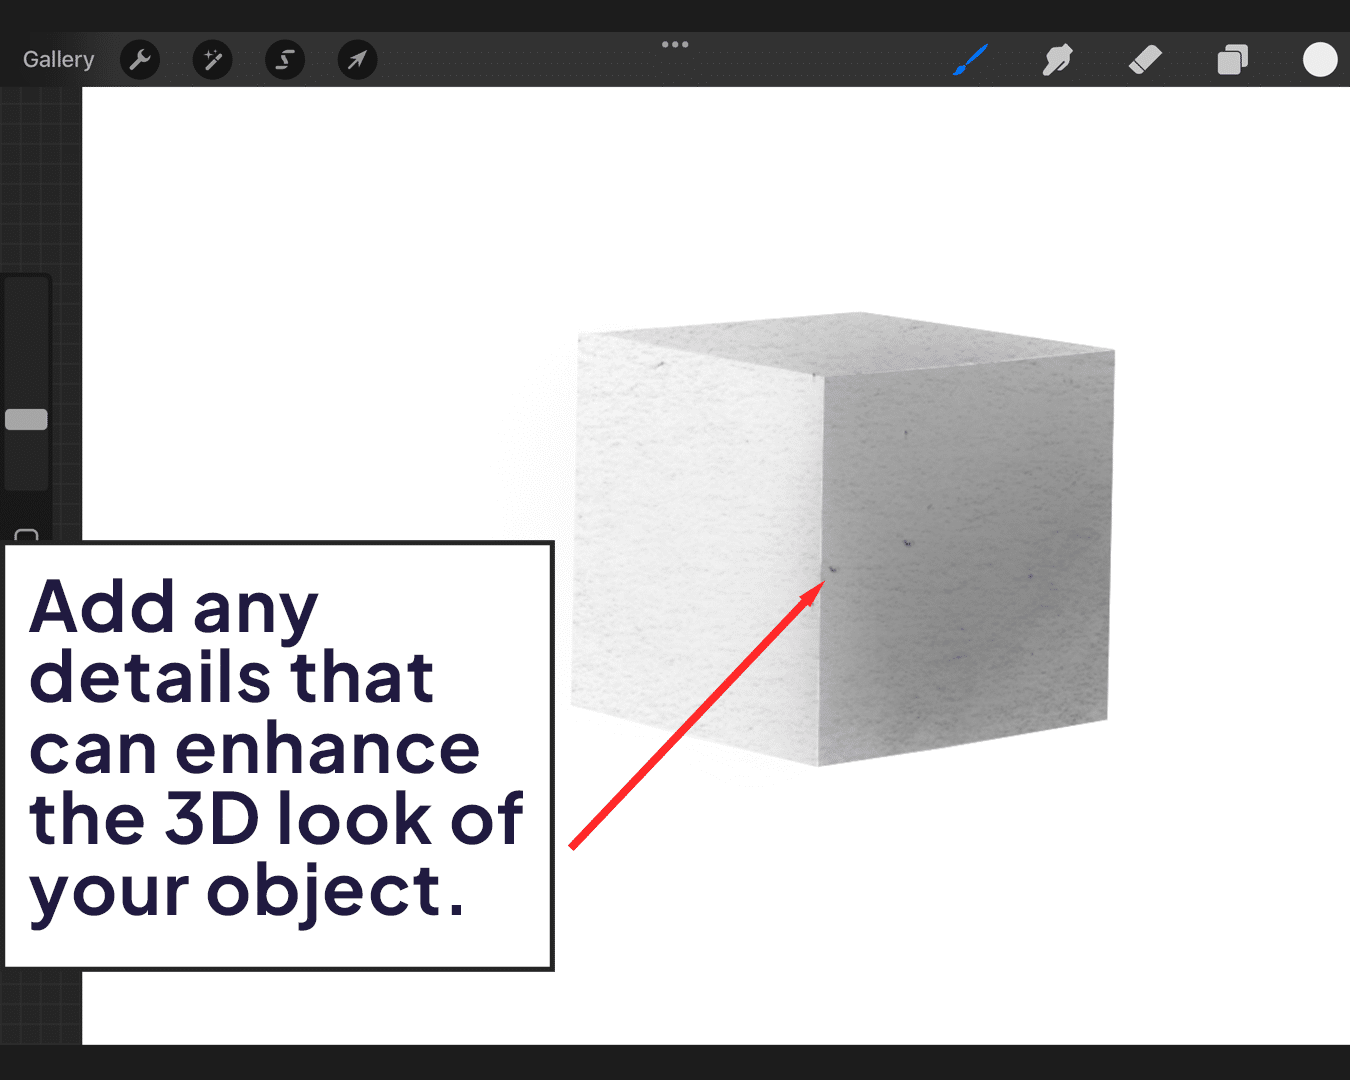
Details Matter: Add small details like reflections, highlights, and shadows to enhance the 3D effect.
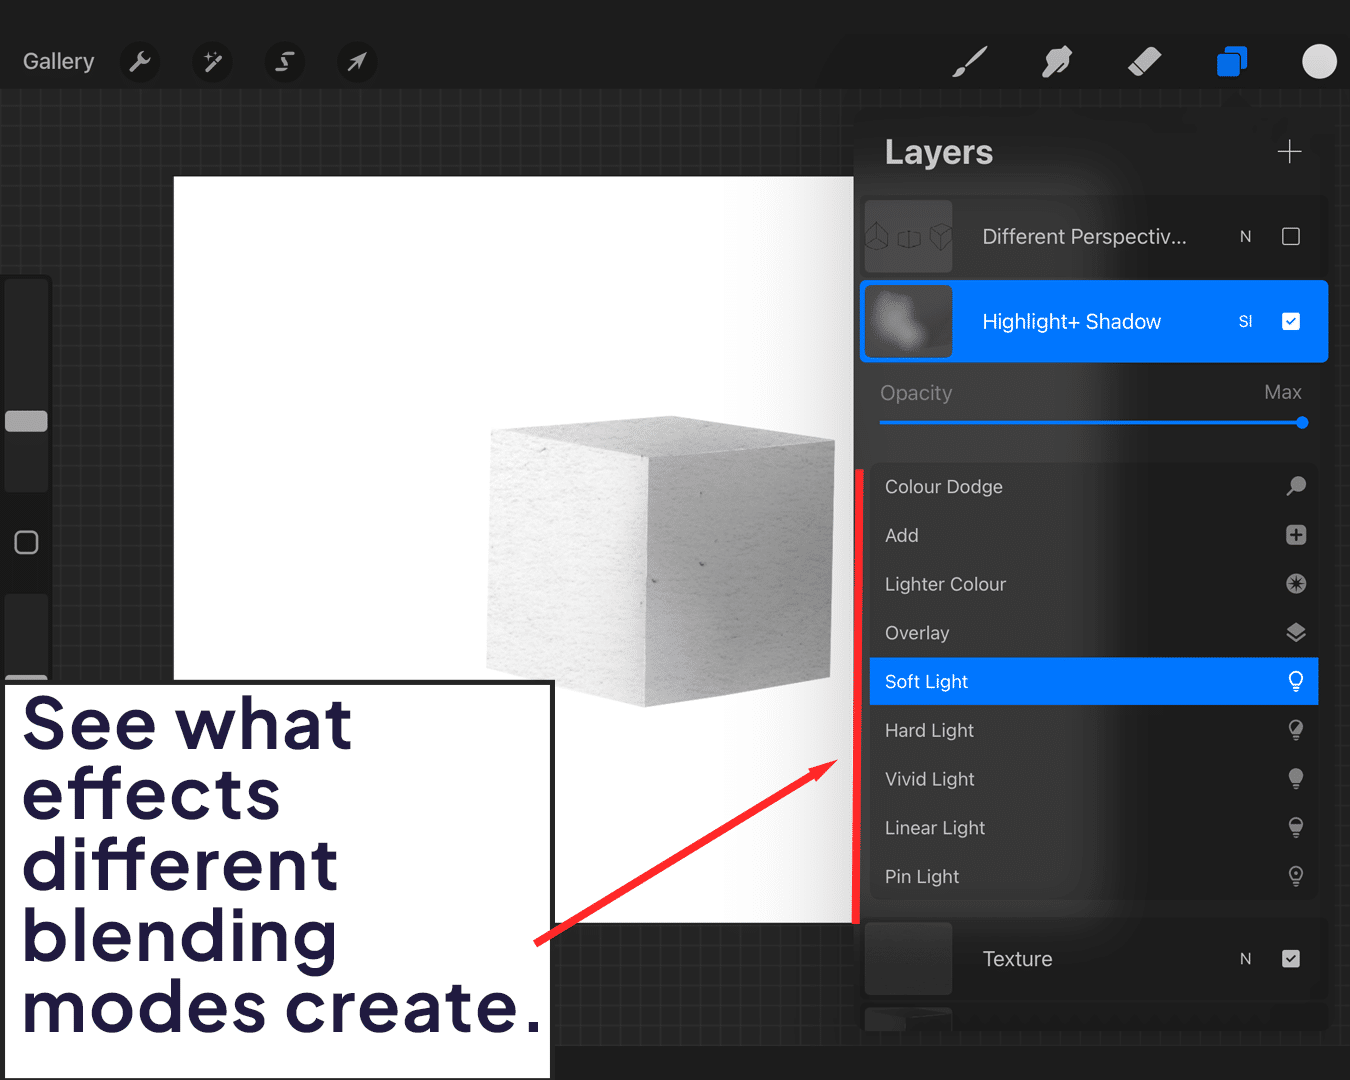
Using Layers Wisely
Separate Elements: Utilize layers for different elements of your drawing. Keep shadows, highlights, and the main object on separate layers for easy adjustments.
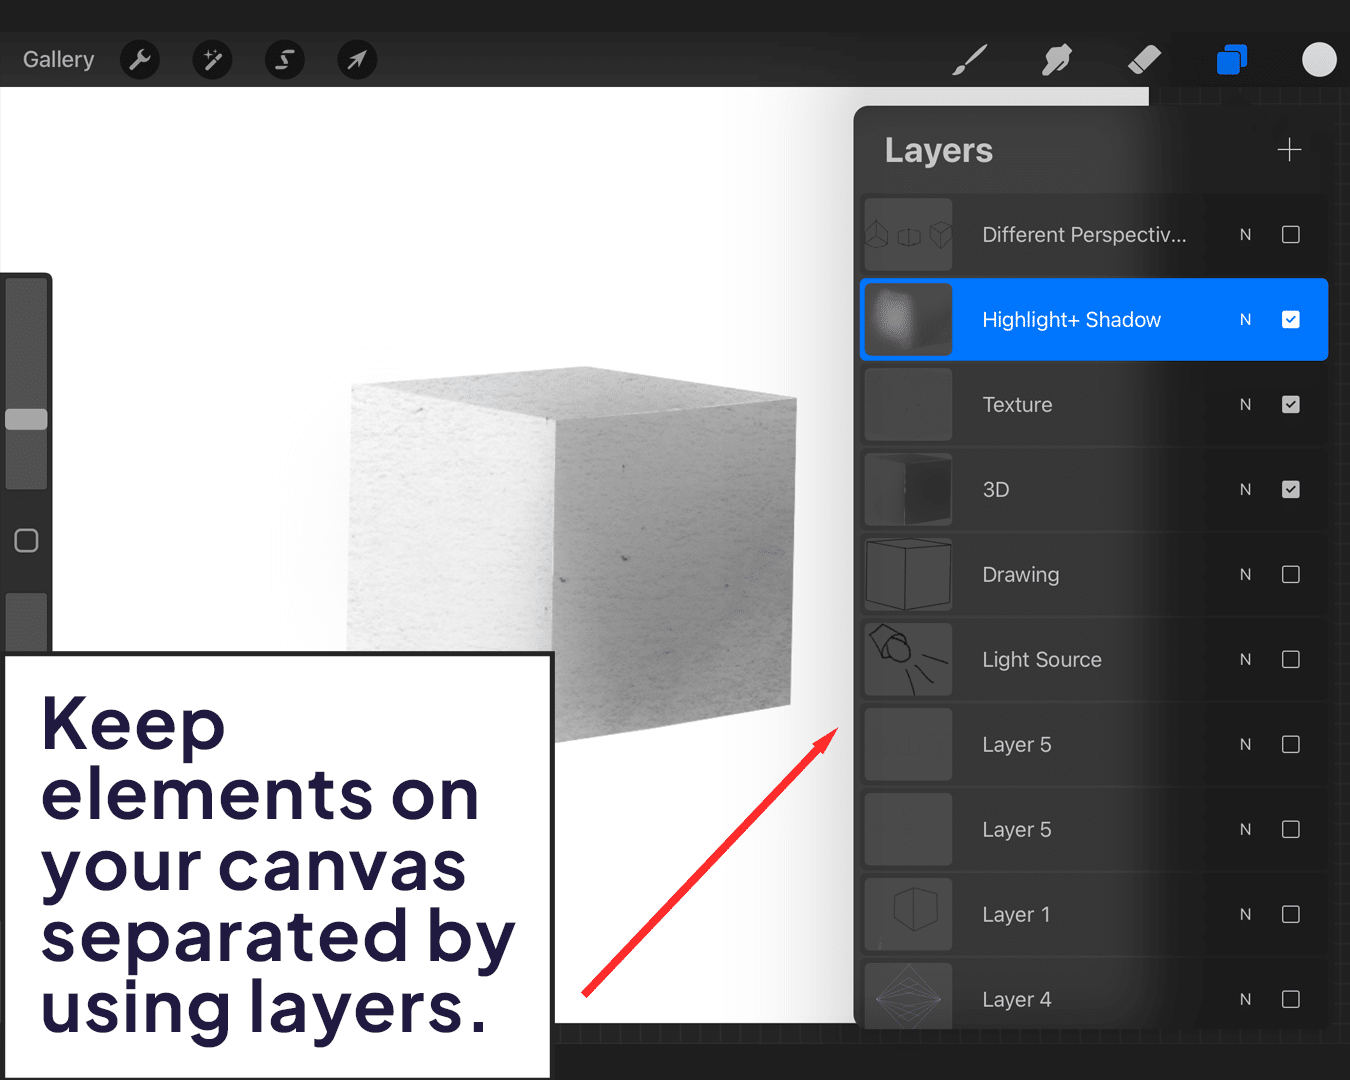
Layer Blending Modes: Experiment with blending modes for shadows and highlights to create a more integrated look.
For those interested in crafting even more complex designs, understanding how to create vector shapes can be incredibly useful. Learn more in this detailed tutorial on how to create vector shapes in Procreate.
Additionally, mastering the art of creating perfect geometric shapes will elevate your designs further. Dive into the techniques here: how to create perfect geometric shapes in Procreate.
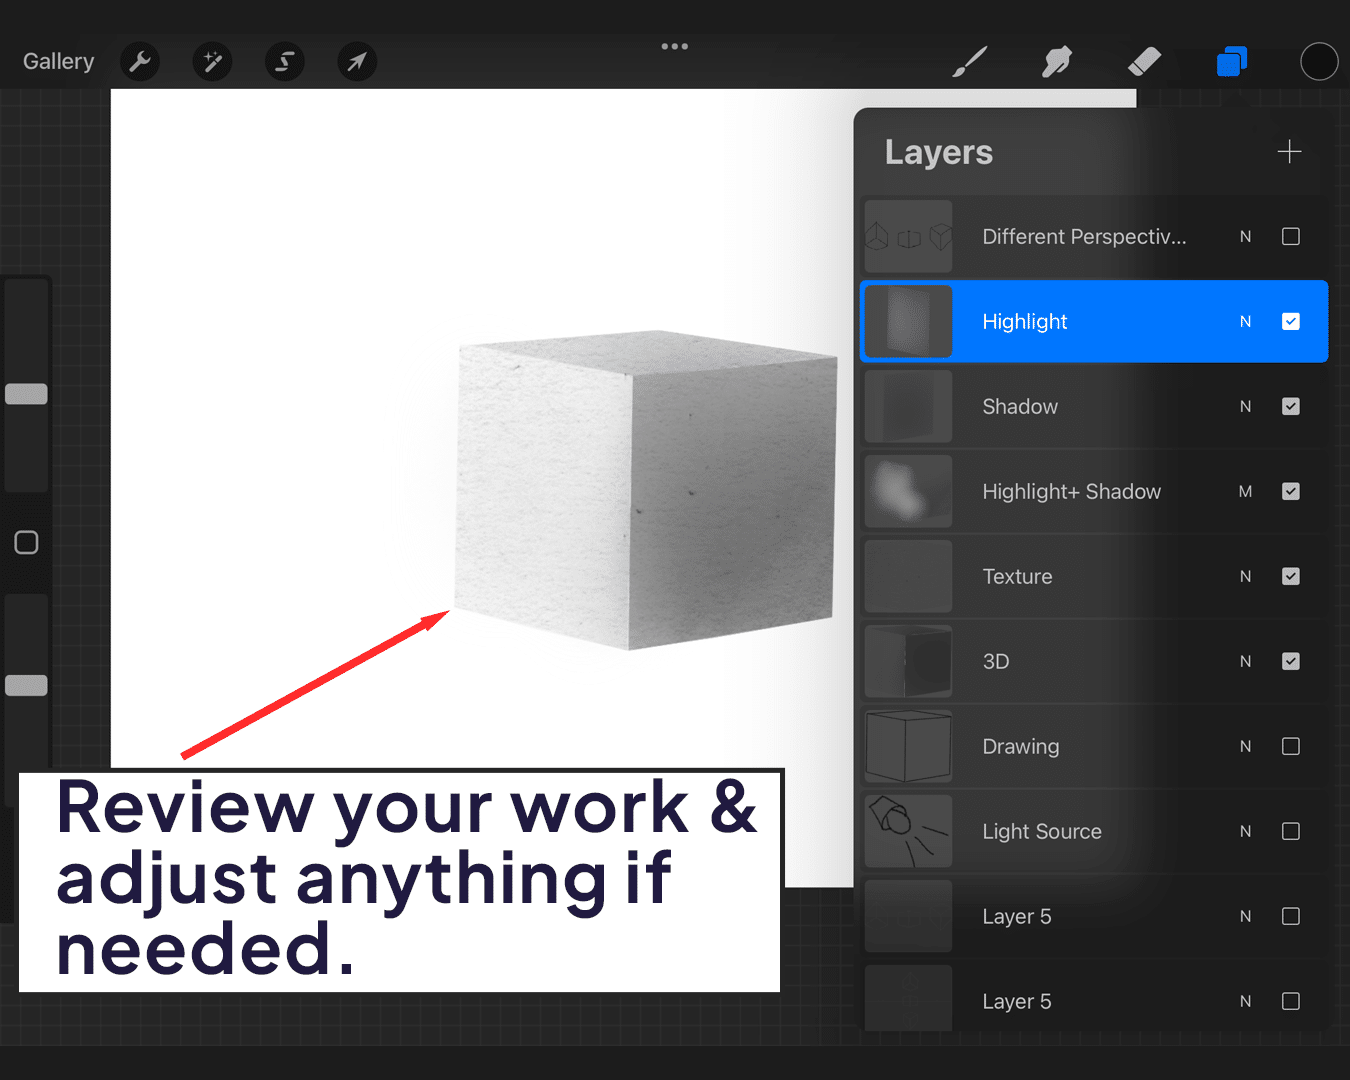
Refining Your Artwork
Review and Adjust: Step back and review your work. Adjust the shading or perspective if needed.
Seek Feedback: Don’t hesitate to ask for feedback. Fresh eyes can spot things you might have missed.
Conclusion
Drawing 3D shapes in Procreate isn’t just about technical skills; it’s a dance between imagination and logic. By understanding the basics of perspective and lighting, and practicing shading and detailing, you can transform those flat sketches into lifelike 3D objects.
Every great artist started with a simple line; now it’s your turn to take that line into a new dimension. So, go forth and give depth to your dreams – one 3D shape at a time!
Happy 3D crafting!


Share this article


