
How To Use Smudge Brush in Procreate

Welcome to the whimsical world of Procreate, where your iPad transforms into a canvas and your fingers, or stylus, into powerful tools of creation.
In this realm, the smudge brush isn’t just a tool; it’s a wand of artistic wizardry, blending colors and textures with a mere swipe. But how do you harness this magical tool to elevate your digital art? Fear not, intrepid artist!
Join me on this enchanting journey as we unlock the secrets of using the smudge brush in Procreate.
Summoning the Smudge Brush
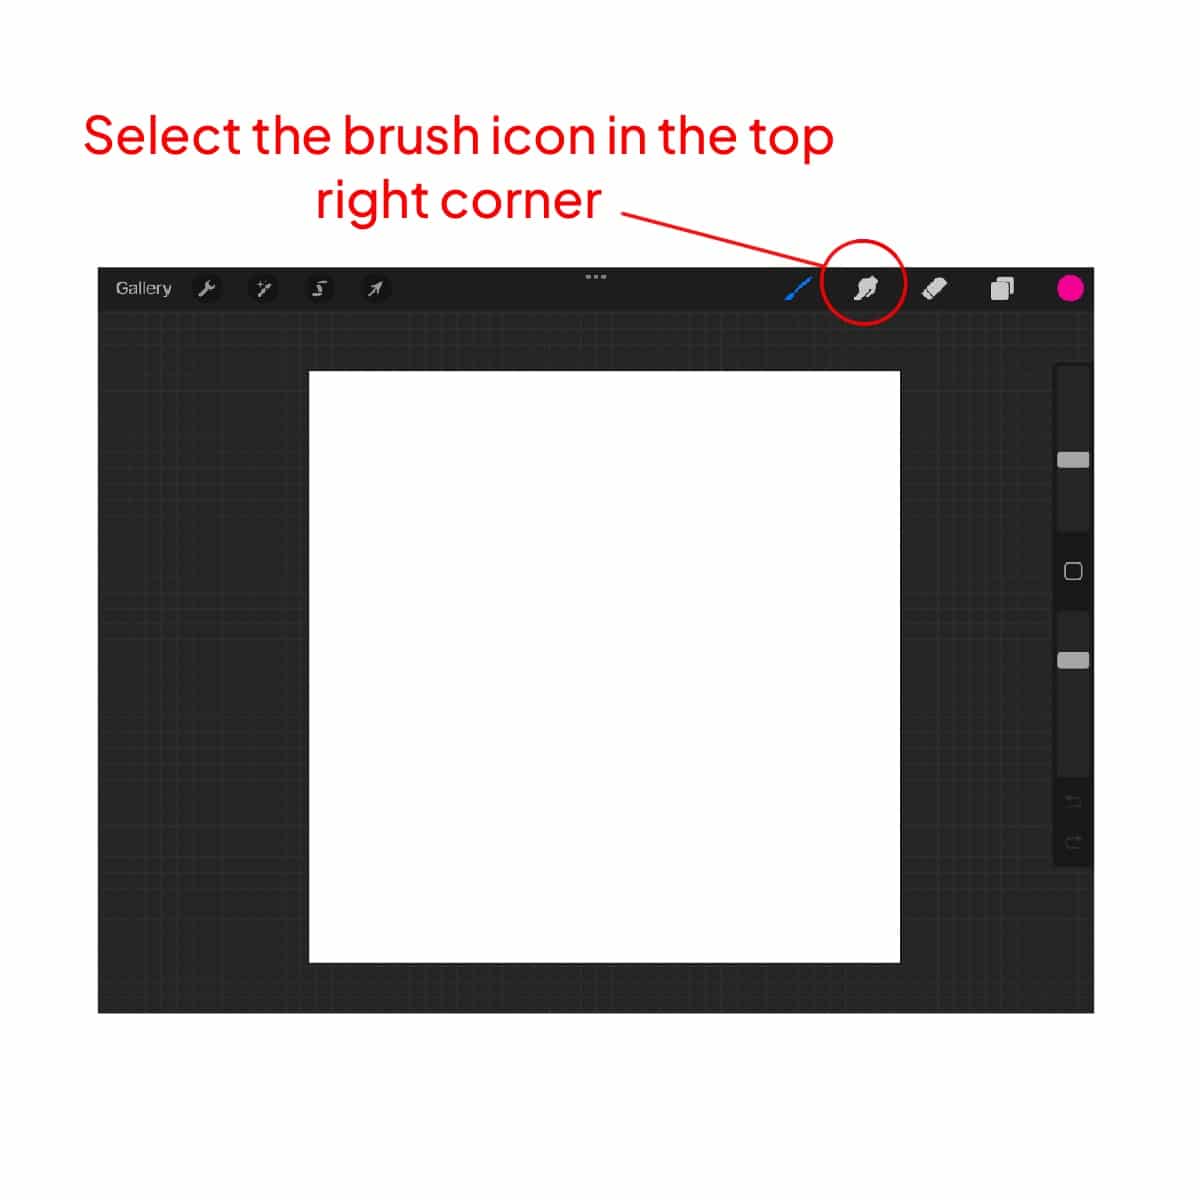
To begin, let’s locate our magical instrument. Open Procreate and choose your project.
Look for the brush icon at the top-right of your screen, tap it, and find the smudge tool icon (resembling a finger-smearing paint).
Selecting Your Magical Implement
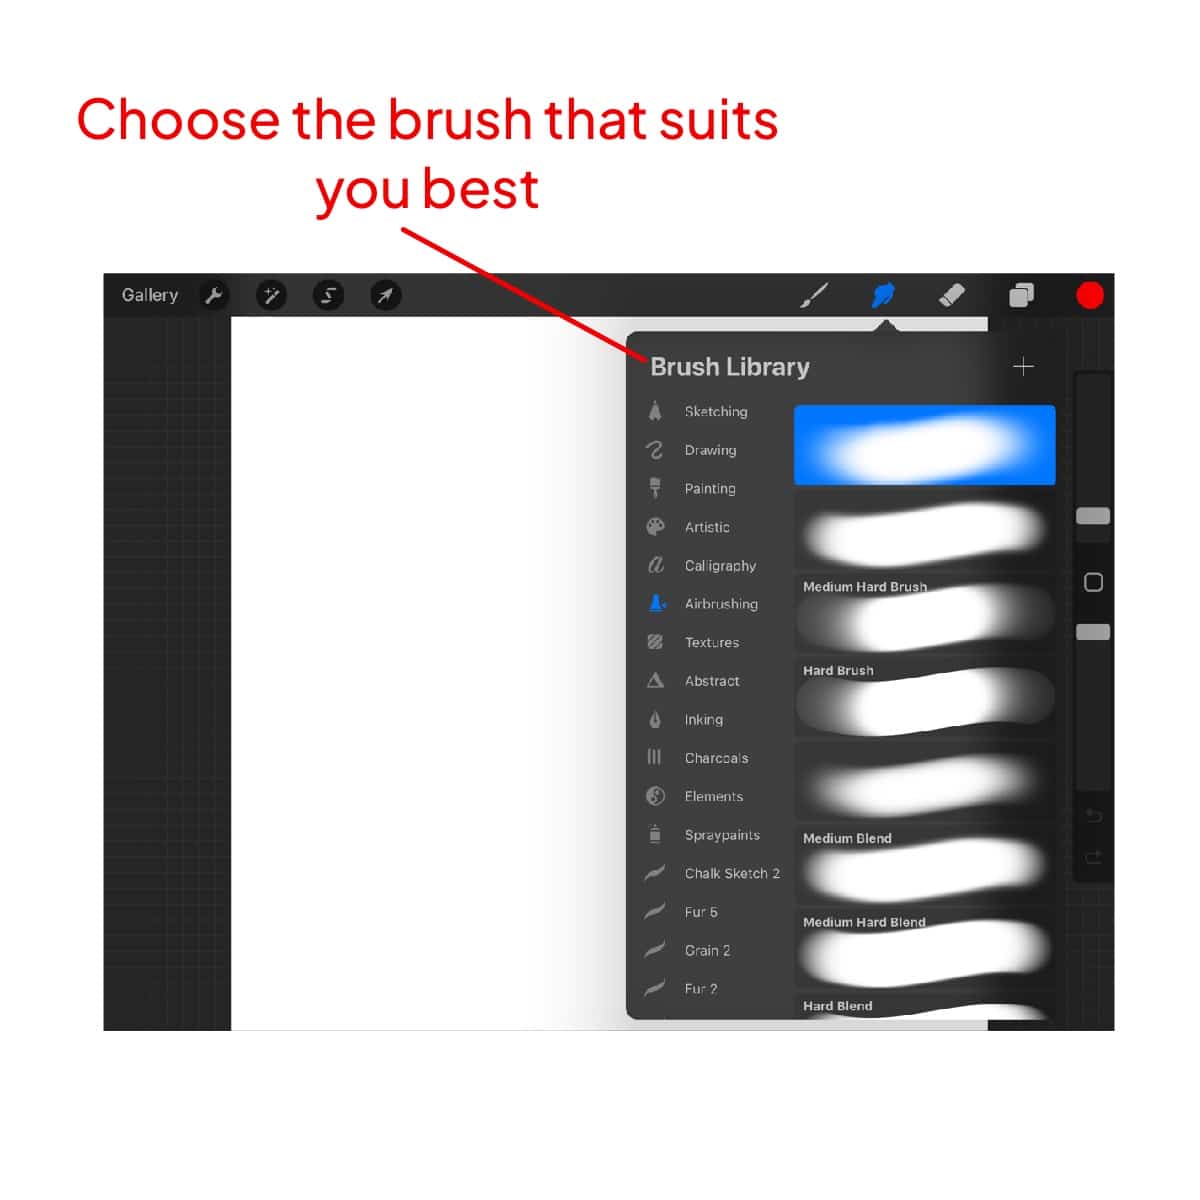
The smudge brush comes in various forms – from soft and fluffy for delicate blending to grainy for adding texture. It’s essential to select the right brush for your task.
For instance, if you’re working on skin tones, a softer brush can create natural transitions, while a textured brush might be perfect for rough surfaces like tree bark or fabric.
The Art of Smudging
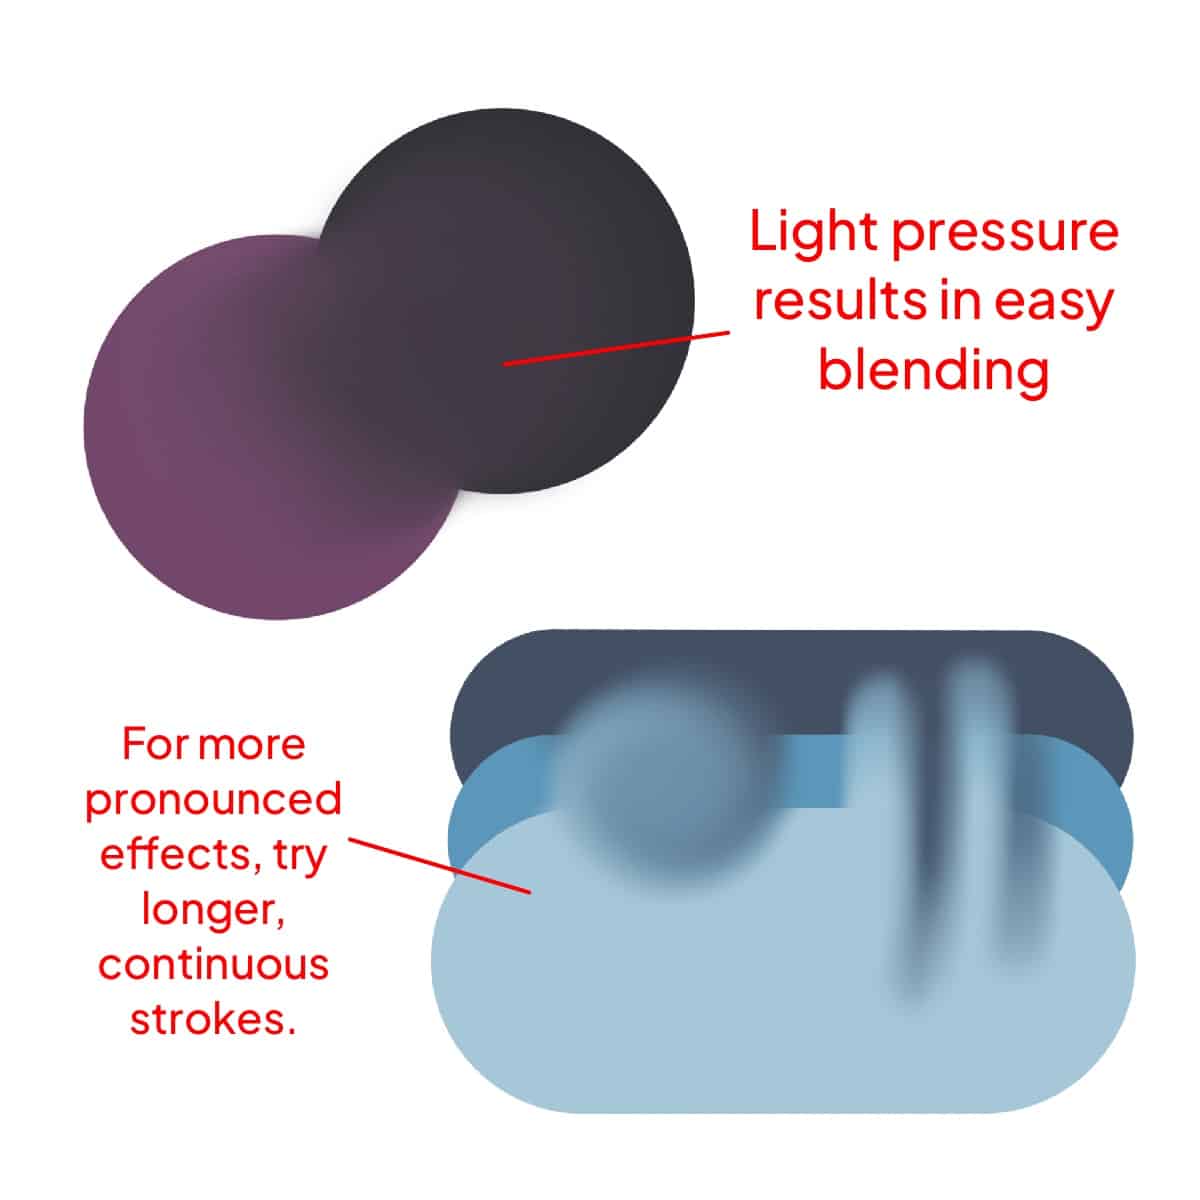
The magic lies in the pressure. Gentle pressure results in a light blend, while a firmer touch dramatically moves and mixes colors.
Directional Mastery:
The direction of your smudge strokes is crucial.
For subtle transitions, use a back-and-forth motion. For more pronounced effects, try longer, continuous strokes.
Customization
Tap the smudge tool again to access settings like opacity and size.
Adjust these to fit the needs of your artwork.
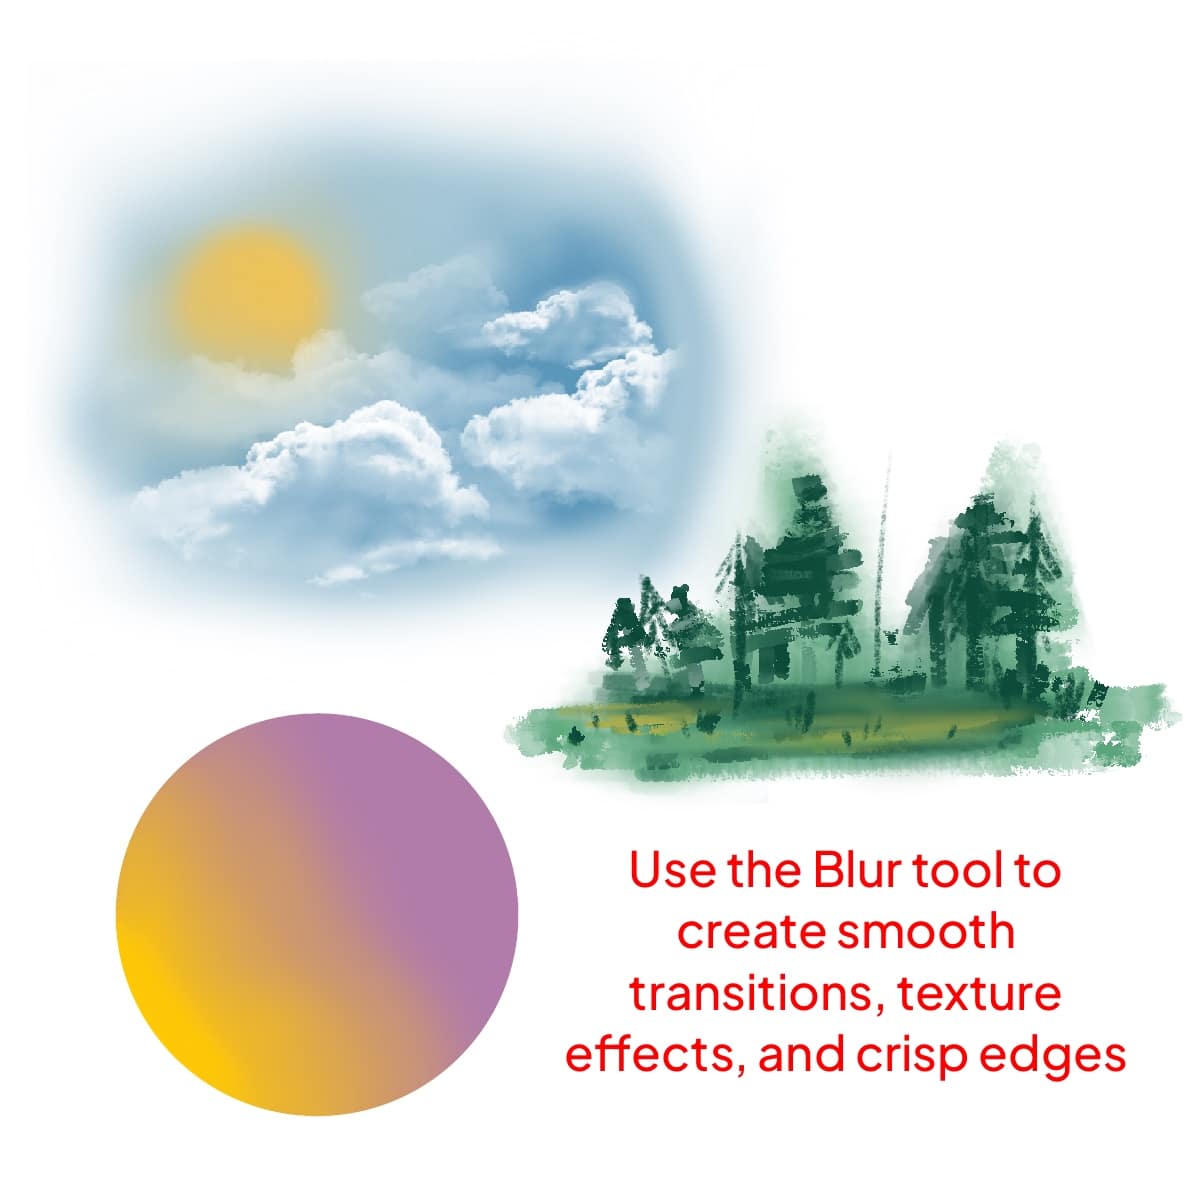
Smooth Transitions:
Perfect for creating gradients or blending colors in skies, fabric, or skin tones.
Textural Effects:
Some brushes add texture while smudging, is ideal for landscapes, clothing, and other elements where texture adds depth.
Refining Edges:
If colors bleed outside your lines, the smudge brush can help tidy up the edges without losing the integrity of the work.
Advanced Techniques
By smudging colors on separate layers, you can create complex, multi-dimensional effects.
Use the smudge brush in tandem with other brushes. Lay down color with a paint brush, then blend with the smudge tool for dynamic results.
Varying the opacity of your smudge brush can create different effects, from barely-there transitions to bold, painterly strokes.
Conclusion
The smudge brush in Procreate is a tool of endless possibilities, transforming simple strokes into works of art. Remember, every great digital artist started with a single swipe. Experiment, practice, and don’t be afraid to make mistakes.
Your Procreate journey is a path of discovery, and the smudge brush is your trusty companion. To further explore the nuances between this and other tools, dive into the difference between pencil brush and smudge brush in Procreate.
Happy smudging, and may your creative journey be as enchanting as the art you create!
P.S.: Stay tuned for more Procreate adventures and tips to help you bring your digital art dreams to life! 🎨✨🌟


Share this article


