
How To Make Inking Brush In Procreate?

Without the know-how to create your own inking brushes in Procreate, you’re limiting your artistic arsenal. Imagine being unable to craft that precise line or perfect shade just because you lack this crucial skill.
This tutorial is your key to unlocking the full potential of Procreate’s brush tools, ensuring you’re always equipped with the right brush for every stroke of genius. Let’s get technical and specific, and turn you into a Procreate brush-making.
What Will You Need
Before we start, make sure you have access to:
- iPad: Procreate is an iPad-exclusive application, so you’ll need an iPad to use it.
- Procreate App: Ensure you have the Procreate app installed. It’s available for purchase in the App Store.
- Shape and Grain Source Images (Optional): If you want to create a brush with a custom shape or texture, prepare or have access to these images. They can be either created within Procreate or imported from external sources.
If you want to save time and start making art right away, dive into the world of custom Procreate Ink Brushes. For artists looking to further expand their brush collection with unique textures, dive into the world of custom Procreate brushes with our guide on how to create an alcohol ink brush in Procreate.
Creating an Inking Brush in Procreate (Step-By-Step)
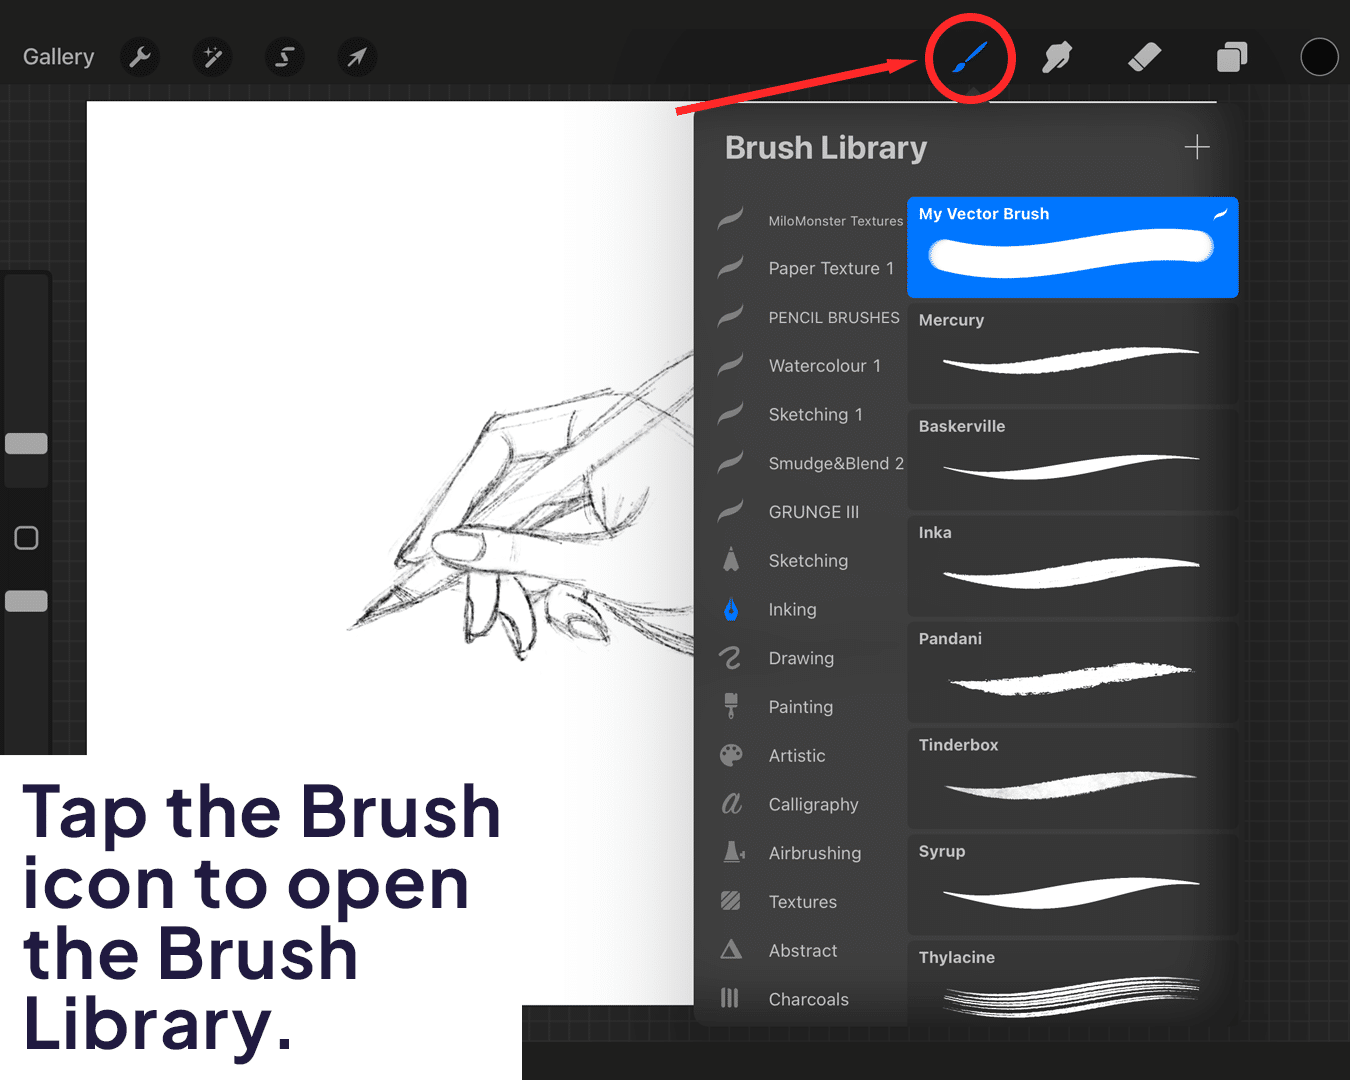
Step 1: Access the Brush Library
Open the Procreate app on your iPad.
Tap the brush icon, located at the top right of the screen, to open the Brush Library. This library houses all your current brushes and is where you’ll create new ones.
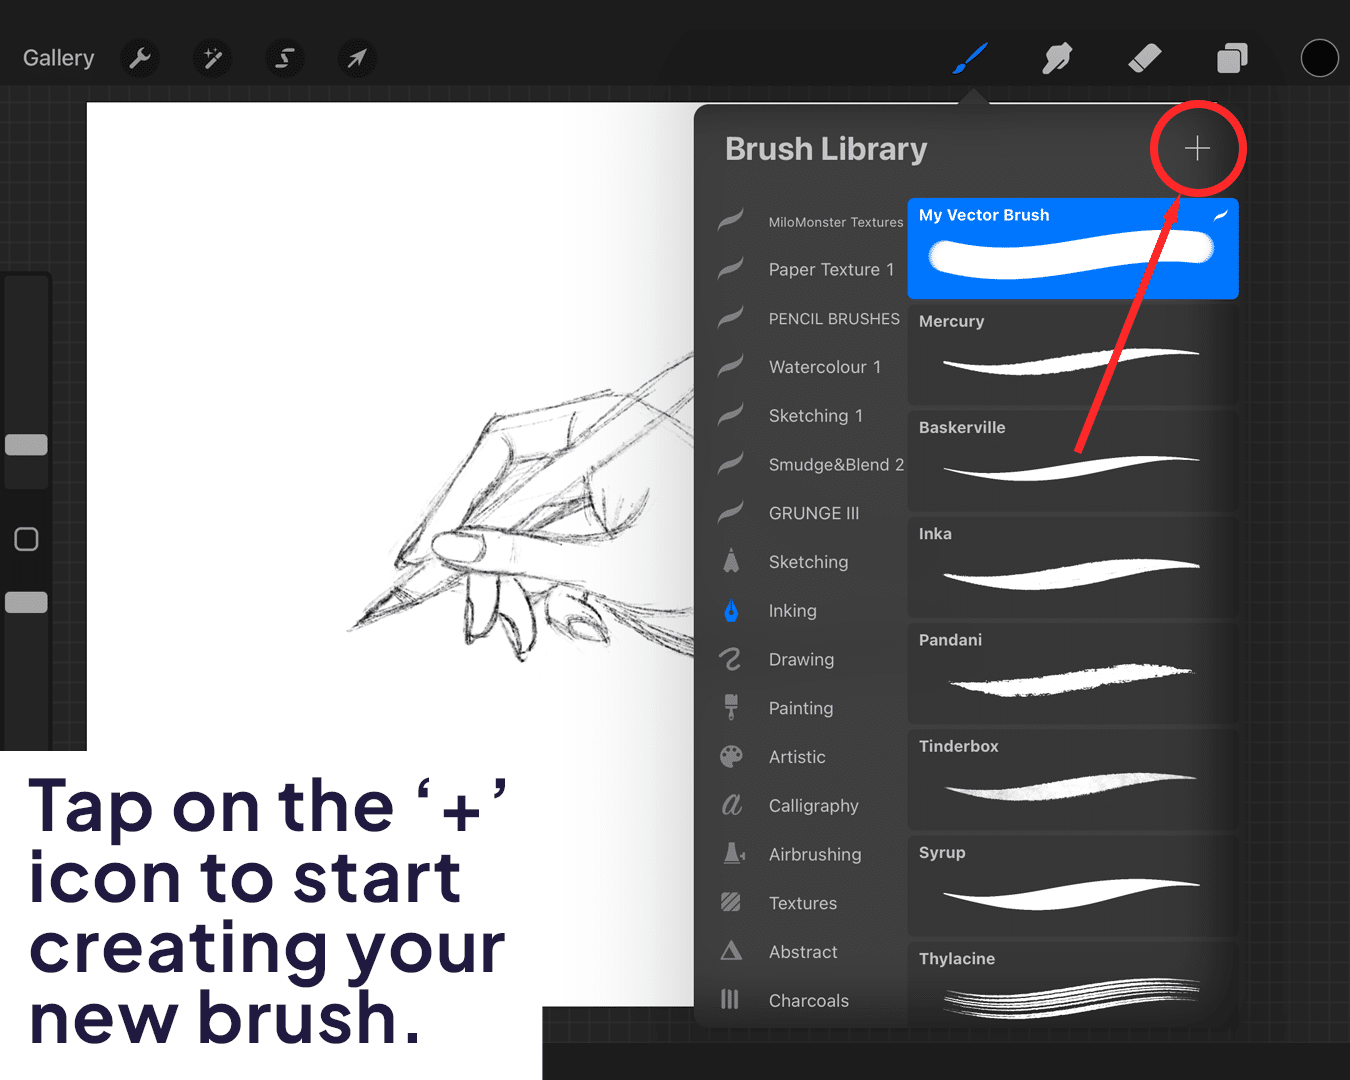
Step 2: Begin Your Brush Creation
In the Brush Library, look for the ‘+’ icon at the top right corner.
Tap on it to create a new brush. This action opens the brush settings panel where you’ll design your custom brush.
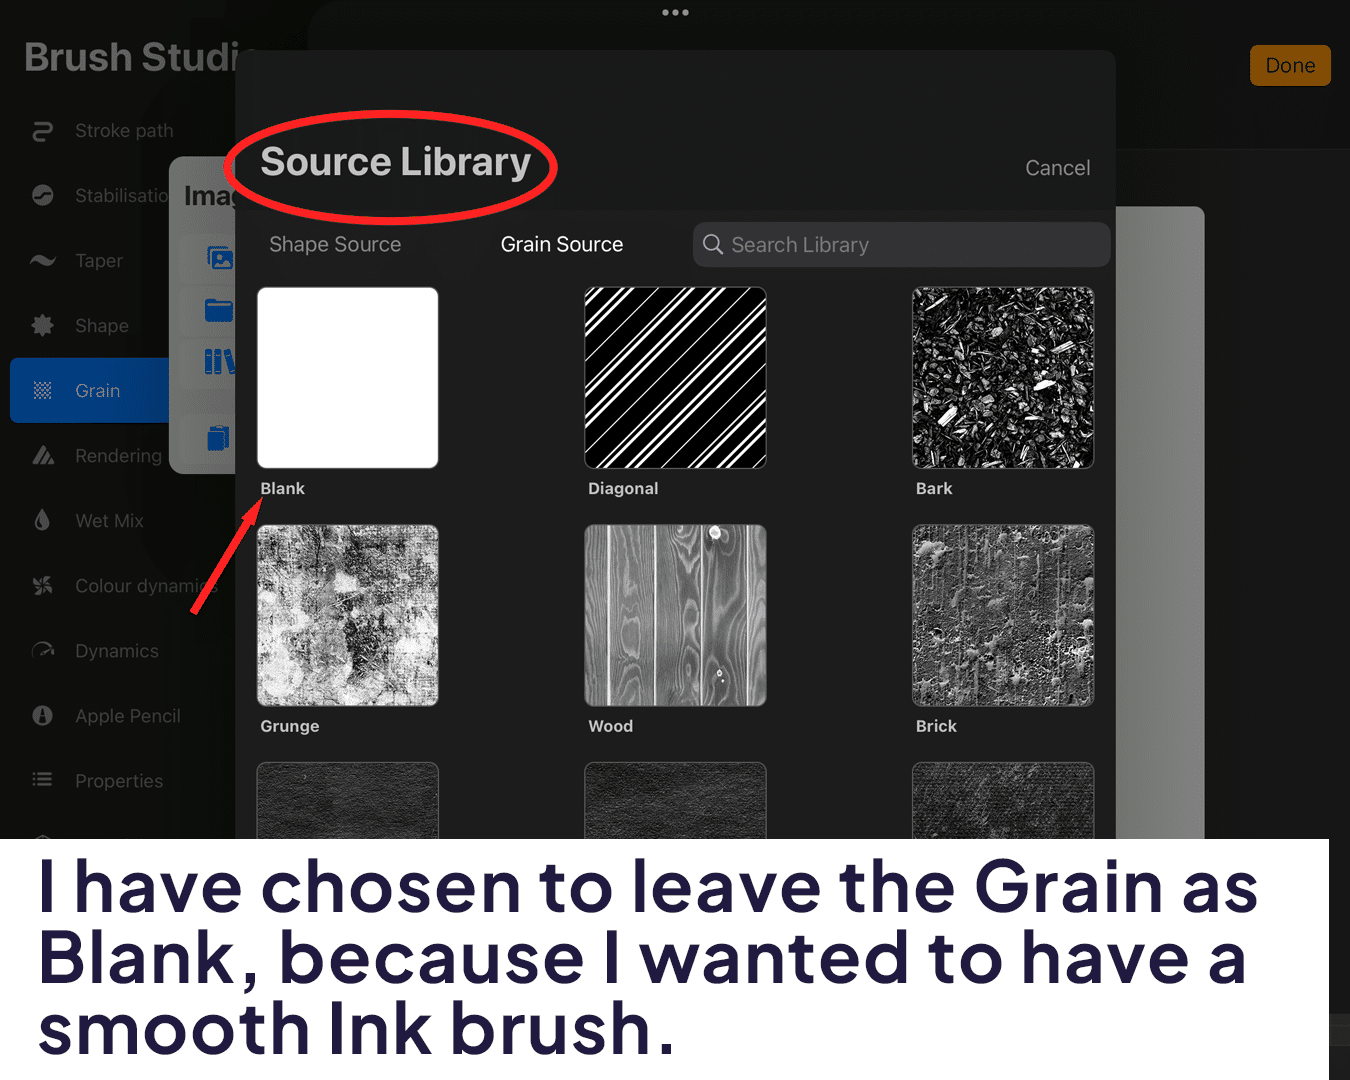
Step 3: Selecting Your Shape and Grain
In the brush settings, you’ll find two critical sections: Shape and Grain.
Shape: This determines the basic outline of your brush stroke. Tap on the ‘Shape’ tab, and then ‘Edit’ to choose or import a shape source. You can use default shapes or import your custom shapes.

Grain: This defines the texture within your brush stroke. Select the ‘Grain’ tab, and similar to Shape, tap ‘Edit’ to choose or import a grain source. Grain can range from smooth to highly textured, affecting the brush’s overall feel.
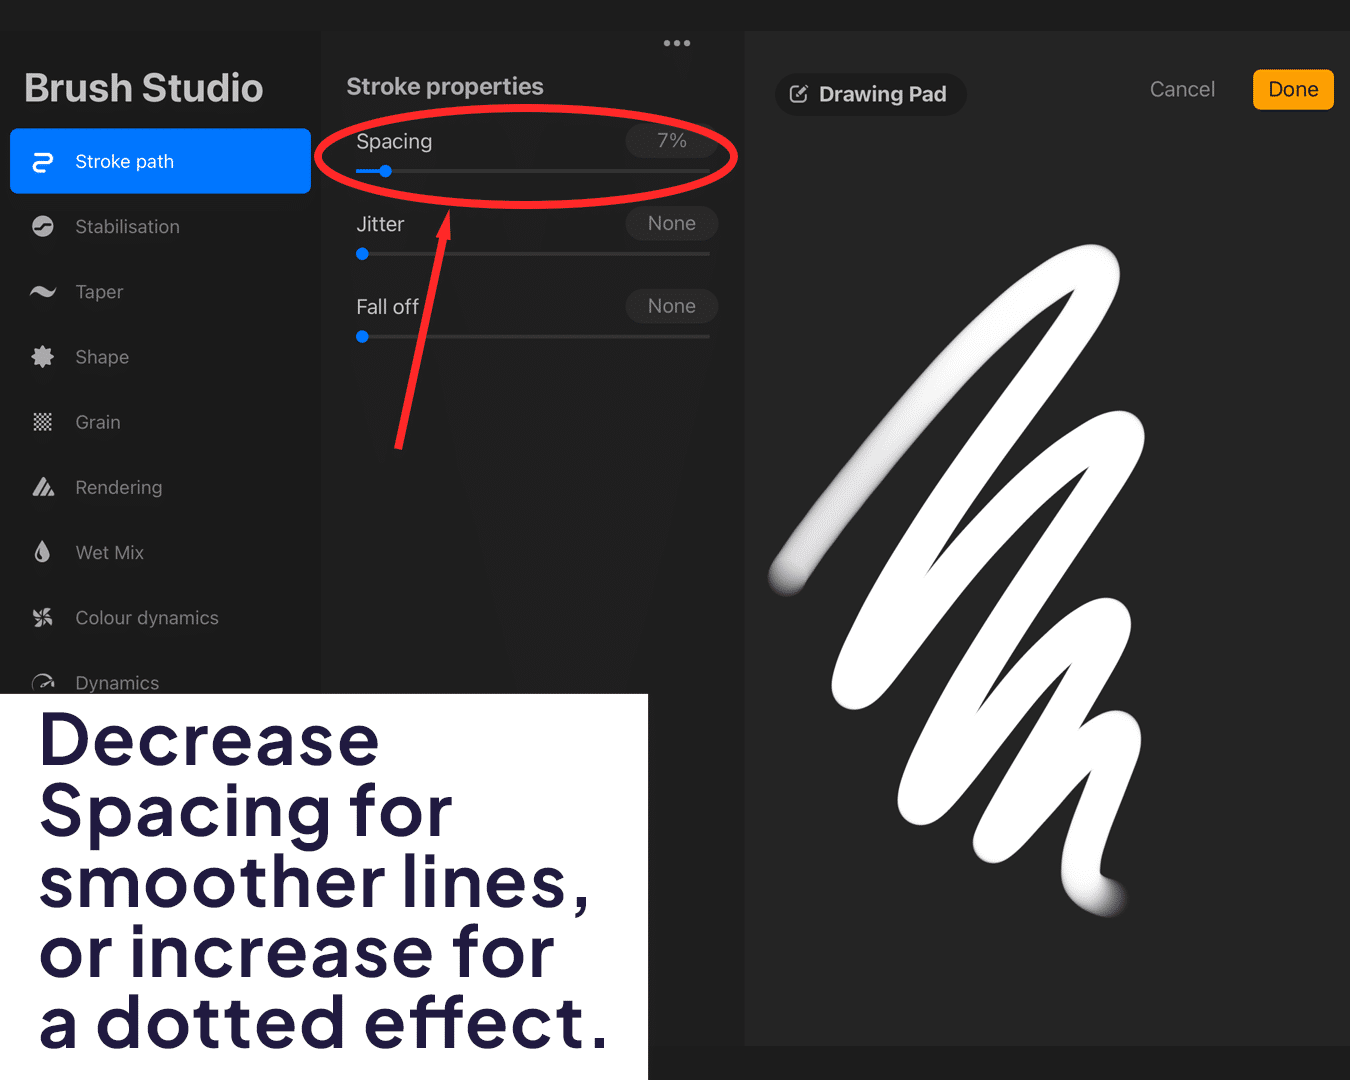
Step 4: Fine-Tuning Brush Settings
Spacing: Found under the ‘Stroke’ tab, spacing controls the distance between each instance of the brush shape along a stroke. Decrease for smoother, continuous lines, or increase for a dotted effect.
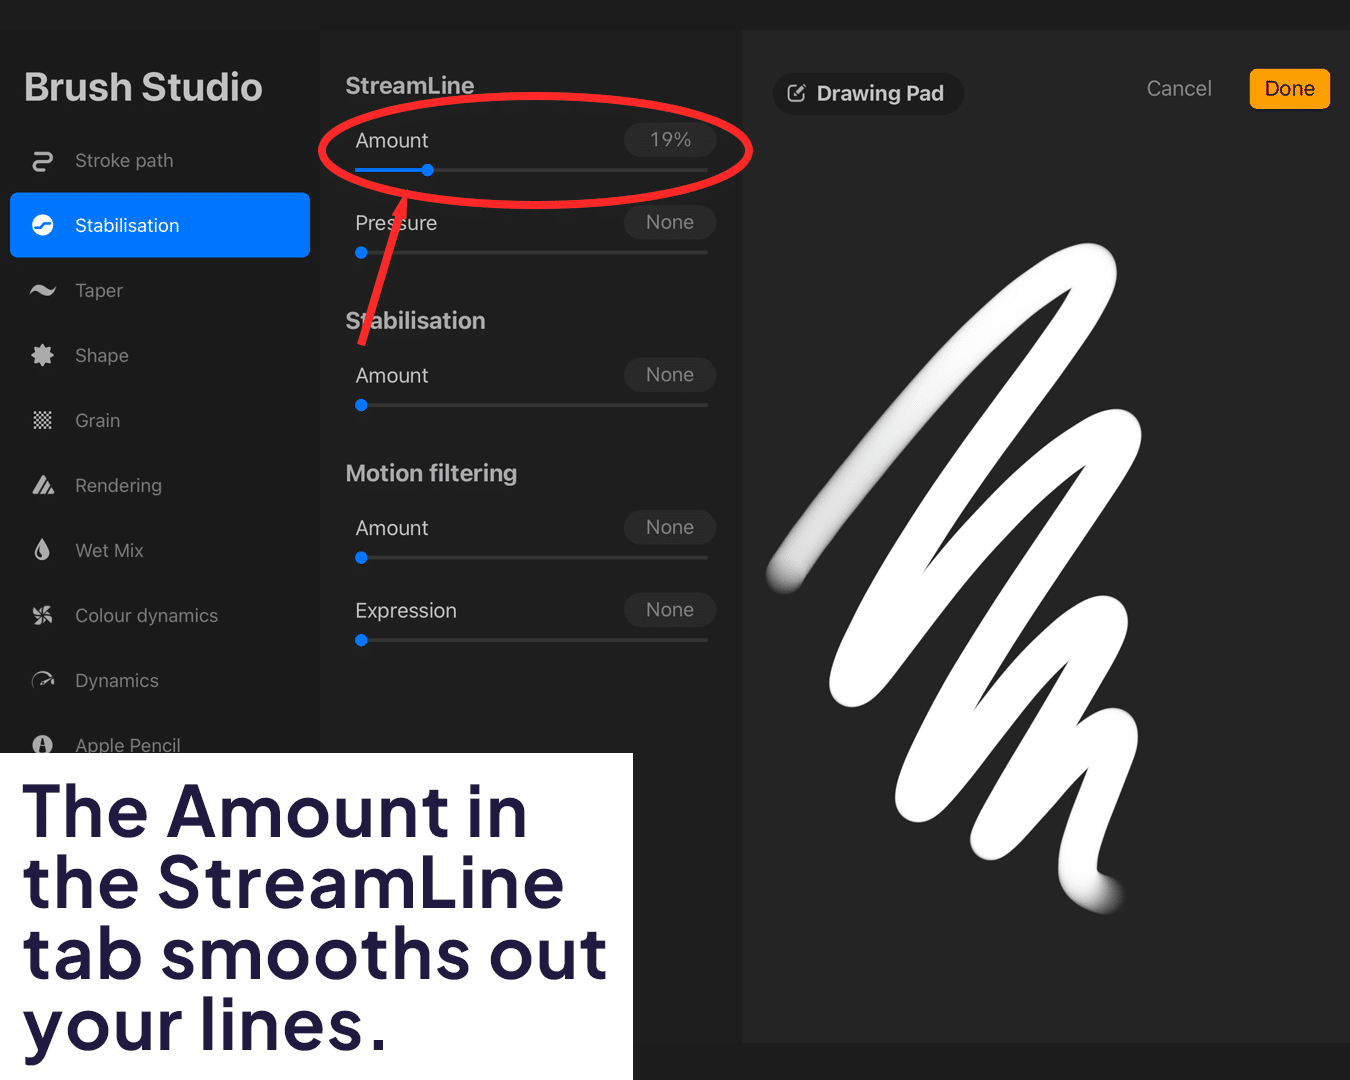
Streamline: Also under the ‘Stroke’ tab, this setting stabilizes your lines, making them smoother. It’s especially useful for hand lettering or precise line work.
Jitter: Located in the ‘Scatter’ section under the ‘Stroke’ tab, the jitter introduces randomness in stroke placement, adding a natural, uneven look to your lines.
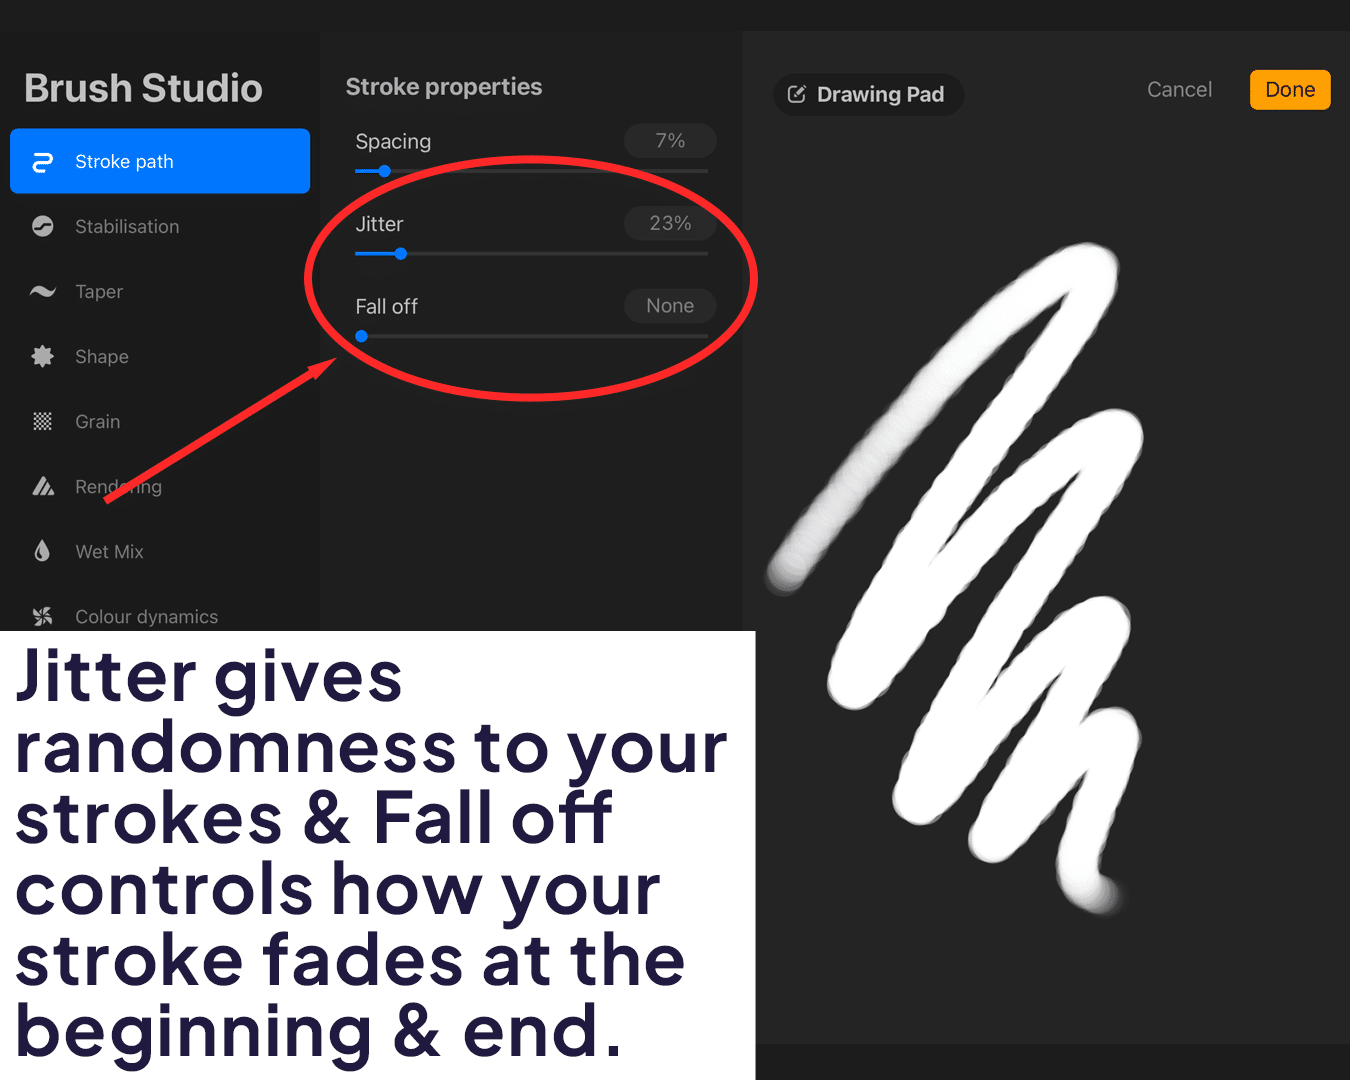
Fall Off: This setting, found in the ‘Taper’ section under the ‘Stroke’ tab, controls how your stroke fades at the beginning and end, useful for creating a brush that mimics pen or marker behavior.

Step 5: Testing and Adjusting
After adjusting your settings, use the canvas on the right side of the brush editor to test your brush.
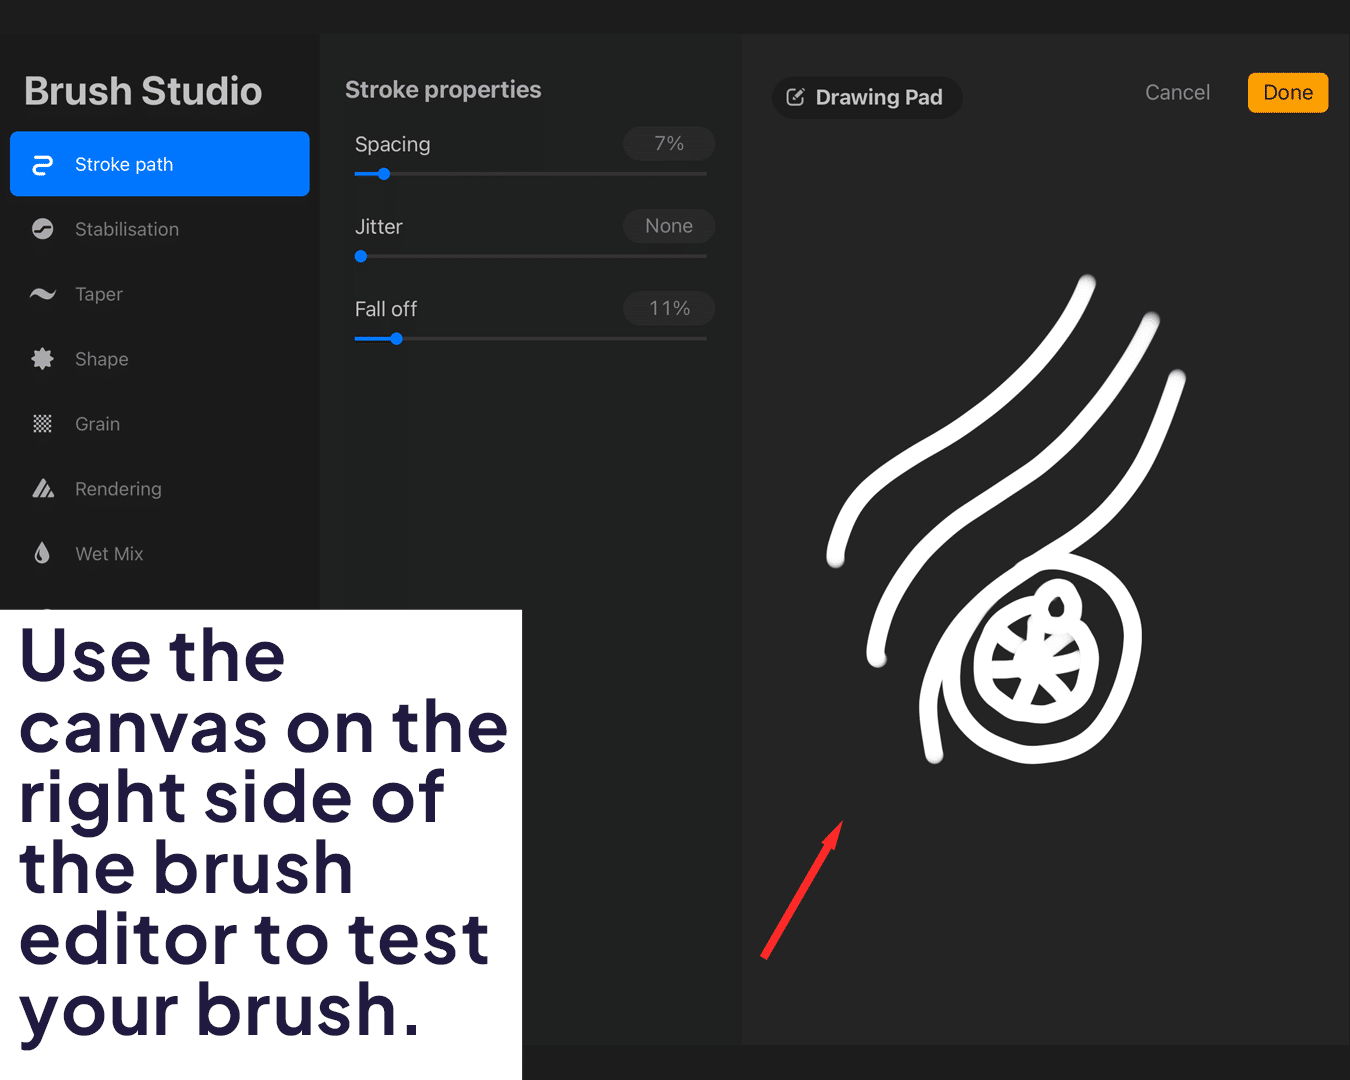
Draw various strokes to evaluate how your brush performs.
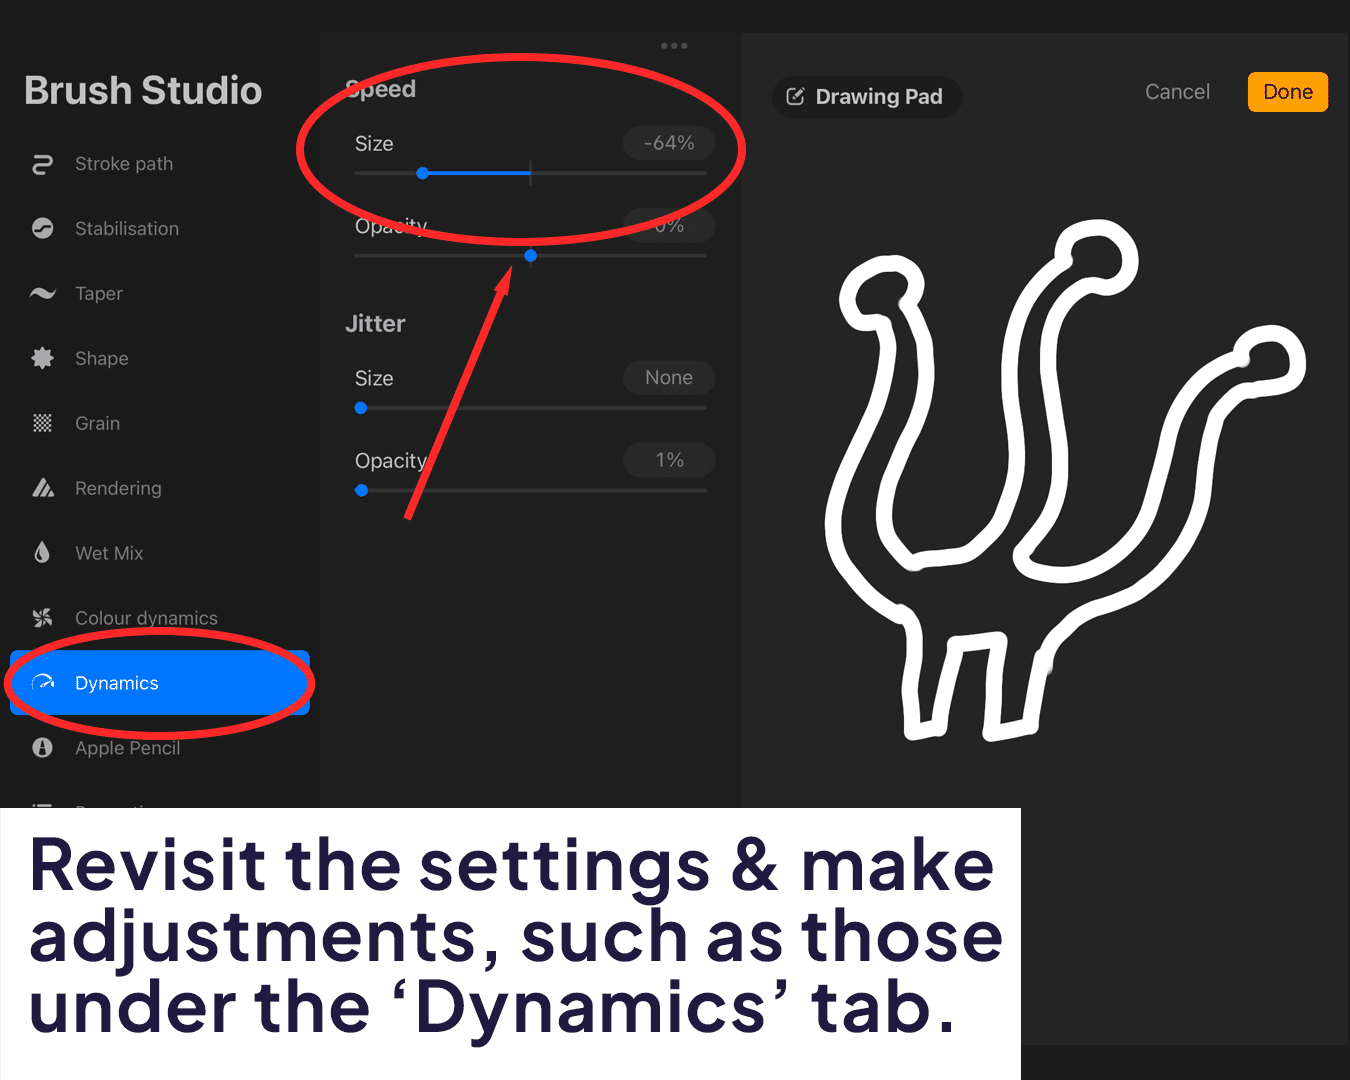
If the brush doesn’t behave as expected, revisit the settings and make adjustments. This might involve fine-tuning the pressure curves under the ‘Dynamics’ tab or adjusting the opacity under the ‘Properties’ tab.
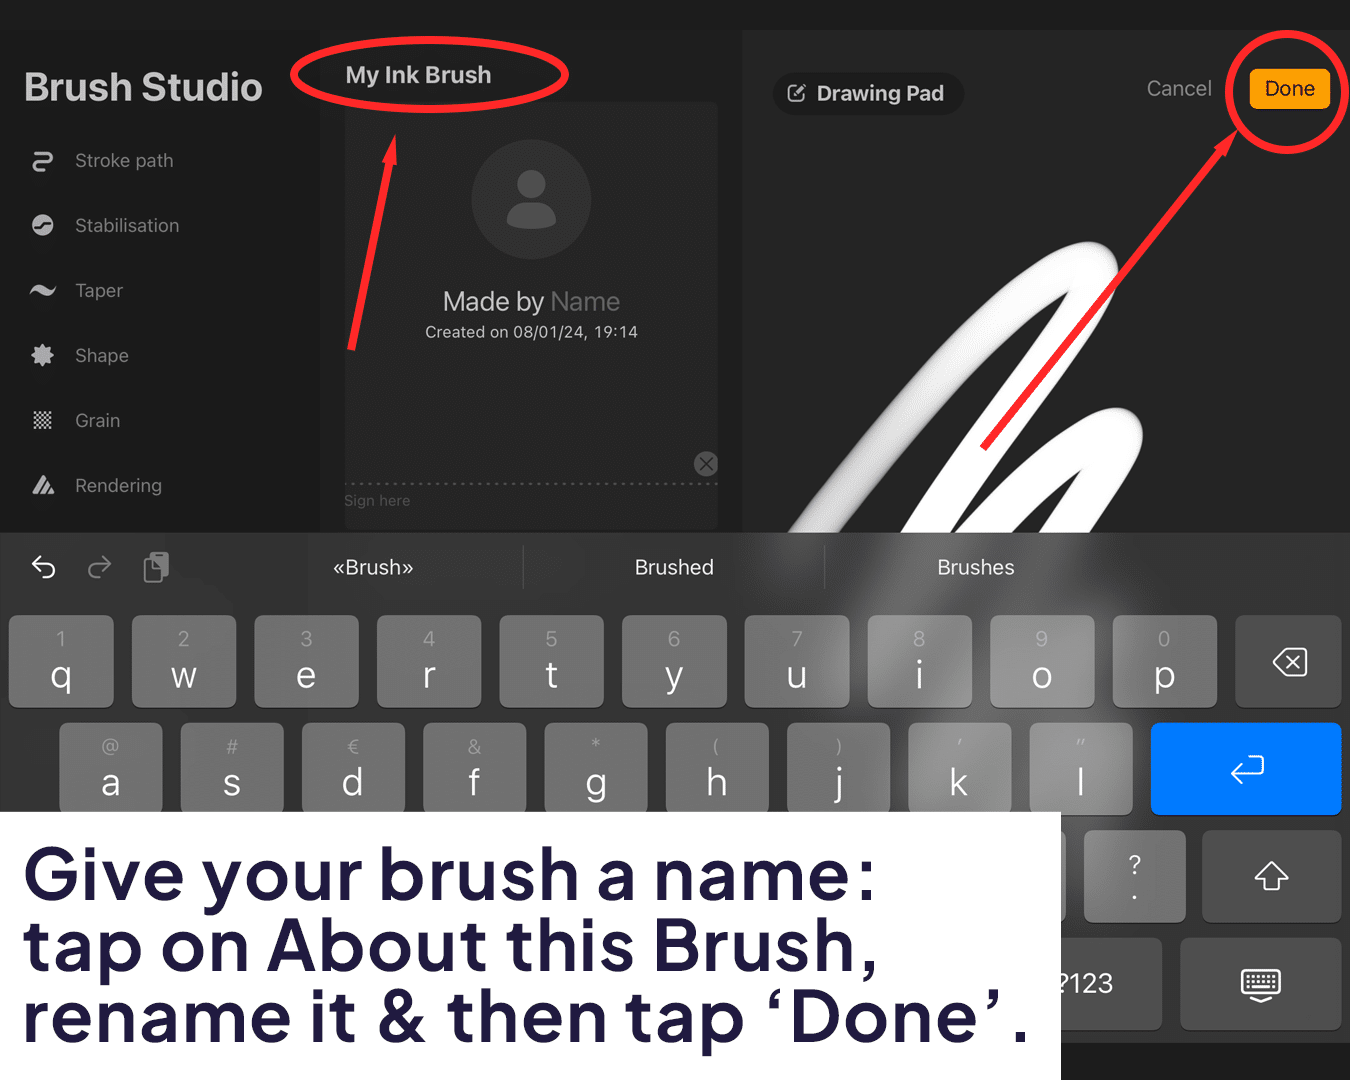
Step 6: Saving Your Brush
Once you’re satisfied with how your brush performs, it’s time to save it.
Tap ‘Done’ in the upper right corner of the brush settings panel.
Name your brush for easy identification. You can do this by tapping on the brush in the Brush Library and selecting ‘Rename’.


Share this article


