
How To Make Grain Brush in Procreate?

Today, I’m going to show you how to create your very own grain brush in Procreate. This way, not only do you save time (and possibly money), but you also get the thrill of saying, “Yeah, I made that!”. Explore our collection of procreate grain brushes to get inspired or to find the perfect addition to your toolkit.
Let’s dive into the world of brush creation and create something that’s not just good, but ‘just right’ for you.
Launch Procreate and Initiate New Brush Creation
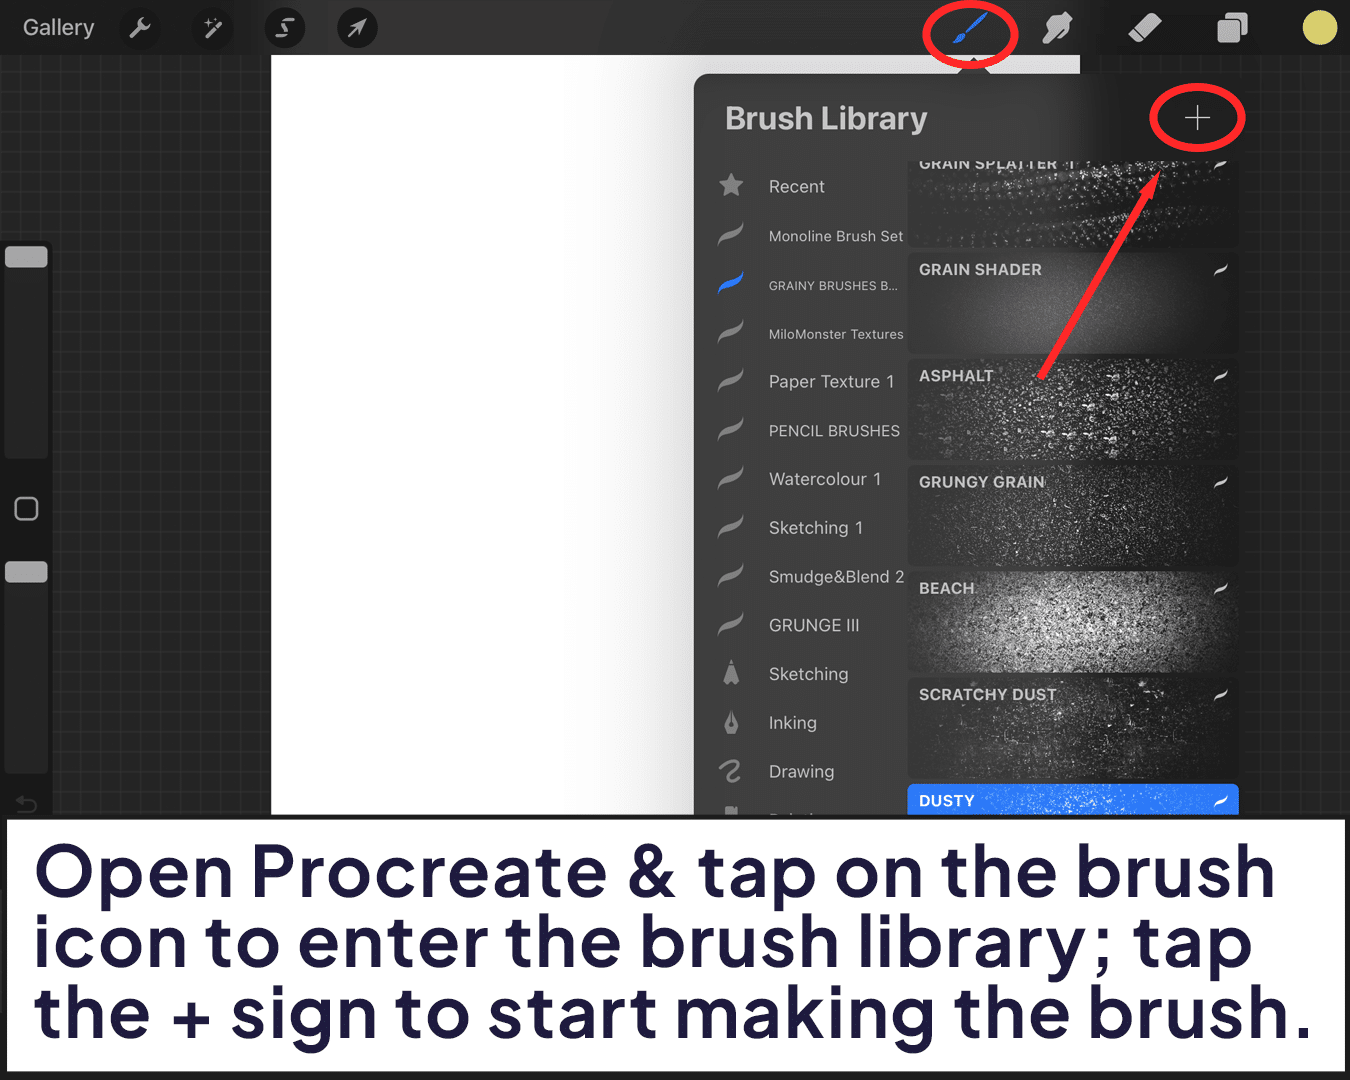
Open the Gates:
Fire up Procreate and tap on the brush icon to enter the brush library.
Begin the Creation:
In the top right corner, find and tap the ‘+’ sign. This is where your journey to create a unique brush begins.
Defining the Core of Your Brush – Shape and Grain
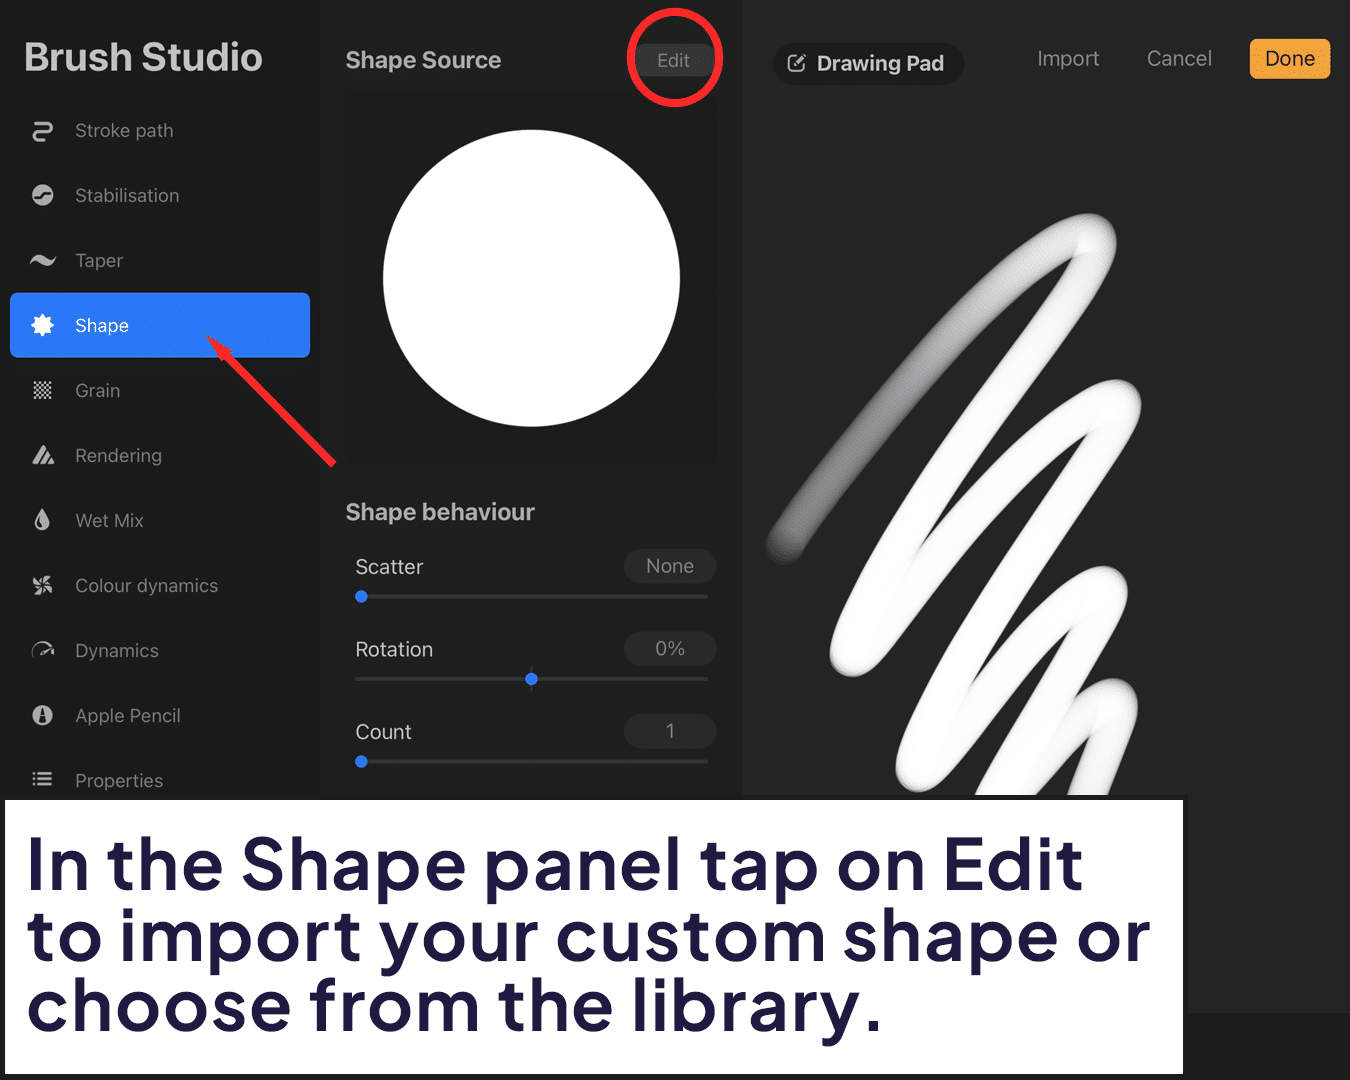
Choosing the Shape Source:
Tap on the ‘Shape’ panel. This defines the core shape of your brush strokes. You can select a basic shape or import a custom shape for something truly unique.
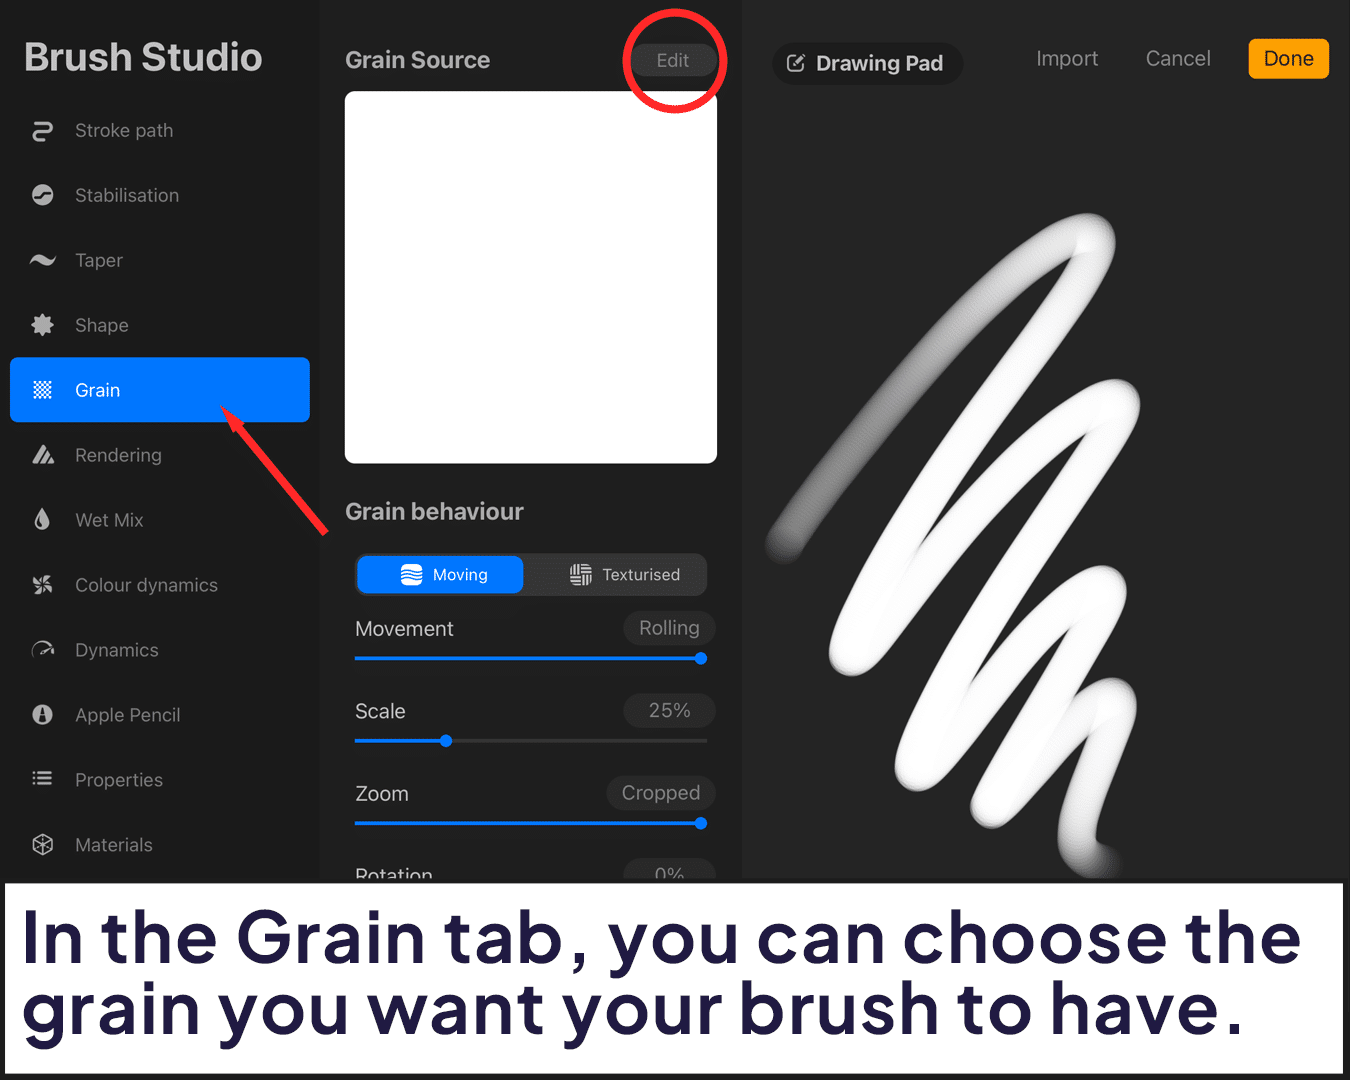
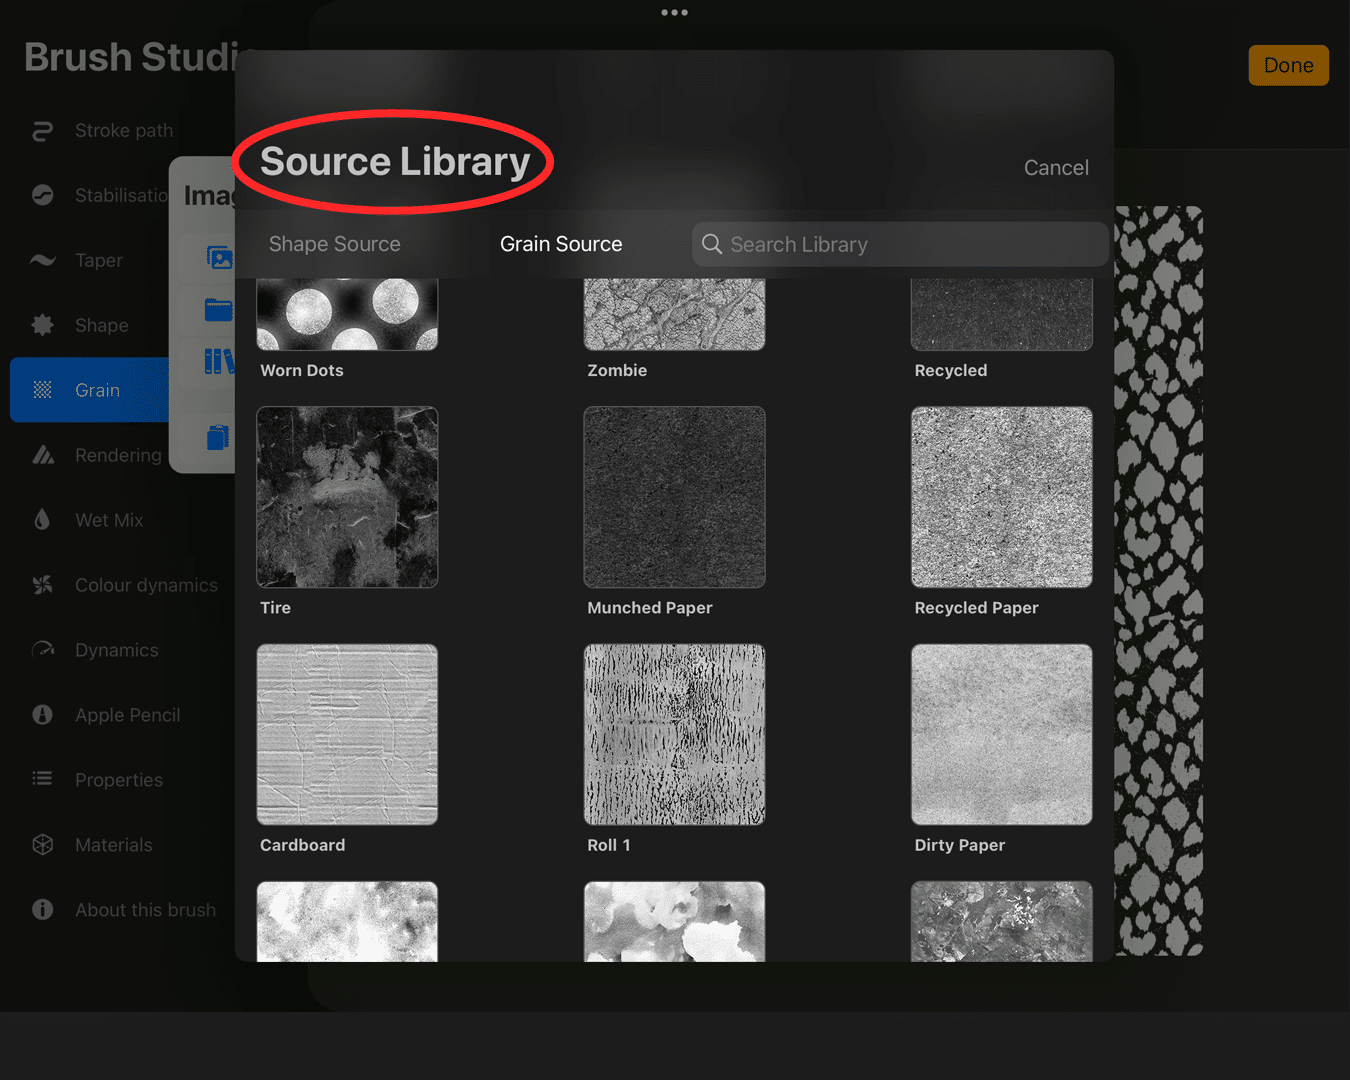
Selecting the Grain Source:
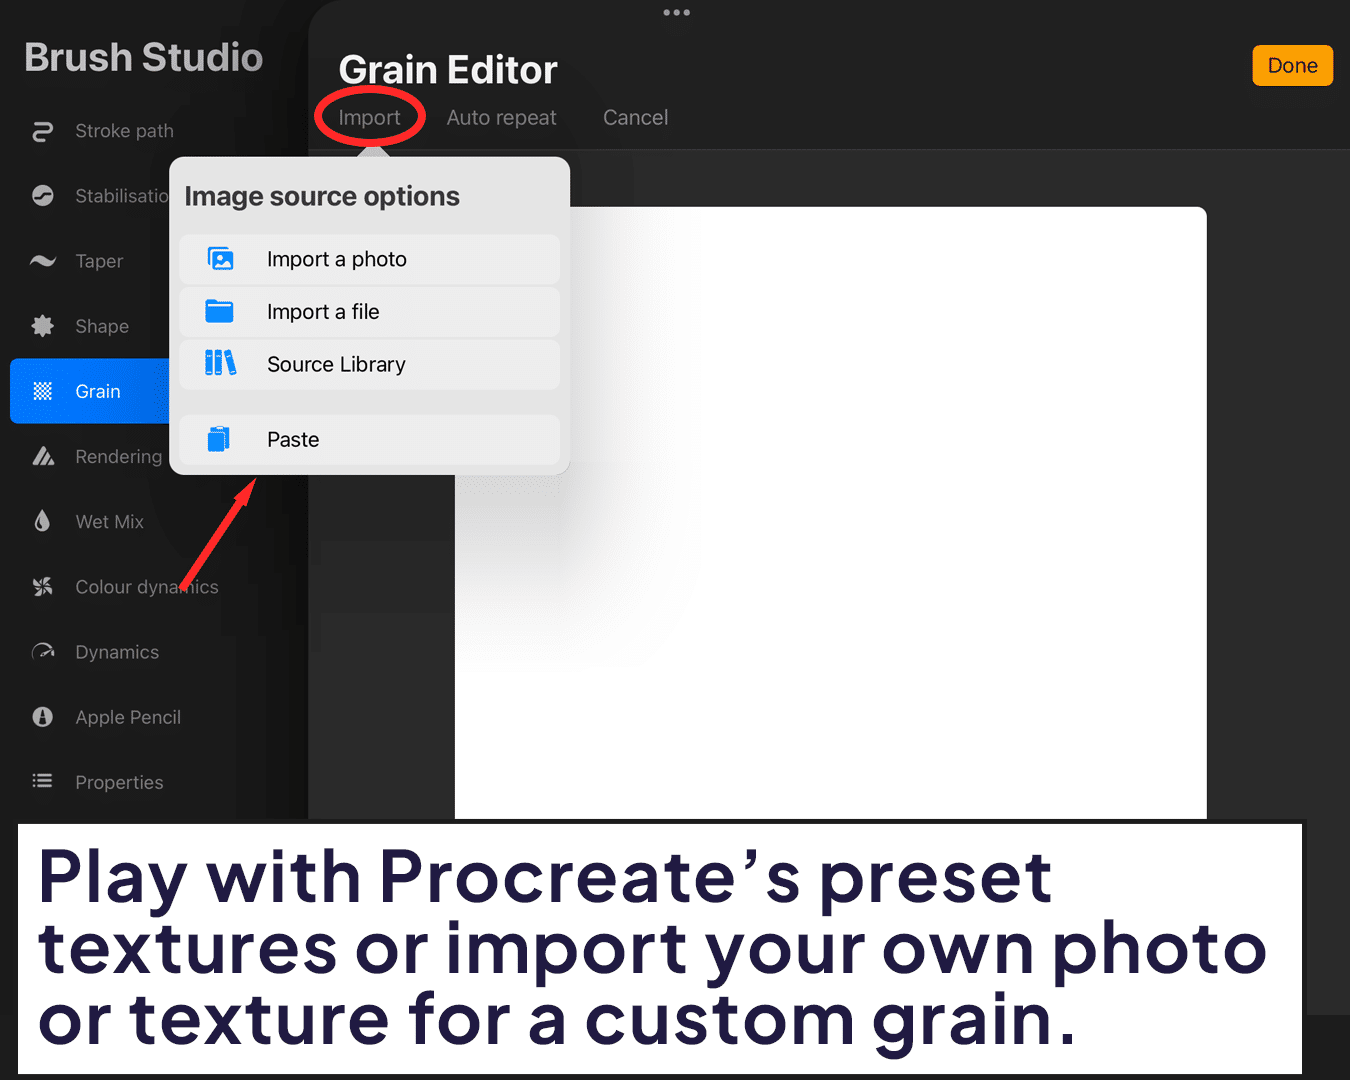
The heart of our mission – the ‘Grain’ tab. Here, you pick a texture that will define the brush’s grain. Feel free to experiment with Procreate’s preset textures or import your own photo or texture to create a signature grain.
Sculpting the Brush Behavior – Stroke Settings
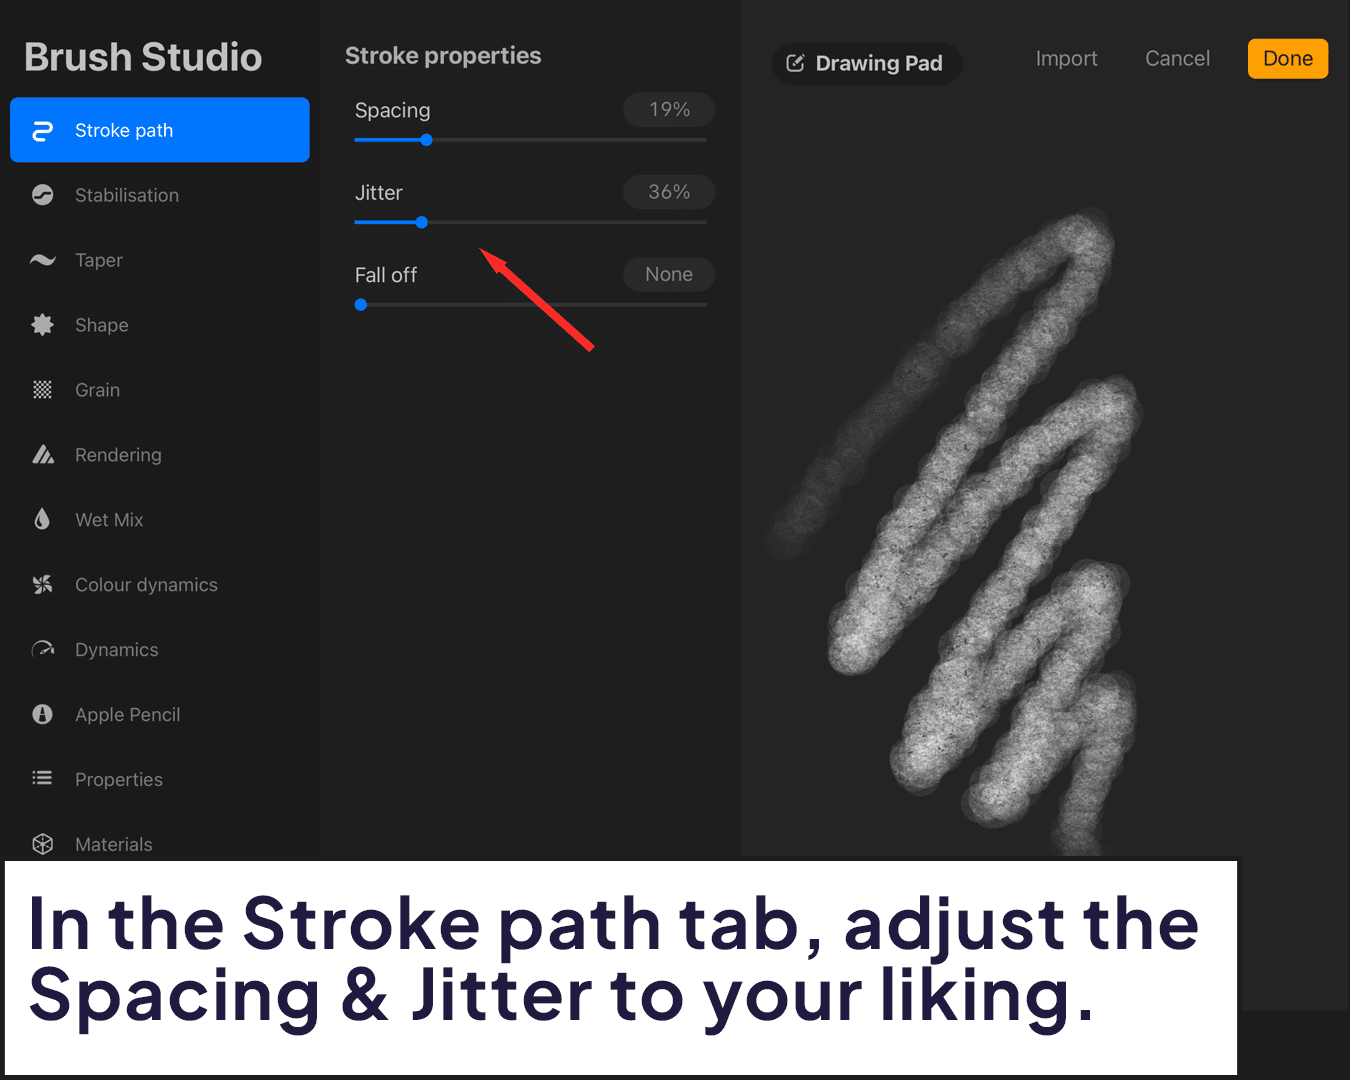
Spacing Mechanics:
In the ‘Stroke’ tab, adjust the spacing slider. This controls how close or spread out your brush strokes will be. Closer spacing results in a more solid stroke, while larger spacing gives a more scattered effect.
Randomness with Scatter and Jitter:
These settings add an element of unpredictability to your brush. Scatter makes the brush strokes spread out randomly, while Jitter varies the placement and angle of the grain within each stroke.
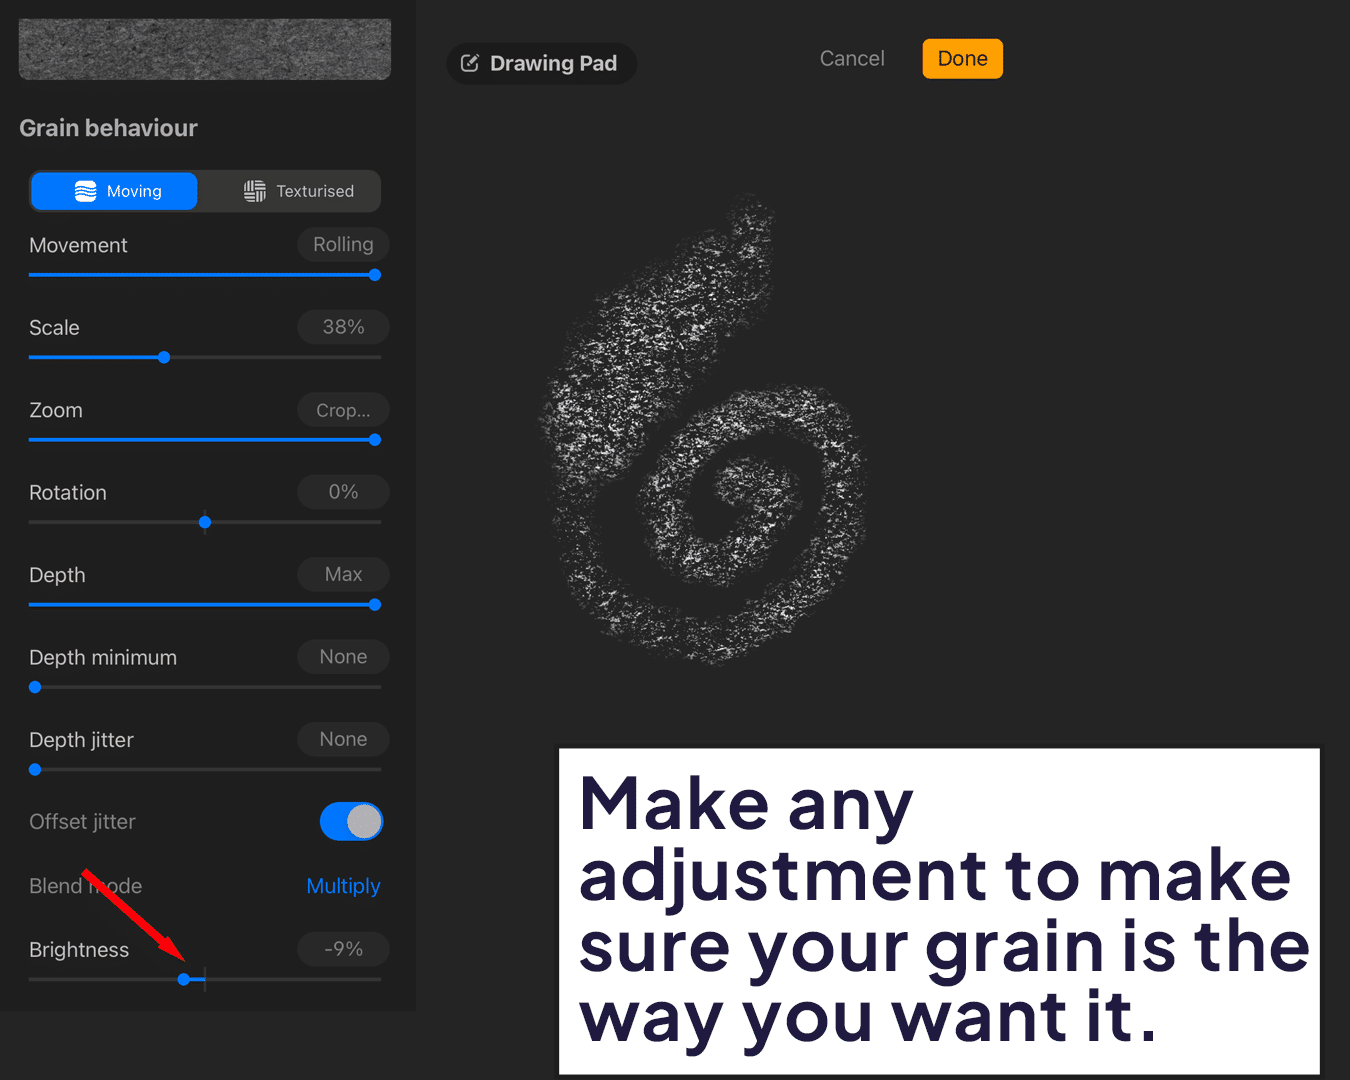
Refining the Texture – Grain Adjustments
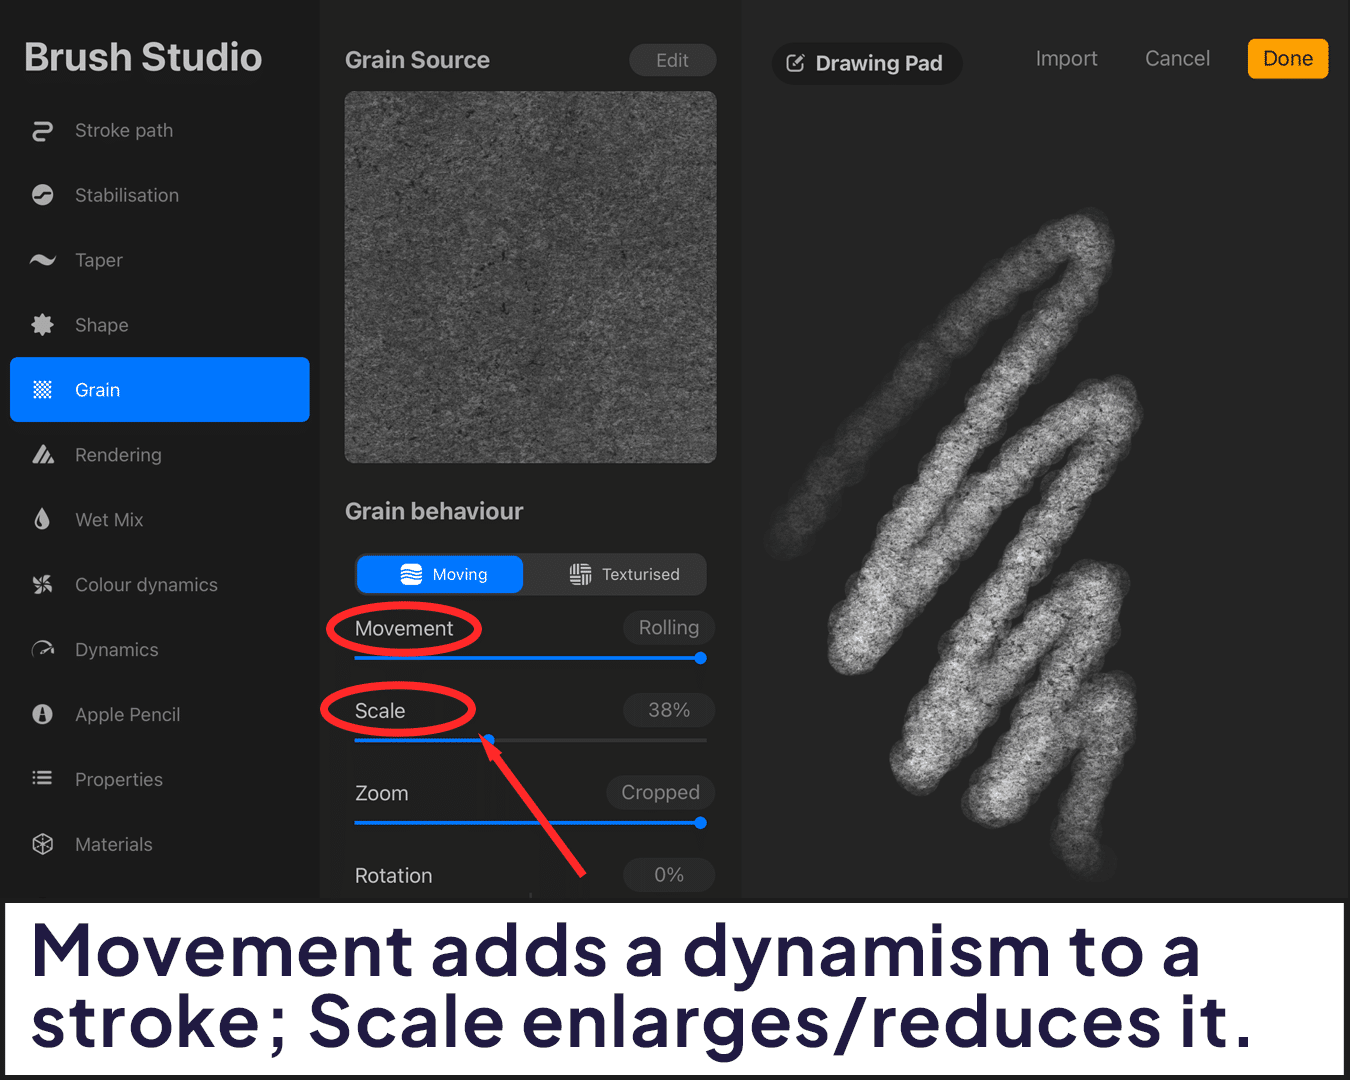
Scale and Movement:
Within the ‘Grain’ tab, play with the ‘Scale’ to enlarge or reduce the size of the grain. The ‘Movement’ option adds a dynamic characteristic, altering the grain as you draw.
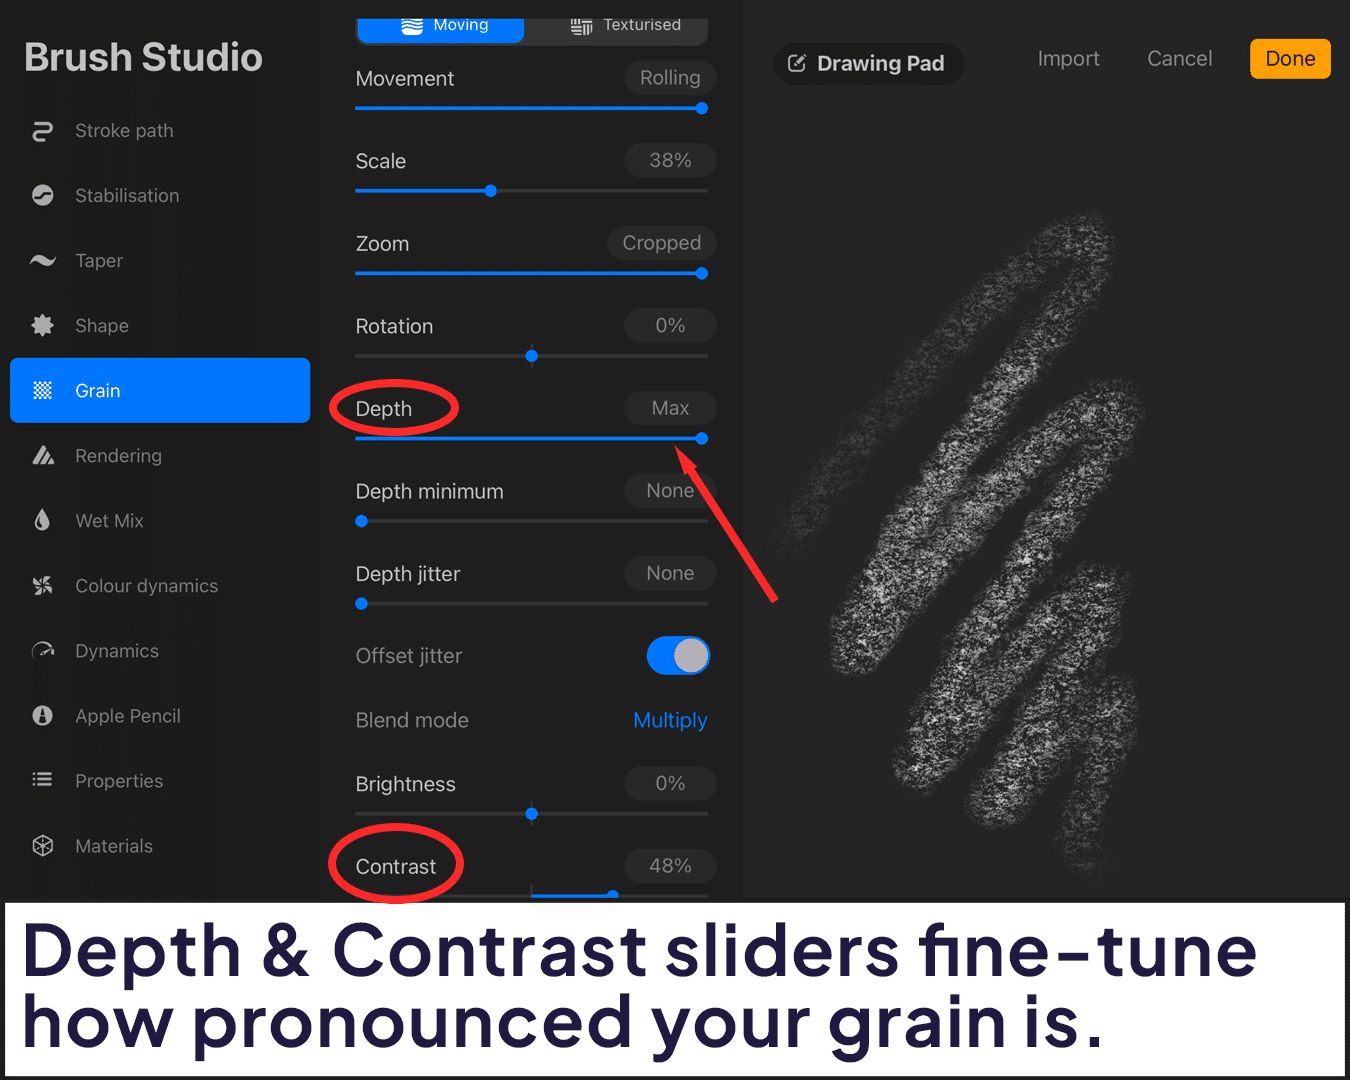
Depth and Contrast Control:
These sliders fine-tune how pronounced your grain is. Depth affects the texture’s visibility, while Contrast sharpens or softens the difference between the grainy areas and the rest.
Testing and Perfecting Your Creation
Trial Run:
Open a new layer to test your brush. Observe the texture, flow, and feel of the brush. Does it match your vision?
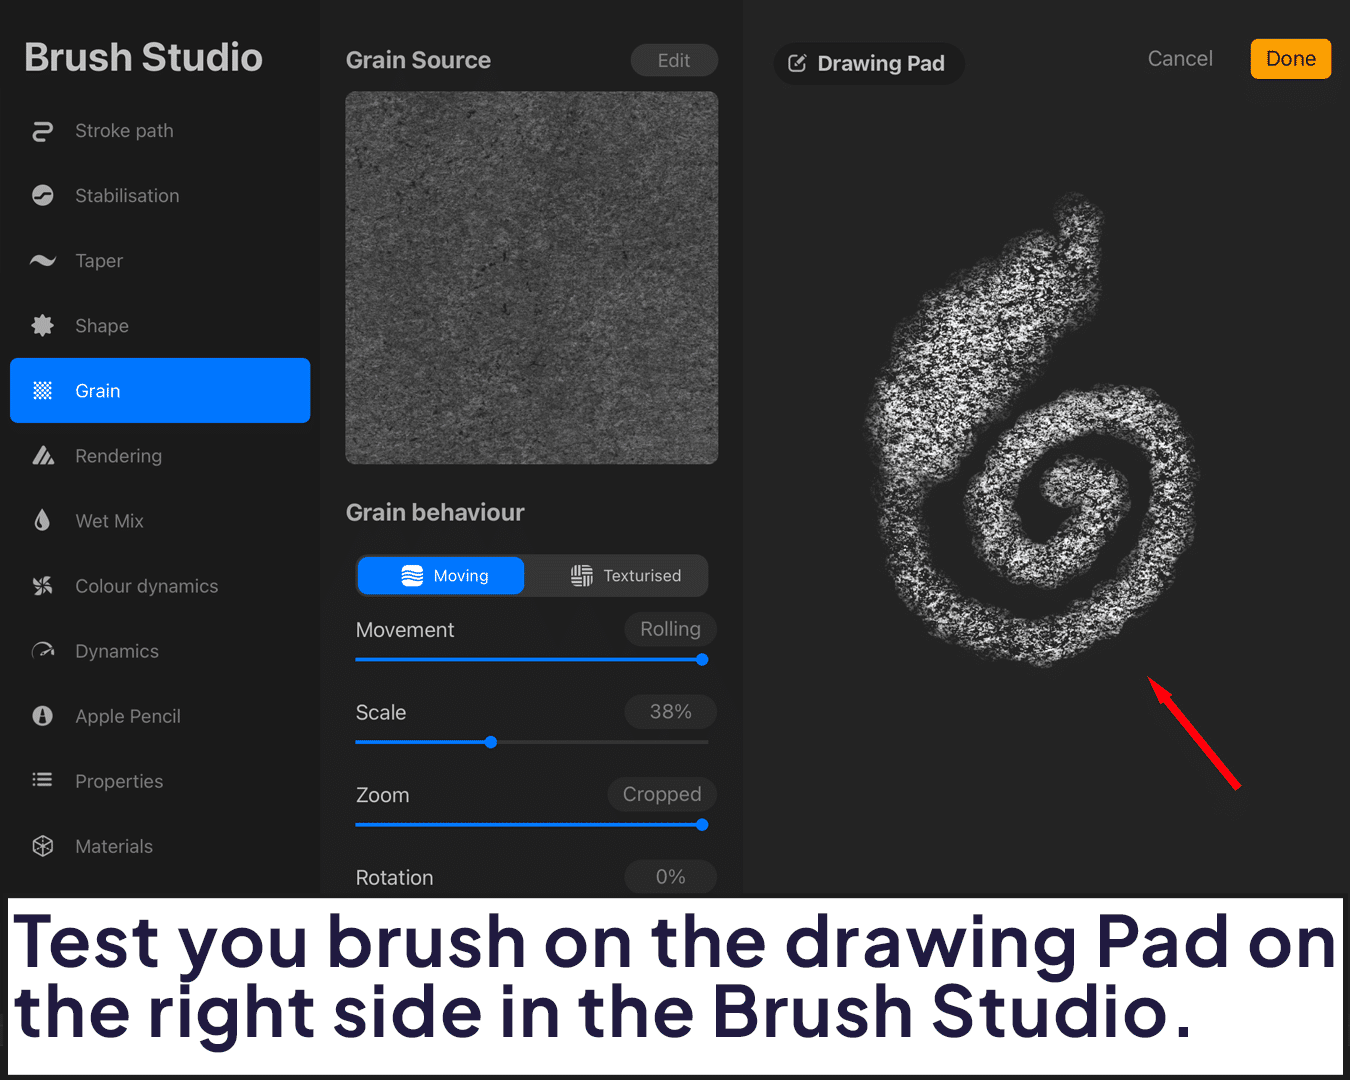
Iterative Refinement:
If something feels off, dive back into the settings. Adjusting your brush to perfection might require several iterations. Remember, patience is the key to masterpiece creation!
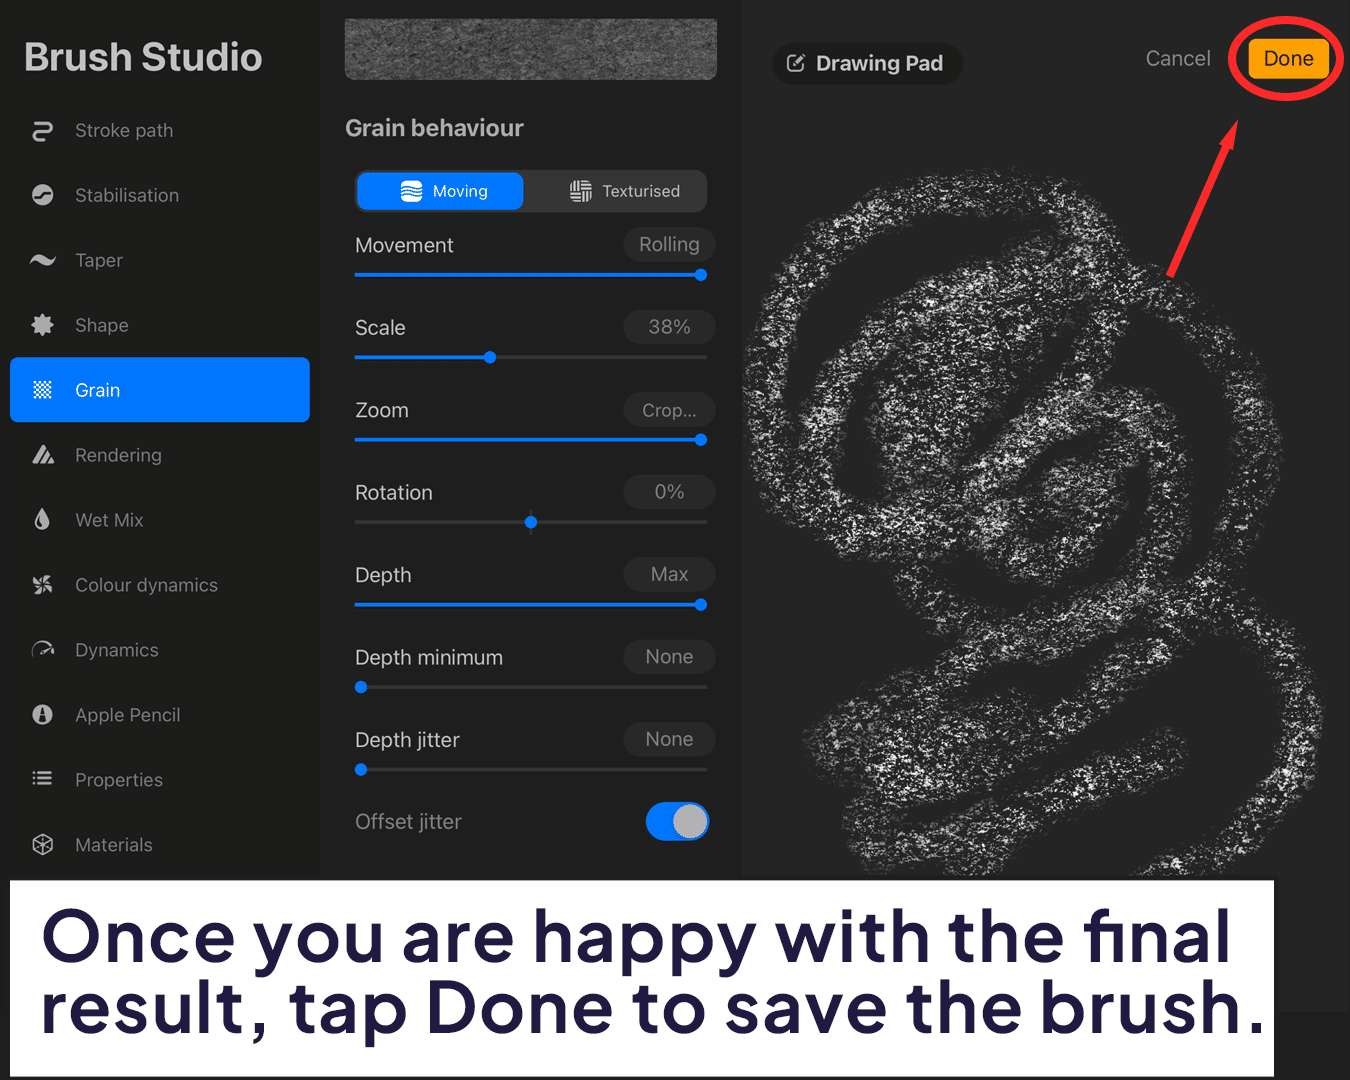
Saving and Naming Your Artistic Tool
Preserve Your Innovation:
Once satisfied, tap ‘Done’ to save your custom brush.
And there you are, a proud creator of a custom grain brush in Procreate! Now that you’ve crafted your own brush, why not enhance your skills further? Learn how to add grain texture to your digital art with our guide on how to add grain texture in Procreate, perfect for applying your newly created brushes in creative ways.
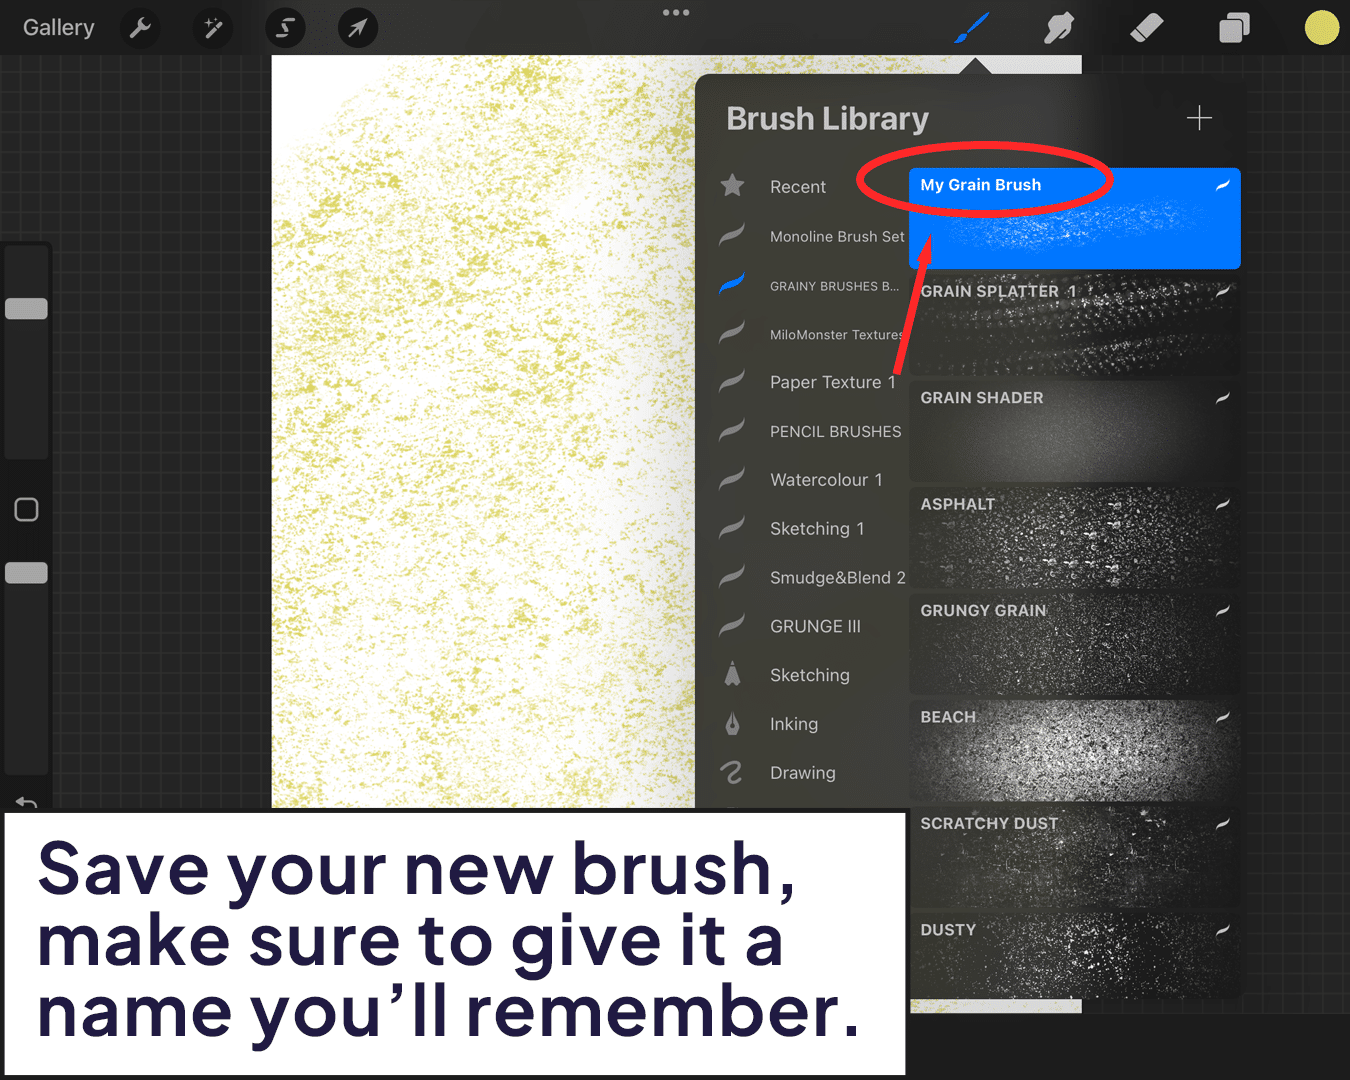
Personalized Naming:
Name your brush something memorable. This not only helps in identifying it later but also adds a personal touch to your digital toolkit.
And there you are, a proud creator of a custom grain brush in Procreate! Gone are the days of settling for brushes that are ‘almost right’.
You’re no longer confined to the brushes others have made – you’re now a brush creator in your own right. Go forth and add that unique texture to your digital art, and most importantly, have fun while doing it!


Share this article


