
How To Add Grain Texture in Procreate?

Are you ready to take your Procreate game up a notch? Grain textures can transform a flat, digital piece into a work brimming with depth and realism. By the end of this guide, you’ll be a grain texture guru, adding depth and character to your digital art like a pro!
Setting the Stage with the Perfect Canvas
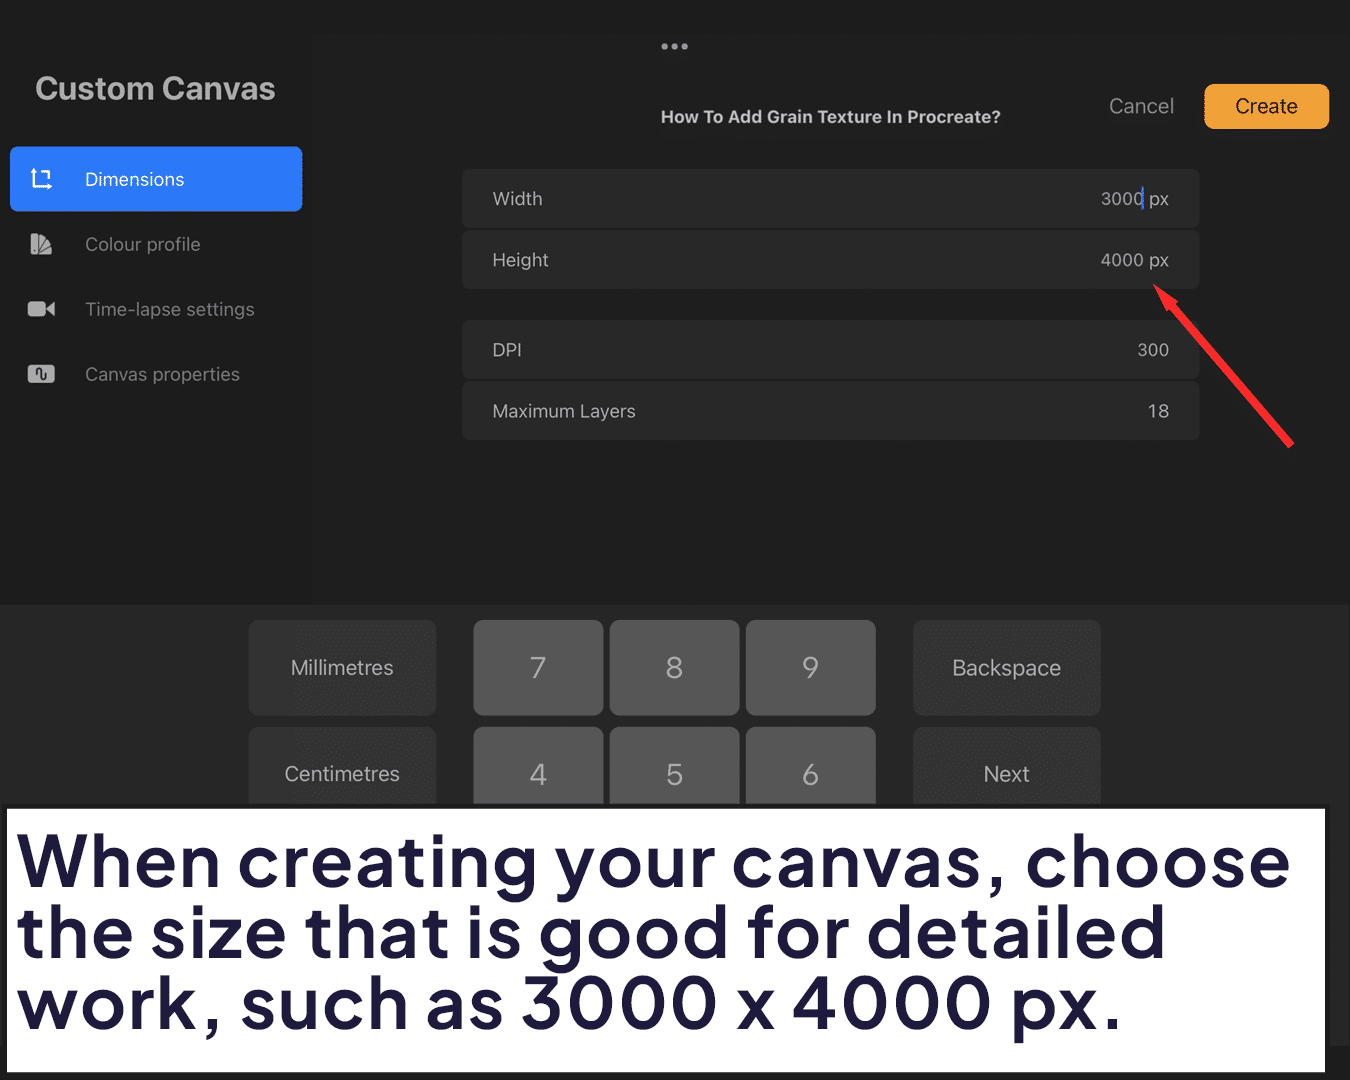
Picking the Right Canvas:
When you open Procreate, choose a canvas size that suits your project. A larger canvas (3000 x 4000 pixels) is great for detailed work. Remember, the larger the canvas, the more room you have to play with textures.
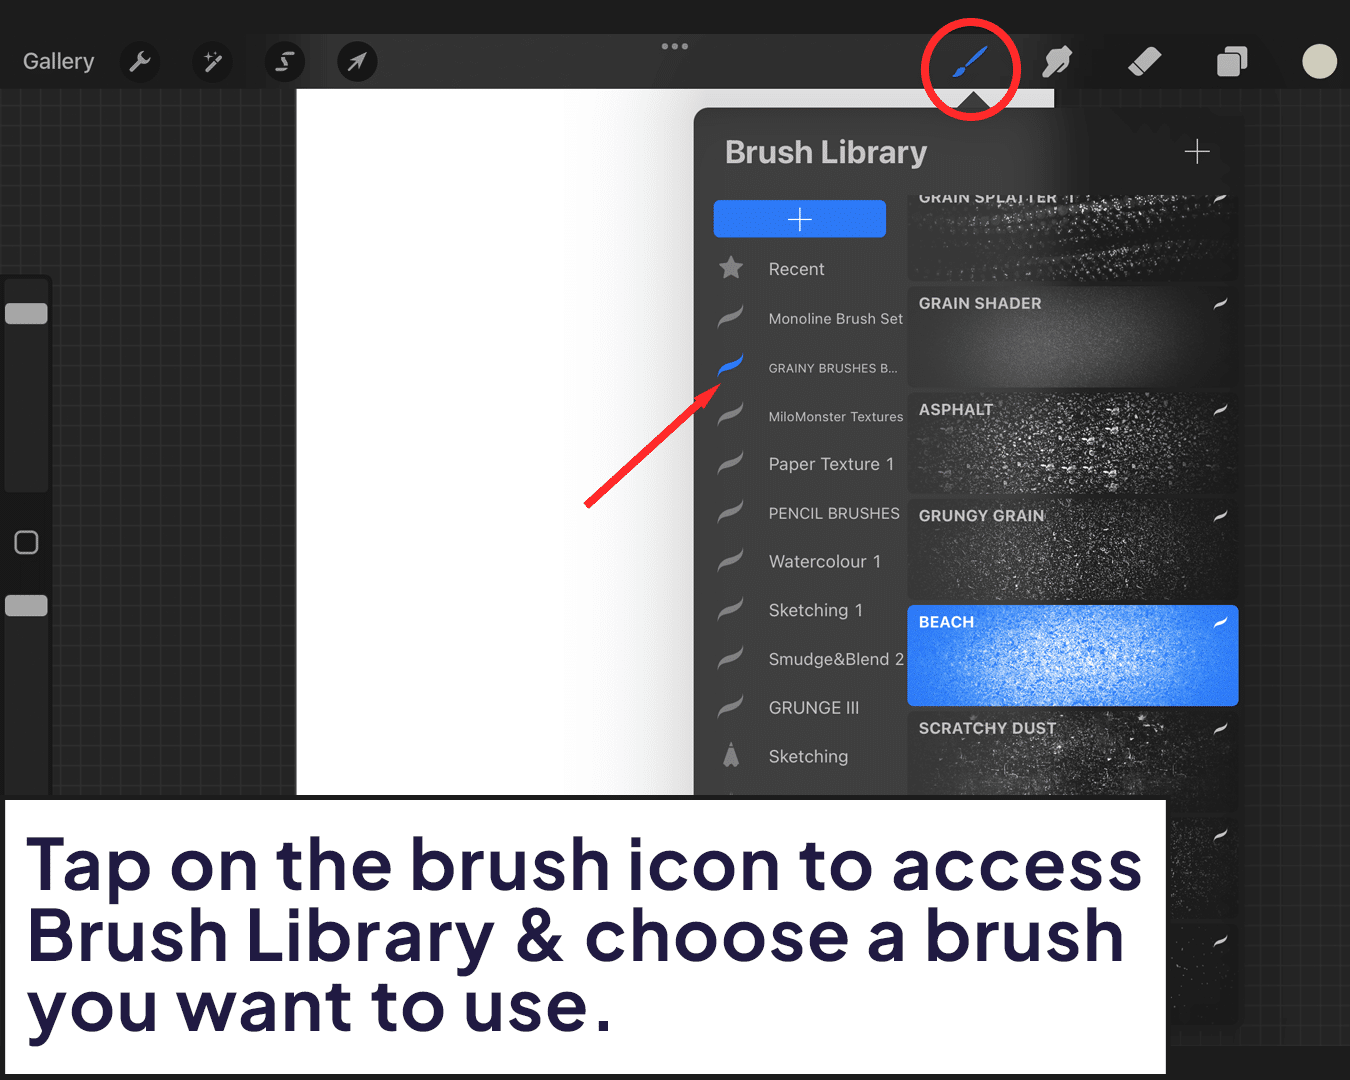
Brush Selection is Key:
Access the brush library by tapping the brush icon. If you’re going for a subtle texture, choose a brush with a fine, sandy grain. For a bolder effect, opt for a brush with a chunkier, more pronounced grain. Exploring our Procreate grain brushes can give you a wide range of options to start with.
Laying the Groundwork for Texture
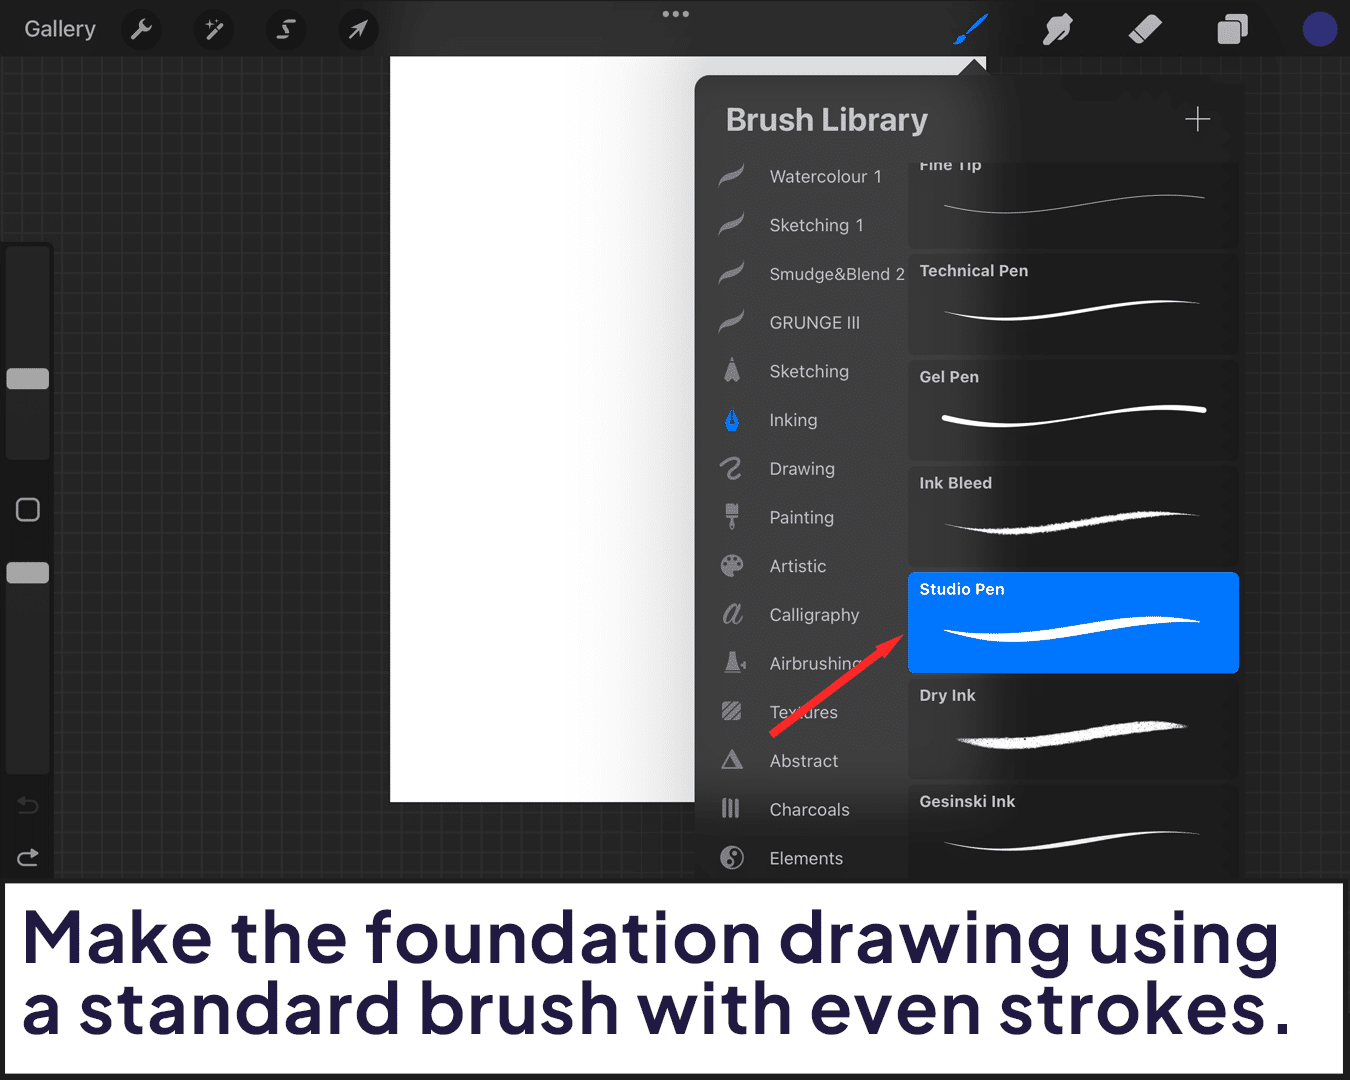
Base Color Basics:
Start by selecting a standard brush to apply your base color. This layer acts as the foundation of your artwork. Consistent, even strokes work best for a uniform base.
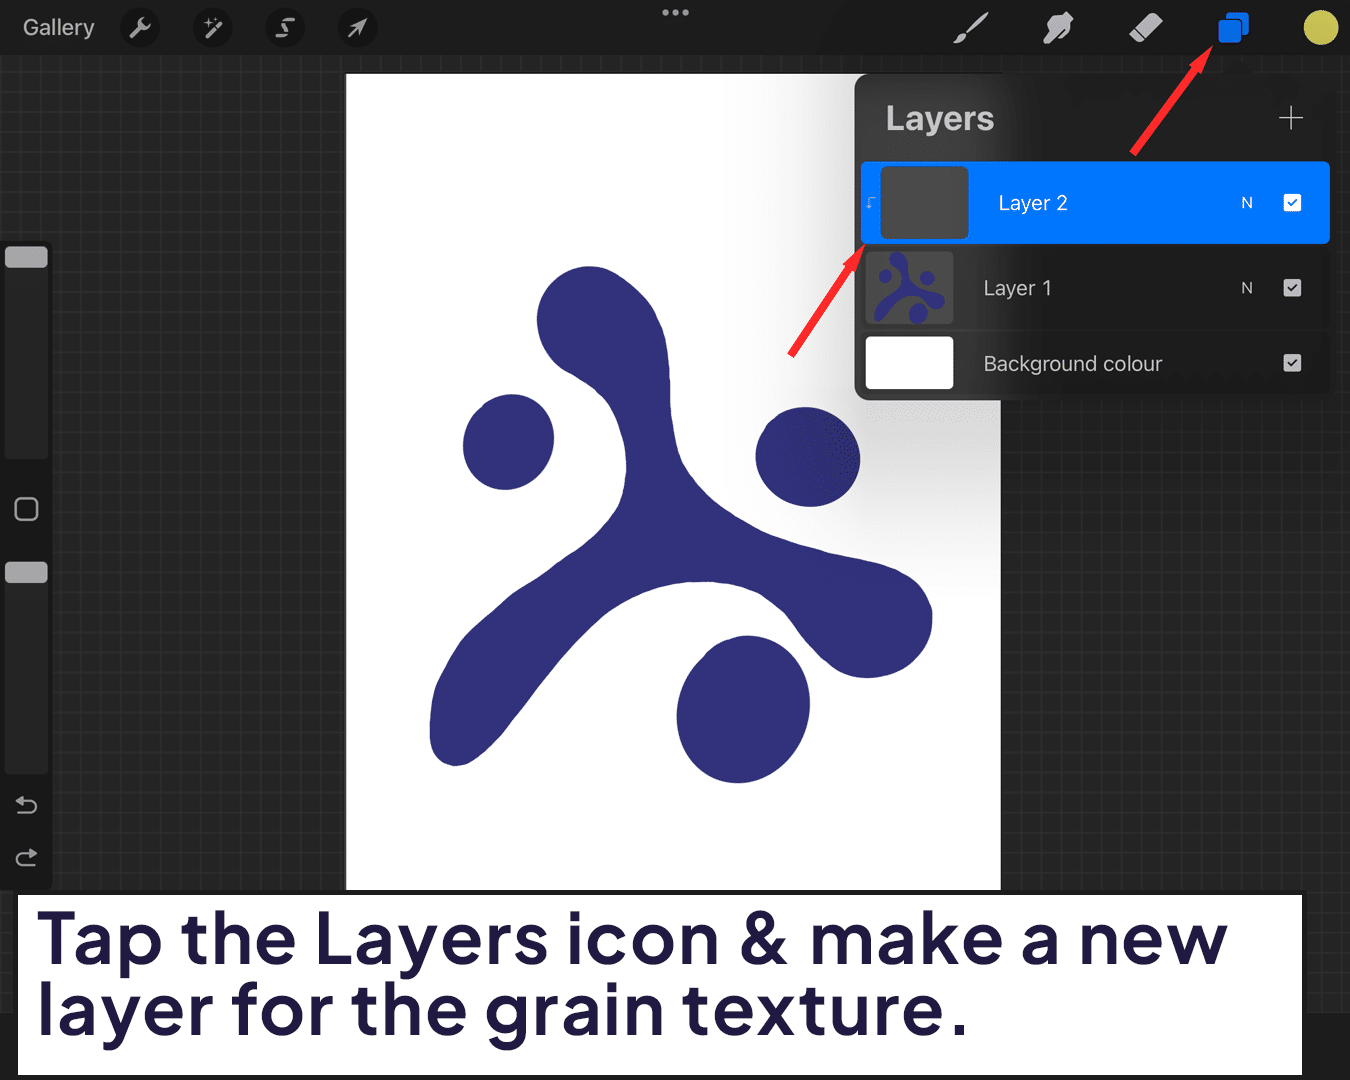
Creating a Texture-Focused Layer:
Tap the layers icon and add a new layer above your base. This layer will be exclusively for your grain texture, allowing for more control and flexibility.
Choosing and Applying Your Grain
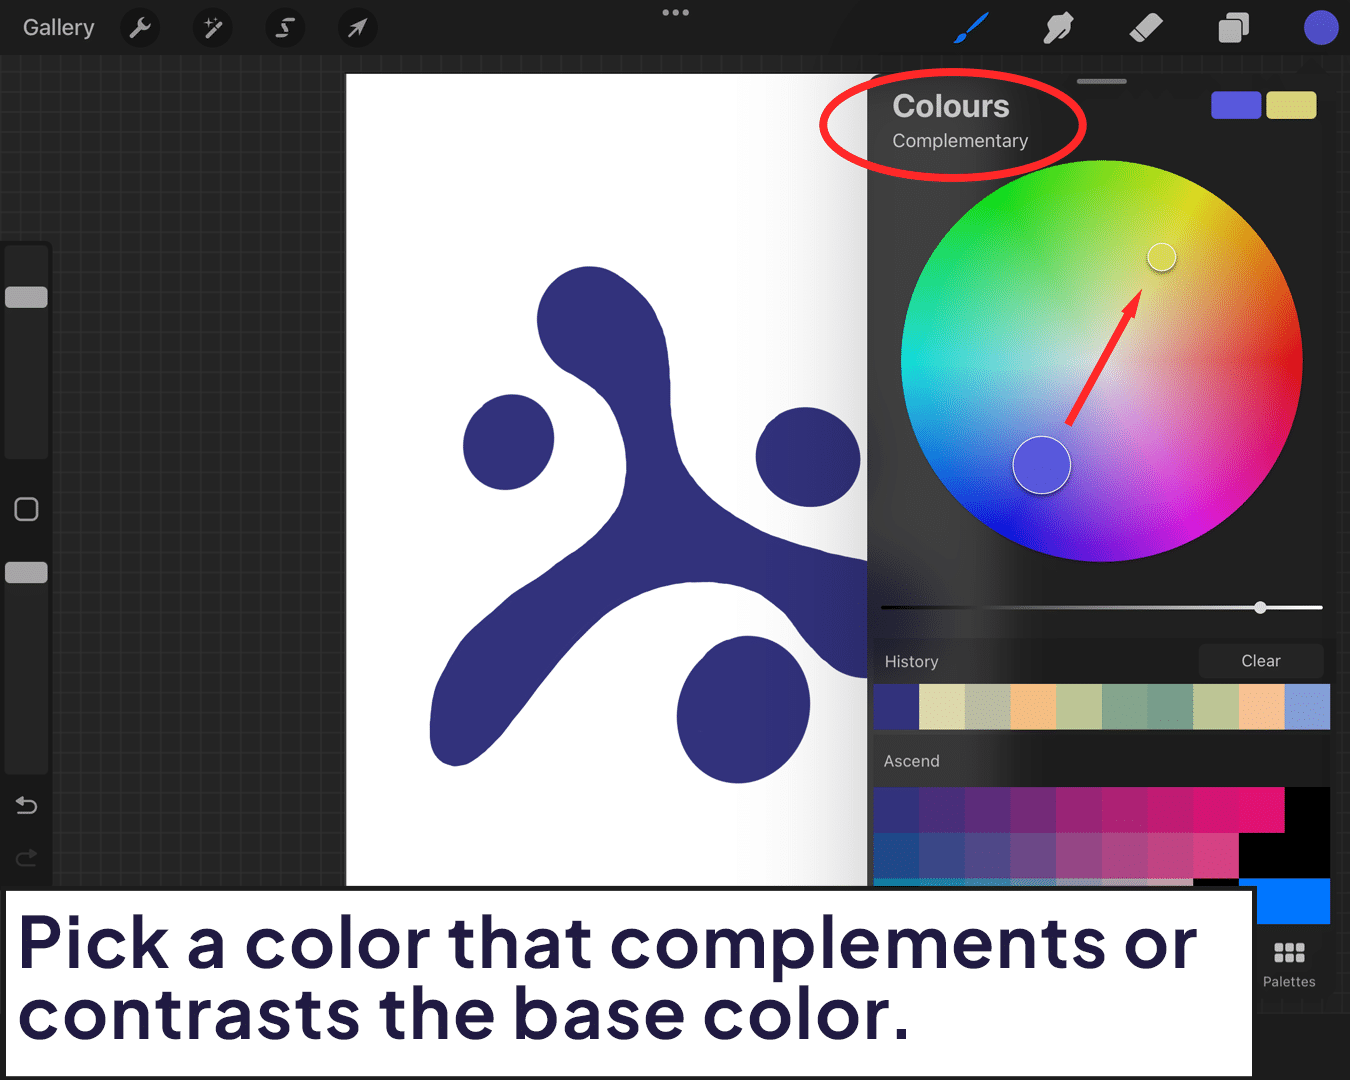
Color Selection for Impact:
For your grain texture, pick a color that complements or contrasts your base color. If your base is light, try a darker shade for the grain, and vice versa. This contrast is what makes the texture pop.
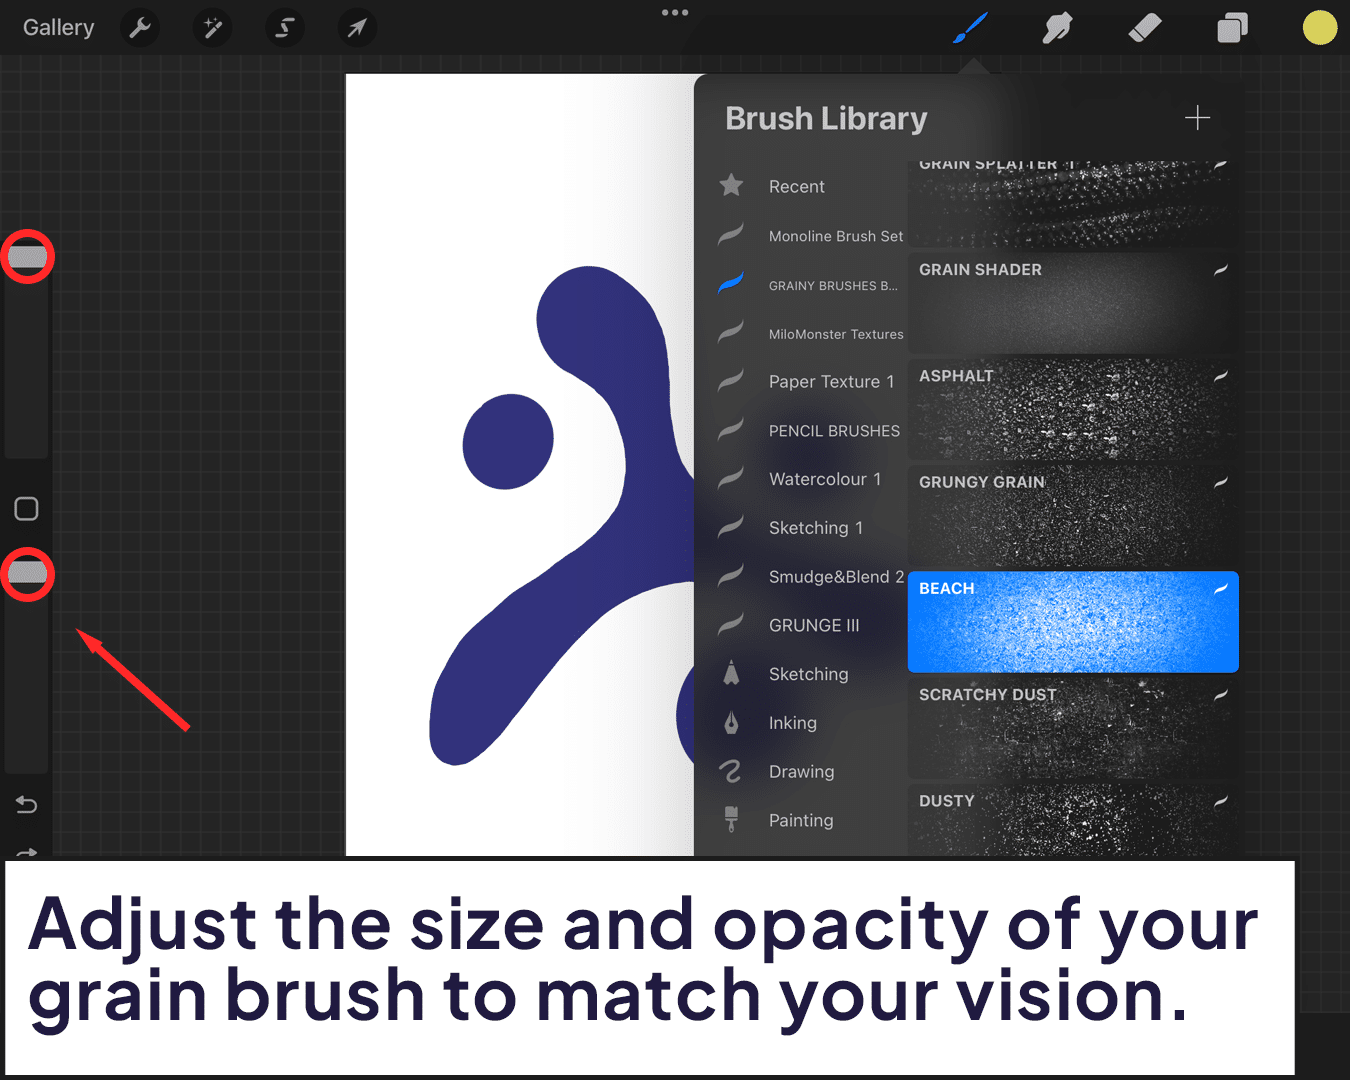
Tailoring Brush Settings:
Adjust the size and opacity of your grain brush to match your vision. Lower opacity gives a more subtle, soft texture, while higher opacity results in a more pronounced grain.
The Art of Applying Grain Texture
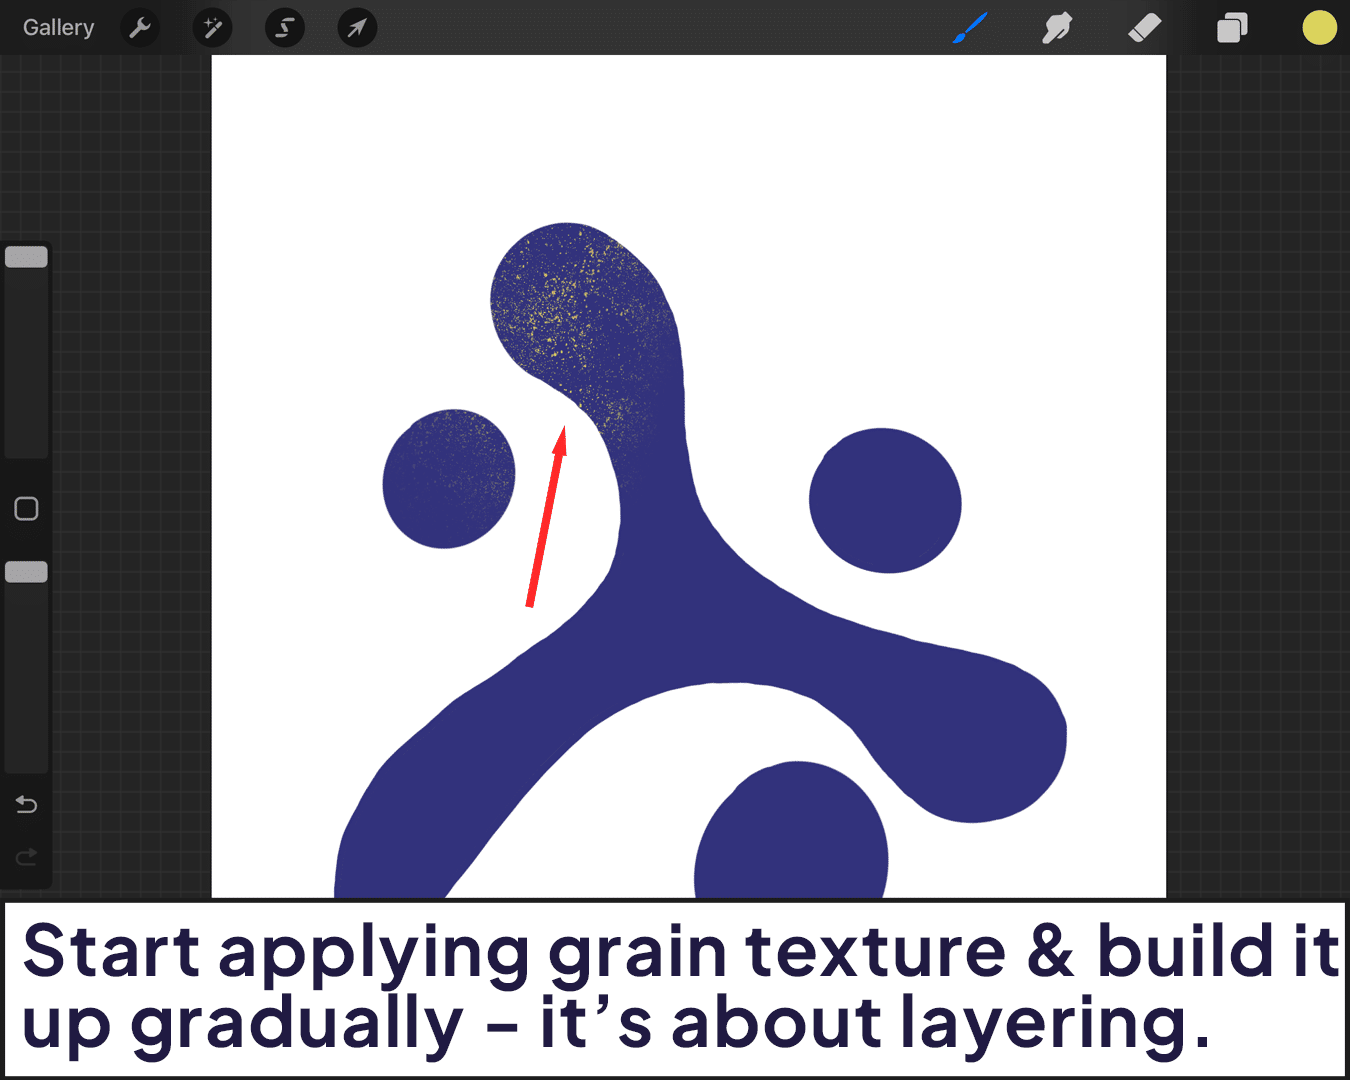
The Application Process:
With your grain brush selected, start applying texture to the dedicated layer. Use a light touch and build up the texture gradually. It’s all about layering; you can always add more, but it’s trickier to take away.
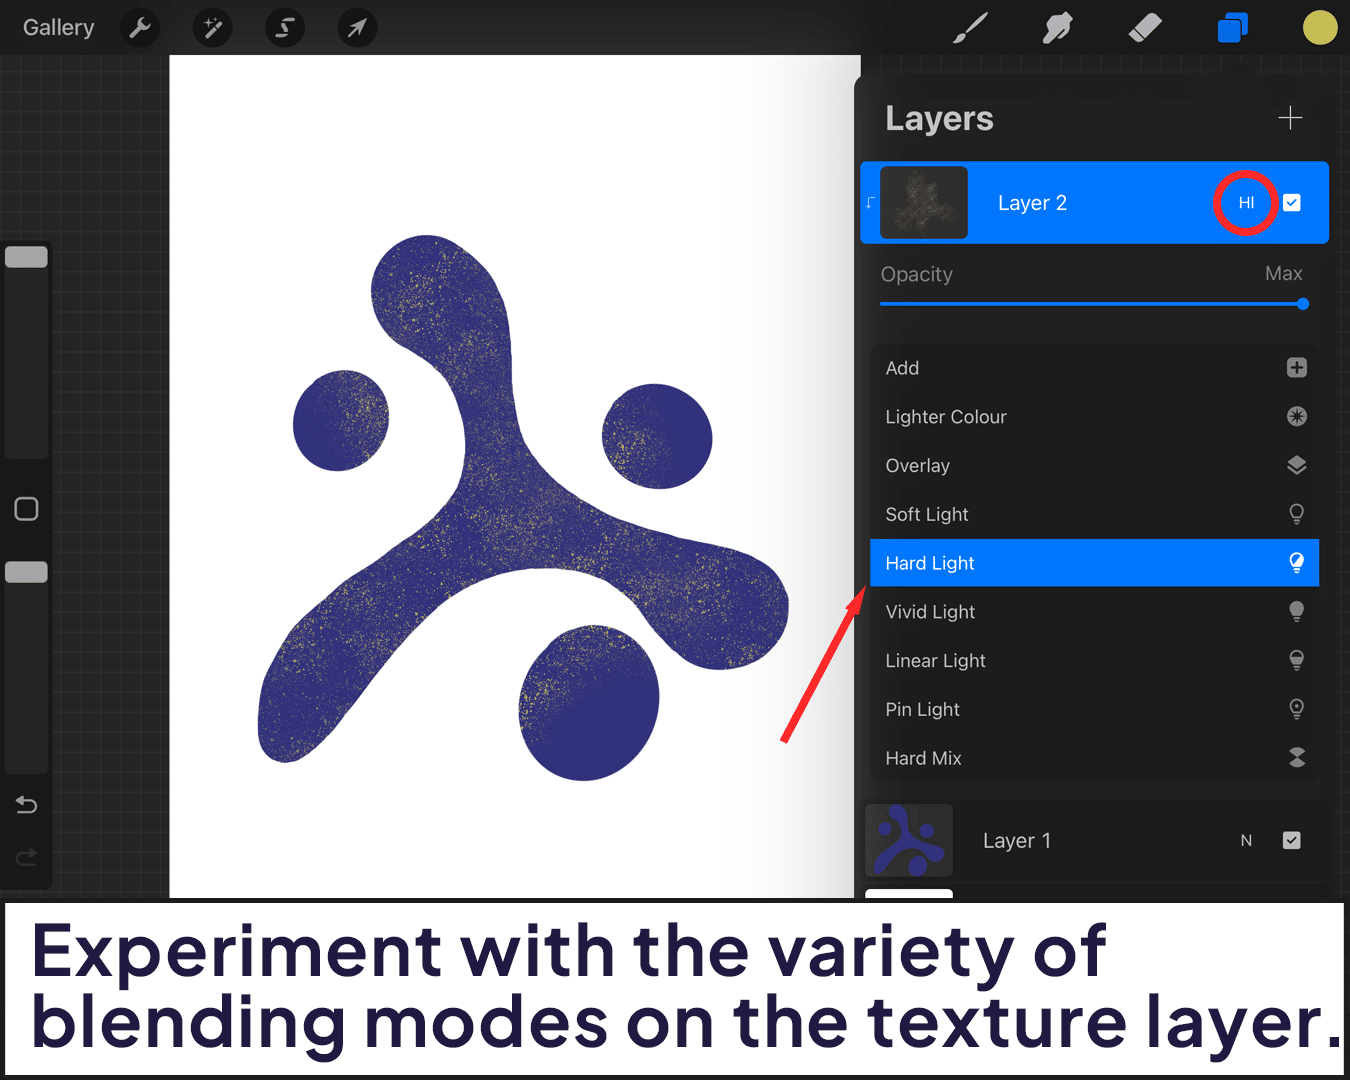
Blend and Balance:
Experiment with blending modes for different effects. For example, ‘Overlay’ can give a vibrant, rich texture, while ‘Multiply’ might offer a more integrated, subtle effect.
Refining and Perfecting Your Textured Art
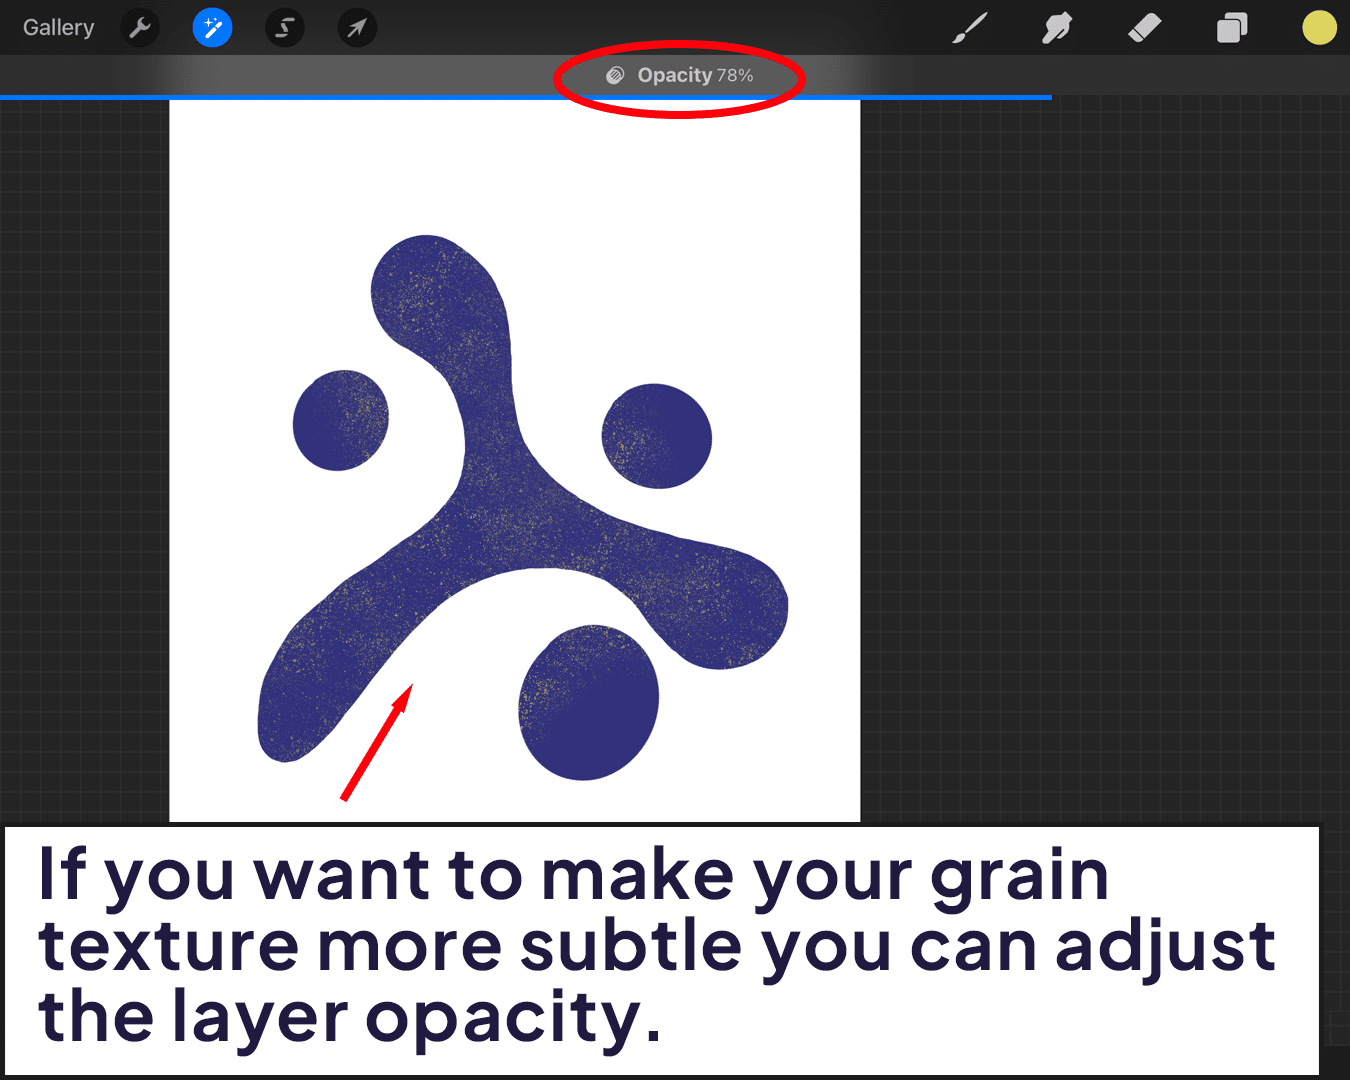
Layer Adjustments for Harmony:
If the texture feels overwhelming, reduce the layer’s opacity or use the eraser tool gently. This can help integrate the texture more naturally into your artwork.
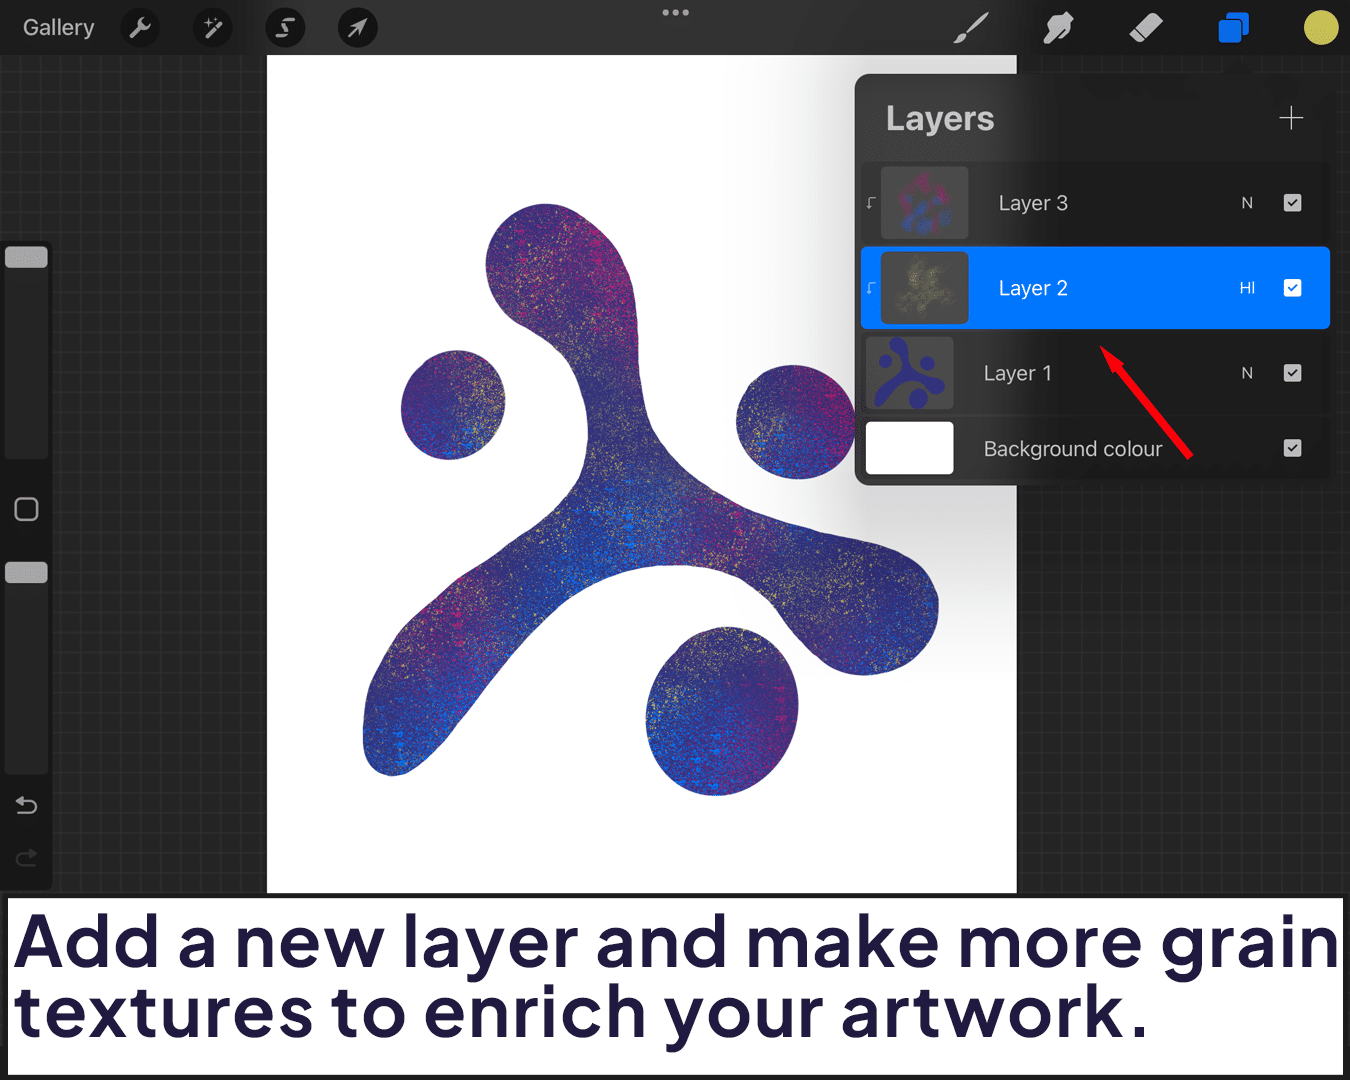
Texture Variety:
Don’t hesitate to add more texture layers with different grain brushes. This can add complexity and depth, making your artwork more visually interesting. For those interested in creating their own brushes, check out our guide on how to make a grain brush in Procreate.
Final Touches and Presentation
Layer Management:
If you’re satisfied with the texture, you can merge the layers for simplicity. Alternatively, keeping them separate allows for more adjustments later.
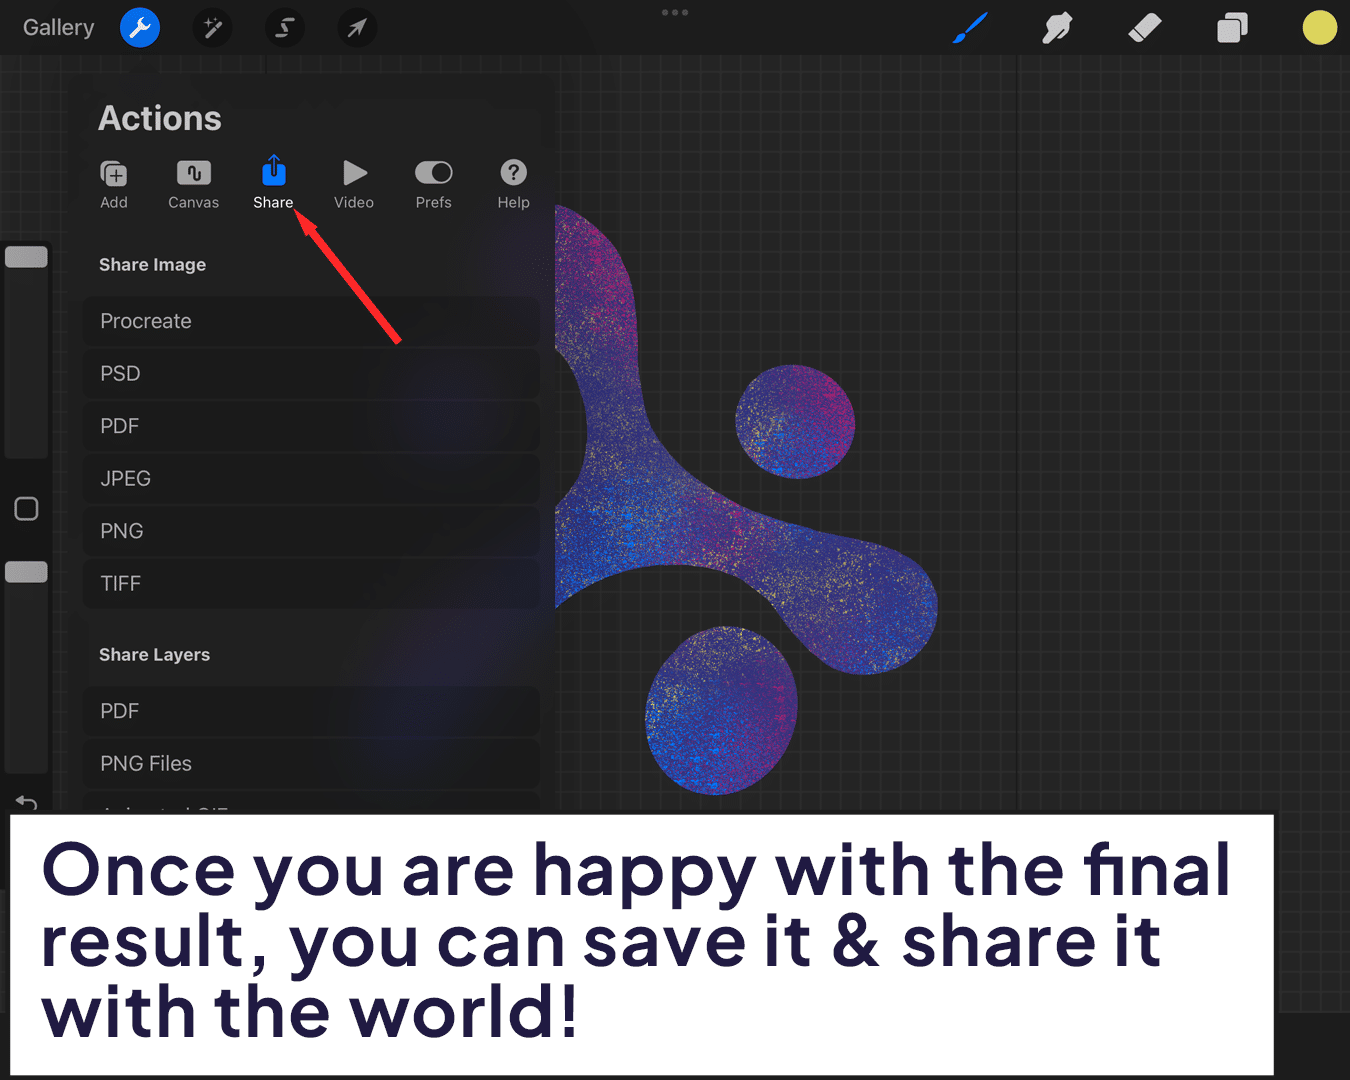
Saving and Sharing:
Once you’re happy with the final result, save your artwork. Share it on social media or digital art forums. Your grain-textured artwork is now ready to wow audiences!
Congratulations! You’ve successfully navigated the intricate process of adding grain texture in Procreate. The beauty of digital art is in its flexibility and the endless possibilities for creativity.
Keep experimenting with different textures and techniques. Every piece you create is a step forward in your artistic journey. Happy texturing!


Share this article


