
How To Make a Confetti Brush in Procreate?

If you’re looking to add a celebratory flair to your artwork, you’re in the right place. I’m here to teach you how to create a custom confetti brush in Procreate.
This guide is designed to help you not only create a functional brush but also understand the nuances that make a great confetti effect.
If you are a fan of Confettis, then Procreate Glitter Brushes would be a good choice for you to pair them with and create awesome artwork for any type of celebration.
Step-by-Step Guide to Creating a Confetti Brush in Procreate
Creating your very own confetti brush in Procreate is like making magic with pixels, and I promise it’s easier than blowing up a balloon! Let’s get started!
Launch Procreate and Open the Brush Library
Start Procreate and tap on the brush icon to open your Brush Library.

Create a New Brush Set (Optional):
Tap the “+” at the top right corner of the Brush Library to create a new brush set for organization. Let’s name it ‘Party Brushes’.
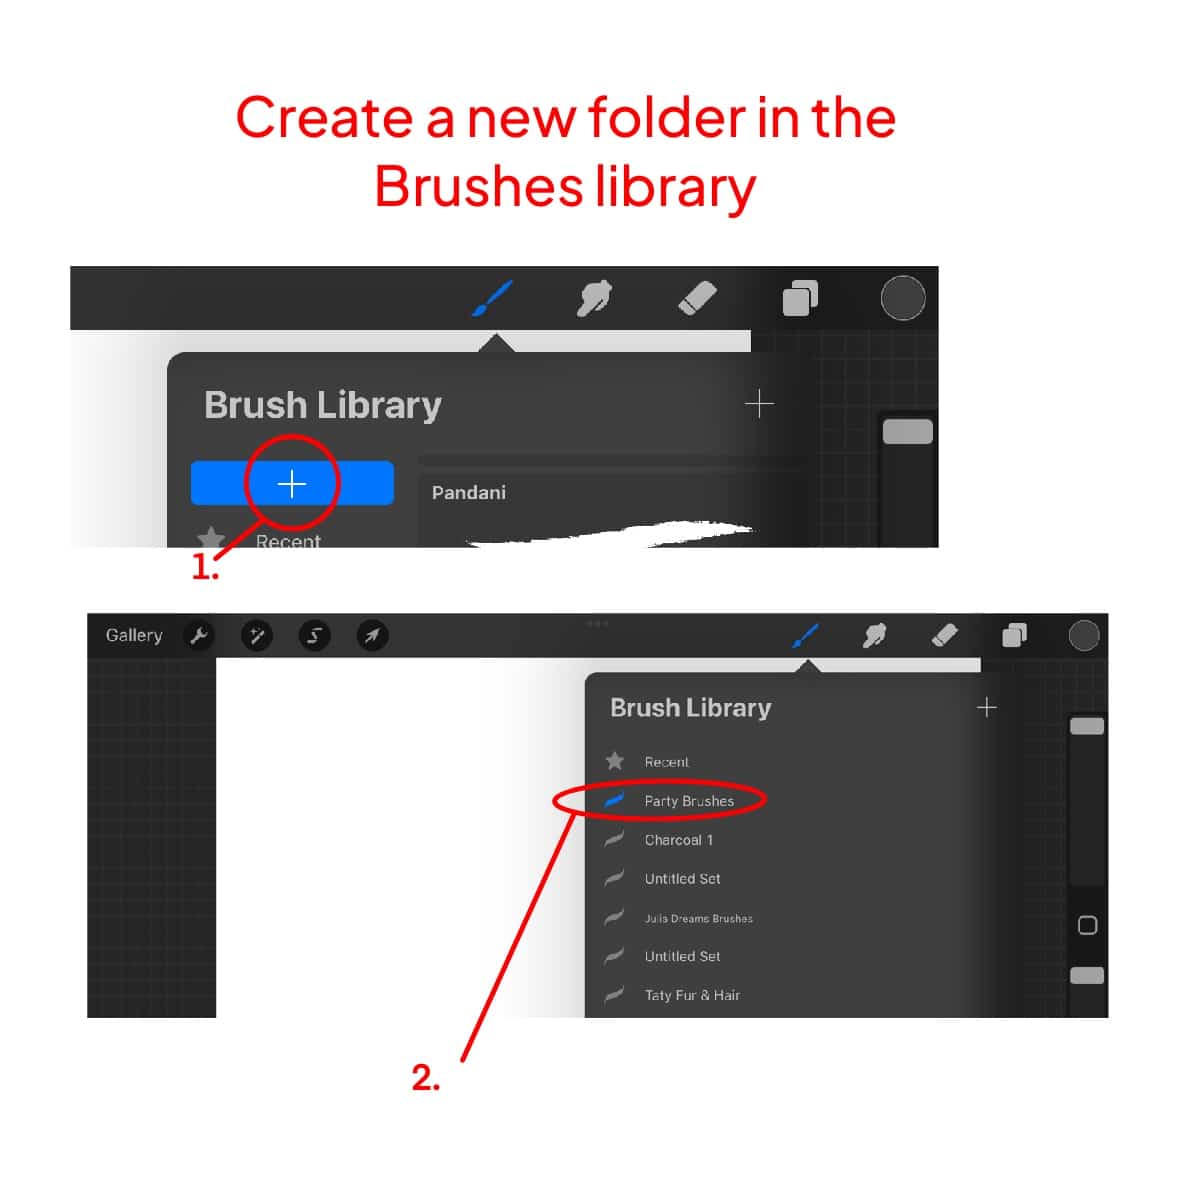
Start Creating a New Brush
In your new brush set or any existing set, tap the “+” icon again to create a new brush.

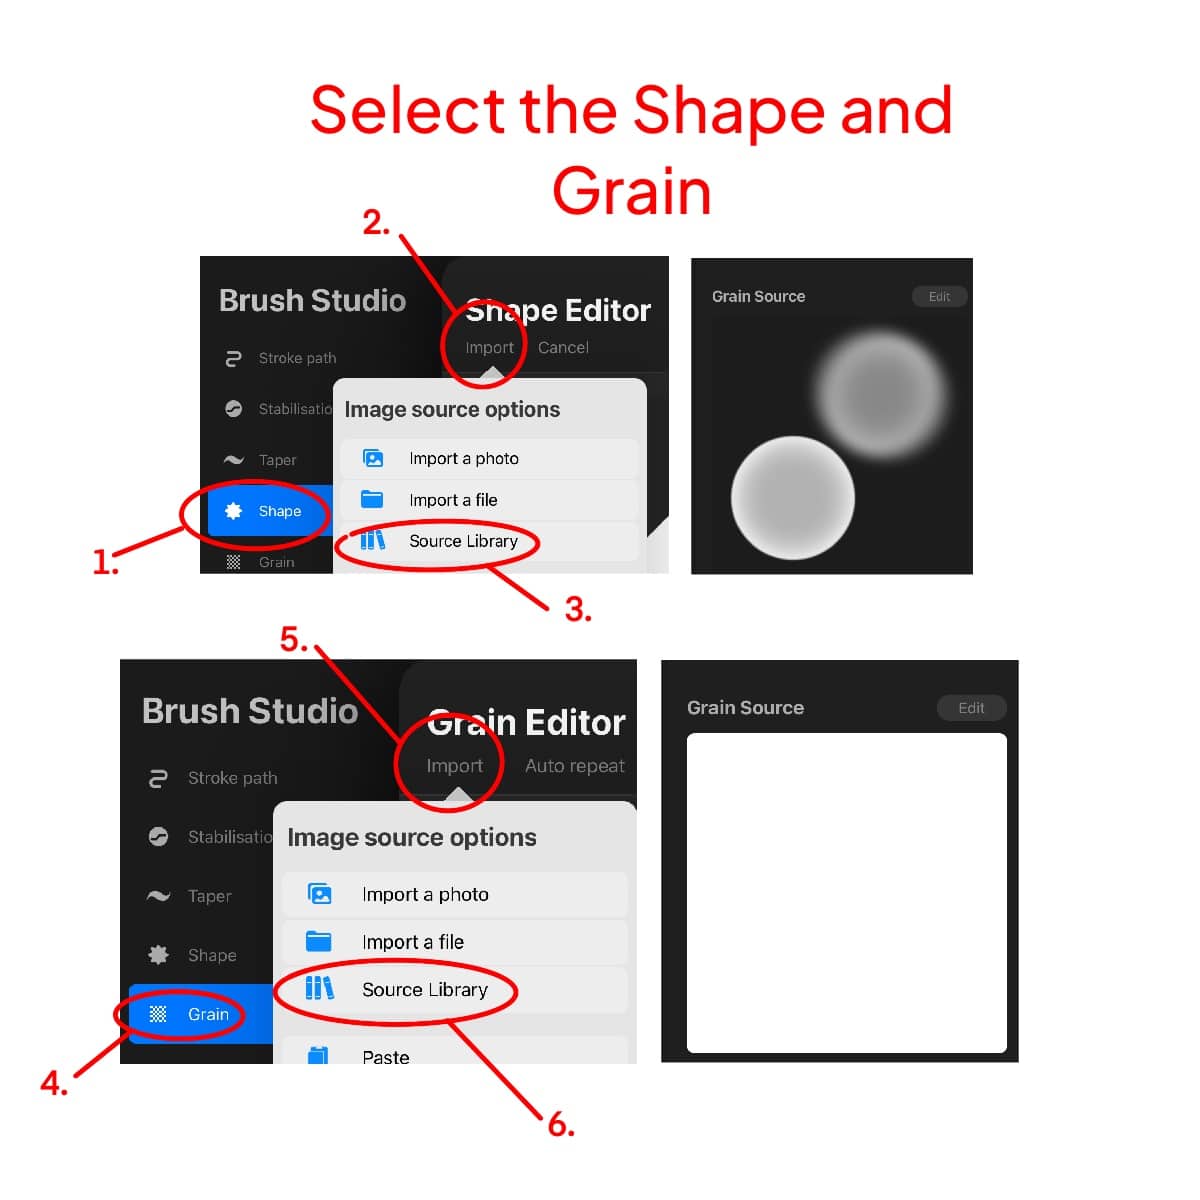
Select the Shape and Grain
Shape:
Tap ‘Shape’ and then ‘Edit’ to choose a shape source. You can use basic shapes for varied confetti pieces.
Grain:
Select ‘Grain’ and then ‘Edit’. A grain with a bit of texture works well for a more natural confetti look.
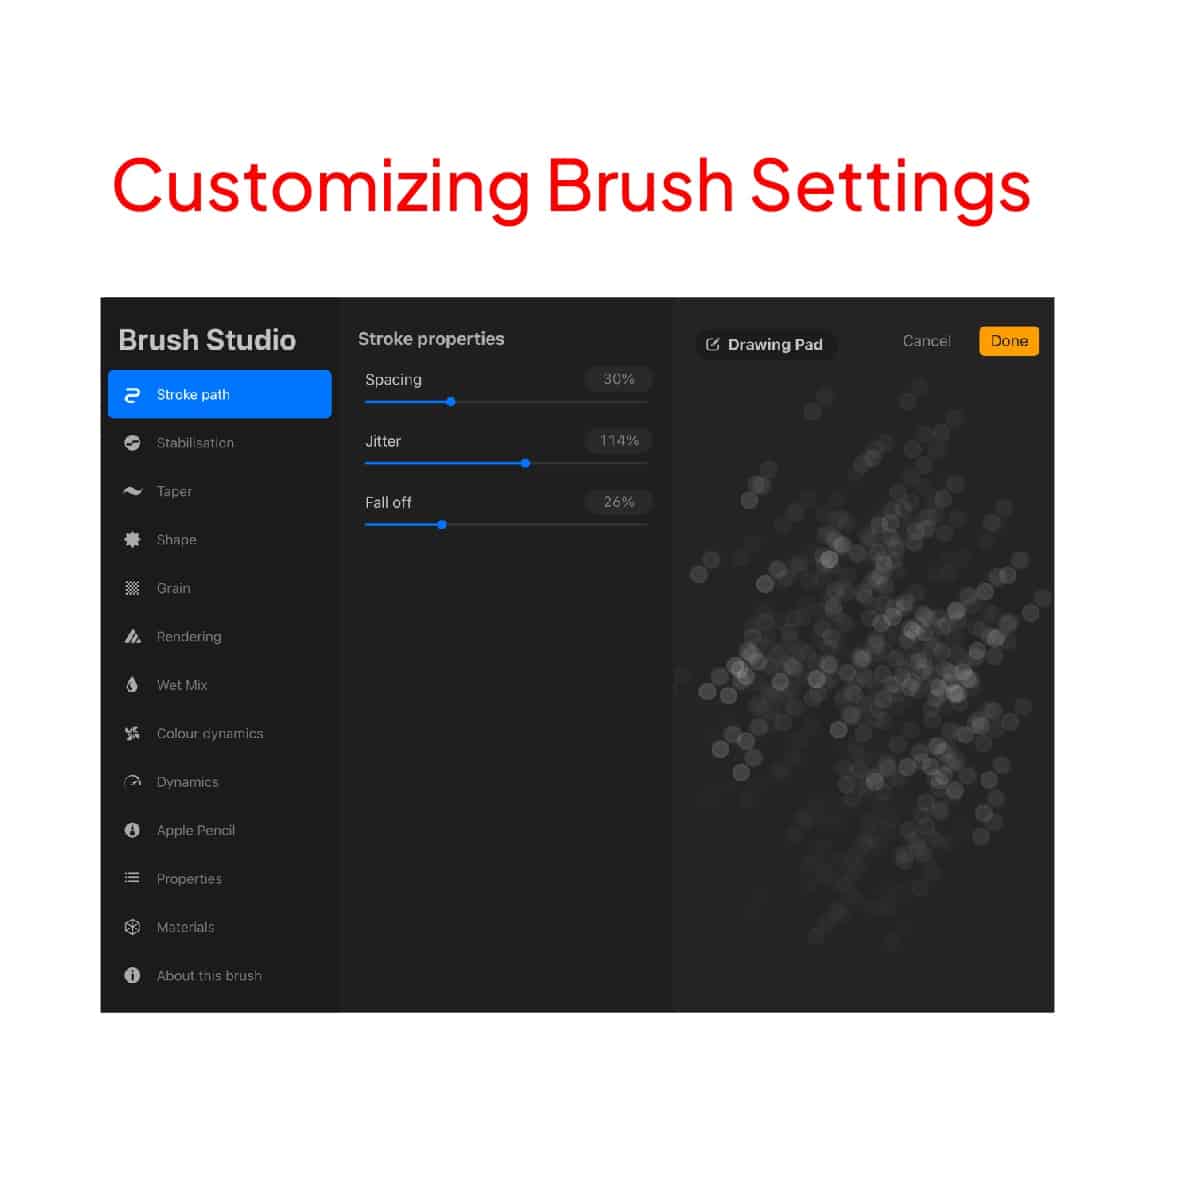
Customizing Brush Settings
Spacing:
Increase the spacing to ensure your confetti doesn’t clump together.
Scatter:
Adjust the scatter to make the confetti spread out more randomly.
Rotation:
A bit of rotation variance gives each piece of confetti a unique orientation.
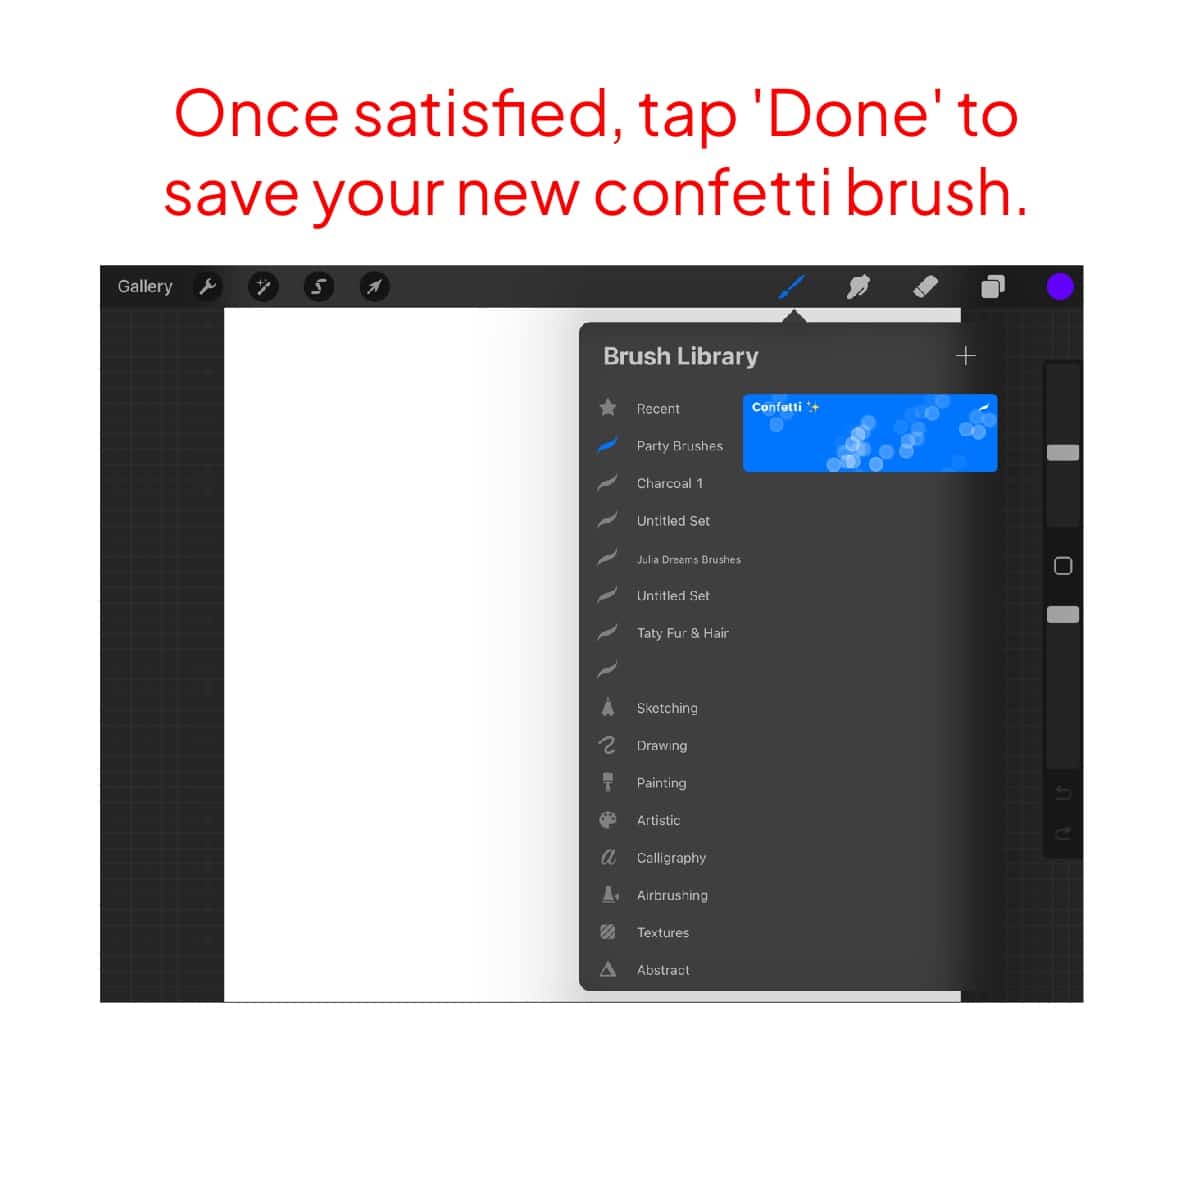
Testing and Adjusting Your Brush
Draw on your canvas to test the brush. Adjust settings like size, opacity, and jitter until you’re happy with how your confetti falls.

Save Your Confetti Brush
Once satisfied, tap ‘Done’ to save your new confetti brush.
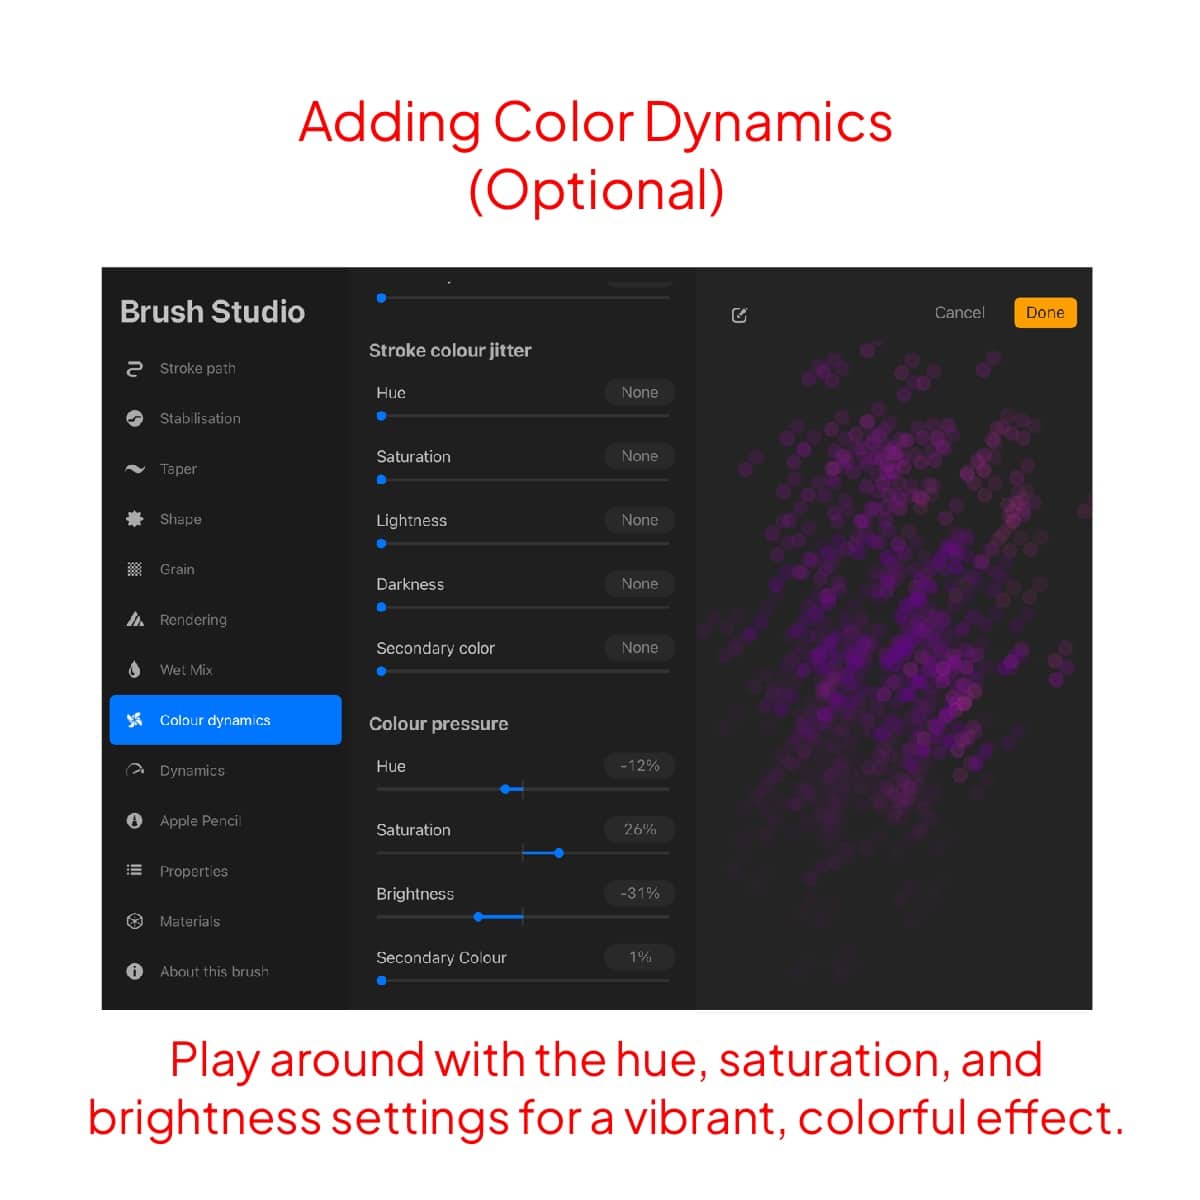
Adding Color Dynamics (Optional)
To make your confetti multi-colored, go to the ‘Color Dynamics’ tab. Play around with the hue, saturation, and brightness settings for a vibrant, colorful effect. Discover how to enhance your confetti and other artwork using the Liquify tool in Procreate for unique and dynamic effects.
And that’s it. Hope we helped you out. Happy creating!


Share this article


