
Selecting and Moving Objects in Procreate: Step-By-Step

Mastering the art of selecting and moving objects in Procreate is foundational to unlocking your full potential in digital art.
With the right Procreate brushes at your disposal, you can further enhance the precision and creativity of your selections and transformations, bringing your artistic visions to life with greater efficiency and impact.
In this guide, we’ll explore the essential steps and tips to effectively use Procreate’s selection and transformation tools, empowering you to manipulate your digital canvases with ease and confidence.
Selecting Objects
To select objects or areas in Procreate, you use the “Selection” tool. Here’s how:
Access the Selection Tool
Tap on the “S” icon (Selection tool) at the top of the Procreate interface. This will bring up the Selection menu.

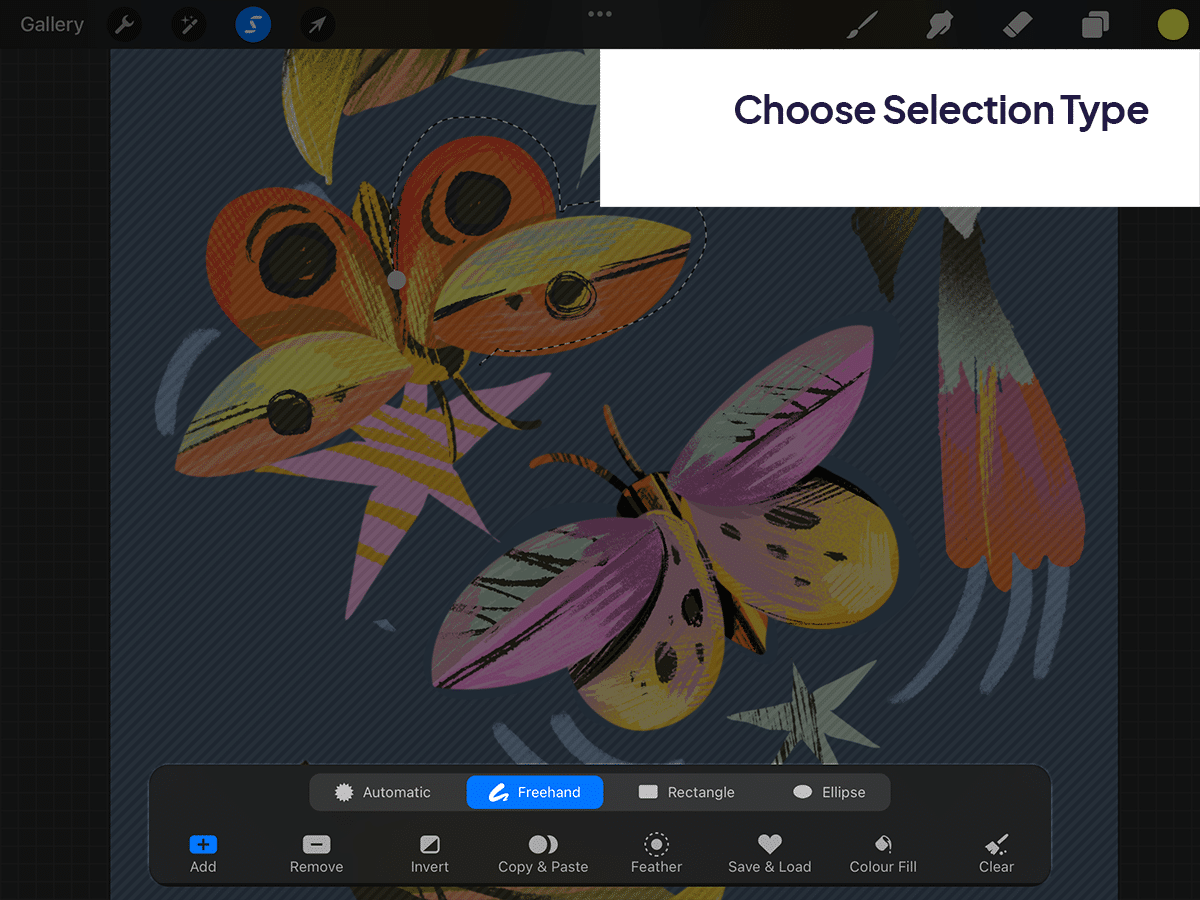
Choose Selection Type
You can choose from different selection options like “Freehand”, “Automatic”, “Rectangle”, or “Ellipse”.
Freehand allows you to draw the selection area manually.
Automatic selects areas based on color similarity and tolerance.
Rectangle and Ellipse let you make geometric selections.
Modify the Selection
After making an initial selection, you can add to or subtract from it by choosing the “Add” or “Remove” options in the Selection menu.

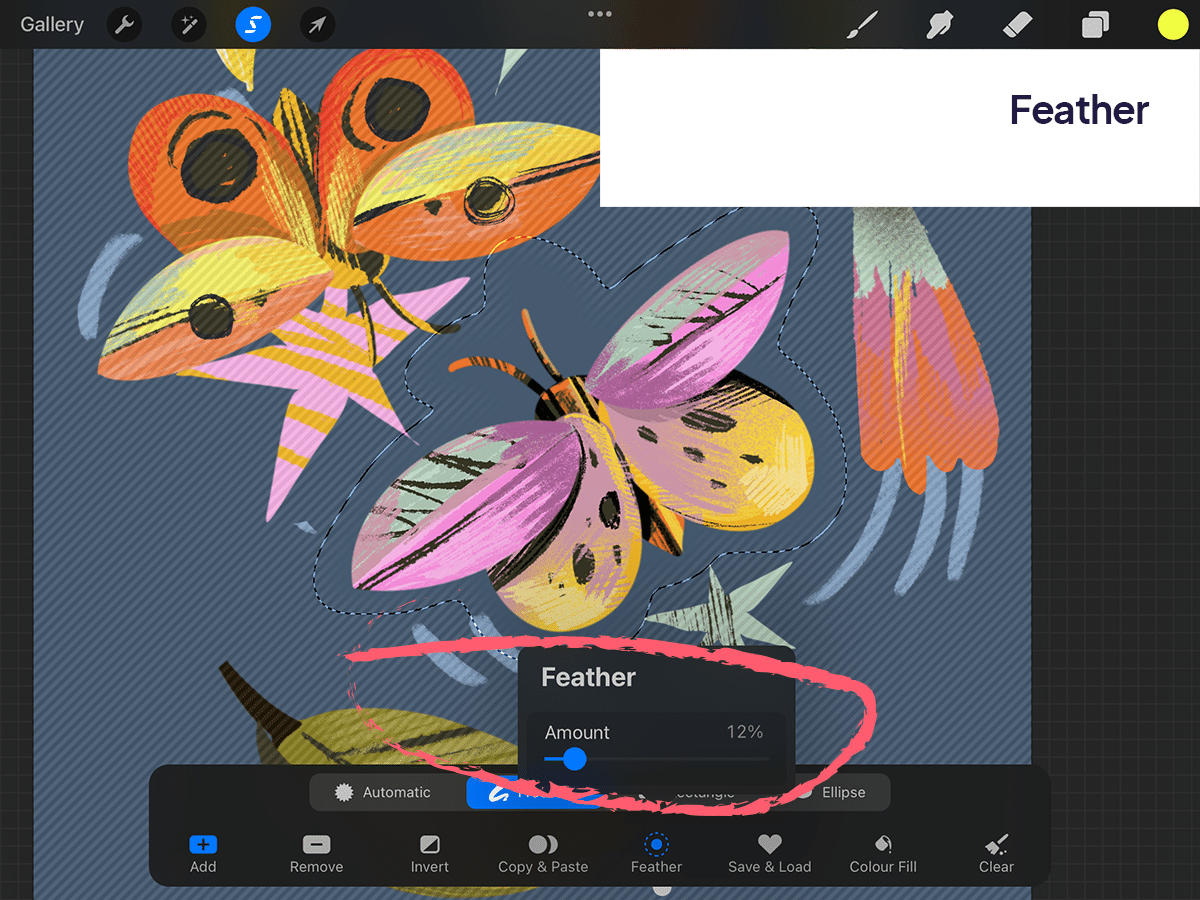
Feather
You can soften the edges of your selection by adjusting the feathering slider.
Moving and Transforming the Selection
After you have made your selection, you can move or transform it:
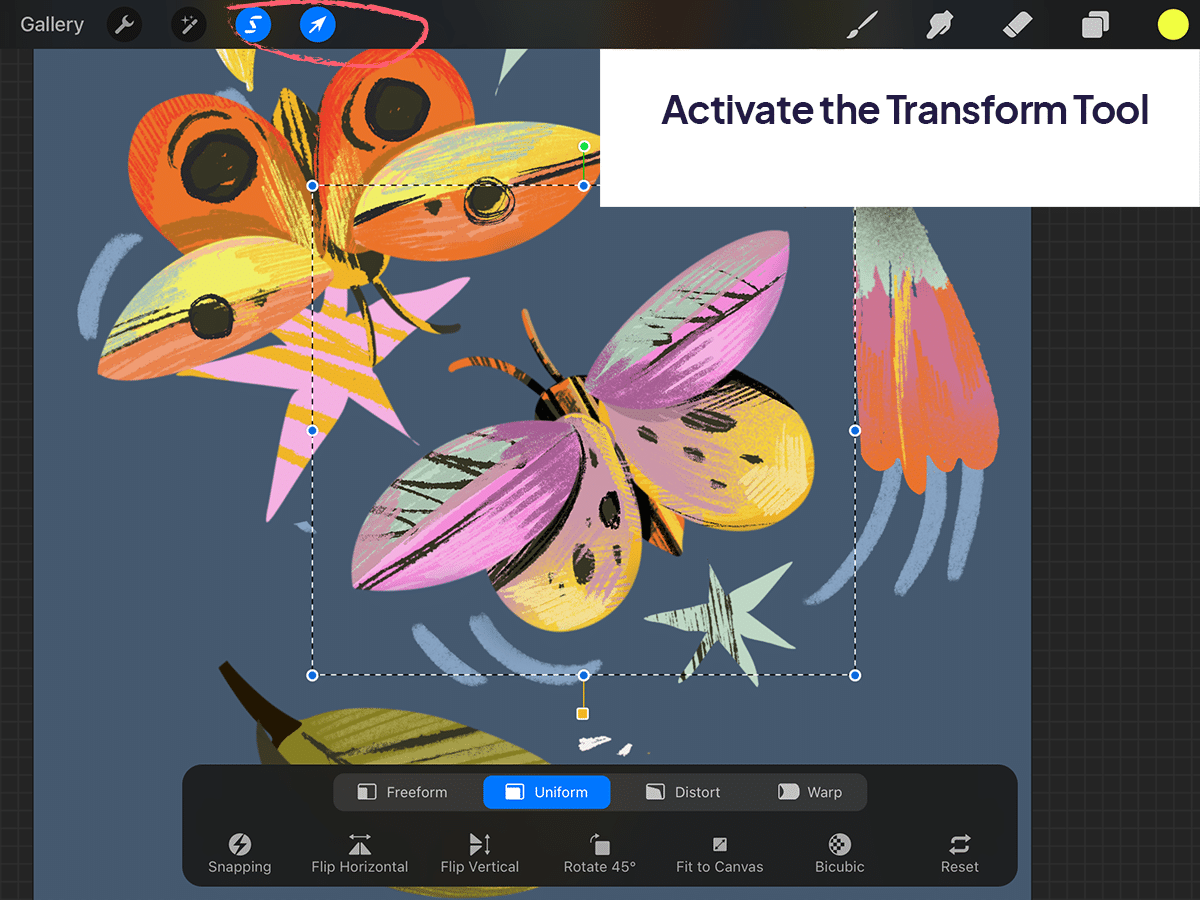
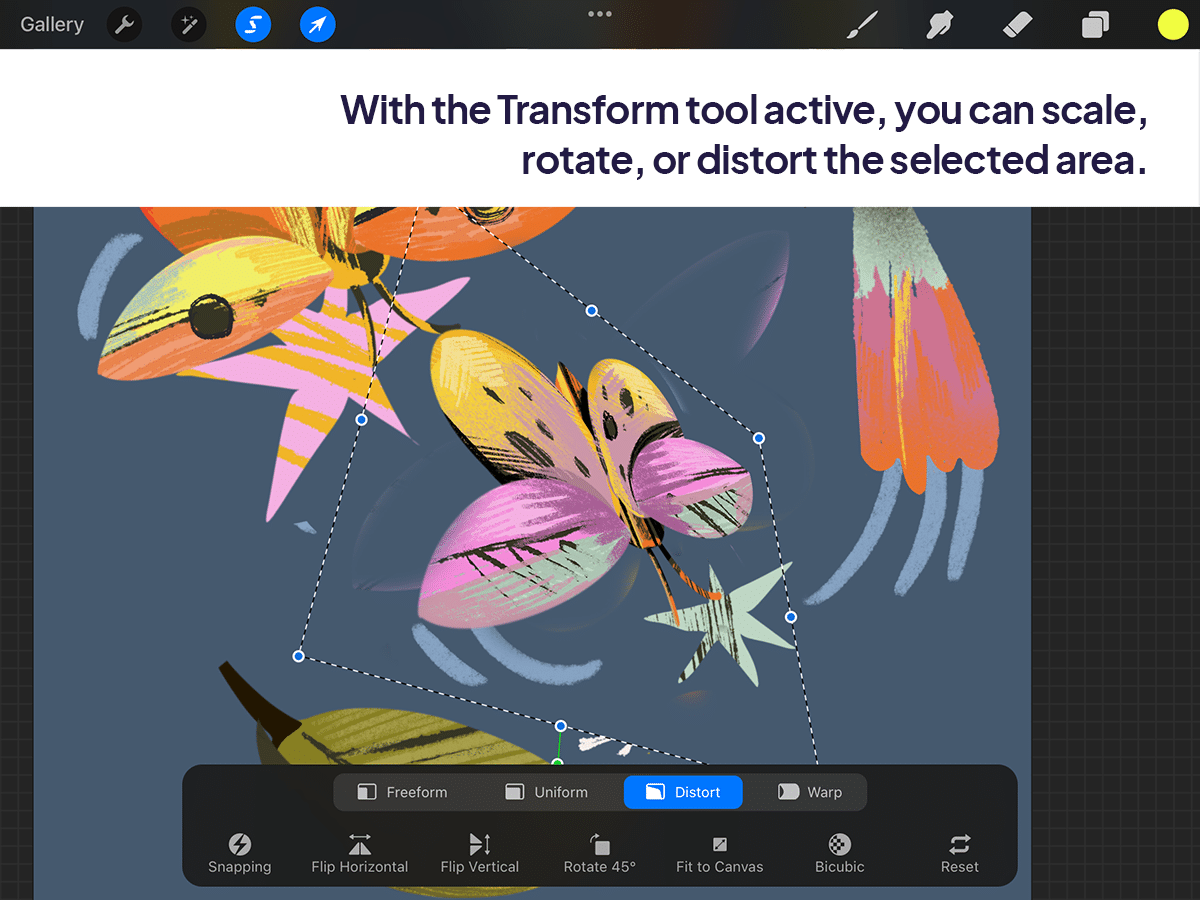
Activate the Transform Tool
Tap on the arrow icon at the top of the Procreate interface to bring up the Transform tool.
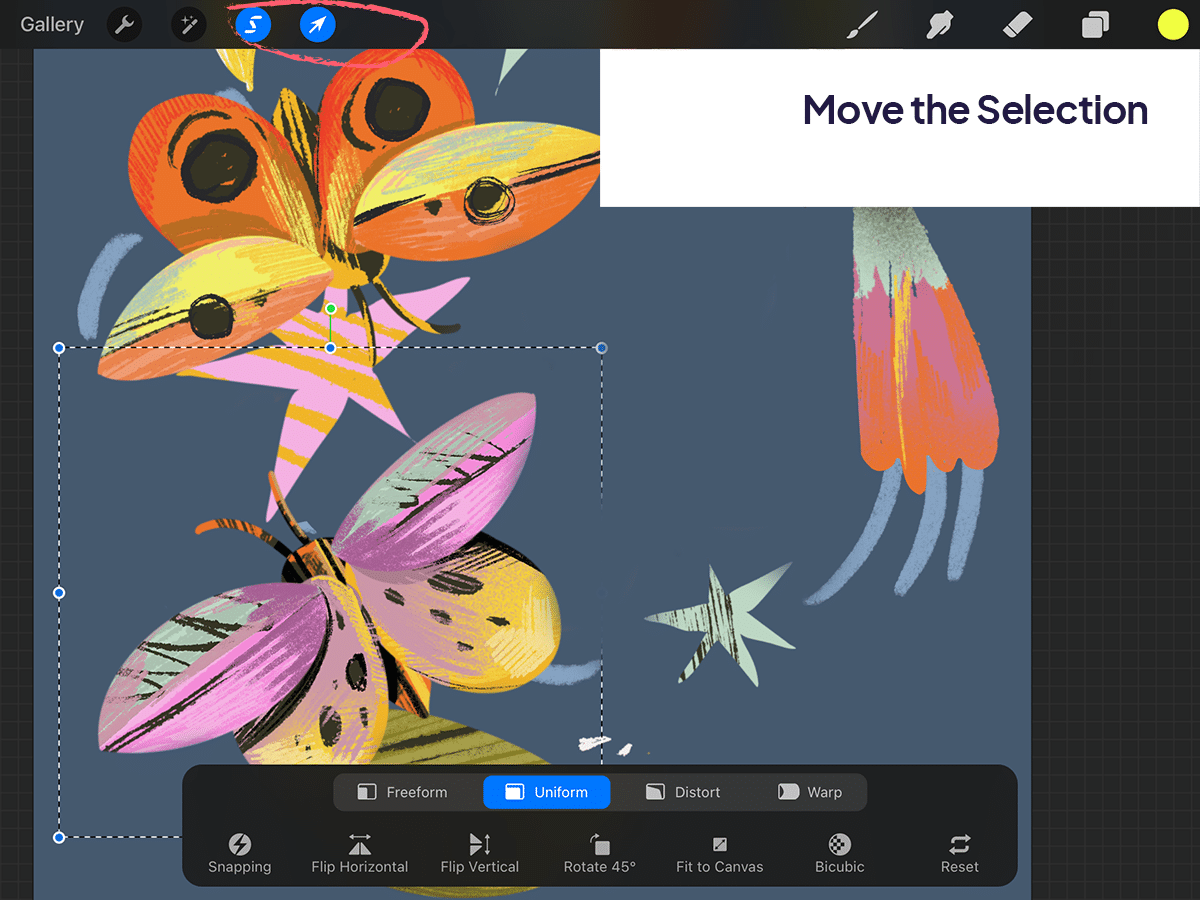
Move the Selection
Simply drag the selection to move it to a new location.
Transform Options
With the Transform tool active, you can scale, rotate, or distort the selected area. Use the handles around the selection to adjust its size or rotate it. Pinch with two fingers to scale proportionally, or use the “Freeform” and “Distort” options for more complex transformations.
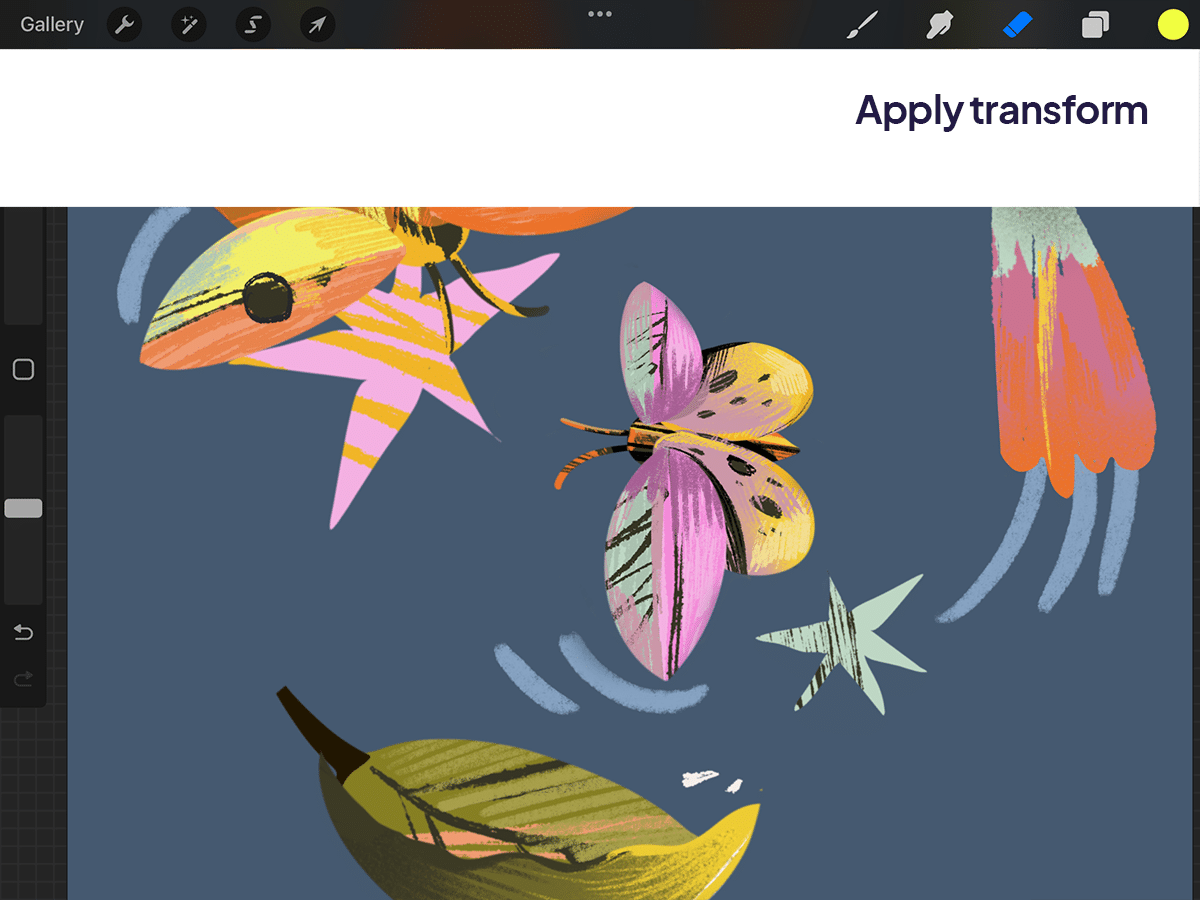
Apply the Transformation
Tap on the “Arrow” icon again or tap “Done” to apply the changes.
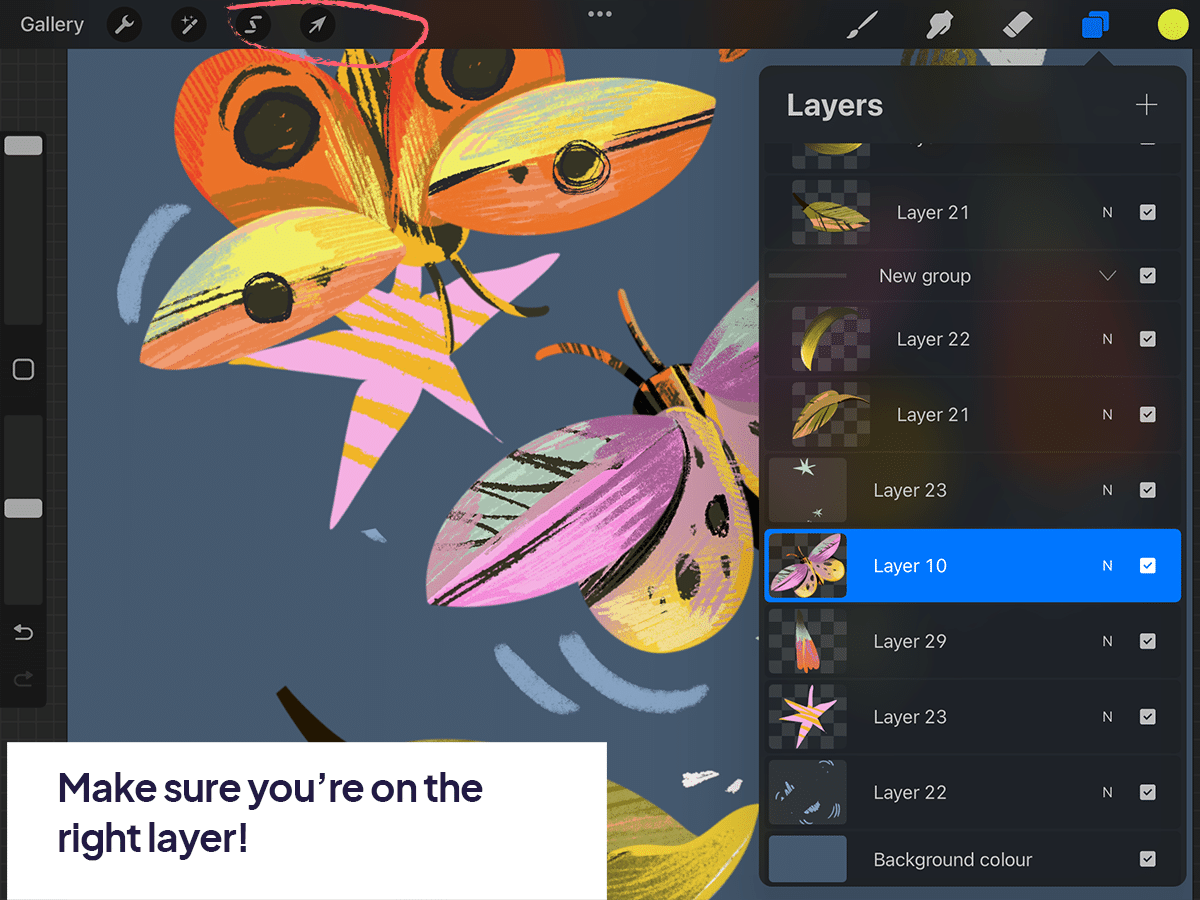
Layer Options
Selections and transformations can be applied to individual layers or multiple layers if they are grouped. You might want to ensure that the correct layer or layers are selected before using these tools.
Practice and Experimentation
The best way to get comfortable with these features is through practice. Try using different selection methods and transformation options to see how they affect your artwork.
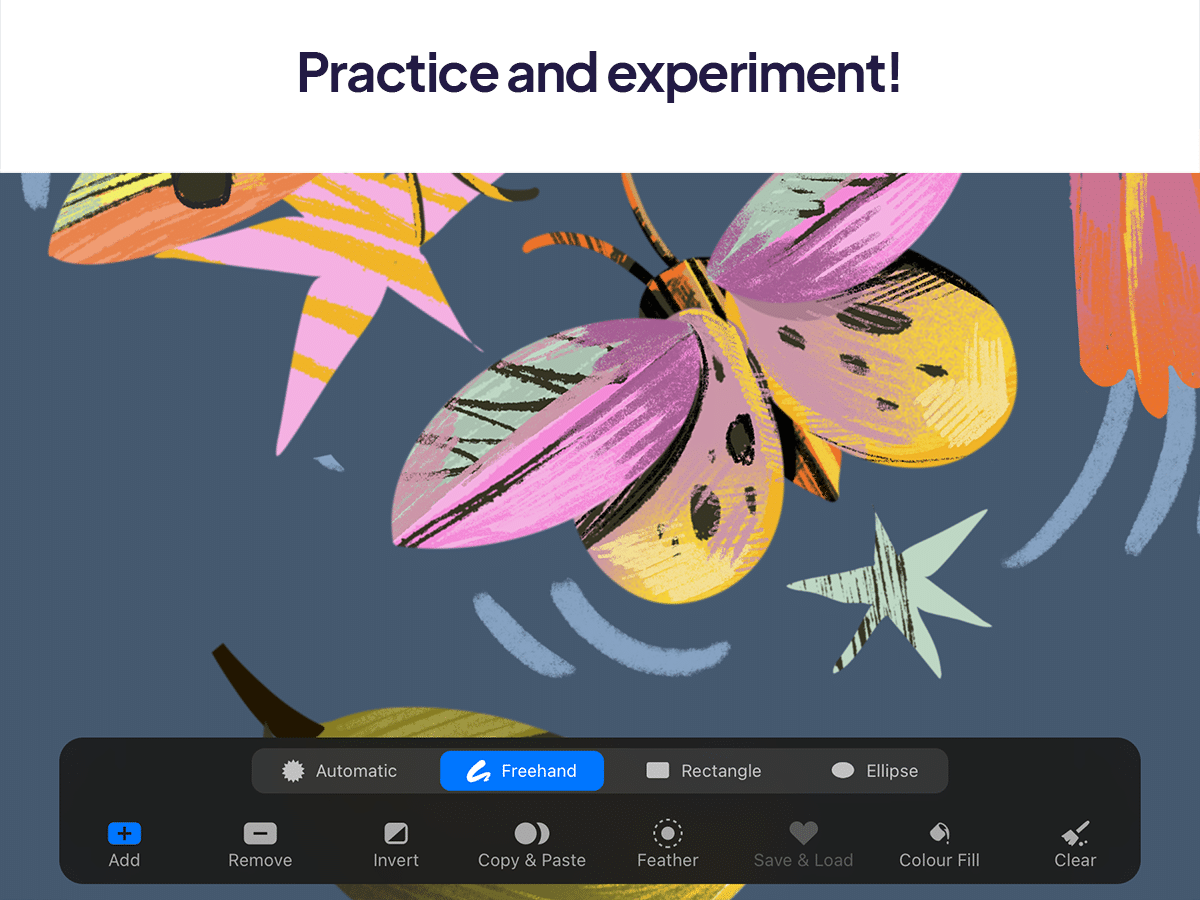
Experimentation is key to understanding how these tools can best serve your creative process.


Share this article


