
How To Use Clipping Mask in Procreate

Hey, creative minds! Dive into the magic of Clipping Masks in Procreate, armed with the dynamic Procreate brushes, and unlock a new realm of artistic possibilities.
Clipping Masks are akin to having a magical wand in your digital art toolkit, allowing you to apply textures, colors, or effects to a specific layer without altering the original artwork.
This guide will walk you through the steps to master Clipping Masks, granting you the power to experiment and refine your artwork with unmatched flexibility.
Step-by-Step Guide to Using Clipping Masks in Procreate
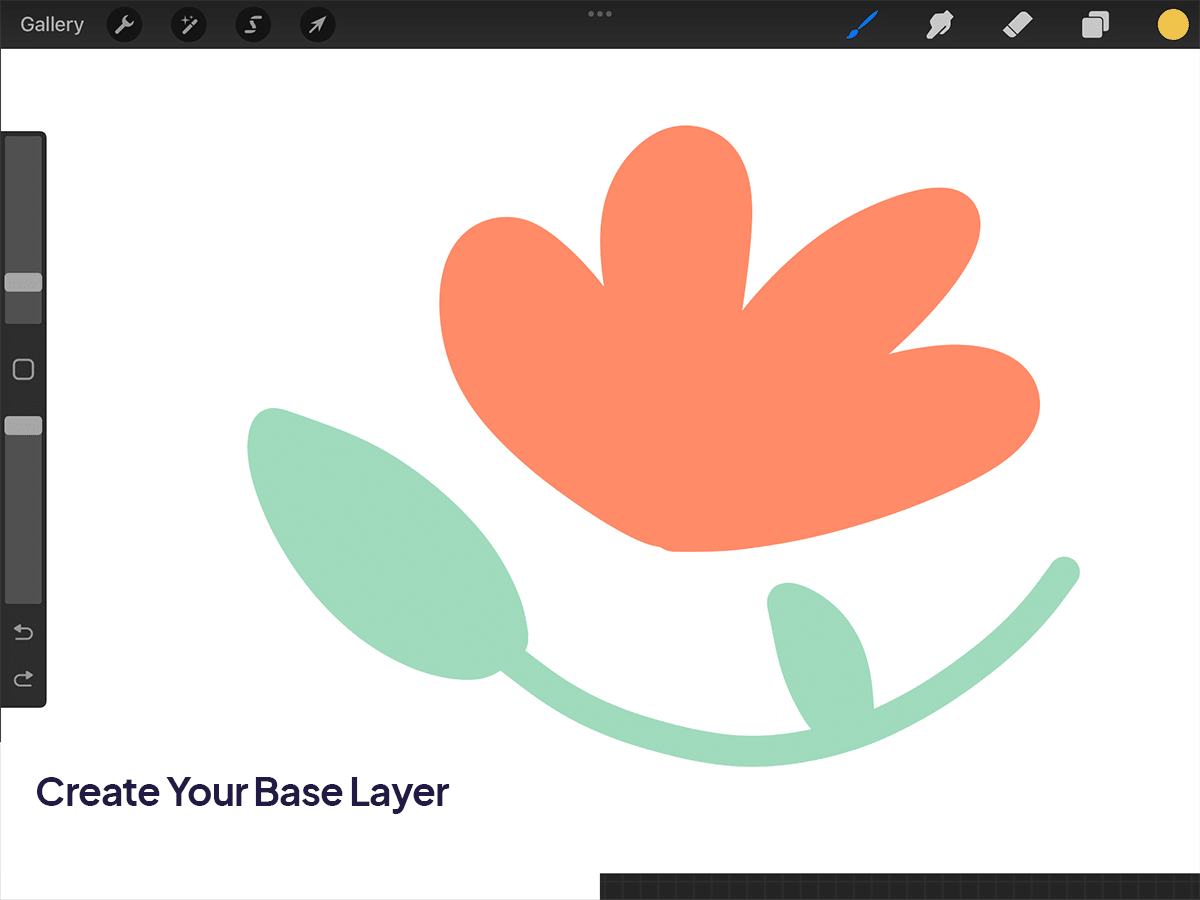
Step 1 – Create Your Base Layer
Start by drawing or placing the element you want to work on. This could be anything from a simple shape to a complex illustration. This layer will serve as the base for your Clipping Mask.
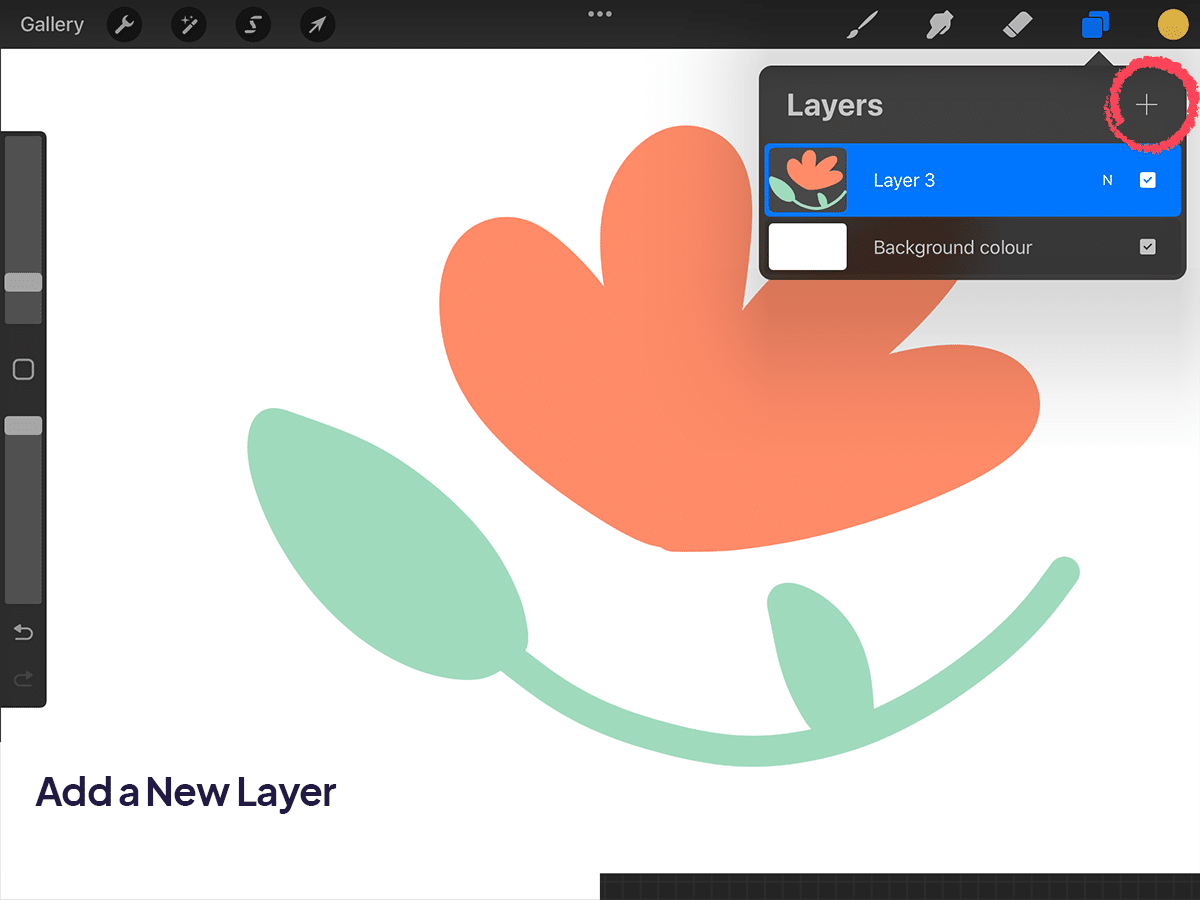
Step 2 – Add a New Layer
Tap the “+” icon at the top of the Layers panel to add a new layer above your base layer. This new layer is where you’ll apply your textures, colors, or whatever effect you want to clip to the base layer.
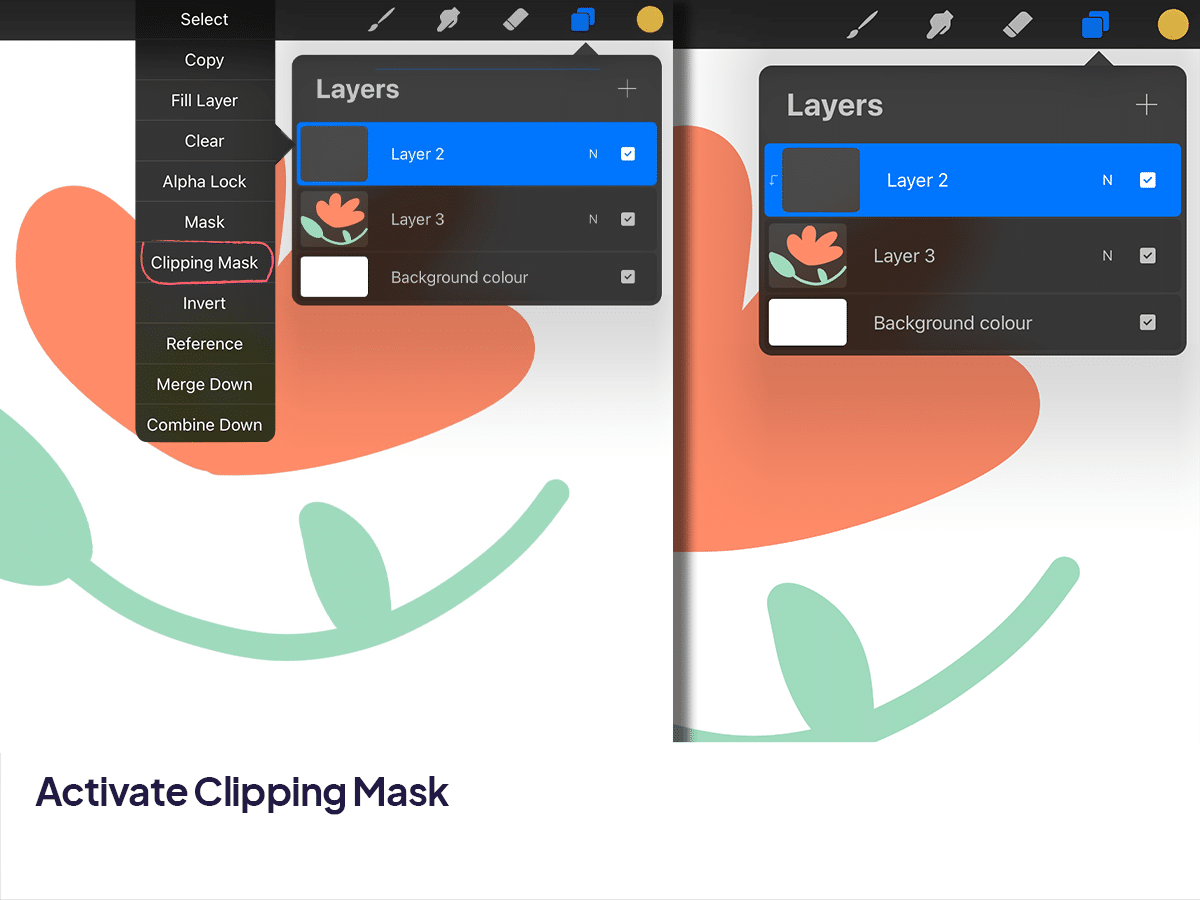
Step 3 – Activate Clipping Mask
Tap on the newly added layer to bring up the layer options menu, then select “Clipping Mask”. You’ll notice that the layer now becomes indented, indicating that it’s clipped to the layer below. Anything you draw or apply on this clipped layer will only affect the non-transparent parts of your base layer.
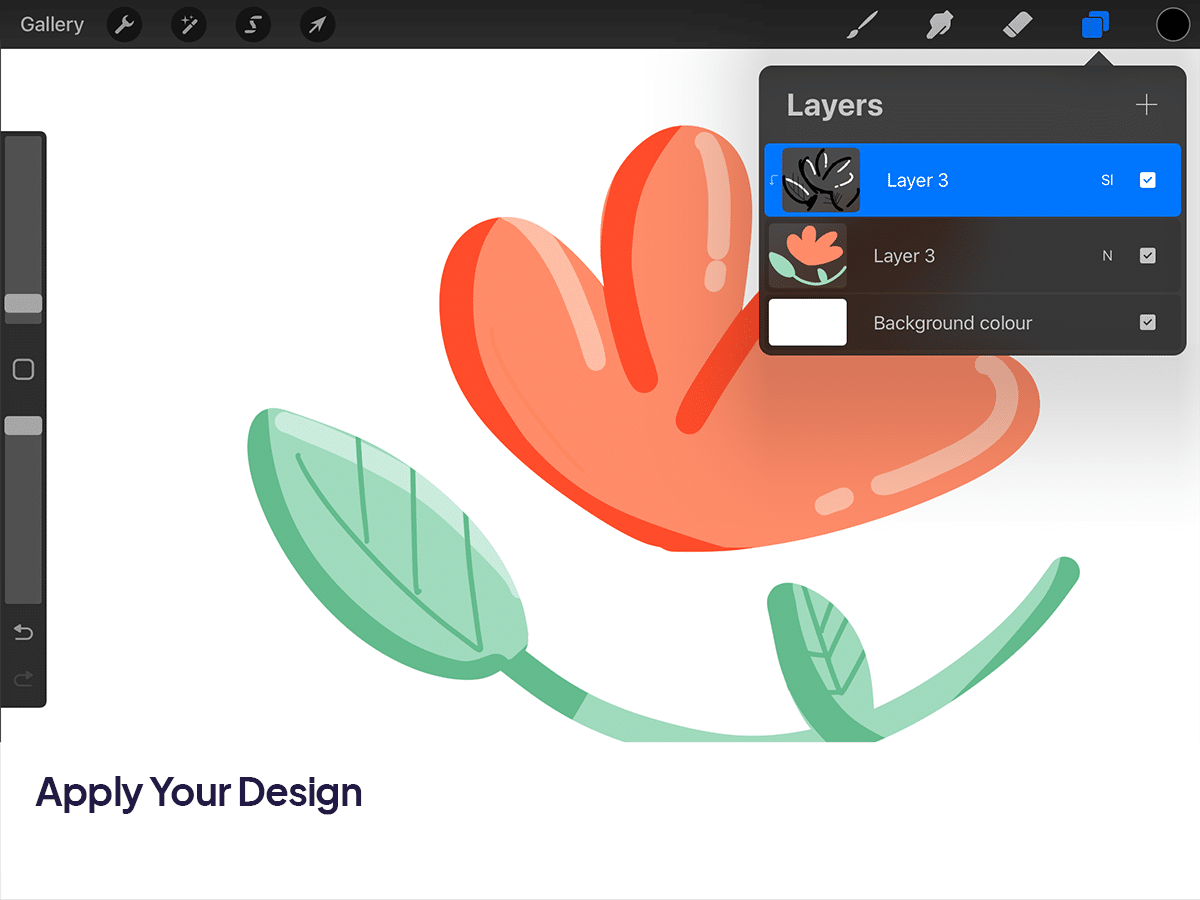
Step 4 – Apply Your Design
Now it’s time to let your creativity flow! Paint, draw, or paste your designs on the clipped layer. You’ll see that these designs adopt the shape of the base layer, allowing for detailed texturing, shading, or coloring without going outside the lines.
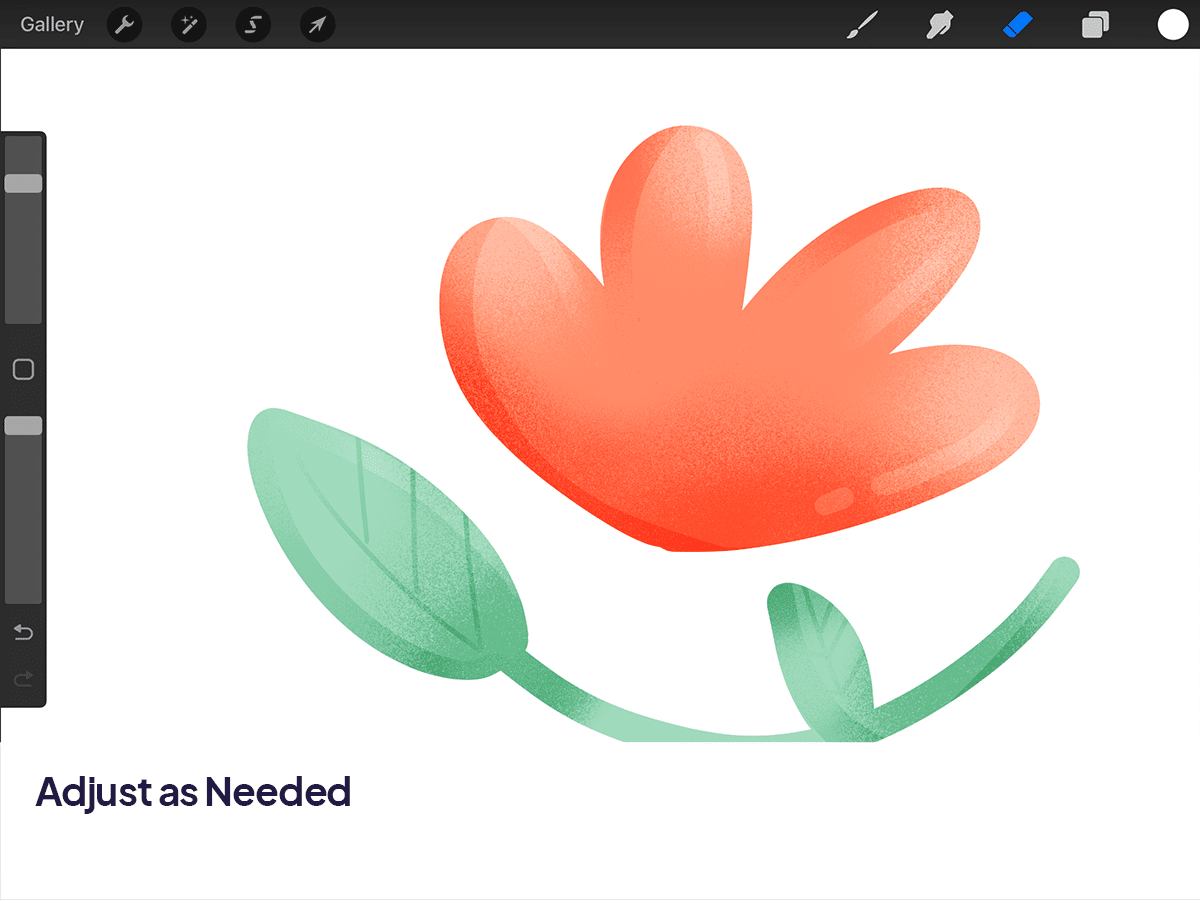
Step 5 – Adjust as Needed
The beauty of Clipping Masks is their non-destructive nature. You can freely adjust, move, or even remove the clipped layer without affecting the original artwork beneath. Feel free to experiment with different effects until you’re happy with the result.
Pro Tips for Mastering Clipping Masks
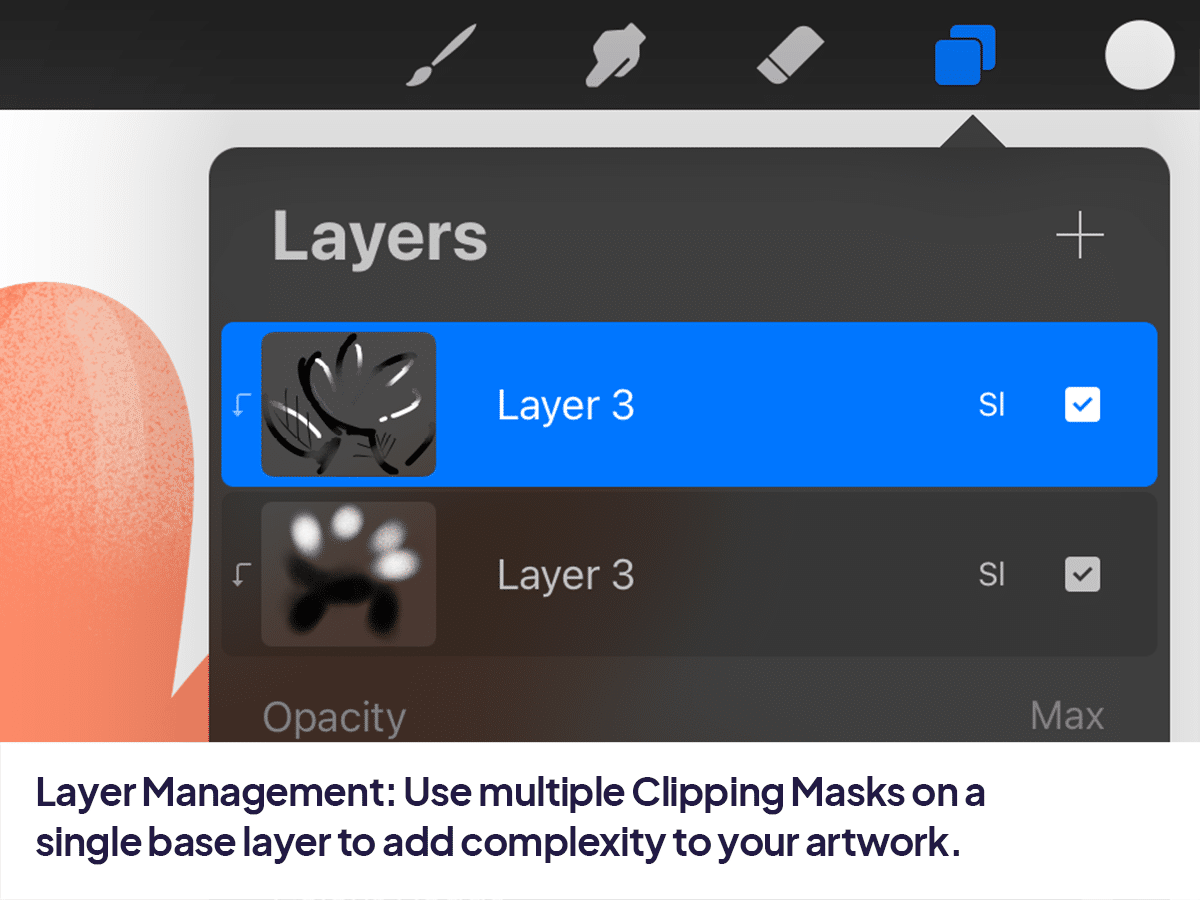
Layer Management: Use multiple Clipping Masks on a single base layer to add complexity to your artwork. This is perfect for creating detailed textures or intricate color gradients.
Blend Modes: Combine Clipping Masks with different blend modes to create unique effects. Changing the blend mode of your clipped layer can dramatically alter the appearance of your artwork, offering endless creative possibilities.

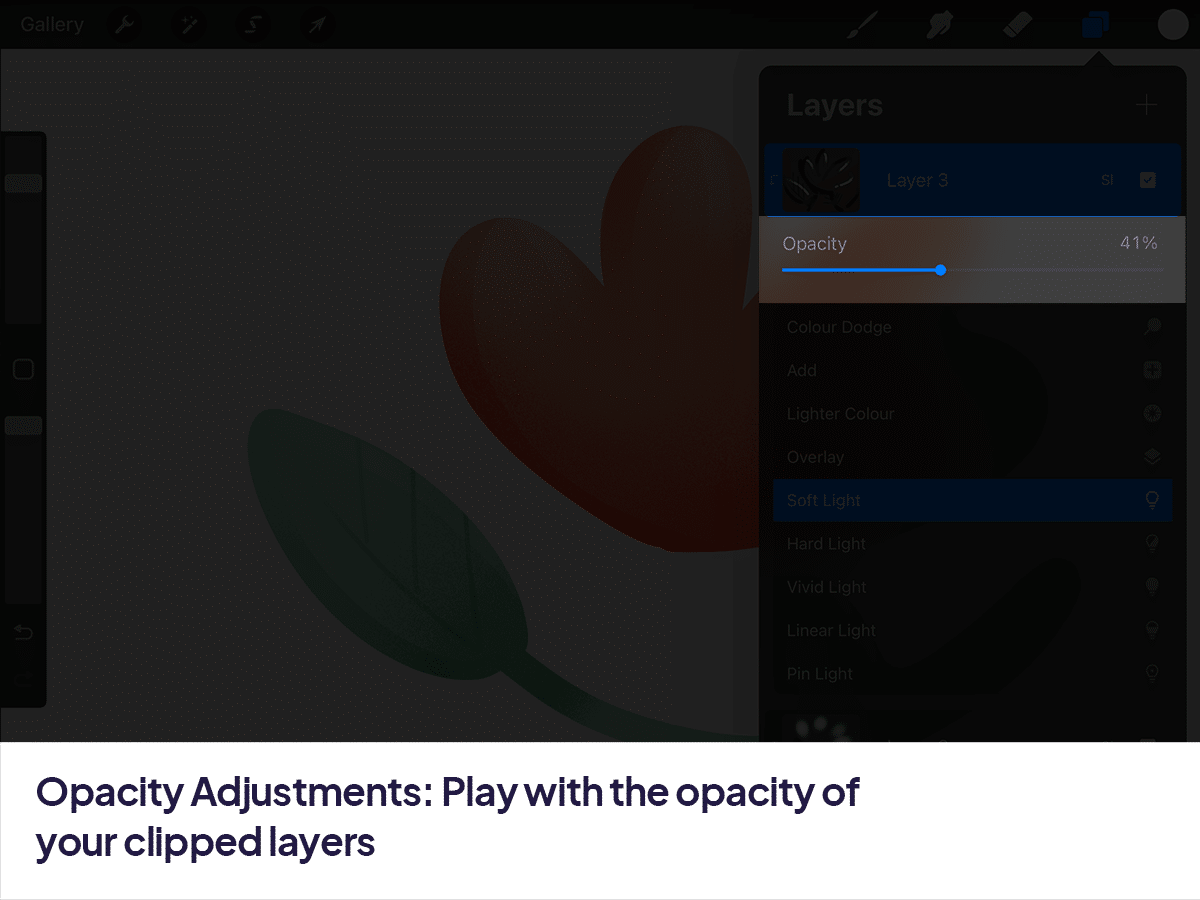
Opacity Adjustments: Play with the opacity of your clipped layers to achieve subtle textures or soft shading effects. This can add depth and realism to your digital art.
Clipping Masks in Procreate are a game-changer for artists looking to push the boundaries of their creativity.
With this tutorial, I hope you feel empowered to explore new artistic horizons and bring your most ambitious ideas to life. Happy creating, everyone! 🎨✨


Share this article


