
How to Turn Off Pressure Sensitivity in Procreate

Greetings, fellow creatives! Embark on a journey to refine your Procreate experience with the versatile arsenal of Procreate brushes at your disposal, especially when aiming for that flawless, uniform line work that elevates illustrations, lettering, or any digital art project you’re passionate about.
Today, we delve into a transformative technique—turning off pressure sensitivity in Procreate. While the dynamic range of pressure sensitivity can add unparalleled depth and texture to your creations, achieving consistent line thickness requires a different approach.
Let’s navigate through the steps to master uniform line work by disabling pressure sensitivity.
Step 1
Begin by tapping on the wrench icon located at the top left corner of the screen to open the “Actions” menu. From there, select “Preferences” (Prefs).
It’s important to note that you must be within a canvas to access this menu. While the effects will be applied globally across Procreate, you need to set it up within a canvas – the specific canvas choice doesn’t matter.
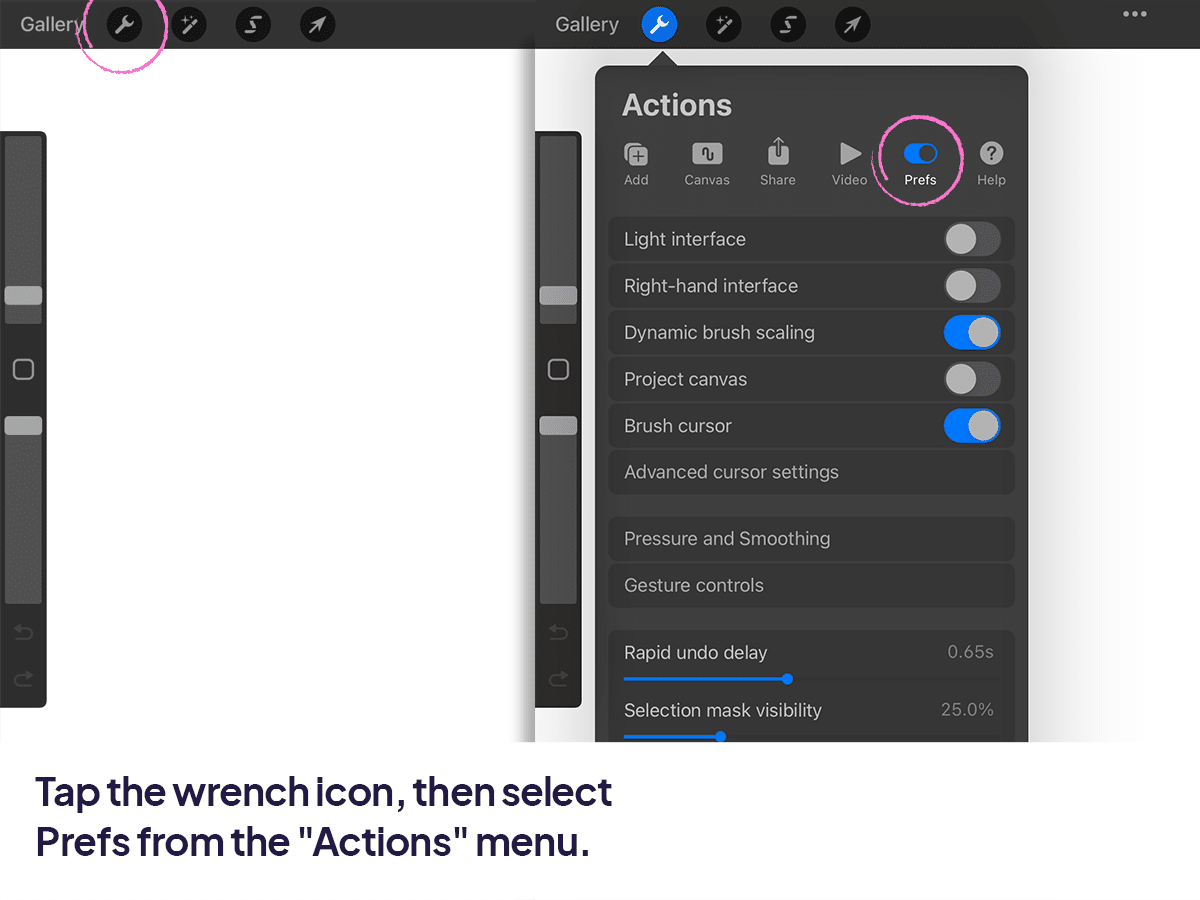
Step 2
Inside the Procreate preferences, you’ll find various options. Locate and tap on “Pressure and Smoothing”.
This section contains settings related to pressure sensitivity and smoothing, allowing you to customize your brush behavior.

Step 3
Within the “Pressure and Smoothing” settings, you’ll find the “App Pressur Sensitivity” box. By default, this box has a diagonal line with dots at both ends.
If the box doesn’t appear this way or you wish to revert to default settings, scroll down within the “Pressure and Smoothing” settings and tap the “Reset all” button.
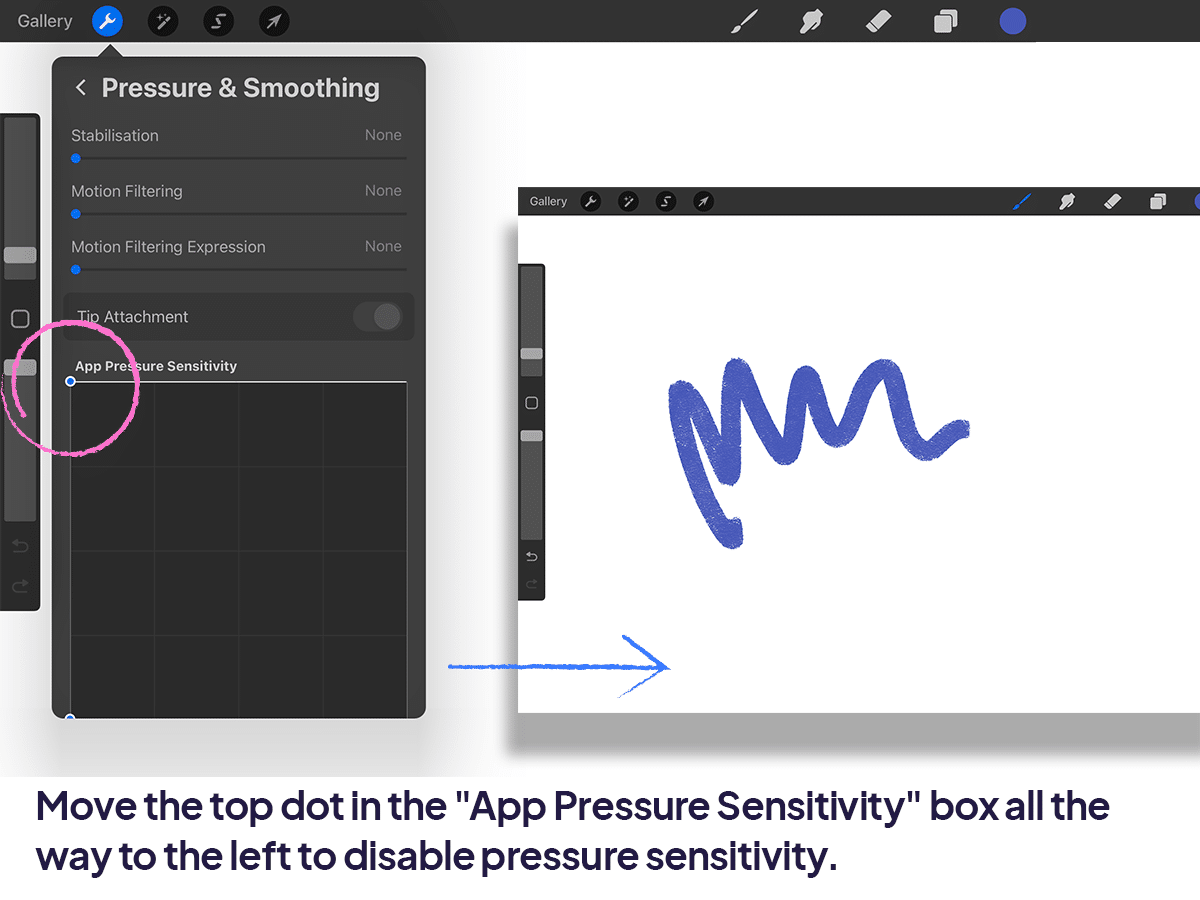
Step 4
To turn off pressure sensitivity across all brushes, move the top dot within the “App Pressure Sensitivity” box all the way to the left.
Place your finger on the top dot located in the right-hand corner and drag it to the top left corner. This action changes the line orientation from horizontal to vertical.
If you can’t move it all the way to the left, don’t worry. Get it as close as possible.
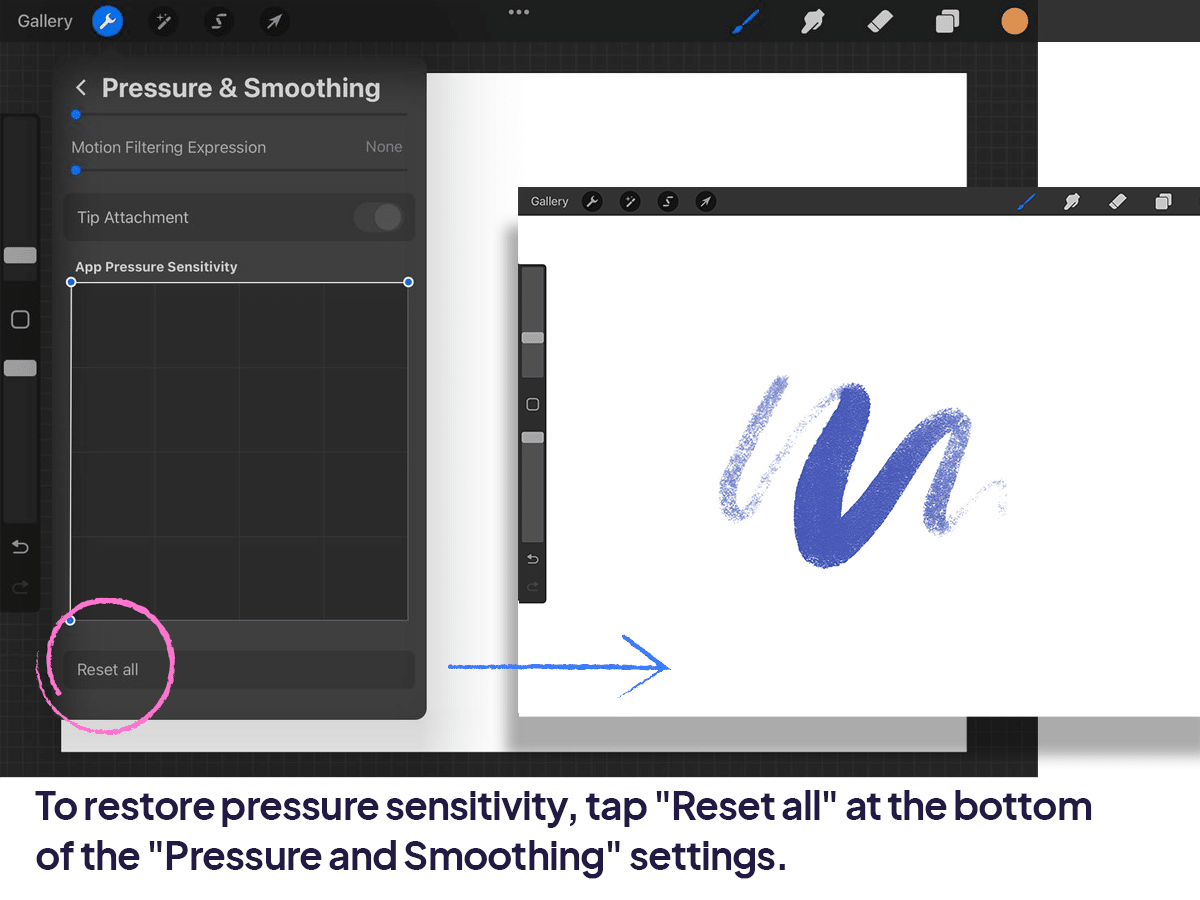
Step 5
To restore pressure sensitivity, reset everything. With the dot in the “App Pressure Sensitivity” box moved to the top left, pressure sensitivity will be turned off across all of Procreate.
This means that the thickness of your brushes won’t be affected by how hard you press on your stylus. Instead, brush thickness will be solely impacted by your brush size slider on the left-hand side of the screen.
To restore pressure sensitivity, scroll down to the bottom of the “Pressure and Smoothing” settings and tap on the “Reset all” button. Keep in mind that this action will reset all settings within these preferences.
Alternatively, you can manually reset pressure sensitivity by dragging the dot in the “App Pressure Sensitivity” box back over to the right-hand corner so that you have a diagonal line again.
Wrapping Up
There you have it, folks – a quick and easy guide to customizing pressure sensitivity in Procreate. By following these steps, you can ensure your lines are exactly how you want them, every time. Happy creating, and stay tuned for more tips and tricks that will elevate your digital art game!


Share this article


