
How To Paint A Still Life in Procreate
Embark on a journey of artistic exploration and skill refinement with Procreate, your digital canvas enriched by the diverse selection of Procreate brushes.
Painting a still life in Procreate is not just about capturing objects on a screen; it’s a deep dive into observation, composition, lighting, and color dynamics.
This step-by-step guide is designed to shepherd you through creating a still life painting that brims with life, leveraging Procreate’s intuitive features and traditional painting technique simulations.
1. Setting Up Your Canvas
Open Procreate and tap the “+” icon to create a new canvas. Choose a size that suits your project – for still life, a square or a rectangle in landscape orientation works well.
Consider Resolution: Higher resolutions are great for detail but can limit the number of layers you can use. A good starting point is 300 DPI for prints or 72 DPI for digital viewing.

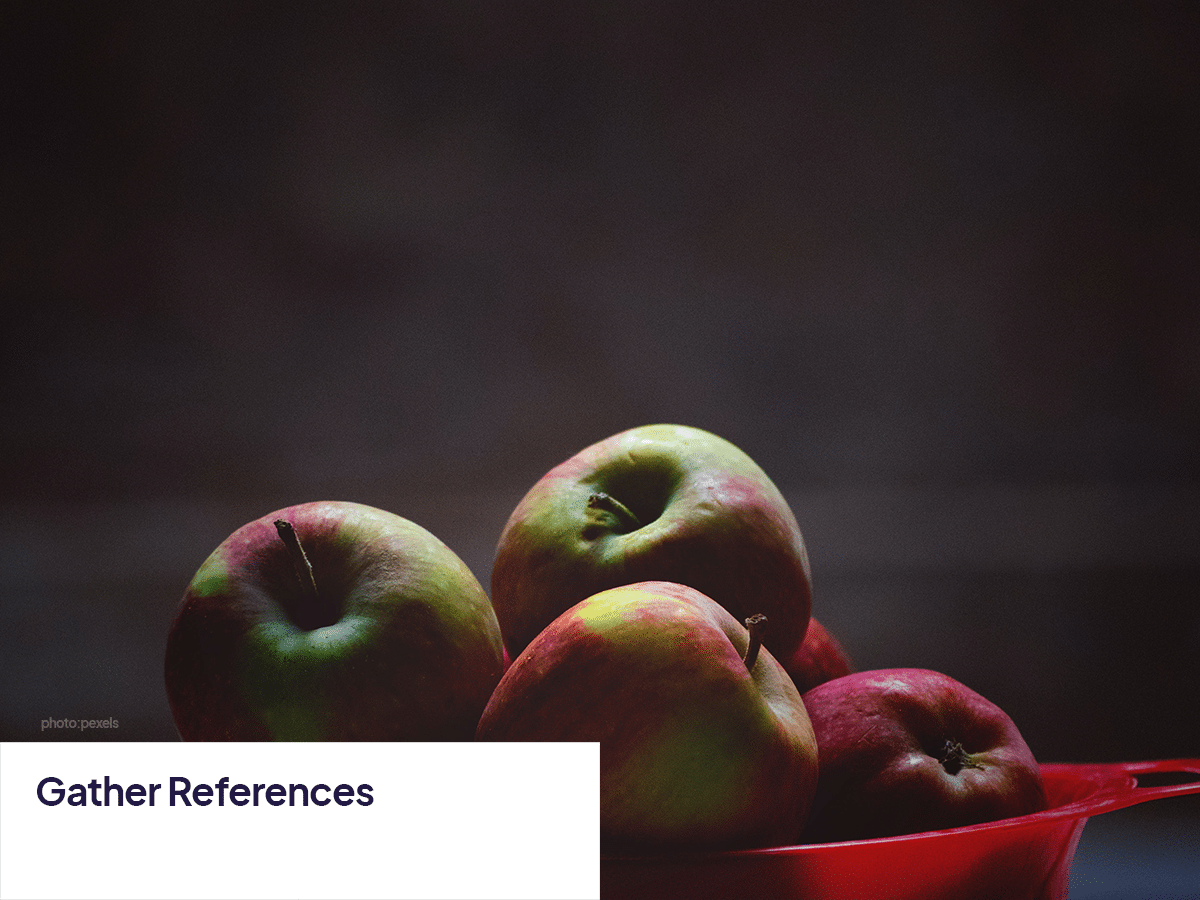
2. Gathering References
Arrange a still-life setup with objects you find interesting. This could be anything from fruits to vases, ensuring there’s a variety of shapes, textures, and colors.
Take a photo of your setup. Good lighting is key – natural light works best to create soft shadows and highlights.
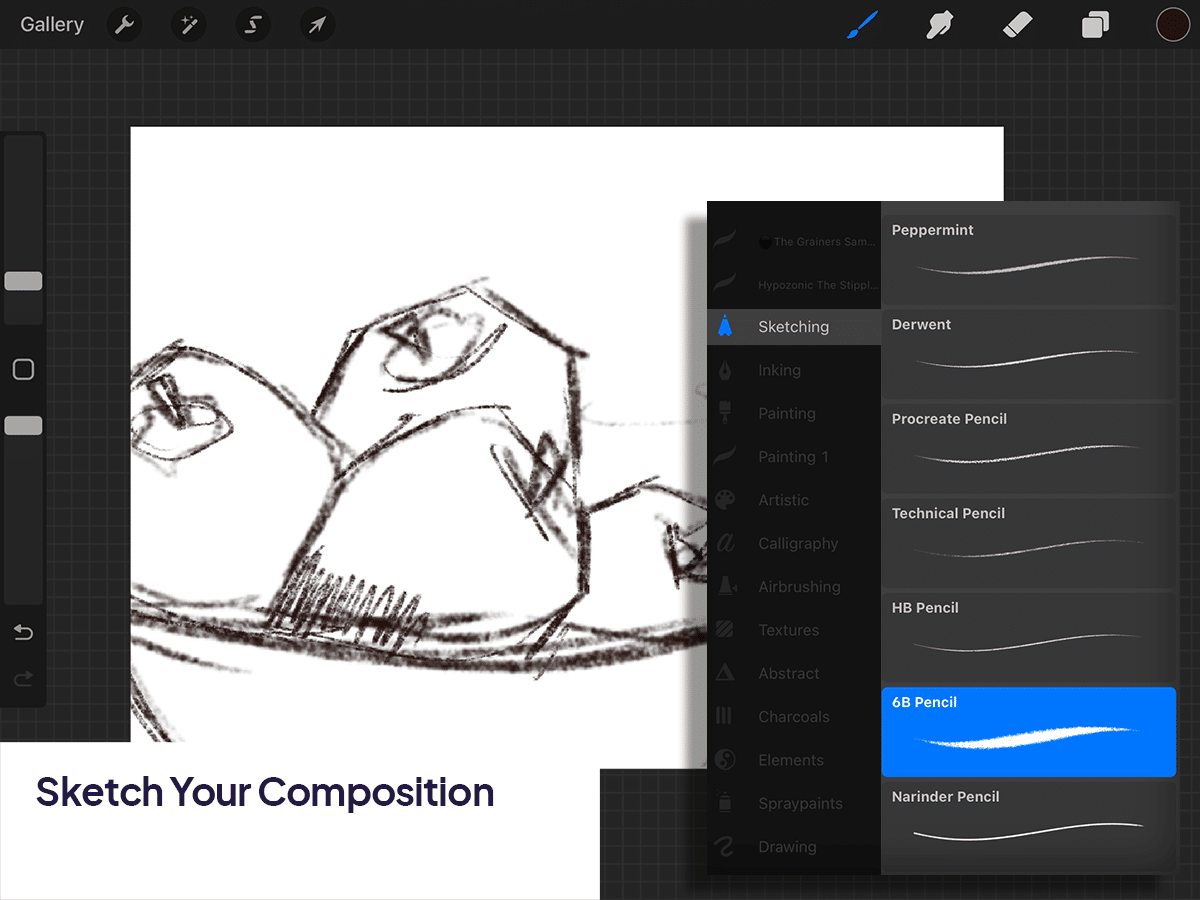
3. Sketching Your Composition
Select a Sketching Brush: Use a pencil brush from the Sketching category to lay out your composition. This initial sketch should focus on basic shapes and placement rather than detail.
Consider Composition: Play with arrangement and perspective until you find a balanced composition. Remember the rule of thirds for an engaging layout.
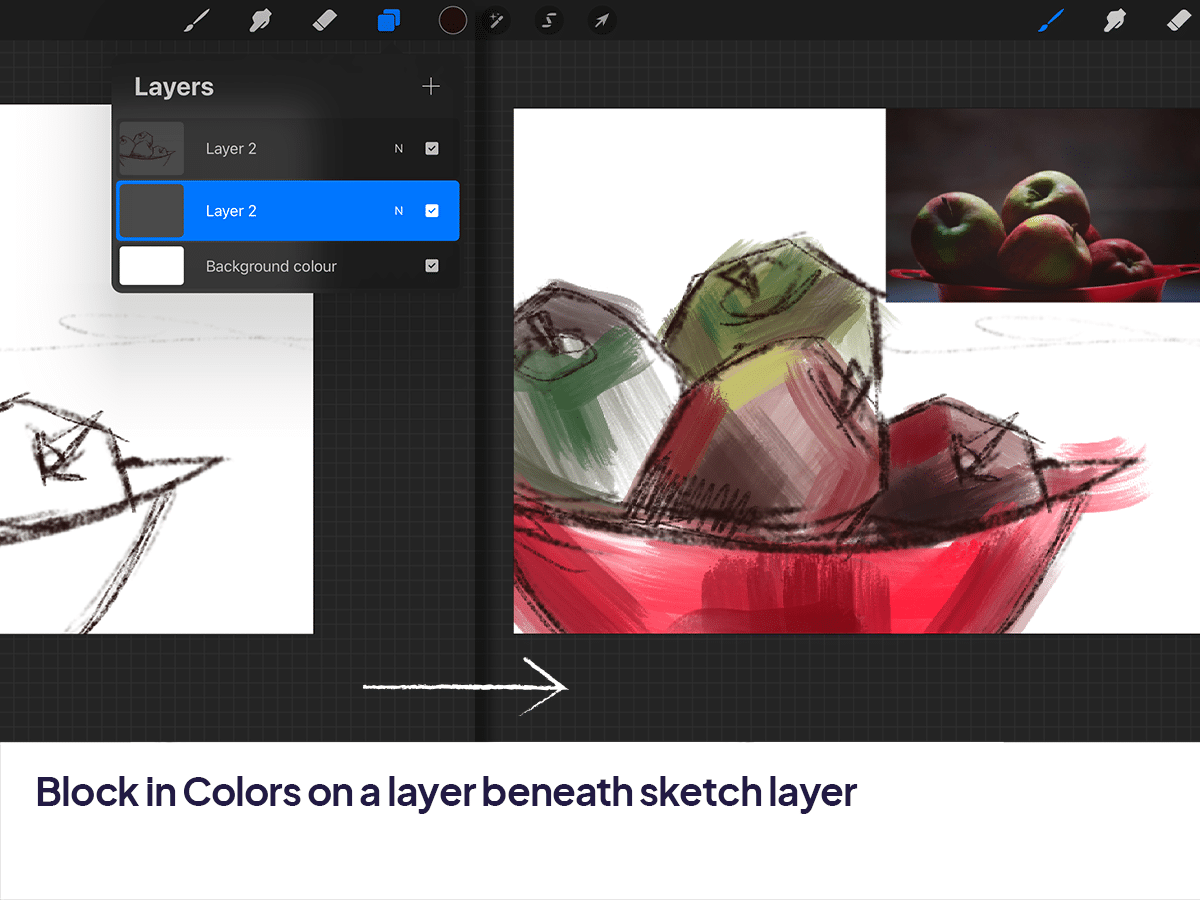
4. Blocking in Colors
Create a New Layer for color blocking, beneath your sketch layer.
Choose Your Base Colors: Using the Color Picker, select colors that match your reference. Don’t worry about getting the perfect shade right now; focus on covering large areas with base colors.
Use a Broad Brush: A larger, softer brush can quickly cover areas without leaving harsh edges.
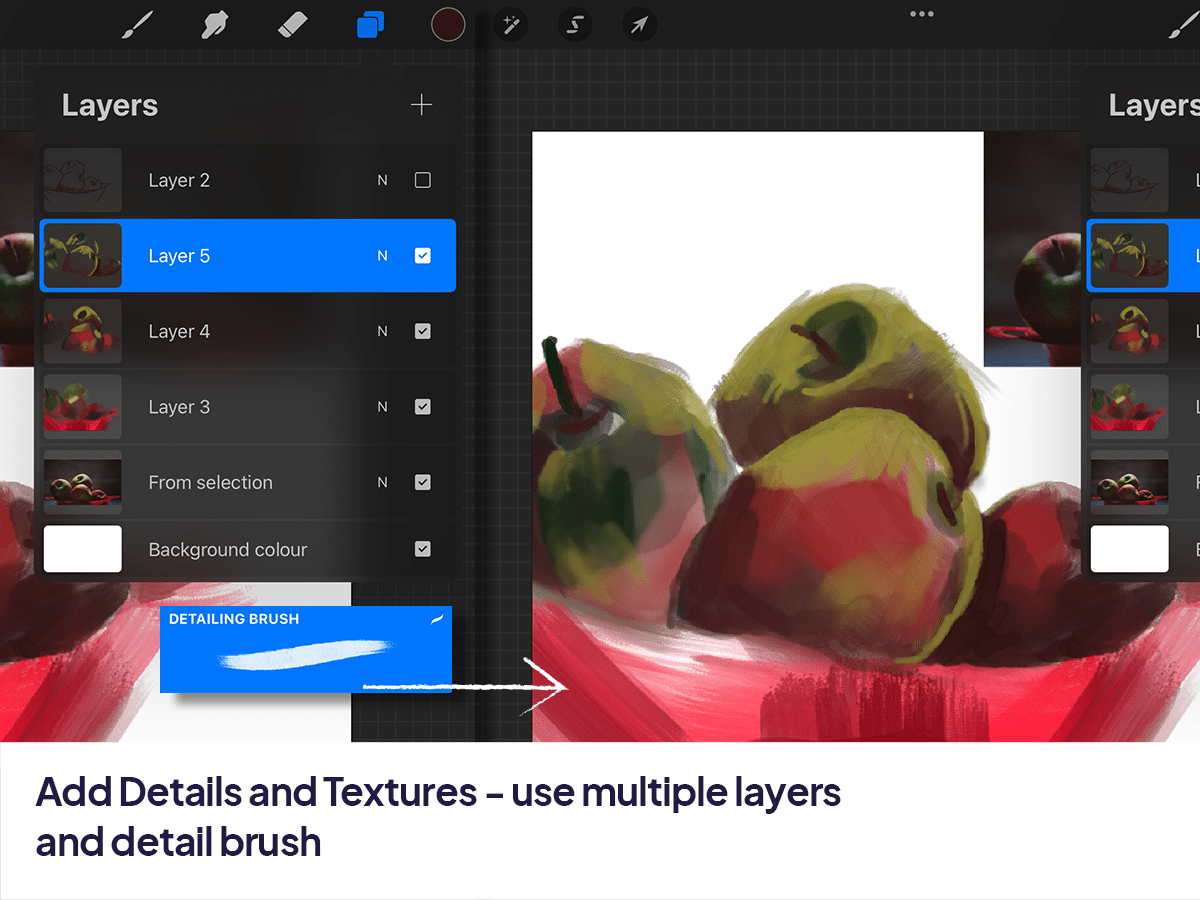
5. Adding Details and Textures
Layering: Add a new layer above your color blocks for details. Working in layers allows you to experiment without altering the base.
Detail Brushes: Switch to smaller, finer brushes to add details. Procreate’s Brush Library offers a variety of textures that can mimic real-life painting techniques.
Observe Your Reference: Pay attention to how light interacts with objects, noting highlights, shadows, and reflected colors.
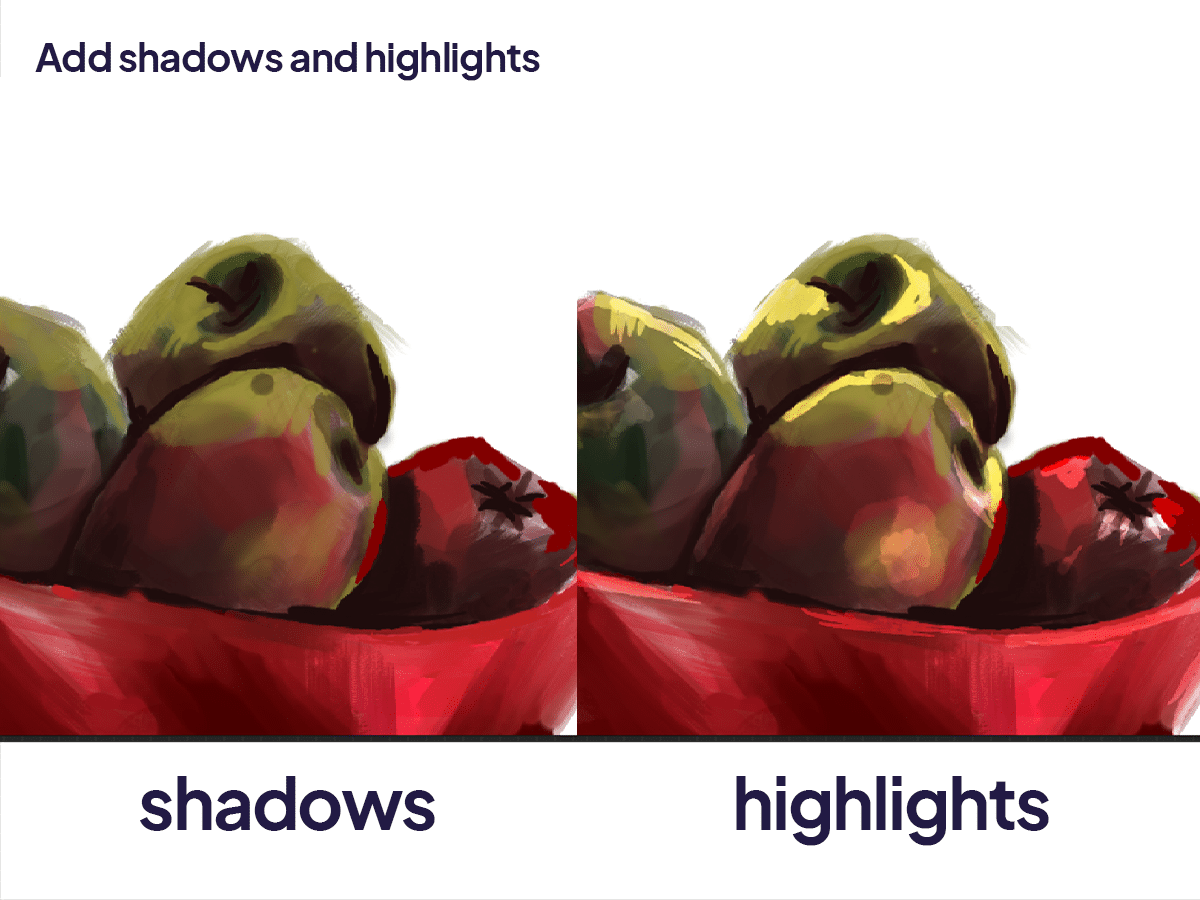
6. Refining Light and Shadow
Create Shadows: Use a darker shade of your base colors to paint shadows. Consider the light source in your reference to maintain consistency.
Add Highlights: Select a lighter color for highlights. A soft brush with low opacity can create a subtle luminosity on reflective surfaces.
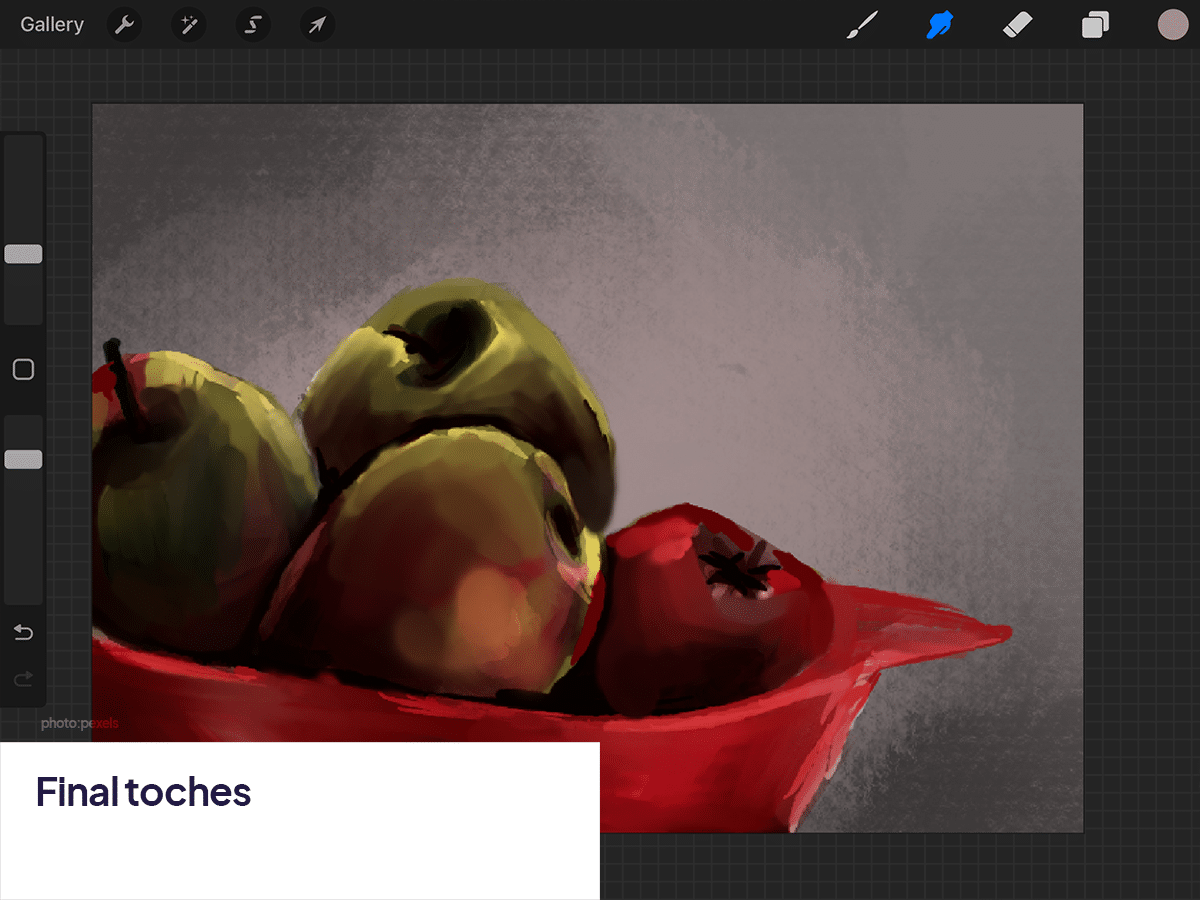
7. Final Touches
Adjustments: Use Procreate’s adjustment tools (Brightness, Contrast, Saturation) to fine-tune your painting. This can help enhance the overall mood.
Add a Background: Consider painting a simple background to complement your still life. A neutral shade can make your subjects stand out.
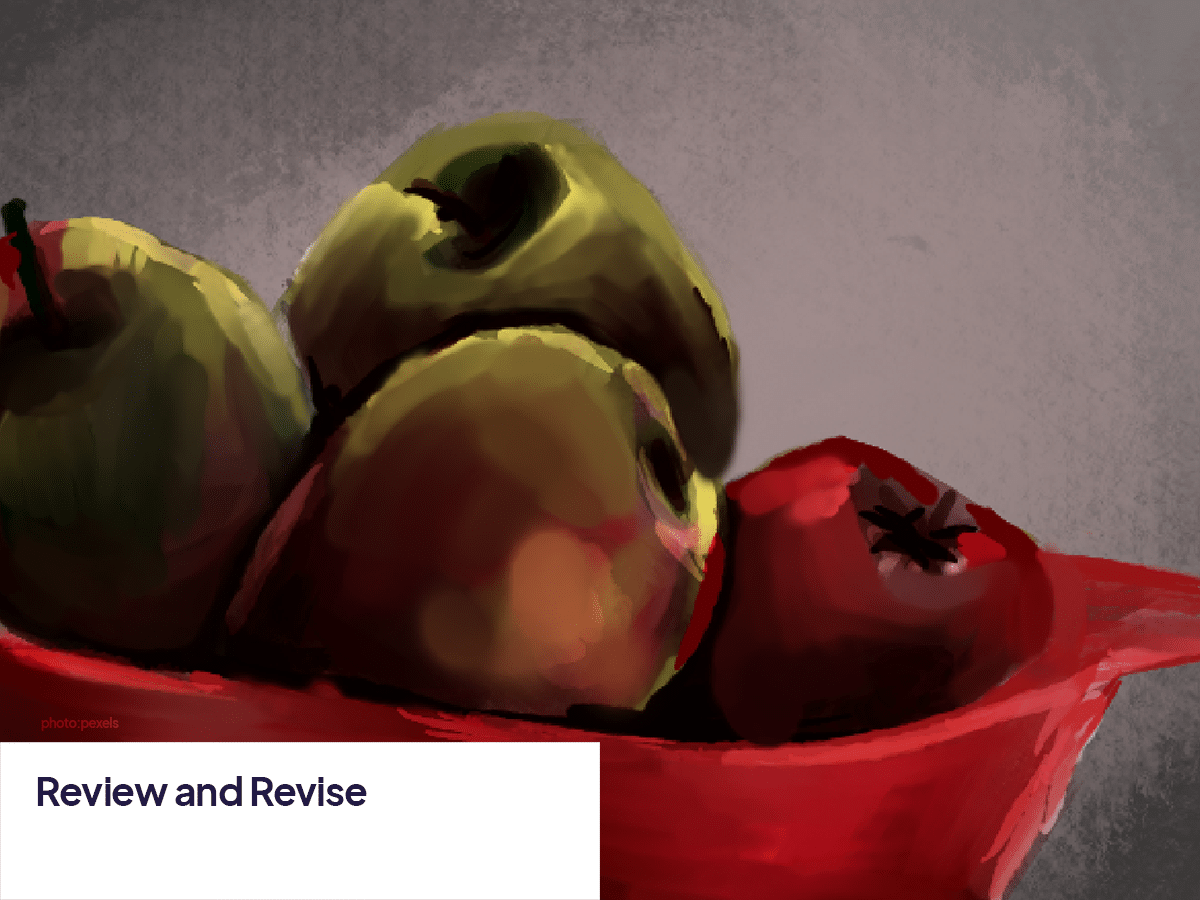
8. Review and Revise
Take a step back and review your painting. You might spot areas that need adjusting or refining. Use the Transform tool to tweak proportions or the Eraser tool to clean up edges.
Tips for Success
Practice Layer Management: Naming layers and grouping them according to their function (e.g., base colors, details, shadows) can help keep your workspace organized.
Experiment with Blending Modes: Layer blending modes can create interesting effects, especially for lighting and shadow.
Take Breaks: Sometimes, stepping away from your work for a while can provide new insights when you return.
Painting a still life in Procreate is not just about replicating what you see; it’s an opportunity to explore creativity, experiment with digital tools, and develop your artistic skills.
Each still life is a journey – from observing your subject to the final stroke, every step is a chance to learn and grow as an artist. So grab your iPad, find your inspiration, and start painting!


Share this article


