
How To Draw Tree Trunk in Procreate

Hey there. Today, I’m going to share the secret to drawing a tree trunk in Procreate that would make Mother Nature herself double-take.
This guide will root you firmly in the basics of creating lifelike tree trunks. So, grab your iPad, open Procreate, and let’s embark on this arboreal artistic adventure together!
Before we start, make sure to check our Procreate tree brushes.
Step 1: Setting the Scene
Open Procreate and select your canvas. For tree trunks, I recommend a canvas size that gives you plenty of space to work with the details. Once you’ve got your canvas ready, it’s time to sketch.

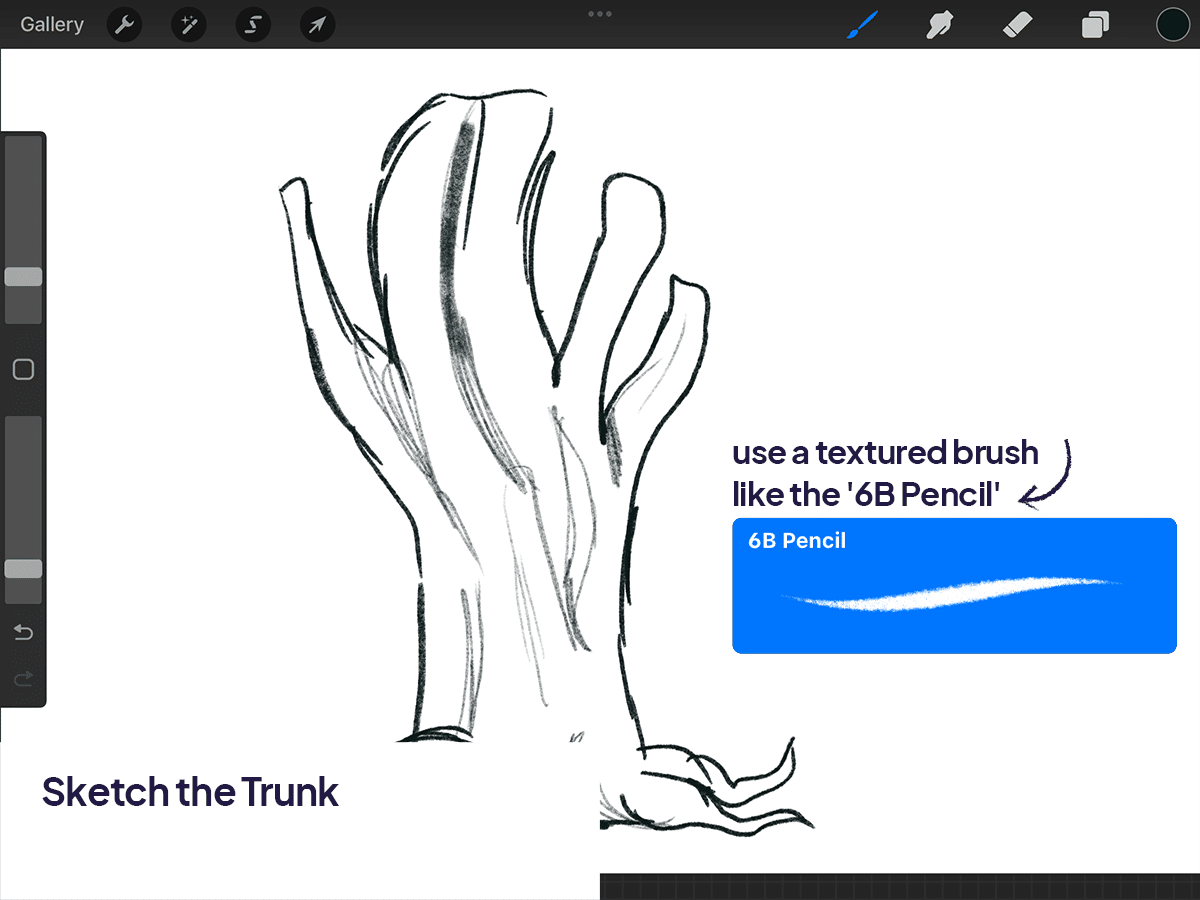
Step 2: Sketching the Trunk
Shape It Up: Start by drawing the basic shape of the trunk. Remember, no two trees are exactly alike. Is your tree old and gnarly or young and straight? Sketch lightly, as this is just the guide for your masterpiece.
Adding Texture: Use a textured brush, like the ‘6B Pencil’ or ‘Charcoal’ brush, to add the rough, uneven texture of the bark. Vary your pressure to create depth.
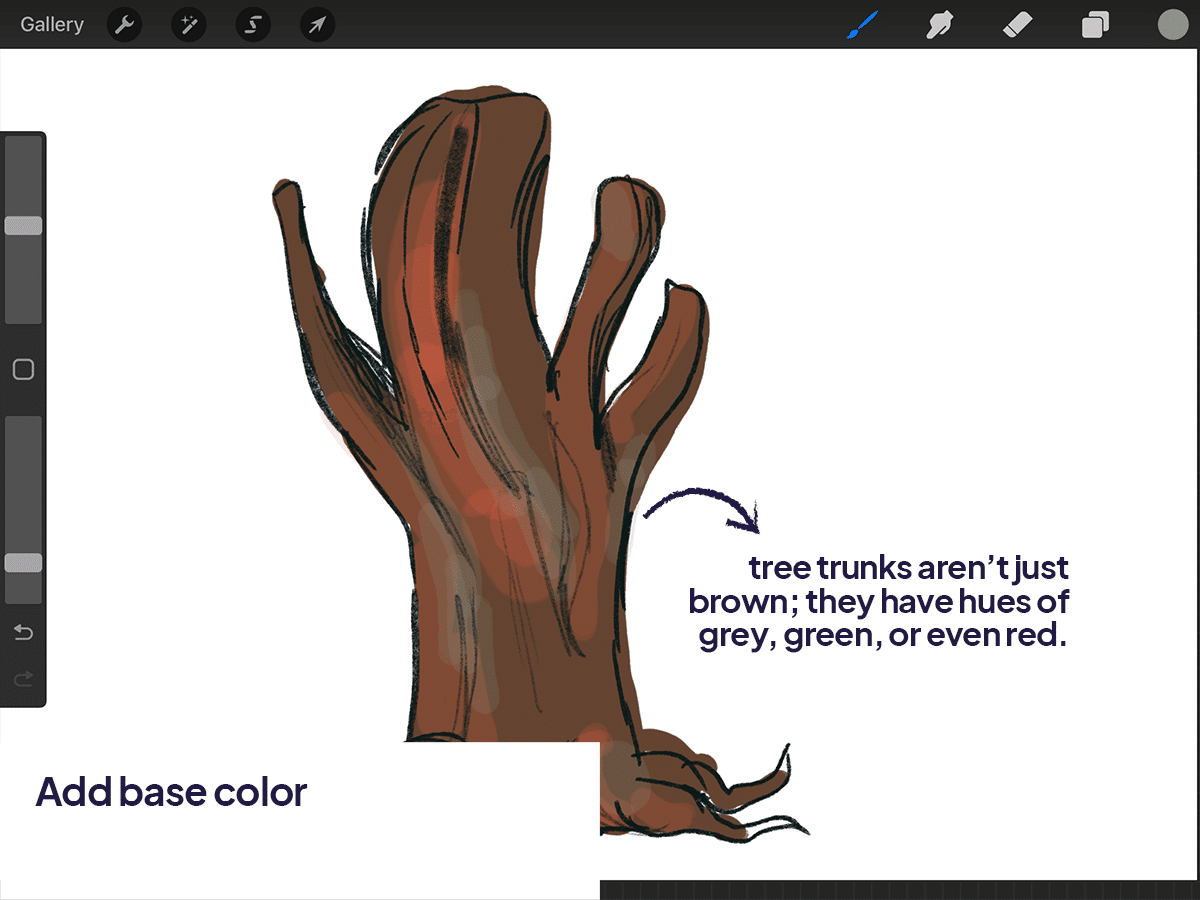
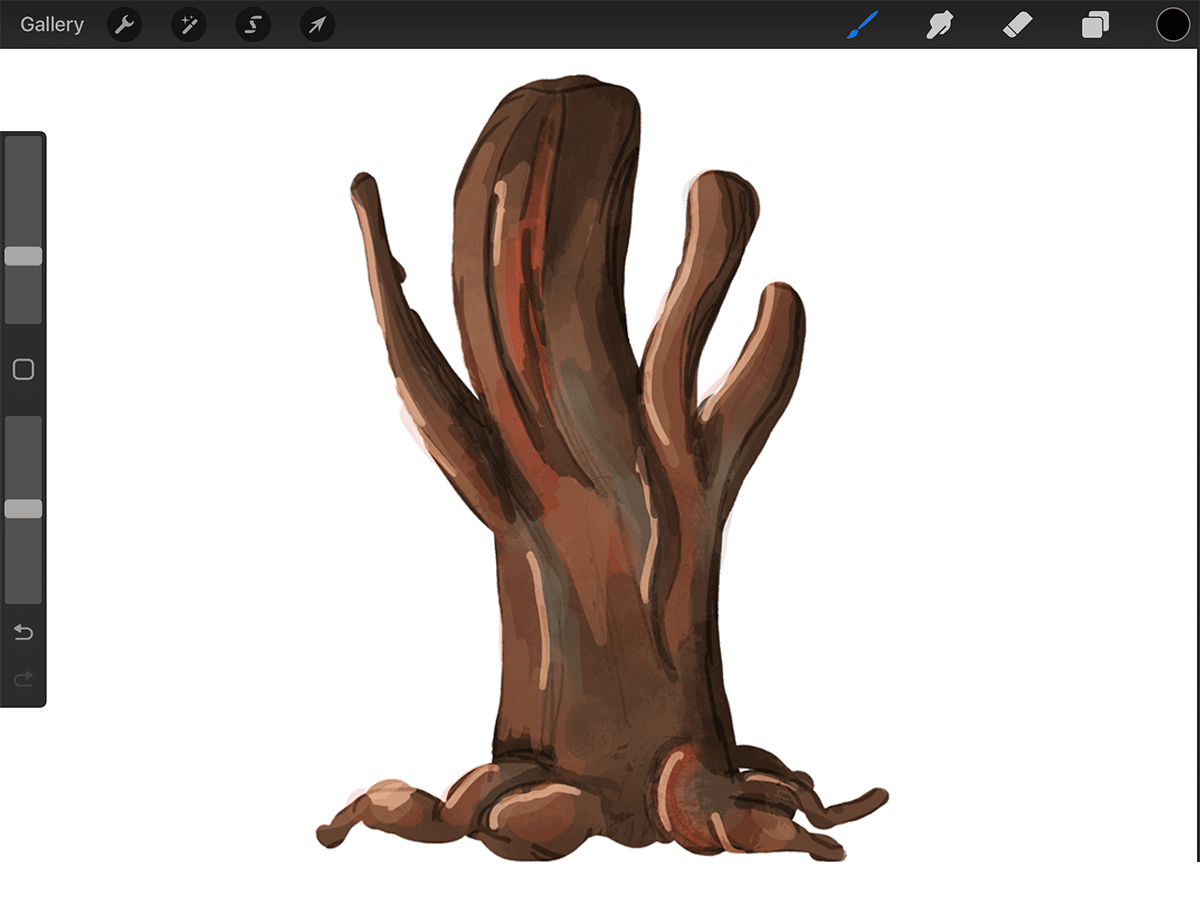
Step 3: Bringing the Trunk to Life with Colors and Shadows
Base Color: Choose a base color for your trunk. Tree trunks aren’t just brown; they have hues of grey, green, or even red. Apply the base color with a medium-sized brush.
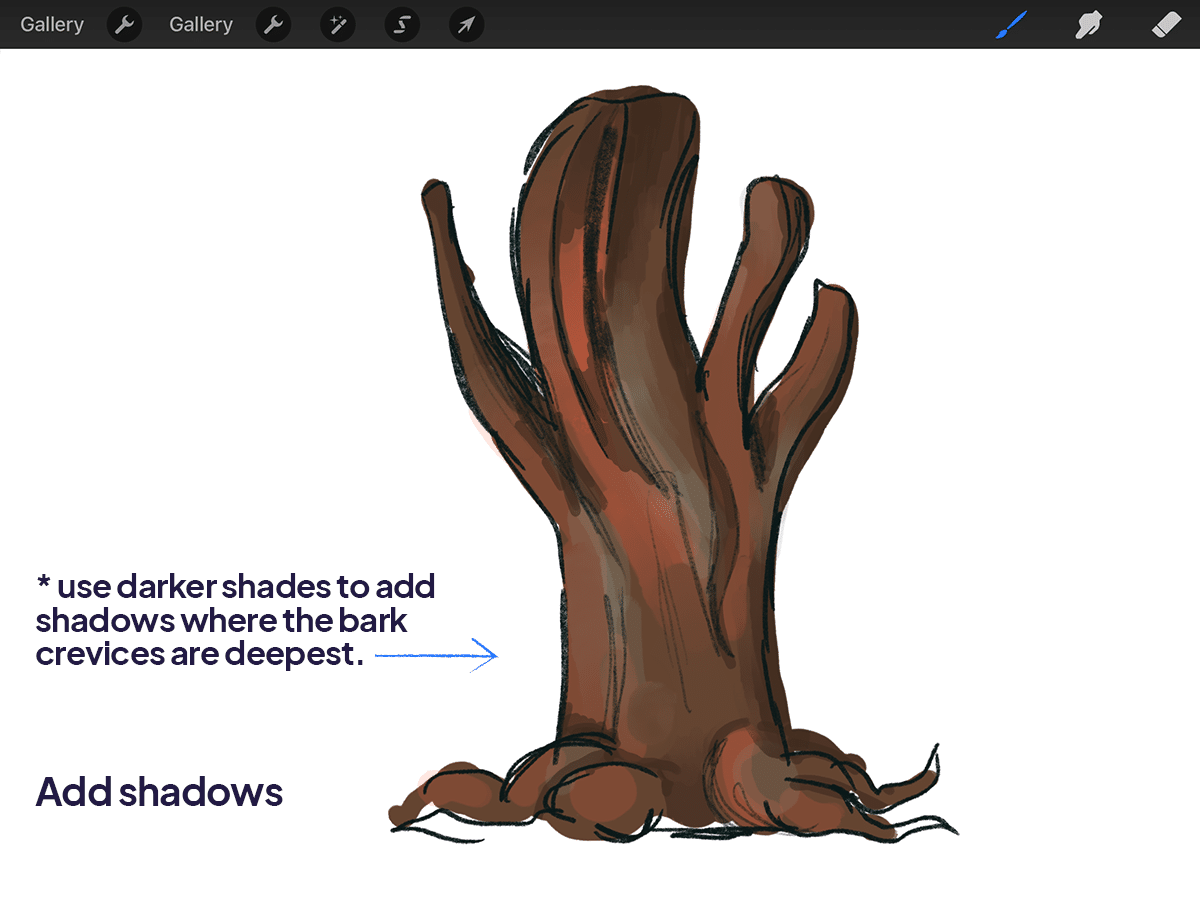
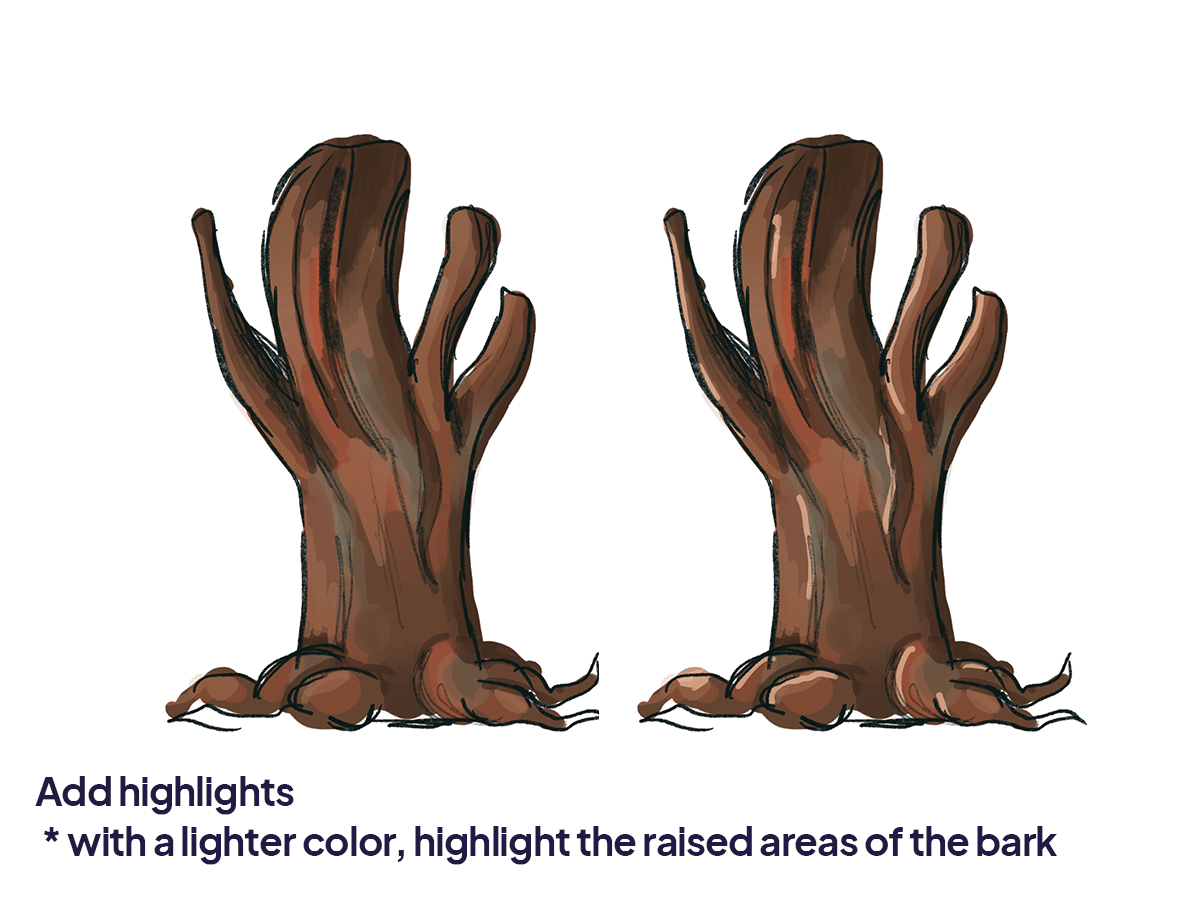
Adding Shadows and Highlights: Use darker shades to add shadows where the bark crevices are deepest. Then, with a lighter color, highlight the raised areas of the bark. This contrast is what brings your tree trunk to life.
Step 4: Detailing with Texture Brushes
Bark Texture:Procreate’s brush library is your playground here. Look for brushes that can mimic the bark’s texture. Gently stroke over the trunk, following its natural lines.
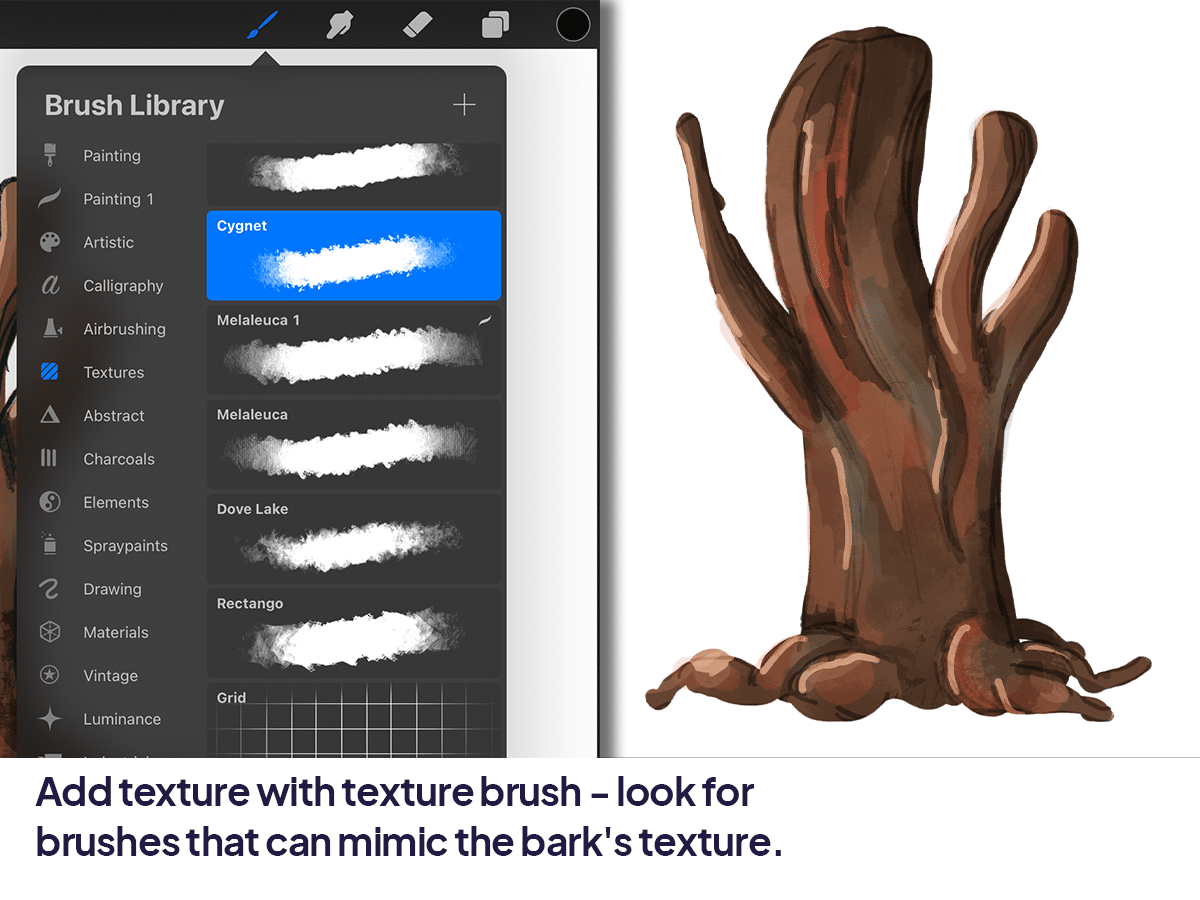
Depth and Realism: Use a combination of light and dark strokes to enhance the 3D effect of the bark.
Section: Using Premade Tree Brushes
For those who want a quicker route or need a background filled with trees, Procreate’s premade tree brushes are a lifesaver.
Selecting Tree Brushes: In the brush library, you’ll find brushes that are designed to create tree textures. Some might be labeled specifically for foliage or bark.
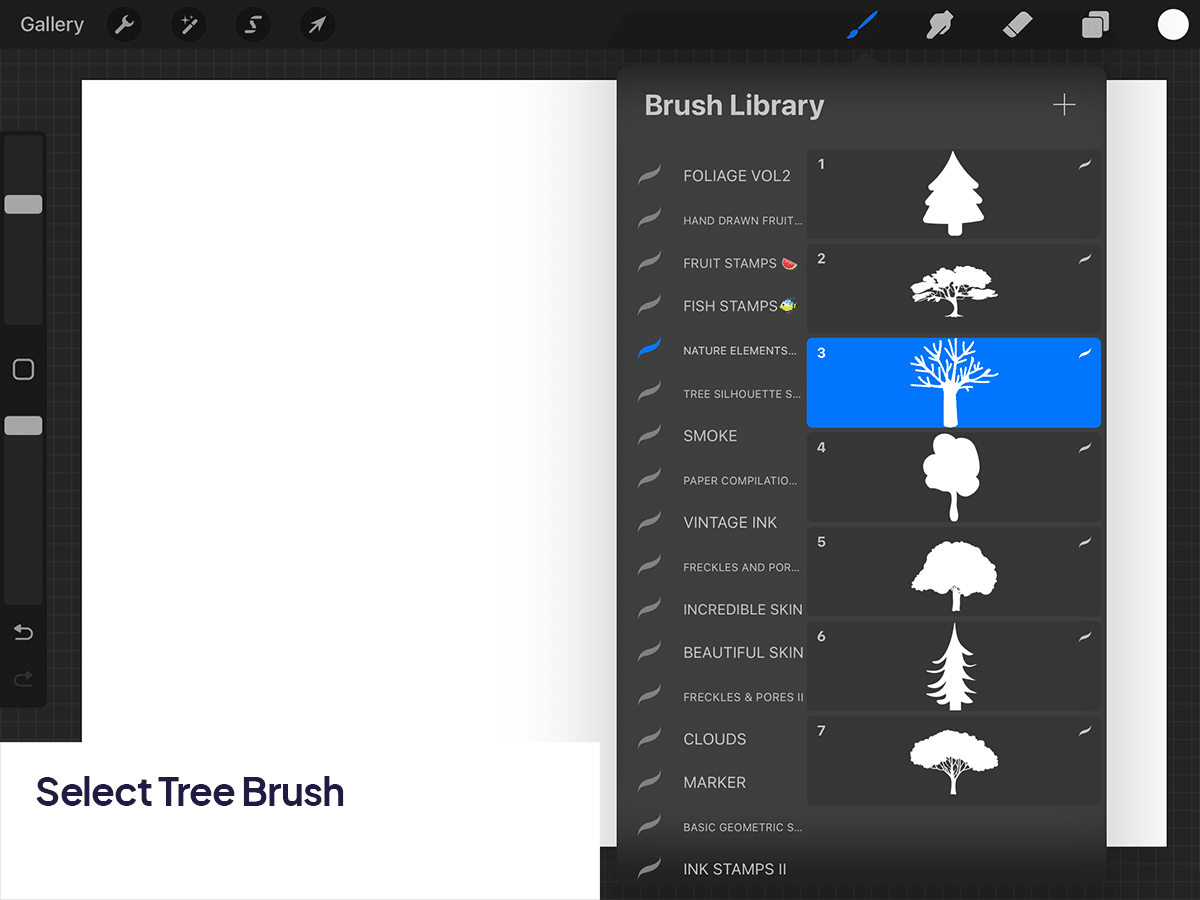
Creating the Trunk: With the tree trunk brush, draw your trunk. These brushes automatically give you a textured, realistic look.
Customizing Your Tree: Even with premade brushes, you can customize your tree. Use the brush settings to adjust the size, opacity, or even the spread of the bristles to suit your tree’s look.

Conclusion
With the techniques I’ve shared and a bit of practice, you’ll be able to create tree trunks that are not just drawings but lifelike stories standing tall on your digital canvas.
Every great artist was once a beginner. Keep experimenting, keep learning, and most importantly, keep drawing. Your digital forest is waiting to be discovered!
Happy drawing, and may your artistic journey be as fulfilling as a walk through a serene, ancient forest!
P.S.: Keep an eye out for more guides to help you nurture your digital art skills in Procreate!


Share this article


