
How To Animate in Procreate in 4 Easy Steps
PROCREATE TUTORIAL: HOW TO ANIMATE IN PROCREATE ON THE IPAD.
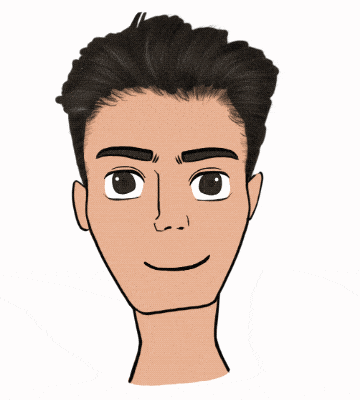
Wouldn’t it be awesome if you can make whatever you draw in Procreate on your iPad move?! But you have got no experience in animation you say? To that, we respond, not a problem. In this post, we will show you how we animate whatever thing we draw in Procreate and how we create a short movie or even a GIF from the simple animation that we will be making using shapes that we draw. Honestly how cool is that?!
Yeah. Not to brag, but we created this simple GIF animation using Procreate 😉 and by the end of this post, you will be able to do so too!
We will include two examples for animation, the first will be a simple one that can super easily be made. And another slightly more complicated one that takes a little more effort and skill to make but still not hard at all! So let’s get started, shall we?
For this tutorial we are going to walk you through the steps of animation:
- Turning On Animation Assist.
- Designing The Artwork.
- Creating Different Layers (Frames) For The Artwork Motion.
- Export The layers As An MP4 Or GIF File.
1. Turning On Animation Assist
The first thing we will need to do is to start off with a new screen size canvas, then turn on “Animation Assist” by going over to the “Actions” menu, then selecting “Canvas“. Turn on “Animation Assist“.
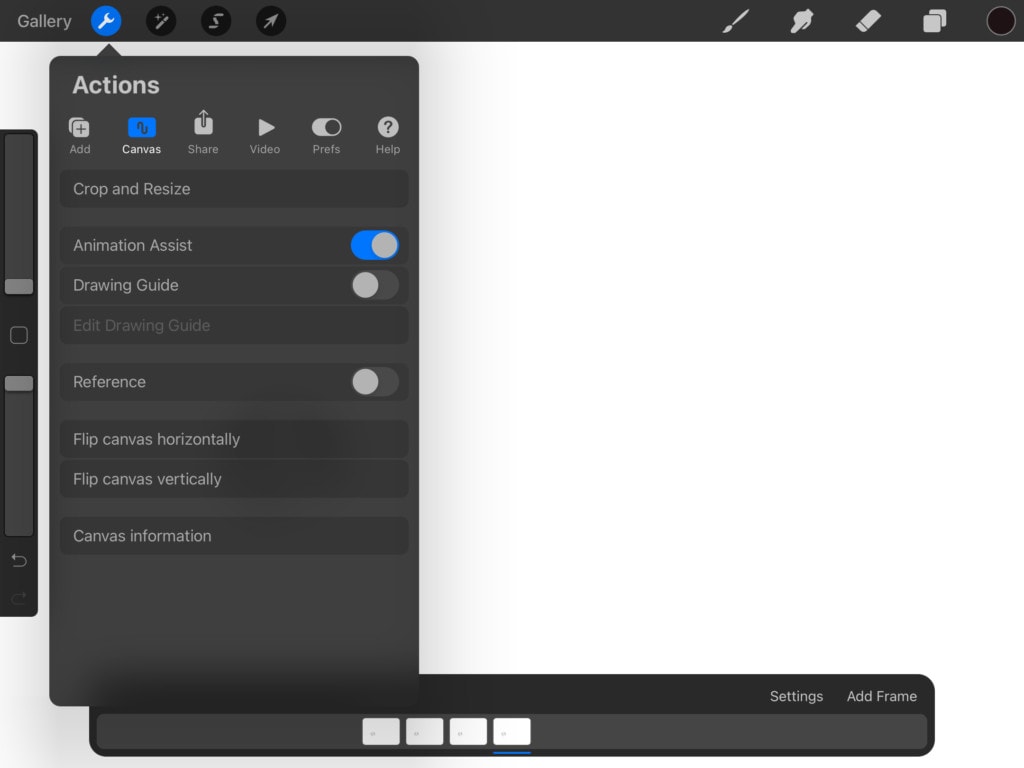
It is exactly like it is called. It will help you better view your animation through this “Frames” bar shown at the bottom of the screen. It will also automatically make your previous layers less opaque (even though we did not play with layer opacity) so that you can better see where your new layer is going to be in relation to the previous one.

What you should know now, is that we are creating something pretty similar to a flip book.
Drawing separate pictures on separate pages (layers) and navigating through these layers quickly would create an animation effect.
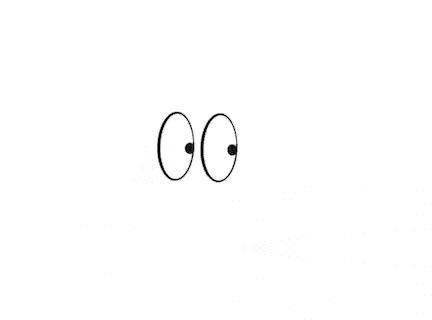
Now let’s get to drawing something. For the first simple tutorial we mentioned we are going for a moving pair of eyes!

2. Designing The Artwork:
First off we are going to draw eyes (we do have a whole tutorial on them that you can check out right HERE). But for this tutorial, we are going for much simpler eyes, pretty similar to the emoji eyes.
We will start off by drawing an oval and holding it. We won’t lift the pencil off of the screen just yet until it forms a perfect oval. That is called “QuickShaping” and we have a tutorial on that as well if you would like to check it out right HERE.
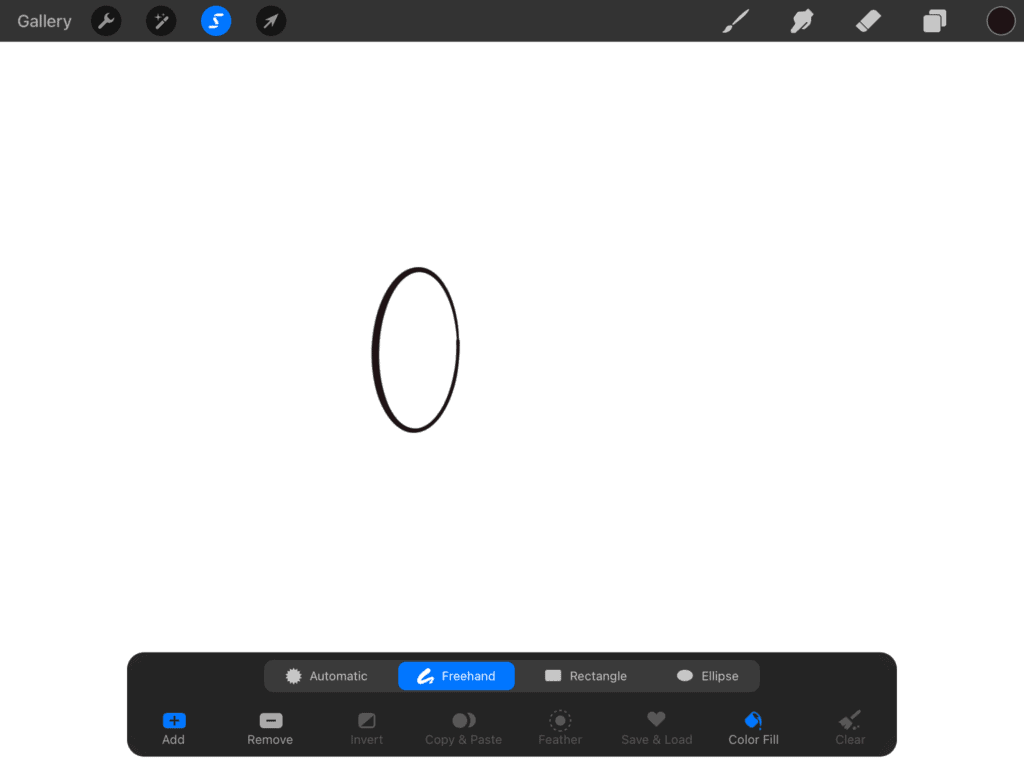
We are then going to select the shape that we drew using the “Lasso” selection tool on the top bar and then we are going to select “Copy & Paste” from the bottom bar.

We then drag our newly copied shape away from the original one. And now we have the eye sockets!
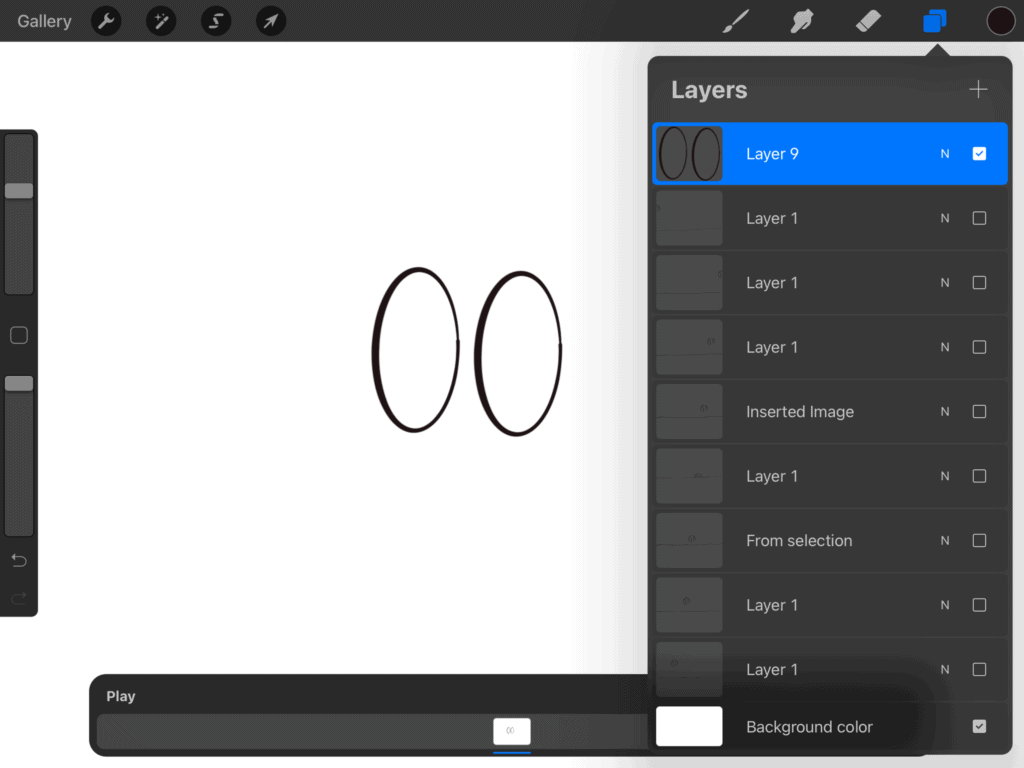
Then we are going to merge these two sockets layers together, by tapping on the top layer then selecting “Merge Down” or pinching the two layers together using two fingers (check out our “Procreate Tips & Tricks” right here (link) for more).
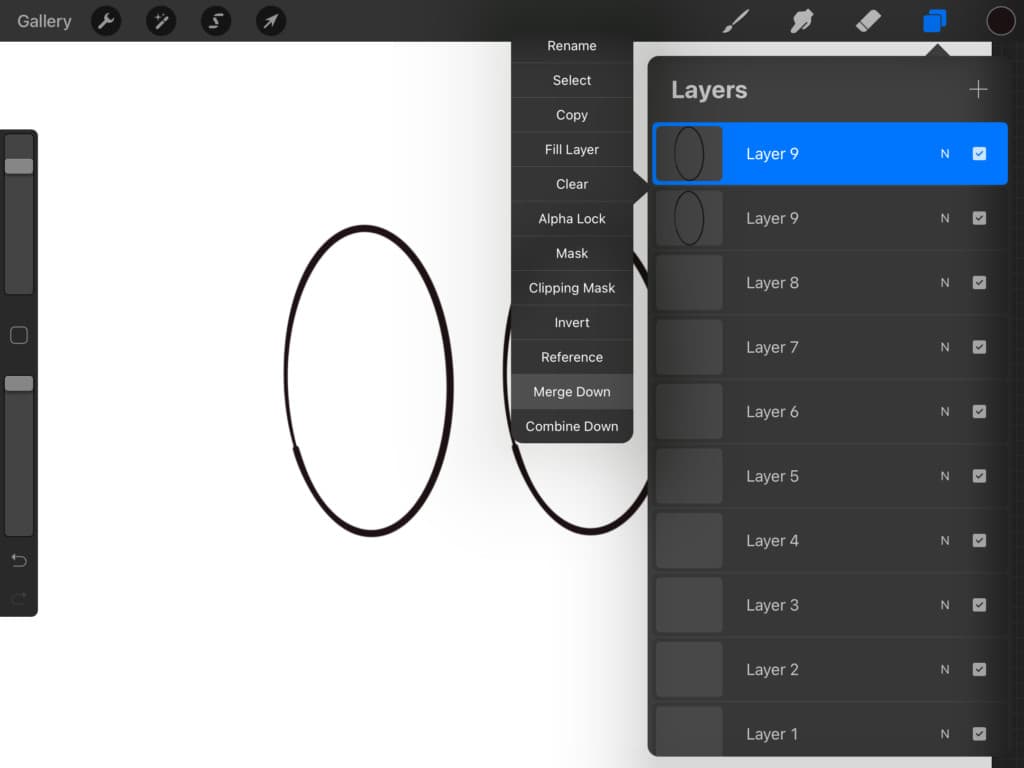
We are then going to duplicate that layer about five times by swiping on the layer to the left using one finger and then selecting “Duplicate”. Repeat this step until you have about five layers of the same layer.

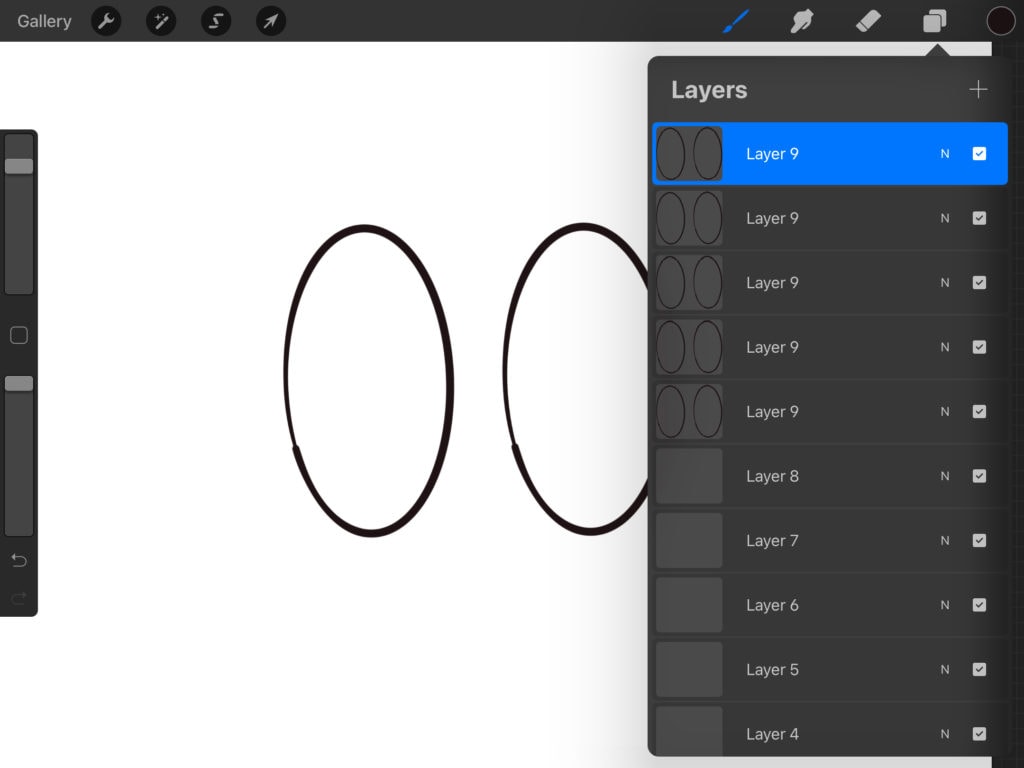
Now it is time to draw the pupil, that we are going to be animating. Draw it on a new layer and duplicate it five times as well for each layer, just like we did with the eye sockets.
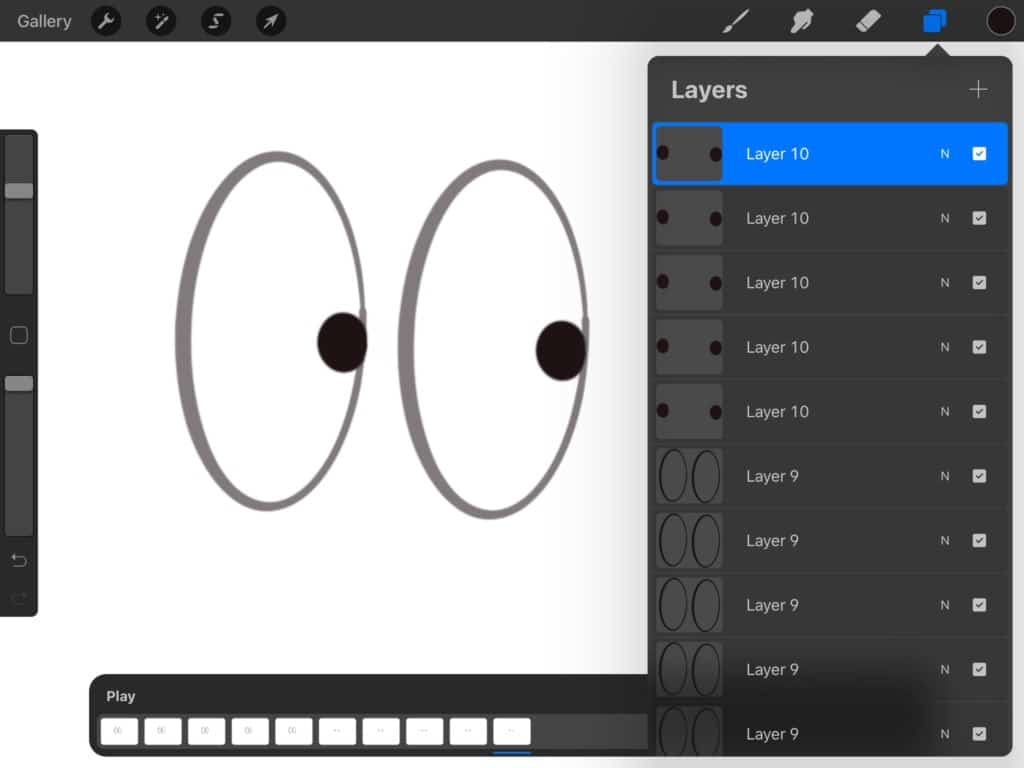
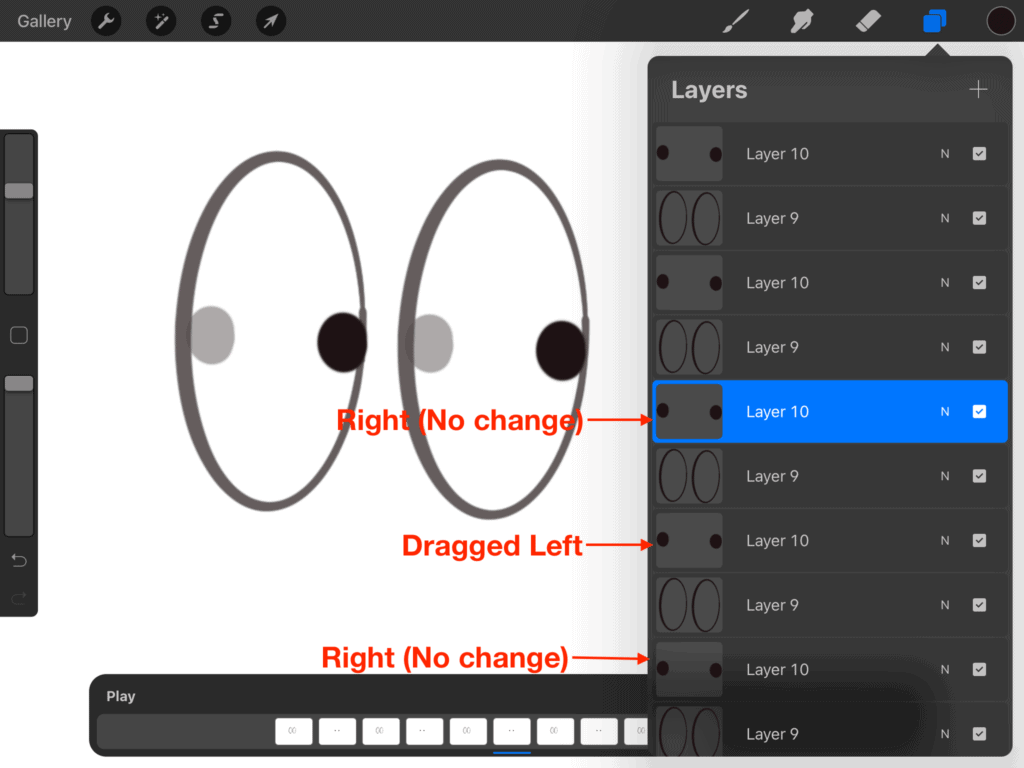
Re-arrange the pupils so that every pair of eye sockets has a pupils layer on top of it.
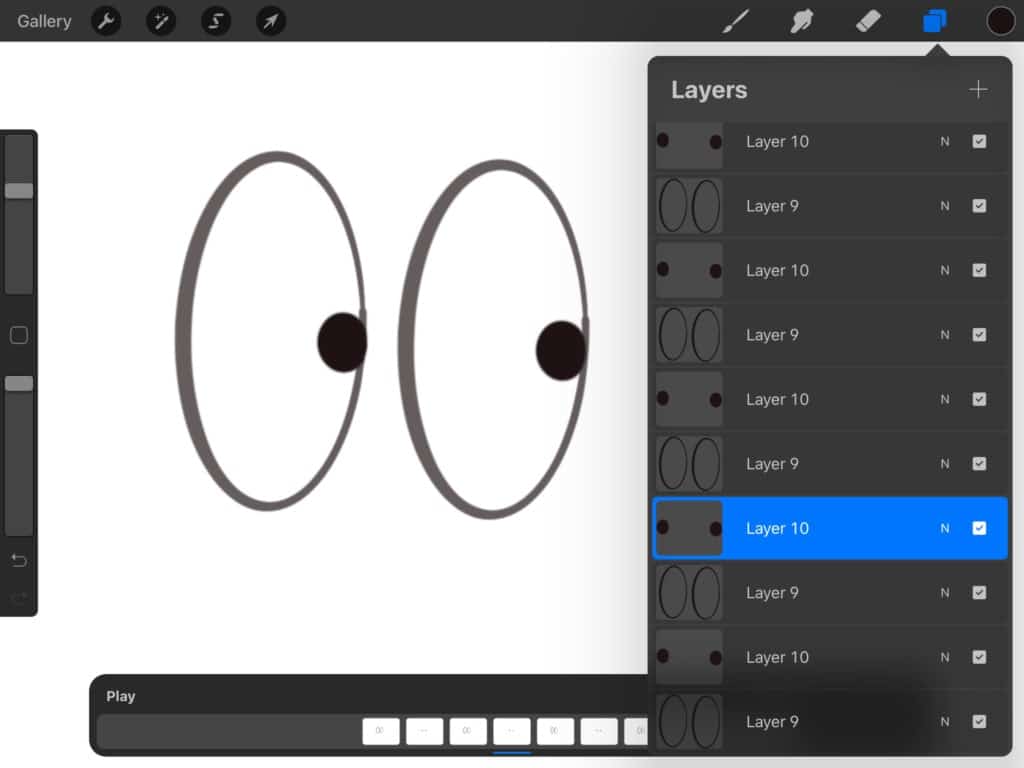
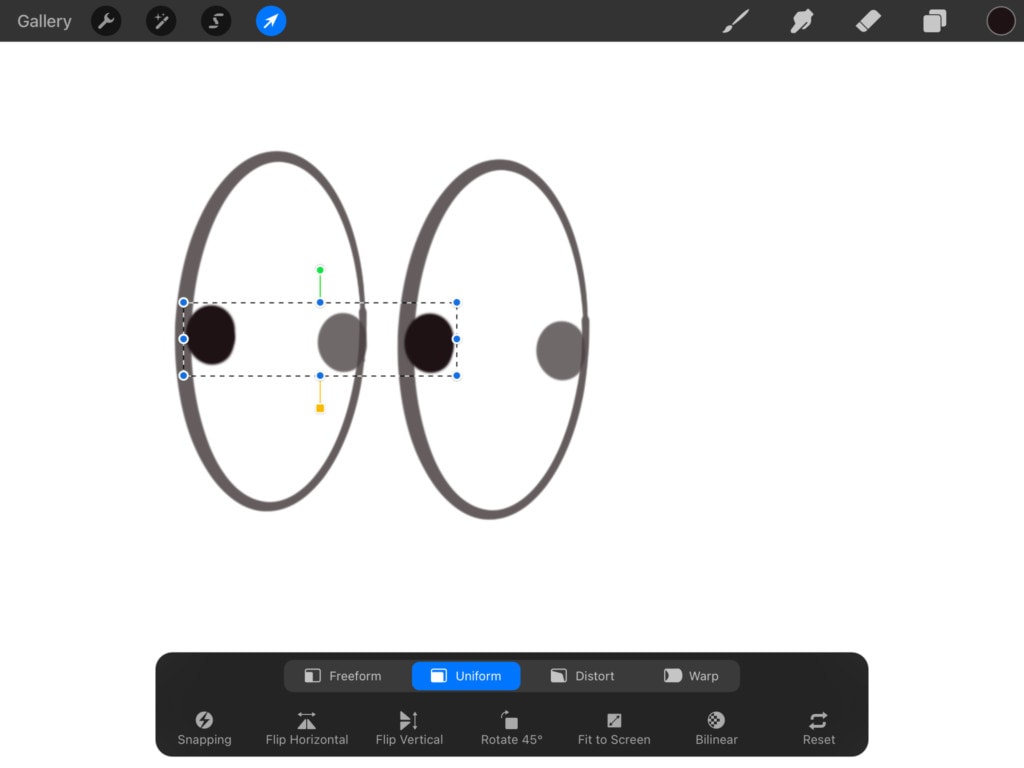
Then move every other pupils layer to the other direction as if it’s looking right and left.
3. Creating Frames For the Animation:
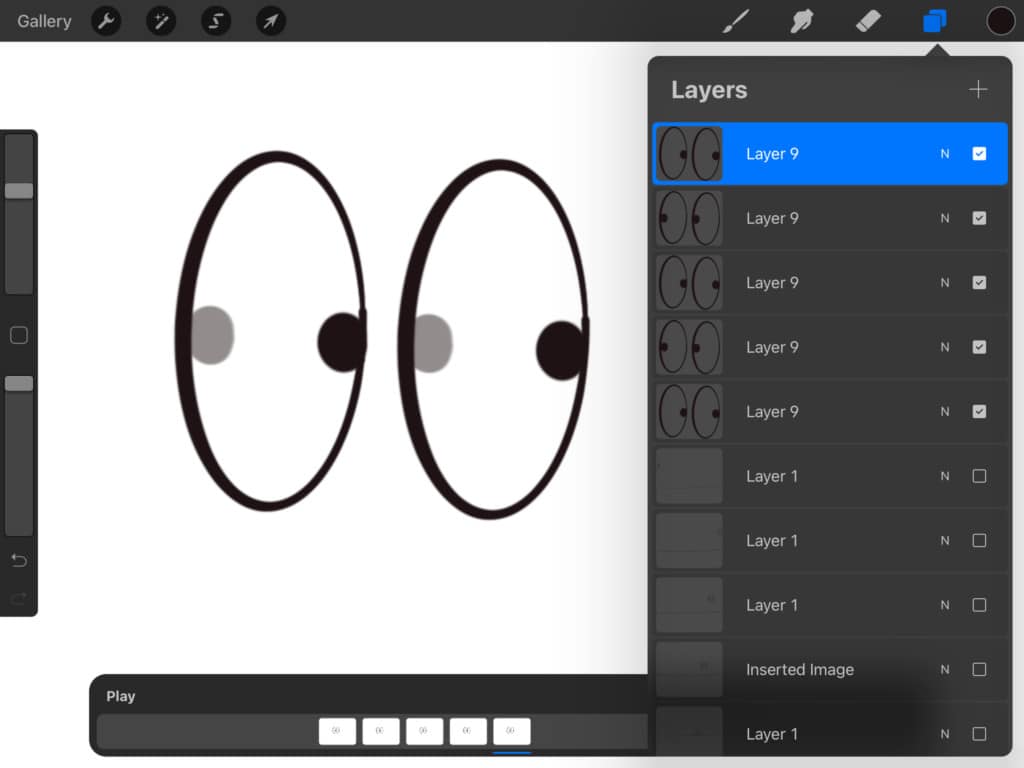
The next step is to merge each eye layer with the pupil layer right on top of it by merging down or pinching as we demonstrated before. Now we have a total of five layers of eyes. One looking left and the next looking right and then left and so on!
4. Exporting File As An Animated MP4 Or GIF:
Now that we have everything ready, let’s check on our animation. Head over to the “Actions” menu, then “Share” as ” Animated MP4” Then adjust the frames per second by sliding the bar in the picture so that the animation goes slower until it looks right.
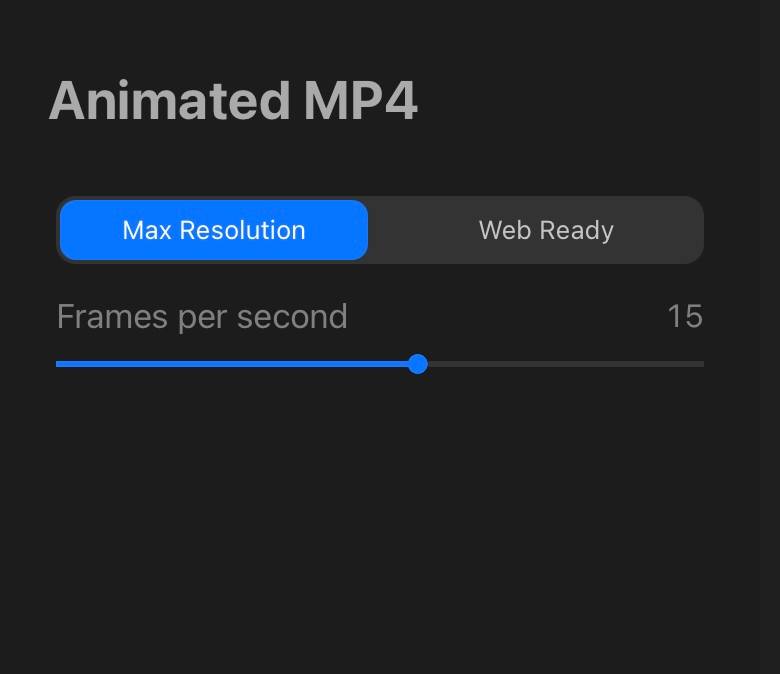
Then save it to your iPad! There you go you have got your first animated movie! Don’t forget to modify the frames per second. Which is the number of frames (or layers) shown per one second. A lot of frames per second means a lot of layers are shown per second and therefore a very quick animation. However, when we lower the frames per second we will have a better-looking animation. Here is How they both look next to each other. The one on the left has a higher number of frames per second than the one on the right.

Now, let’s do another animation that is a bit more advanced than the previous one!
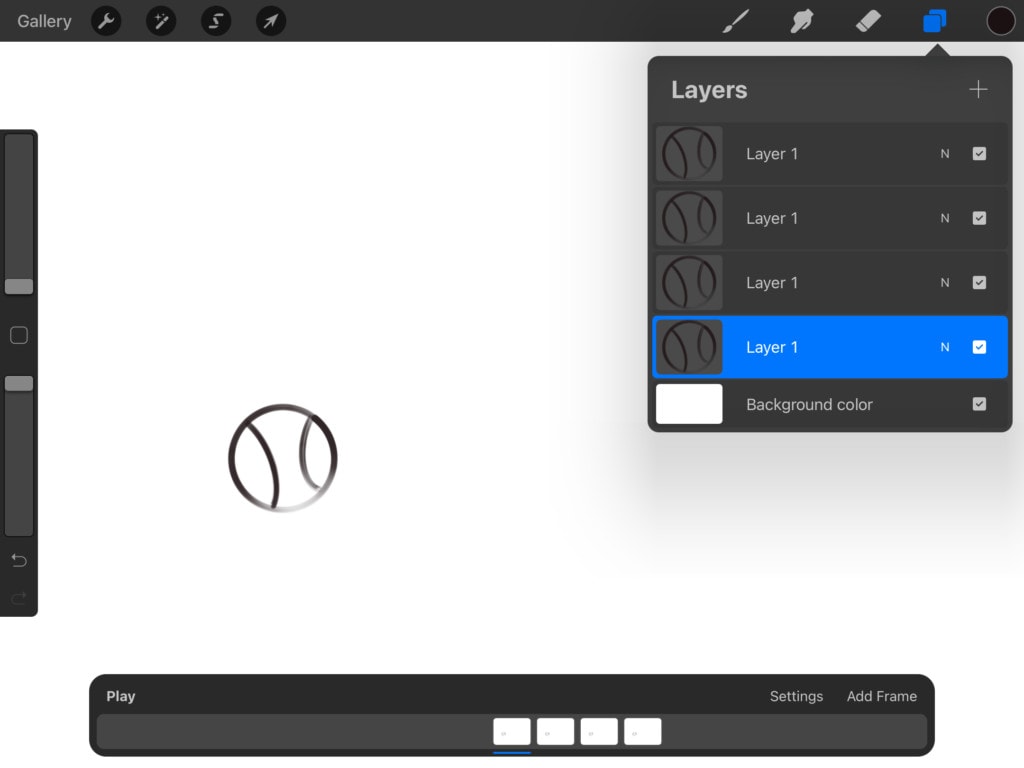
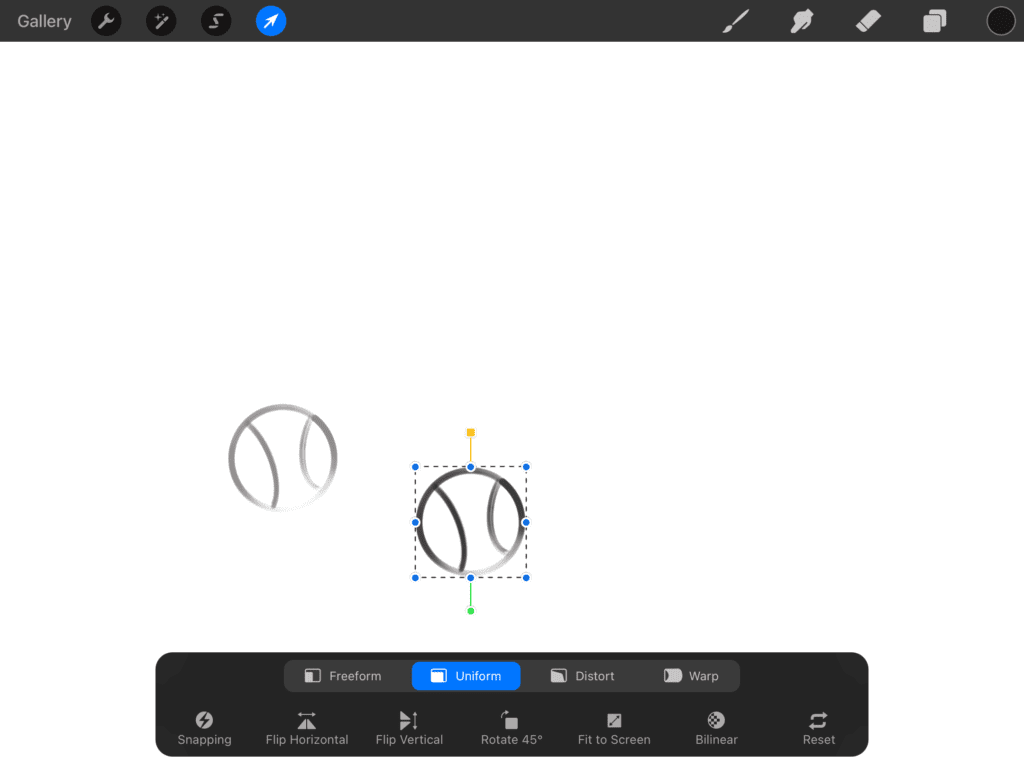
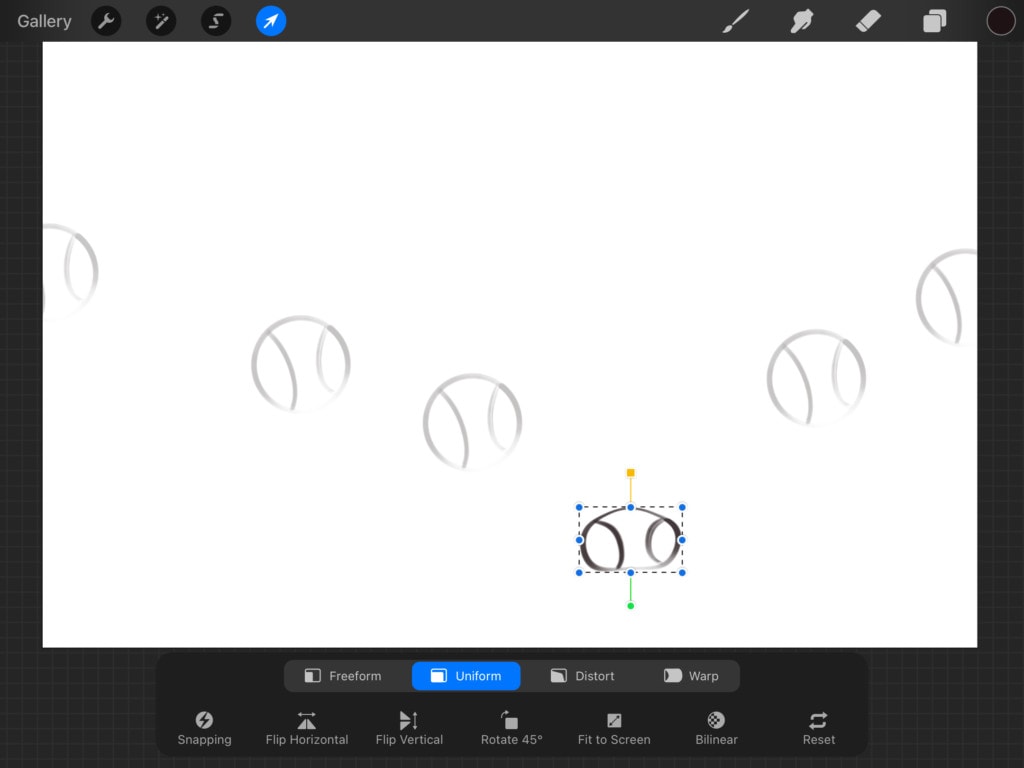
For this one, we will be drawing a ball that is bouncing on the floor. Start off by drawing the ball. Then duplicate the layer six times the same way we did before. You should now have six layers each one of them has a ball on it.
What we should do next is start moving the ball on each layer a bit so it looks like the ball is moving. We select the desired layer. then select the “Arrow” tool for selection, so that we would be able to drag and move our ball around.
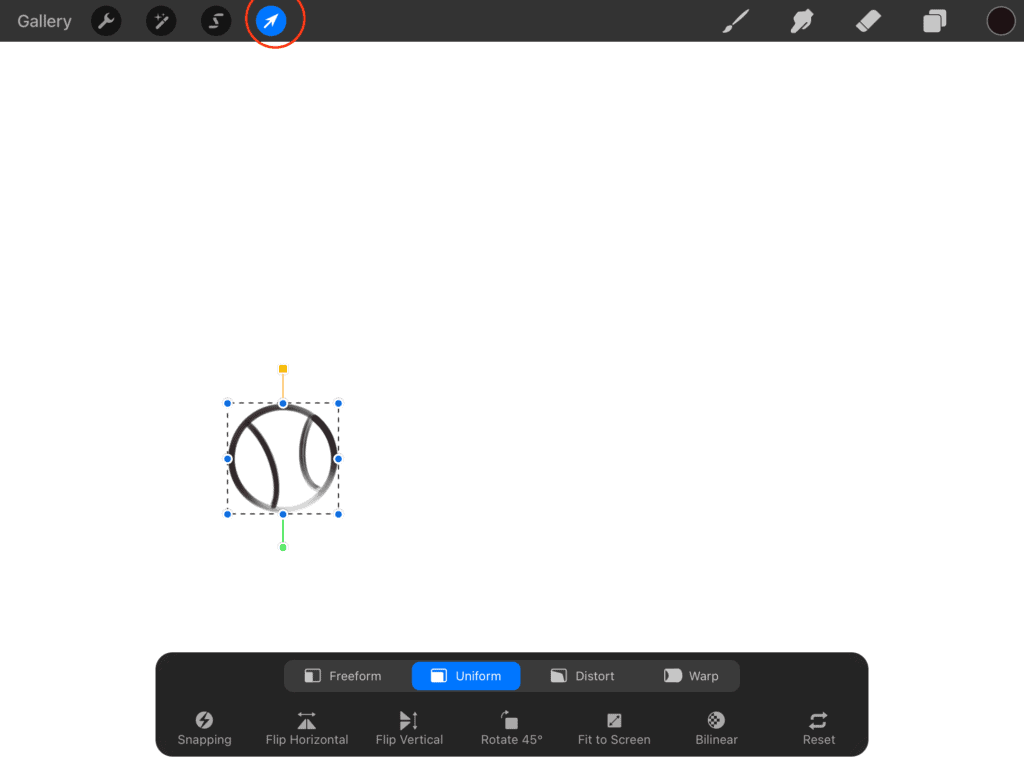
Do you see the less opaque ball from another layer that is not selected? That is because we have our “Animation Assist” turned on. It made anything that is not on the selected layer a little transparent so you are able to see what you are doing in all the layers at once and how everything goes together.
We are going to keep moving all the balls until we have them aligned how we like. Make sure that the layers’ order is respected in the balls’ positions.

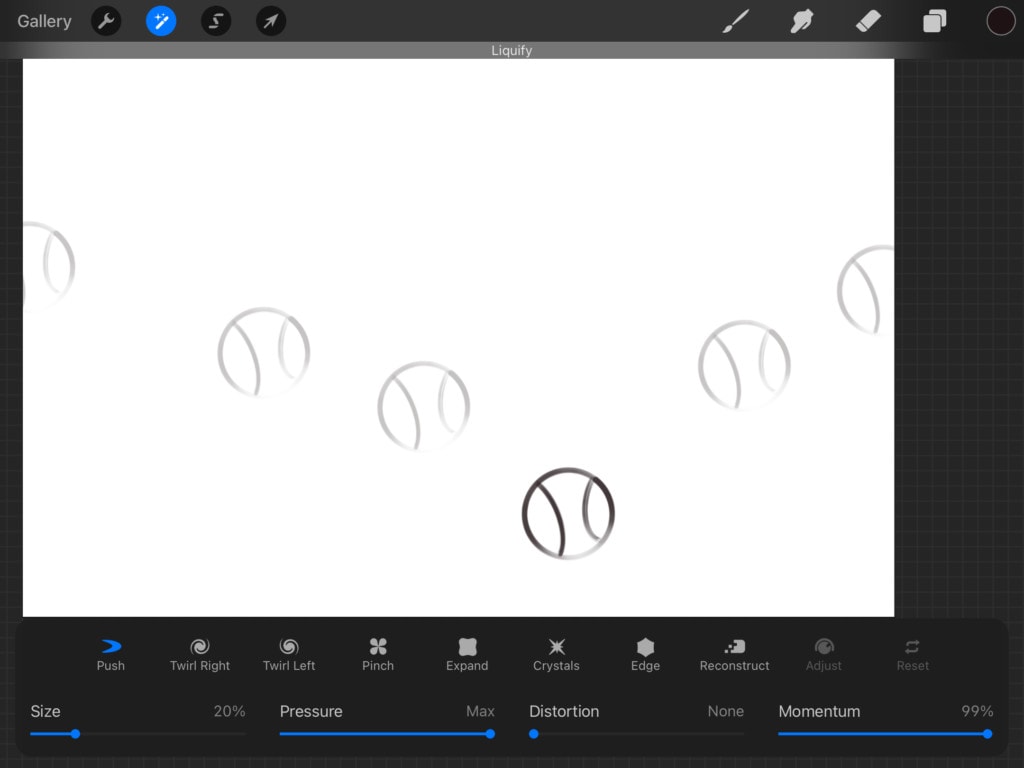
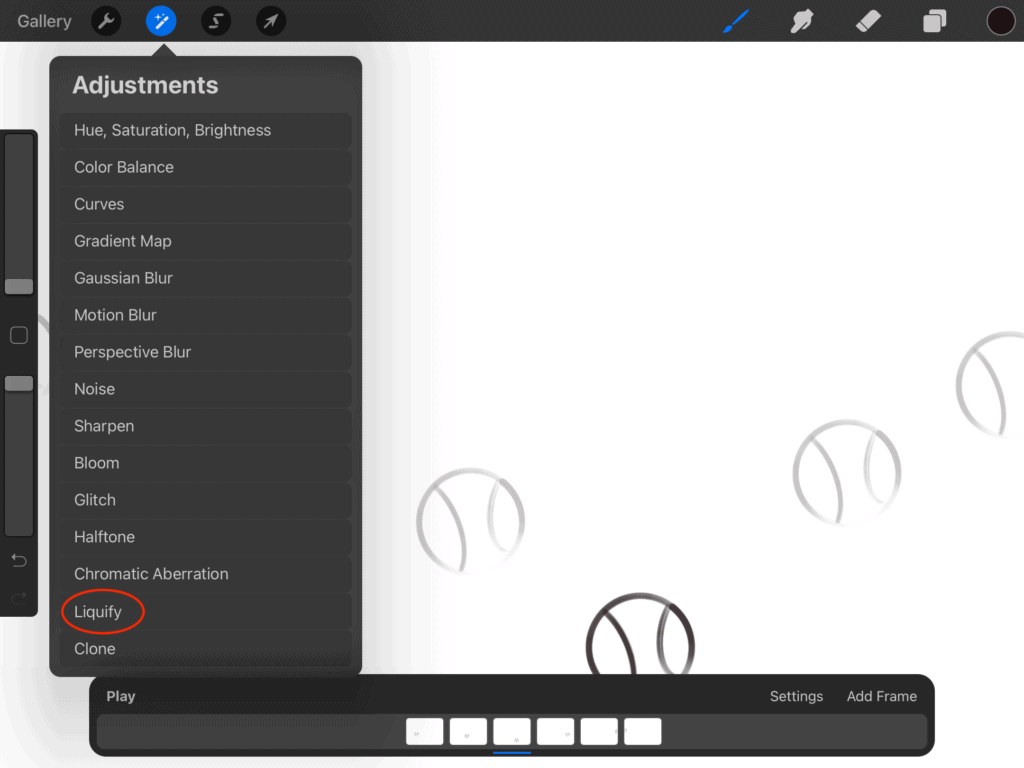
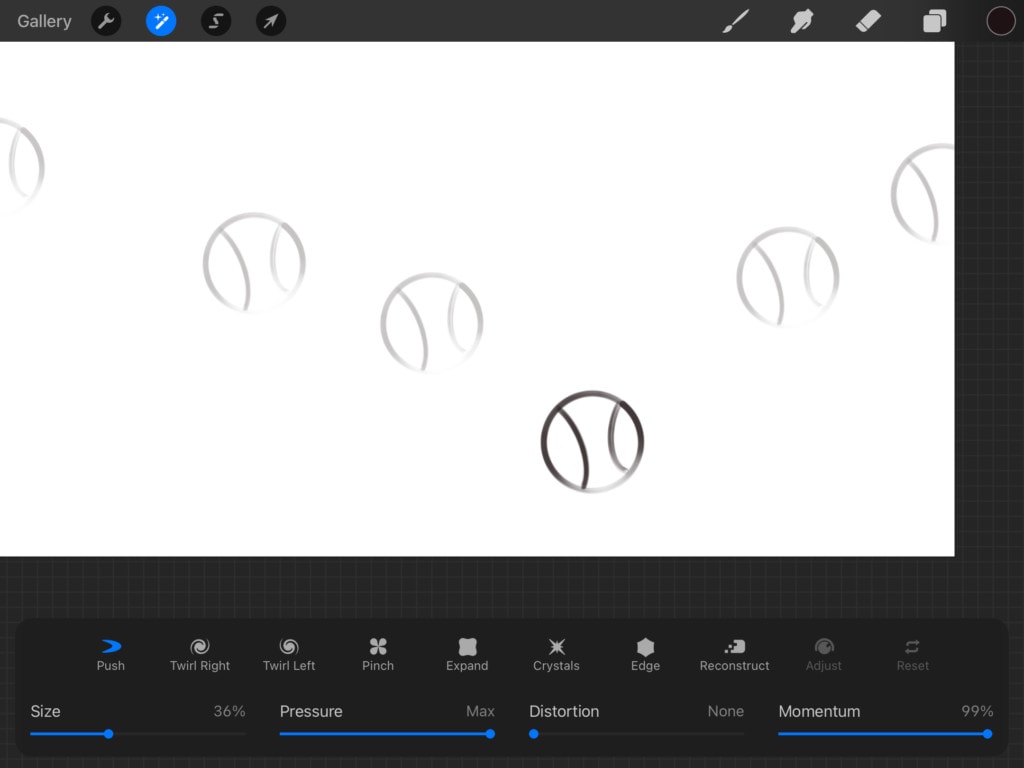
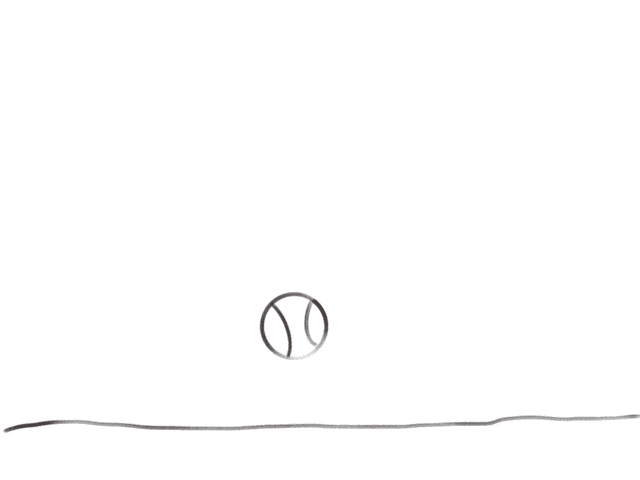
We then are going to squish the ball in the middle a little to make it look like it hit the ground! So, we will go-ahead to the “Adjustments” menu then select “Liquify“. With “Push” automatically selected, we are going to push the top and the bottom of the ball a bit so that it looks squished.
Now it is time we draw a ground for the ball to bounce on. Make sure you either draw it in all of the layers or duplicate the ground layer so you have six of it and then merge each one of them with a ball layer.
Note that in order for the animation to work properly you need all the layers to have all the elements of your drawing (in this case a ball and a ground, or sockets and pupils in the previous animation), you might think that we don’t have to include the ground in every layer since we are not animating it anyway. However, that is totally wrong. If the ground for example was missing from one of the layers that means that in that particular frame in the animation there will be no ground. It will disappear from the animation for a part second. So, we have to make sure that all of the elements are there to avoid any flashing effects.
We can always use the “Frames Bar” to check on our animation by moving the slider bar.

The next step is saving and extracting like we did with the previous moving eyes animation. Here is our finished animation.
And that is pretty much it for animating using Procreate! You can start small like moving pupils around or even work on something bigger such as someone waving their hands and smiling :). The limit is really your imagination!
And as always we prepared a collection of more than 50.000 brushes that can help you on your way to becoming an excellent artist. Keep on creating!


Share this article


