
How To Blend Hair in Procreate in 6 Steps

Picture this: you’ve sketched out a fantastic portrait, but when it comes to the hair, it just looks… off.
Without proper blending techniques, your hair might end up looking like a clumpy, unrealistic mess, turning your digital masterpiece into a digital disaster.
But don’t worry! I’m here to guide you through the process of blending hair seamlessly in Procreate, turning what could be a hair-raising experience into a smooth, satisfying part of your artistic journey.
Let’s dive into the steps to ensure you never fear the hair again.
Here’s a quick summary of what you’ll learn:
- How to apply the base color and additional tones for blending.
- Selecting the right brush, with a focus on using the soft airbrush for precision.
- Techniques for gently blending colors together for a natural transition.
- Adjusting the opacity of your brush for softer, more realistic blending.
- Adding back fine details and individual strands after blending.
- Making final adjustments and reviewing your work for a polished finish.
Blending Hair in Procreate (Step-By-Step)
Right before we go into our step-by-step guide, here’s a quick information. Throughout tutorial, you will notice a screenshot of the brushes used for blending. These brushes are included in Painterly Blenders pack. If you want to find more hair-related brushes, then check Brush Galaxy’s collection of Procreate Hair Brushes.
Now let’s go to the tutorial.
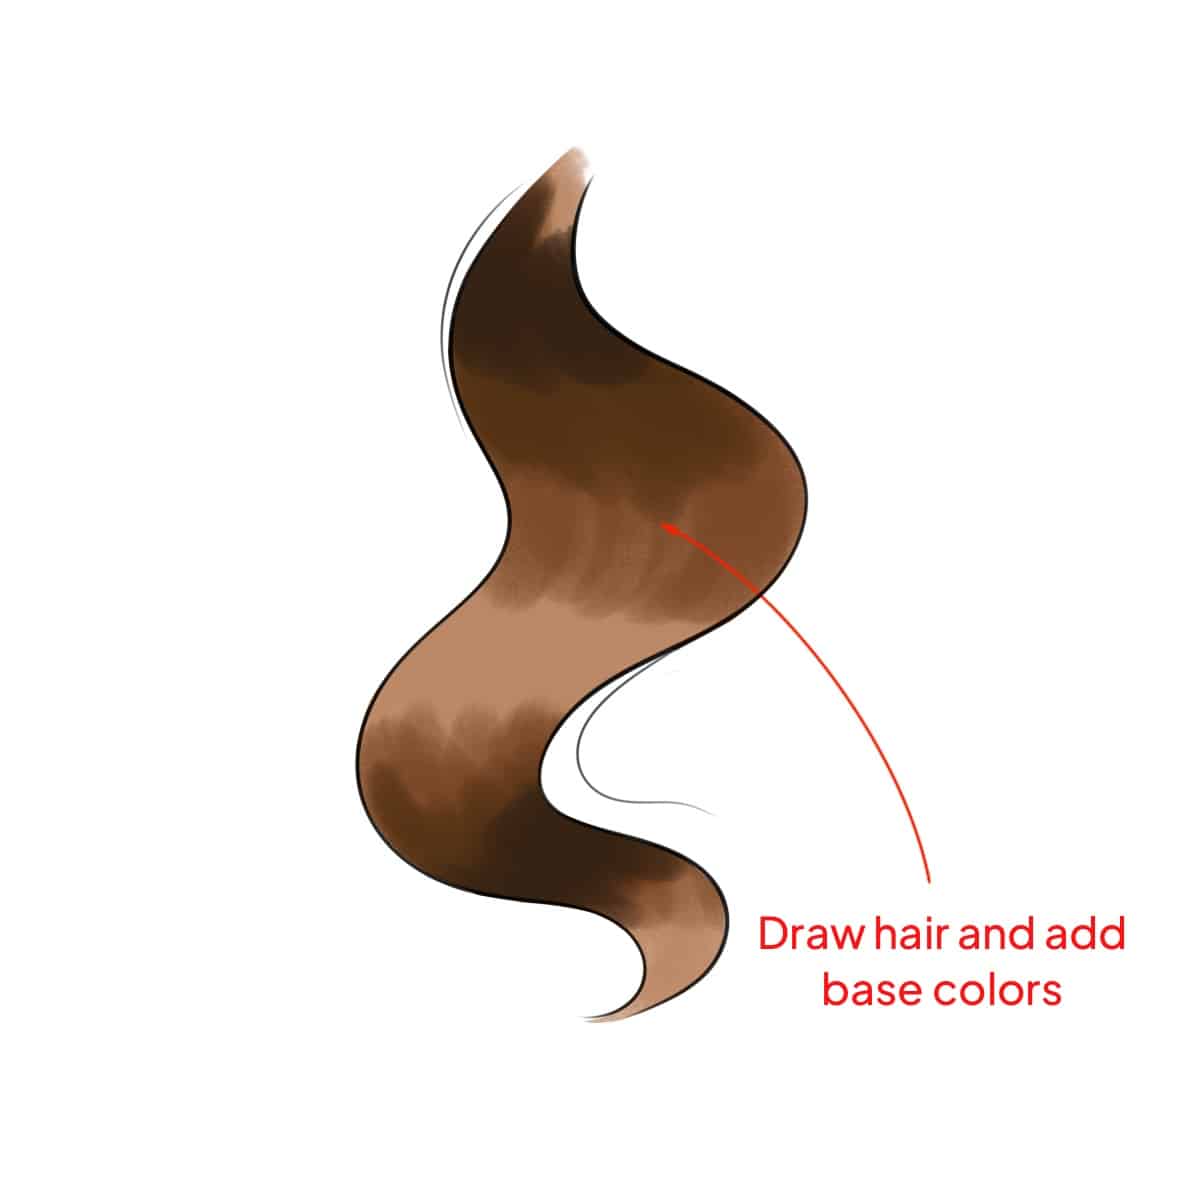
Step 1 – Laying Down Your Colors
Start by applying the base color for the hair on your canvas.
Then, add in the other colors you plan to blend, like darker tones for shadows and lighter ones for highlights. This sets the stage for your blending work.
Step 2 – Pick The Right Brush
The soft airbrush is my go-to for blending hair in Procreate. It’s smooth and allows for a lot of precision, making it perfect for getting those subtle gradients in hair.
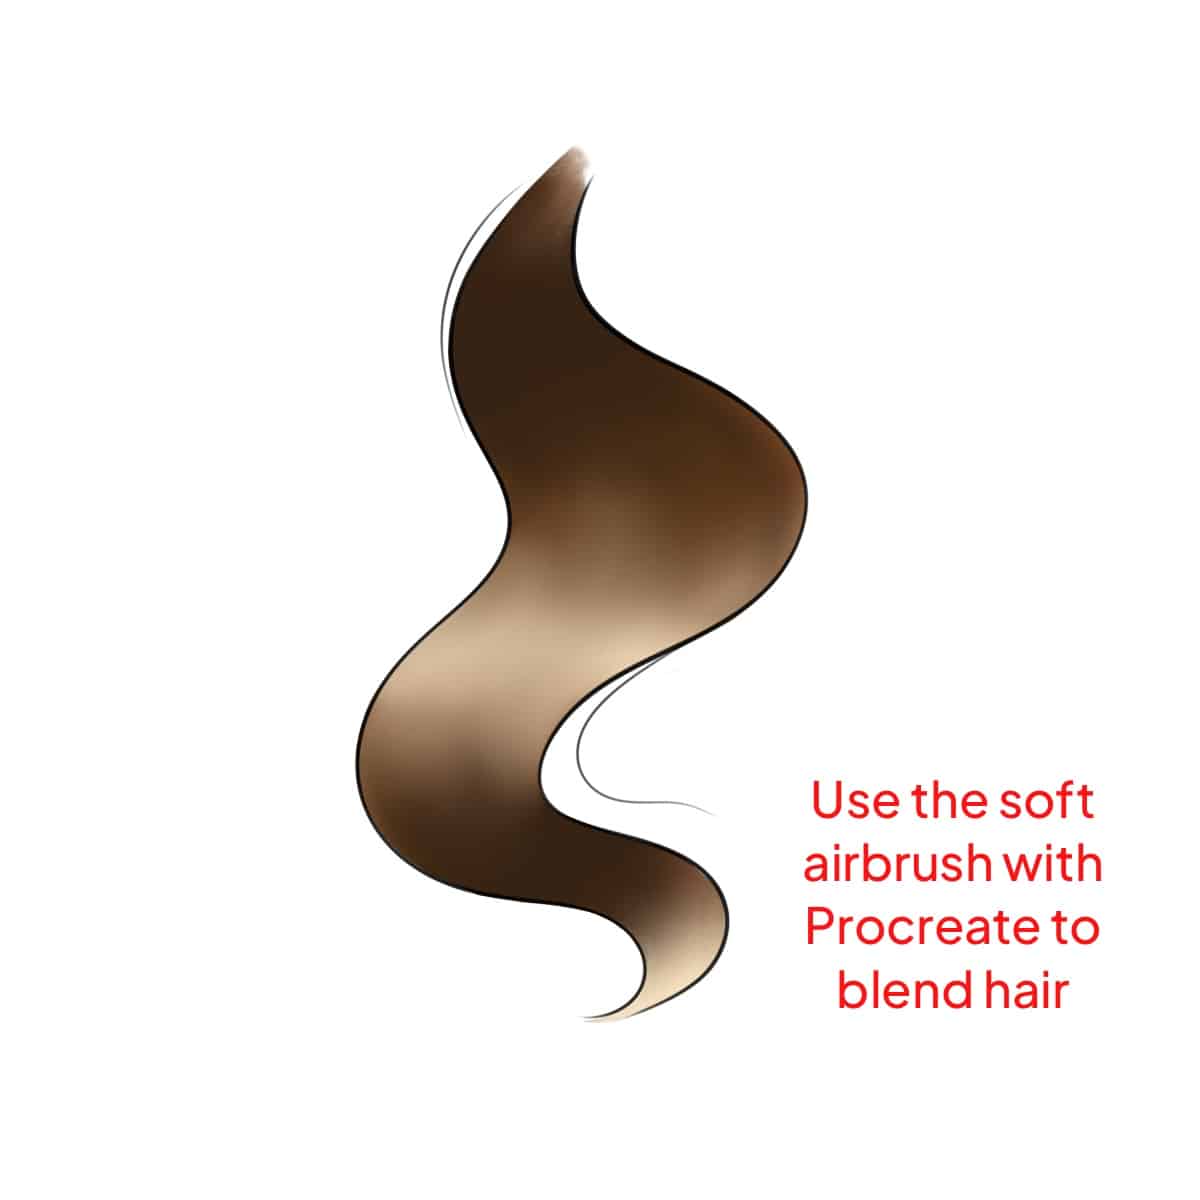
Step 3 – Continue to Blend
Gently stroke the areas where your colors meet using the soft airbrush. The key here is to use a light touch and to build up the blending gradually, ensuring a seamless transition between colors.

Step 4 – Controlling Opacity
Adjusting the opacity of your brush is crucial. Lowering the opacity results in softer, more subtle blending, which is ideal for achieving natural-looking hair.

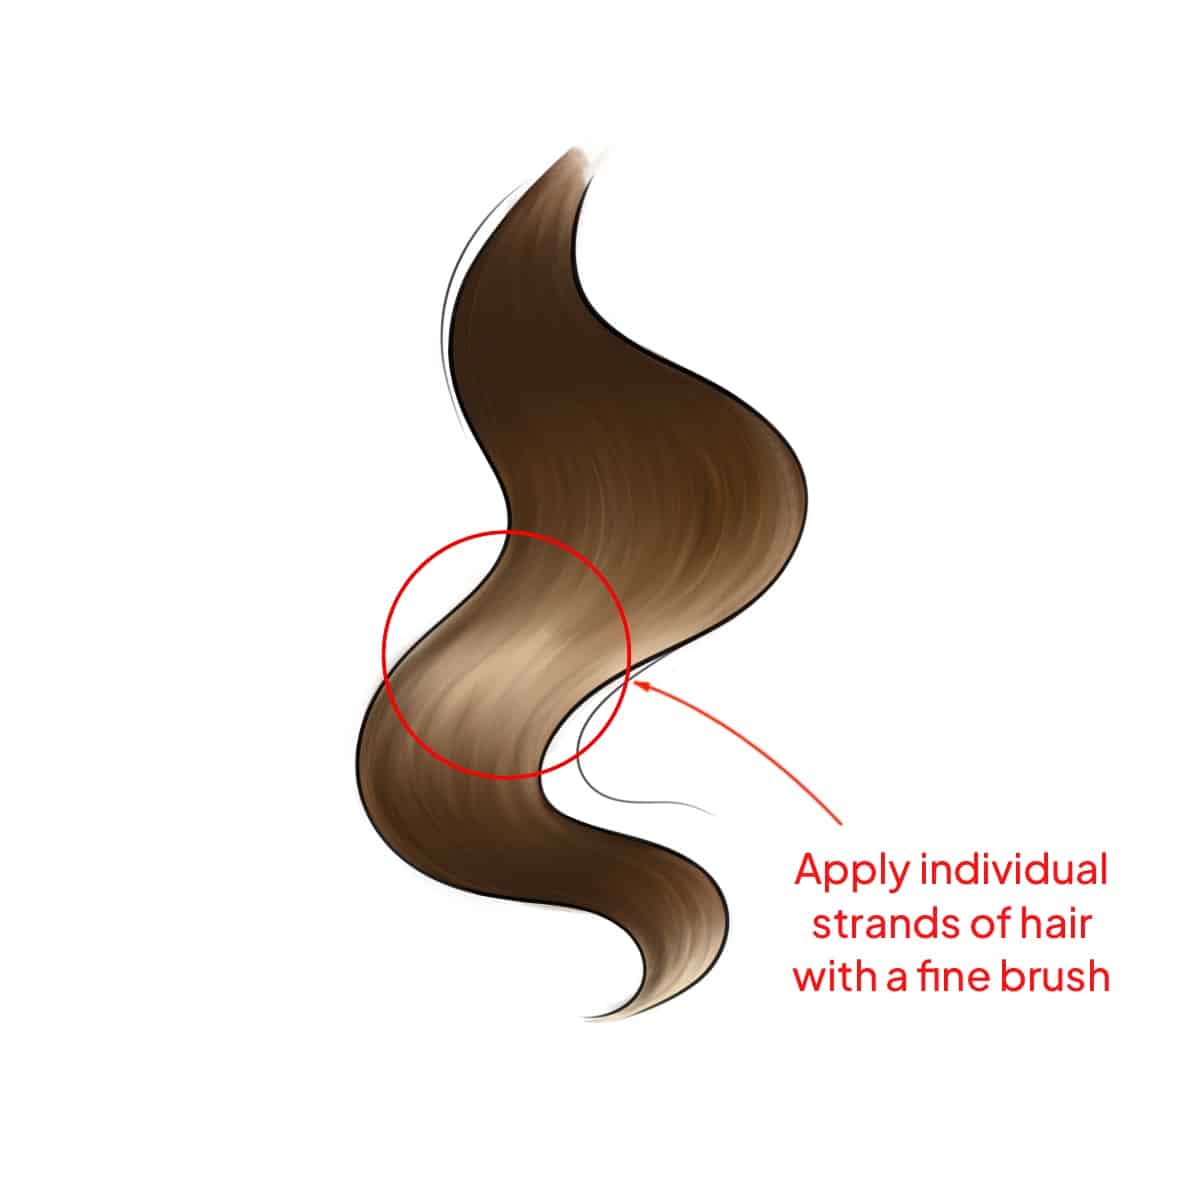
Step 5 – Re-adding Details
Once you’ve blended your colors, it’s common to lose some of the finer details. Go back in with a smaller, finer brush to add back those individual hair strands and details for a more realistic look.
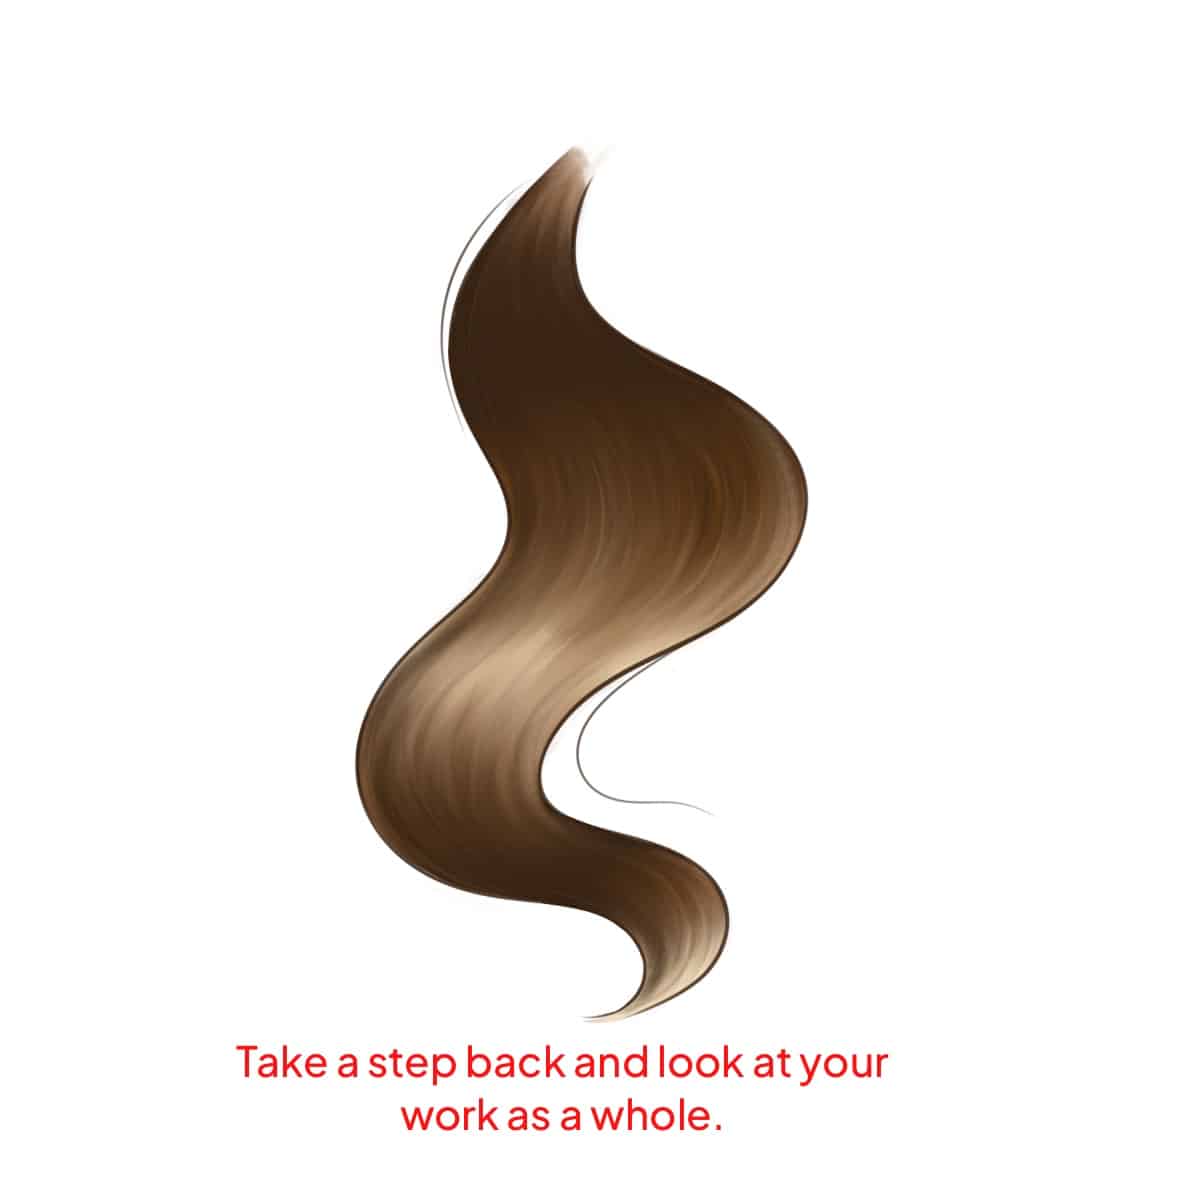
Step 6 – Final Tuning
After blending, take a step back and review your work as a whole. Make any final tweaks or adjustments to the blend to perfect the look of the hair.
By following these steps, you can create beautifully blended hair in your Procreate artwork, transforming what once seemed daunting into an achievable and enjoyable part of your creative process.


Share this article


