
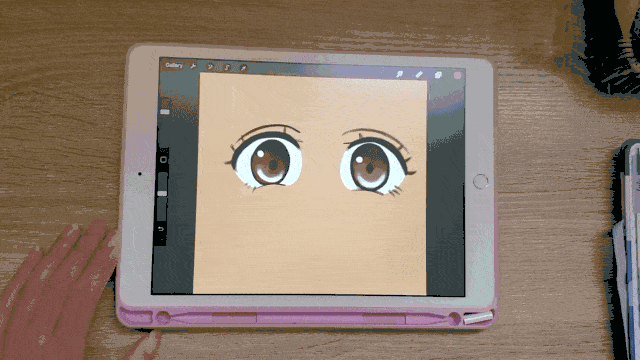
24 Must-Know Procreate Tips And Tricks
Hello there! Have you been getting started with Procreate?! Well, then you have probably come across artists, YouTubers, and people doing some sort of wizardry! Where they just do stuff that you have no idea how or even what they did!
So today, we are going to teach you some handy dandy Procreate tips and tricks that are going to make your life a whole lot easier! So grab on to your wand and let’s do some magic, shall we?! Well, not exactly MAGIC! But at least that was the way we saw it when we first got started :). However, it still feels so cool every time we do one of these tricks! So, keep on reading and make sure you get to the very end because we are saving the best for last. [WINK, WINK]
Contents:
- Opacity And Brush Size Slider.
- Selecting Layers.
- Pinch To Merge.
- Move A Layer To A New Project.
- Dark Vs Light Interface.
- Left Vs Right Interface.
- AutoFill And Color Gaps.
- Three Fingers Swipe.
- Two Fingers Swipe.
- Double Tap.
- Triple Tap.
- Four Fingers Tap.
- Long Tap.
- Draw And Hold To QuickShape.
- Scrubbing The Screen With Three Fingers.
- Gesture Controls.
- Quick Menu.
- Color Wheel Automatic Color Choices.
- Nudge Selection To Move.
- Change A Drawing’s Colors.
- Pinch To Fill Screen.
- Get Flowy Lines.
- Long Tapping The Brush Icon.
- Make A Gradient Overlay.
1. Opacity And Brush Size Slider
Have you been wanting to adjust the opacity and sizes of your brush to a certain percentage but always found it tricky to control it to get exact percentages because the slider moves too fast? All you have to do is go to your slider drag it outwards, and now you can move it way slower than before so that you get better control!

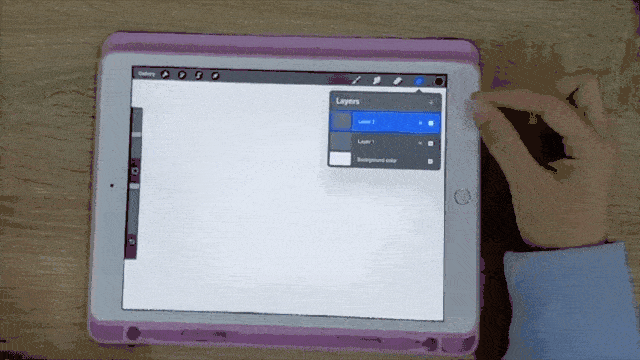
2. Select Layers
Did you know that you can select multiple layers by swiping them to the right using one finger? Now you can move stuff on different layers at the same time without having to merge them!
3. Pinch To Merge
Have you been using the good old “Merge Down” to merge your layers? Well, you can also merge the layers by pinching the ones that you would like to merge together.
4. Move A Layer To New Project
Did you know that you can copy a layer that you created and paste it to other projects by dragging it with one finger, then with the other index finger from your other hand tap “Gallery” and then select the project that you would like to copy it to, open “layers” and place it where you would like.
Or you can even make it a project of its own by repeating the same steps. However the time you would just drop the layer in the gallery and it will be saved as a new project.
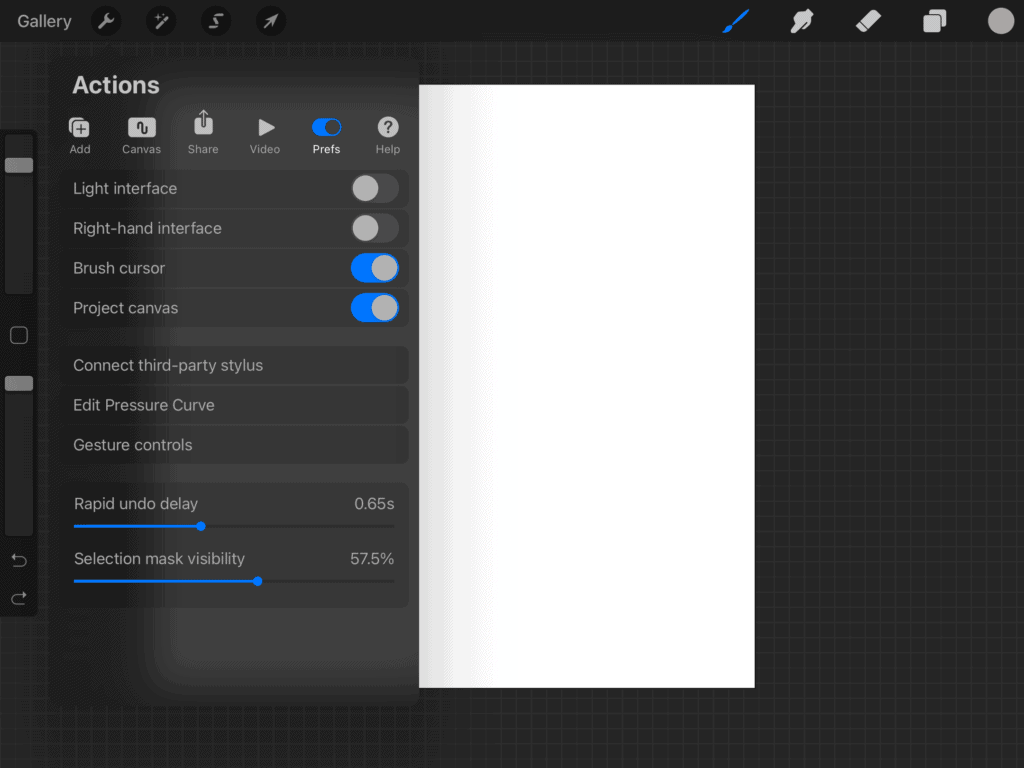
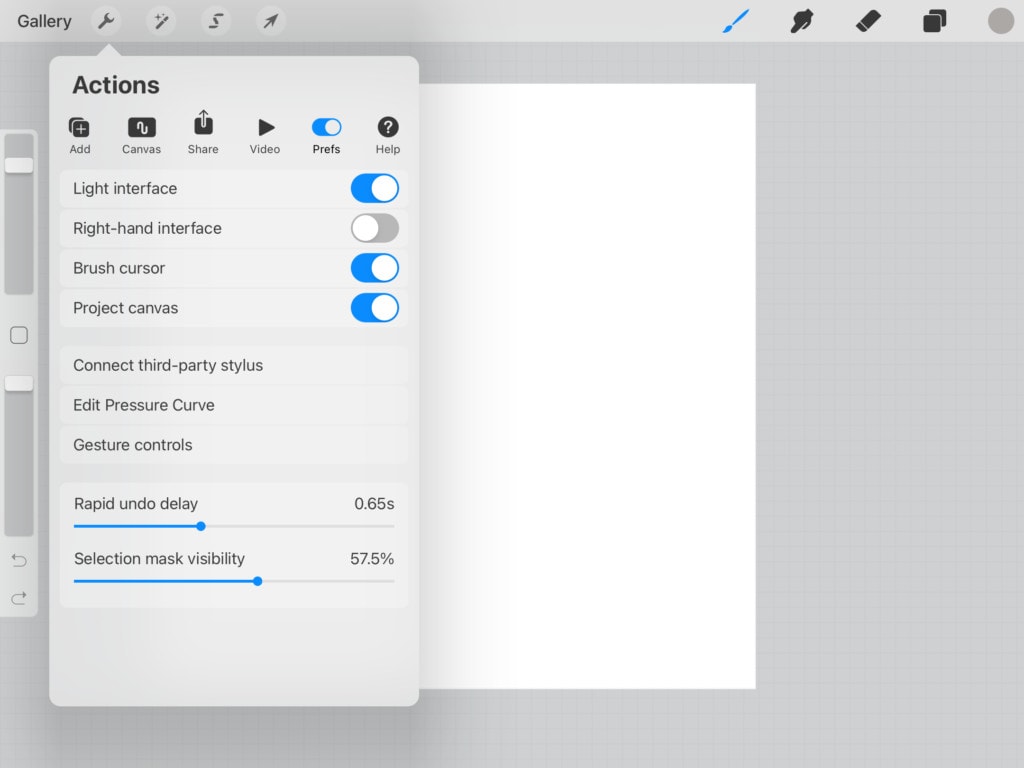
5. Dark Vs Light Interface
You can also change if the user’s interface is light or dark. For this post we will be changing a dark interface to light, by heading over to the “Actions” Menu, “prefs” then toggling the “Light Interface“.
And now we remember when Phoebe Buffay from Friends said: “MY EYES“! LOL.
Okay, we are going to change it back right now! But just in case you needed a change it is right here 😉
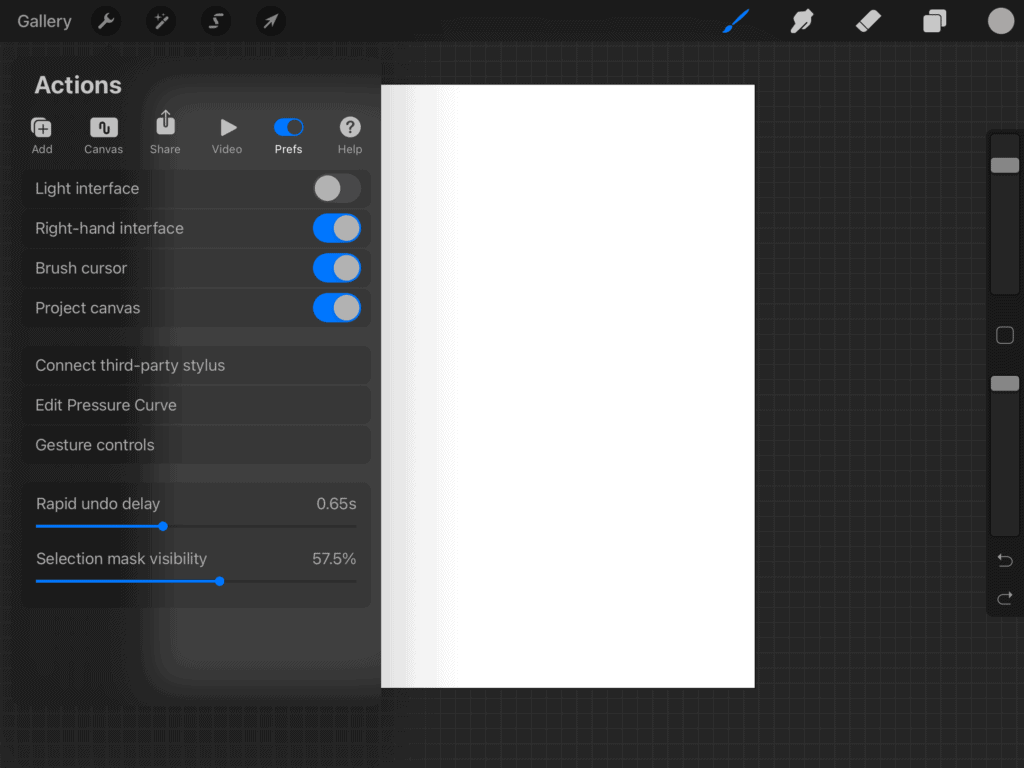
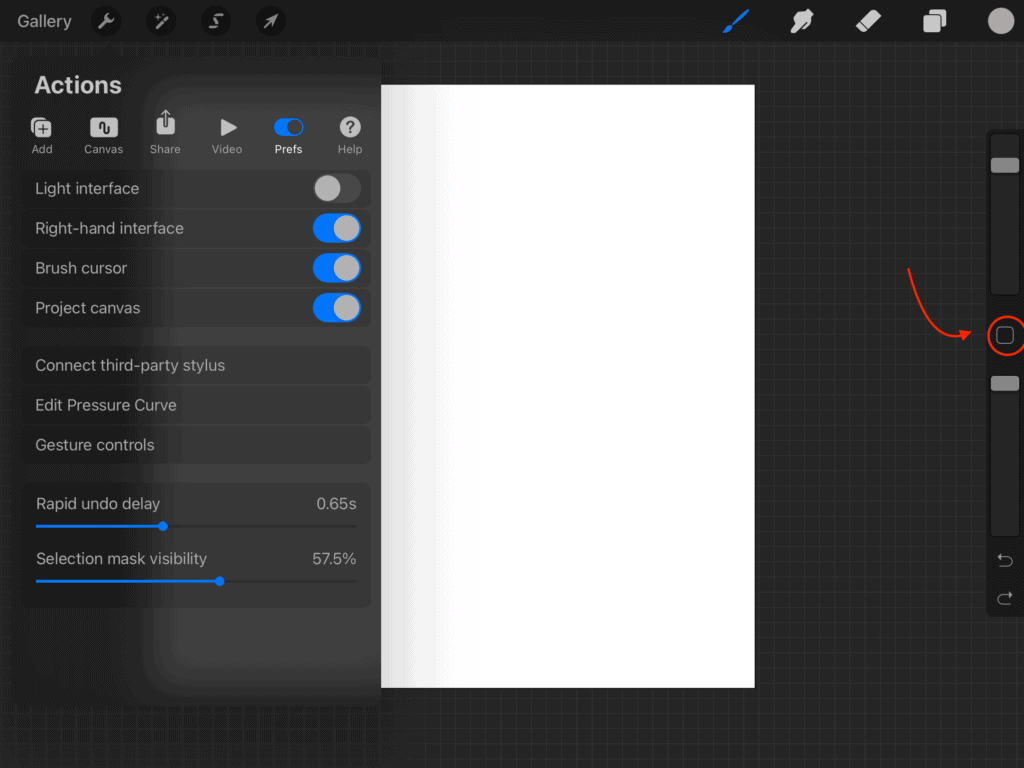
6. Left Vs Right Interface
And we have always wondered about the location of the brush size and opacity slider bars and how it’s always to the left and far away for a right-handed person. Turns out it is the “left-hand interface”, and you can change it by going to the “Actions” menu, “prefs” then toggle “Right-hand Interface“! Cool right?!

7. Autofill And Color Gaps
Have you come across these annoying coloring gaps whenever you are using Procreate? well, if you haven’t yet, you eventually will. So you are using your beloved autofill tool and you just colored a big piece of your drawing only to find that you have to go over it to fill in the awkward gaps. We are here to tell you that you don’t have to! You can just use the color drop to fill in your drawing with colors. However, do not release the color just yet drag your pencil outwards to fill the whole shape in with color.
This tool also comes in handy when you would like to fill a piece with color and then somehow accidentally the color spreads to the whole drawing. However, this time you fill in the shape with color, then you drag the color inwards instead of outwards before releasing it.
8. Three Fingers Swipe
Did you know that you can use three fingers to copy and paste? All you have to do is swipe across the screen from top to bottom. A panel shows on the bottom of the screen. Select “Copy“. This will copy whatever you have on the current layer. Swipe again with three fingers and select “Paste“. We have a whole post on different ways you can copy and paste, you can check it out right here.
9. Two Fingers Swipe
Did you know that you can simply set your layer to “Alpha Lock” by using two fingers to swipe over the layers to the right and swipe again the same way to disable the alpha lock?
with your layer alpha locked you can only paint within the limits of whatever already existed on the layer.
10. Double Tap
You can always use this “undo” button in the slider bar to undo any action you have done.
You probably know that already. However, there is a quicker way to undo which is by tapping with two fingers at once on the screen.
11. Triple Tap
You can also quickly redo an action that you have undone by tapping on the screen with 3 fingers at once.
12. Four Fingers Tap
Did you know that tapping with four fingers on the screen allows you to get a full-screen view of your artwork without the toolbars and sliders being in the way? Note that you will need to tap again the same way in order to restore your bars. No one wants to lose their Procreate bars, right?
If you tried that and didn’t work for you, then maybe you will need to activate it. Read on till you reach the “Gesture Controls” part. This is where you activate it!
13. Long Tap
If only there is a way to pick or match colors without having to press that square sign every single time, UGH.
Ohh wait, there is! You can color pick by long-tapping the area that you would like to pick the color from.
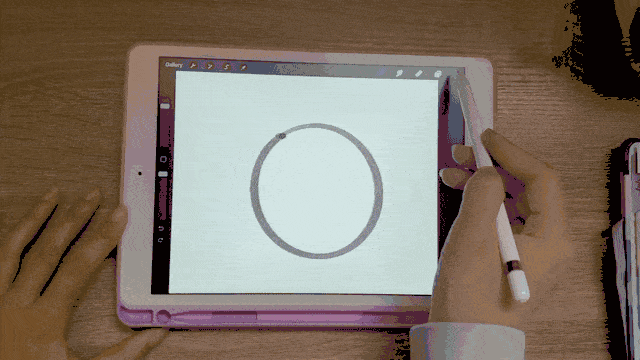
14. Draw And Hold To Quickshape
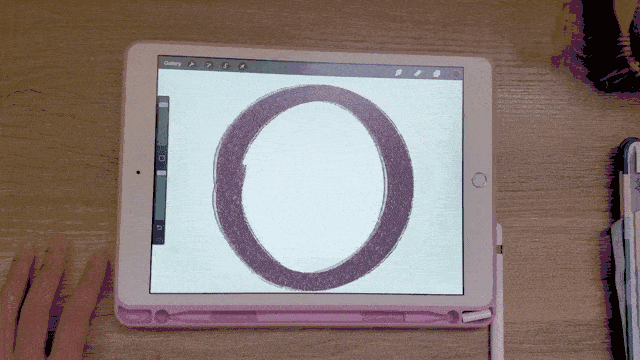
Many digital drawing programs allow you to draw straight lines through some sort of a ruler tool. However, a cool feature that Procreate has is “QuickShaping” and that is the ability to turn any shape that you draw -not just lines- into geometrical ones. So, how exactly do you do that, you ask? It’s by simply drawing the shape normally and then before lifting your pencil off of the screen you wait 2-3 seconds, and it is just going to turn into a geometrical shape! Awesome right.
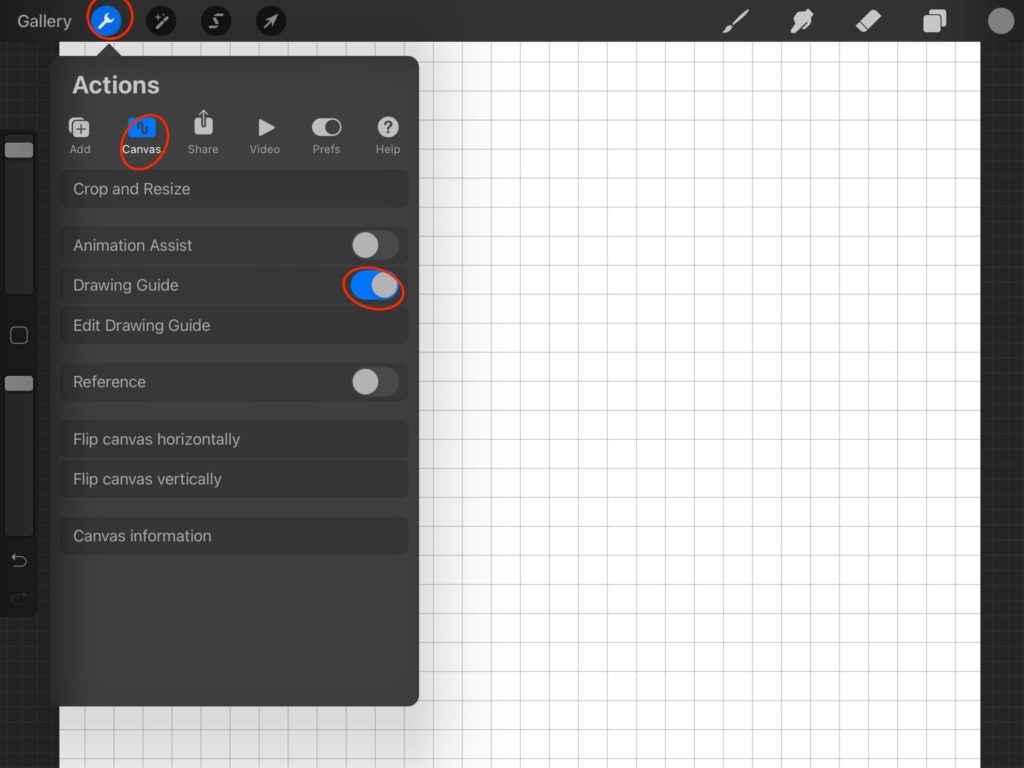
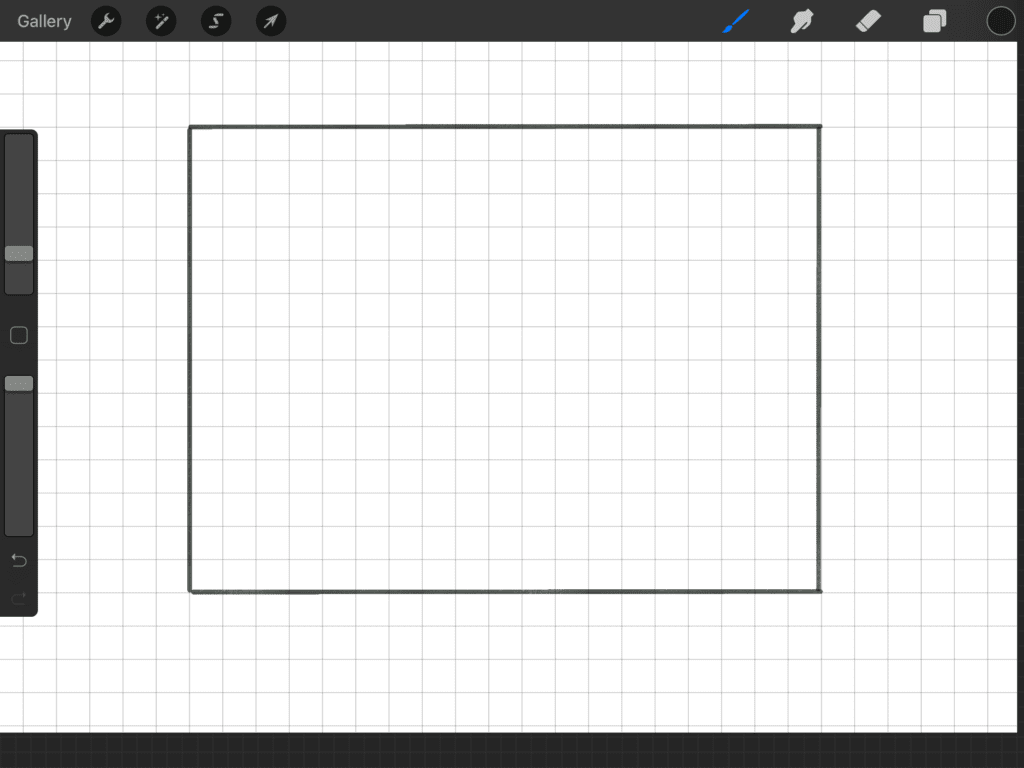
You can use this feature to draw circles, lines, squares, and even curves. You can also turn on the grid drawing guide by heading over to the “Actions” menu, “canvas” then “Drawing Guide”, and turn it on. There you go! You have now got yourself a 2d drawing guide to make sure you are drawing perfect squares or rectangles or just whatever you think about!
15. Scrubbing The Screen With Three Fingers
That might be the most unknown one on the list, but did you know that you can use three fingers to scrub the screen in order to clear the layer you are on? Now, I am really sad I wasted so much time deleting layers and re-adding them!
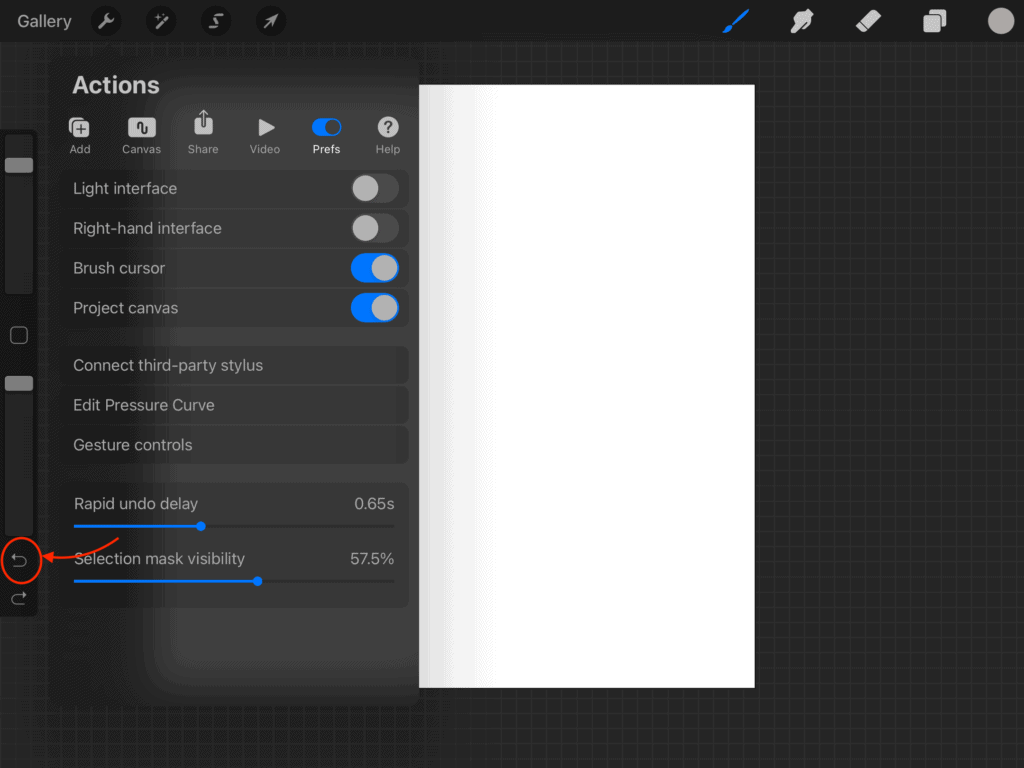
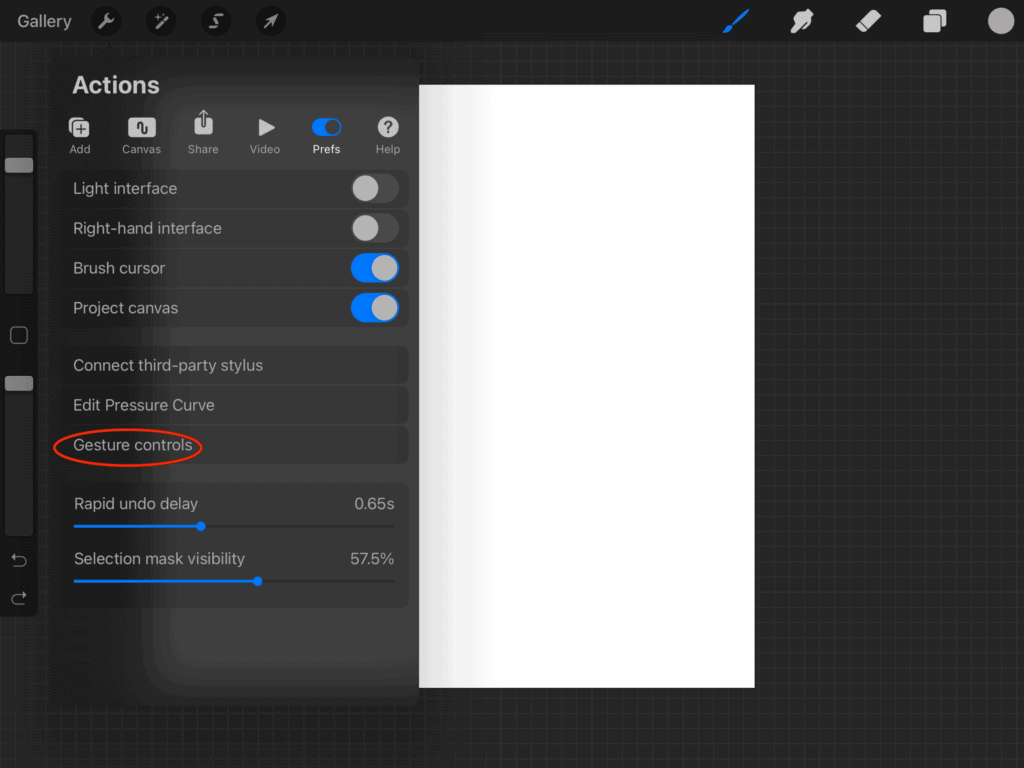
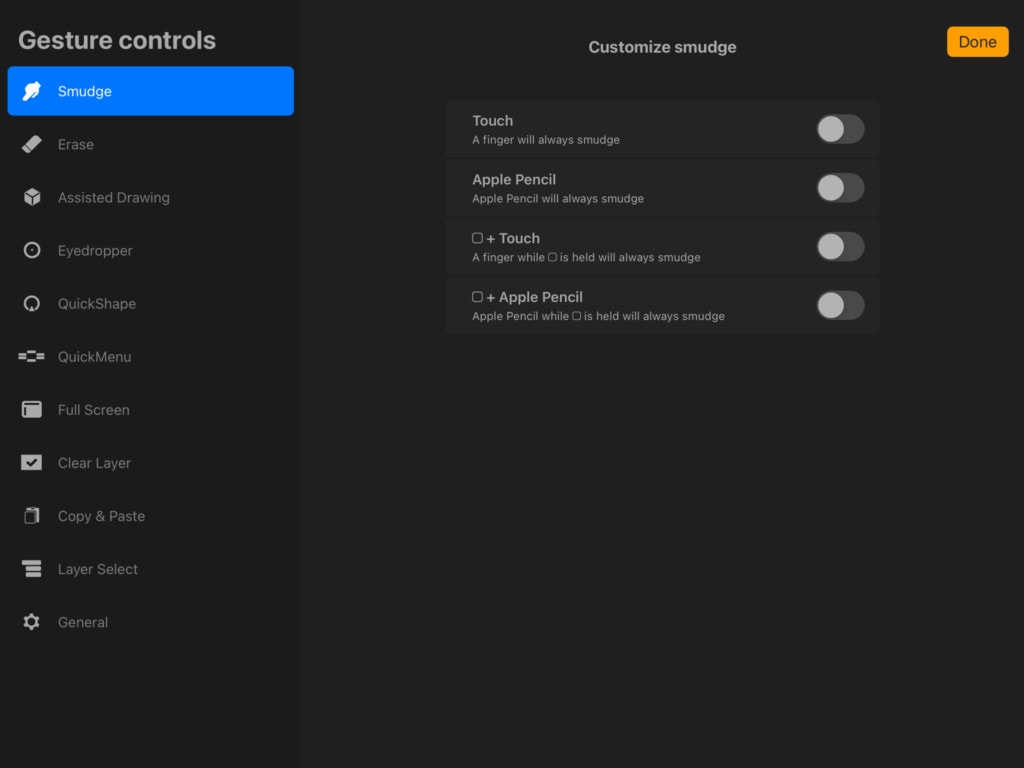
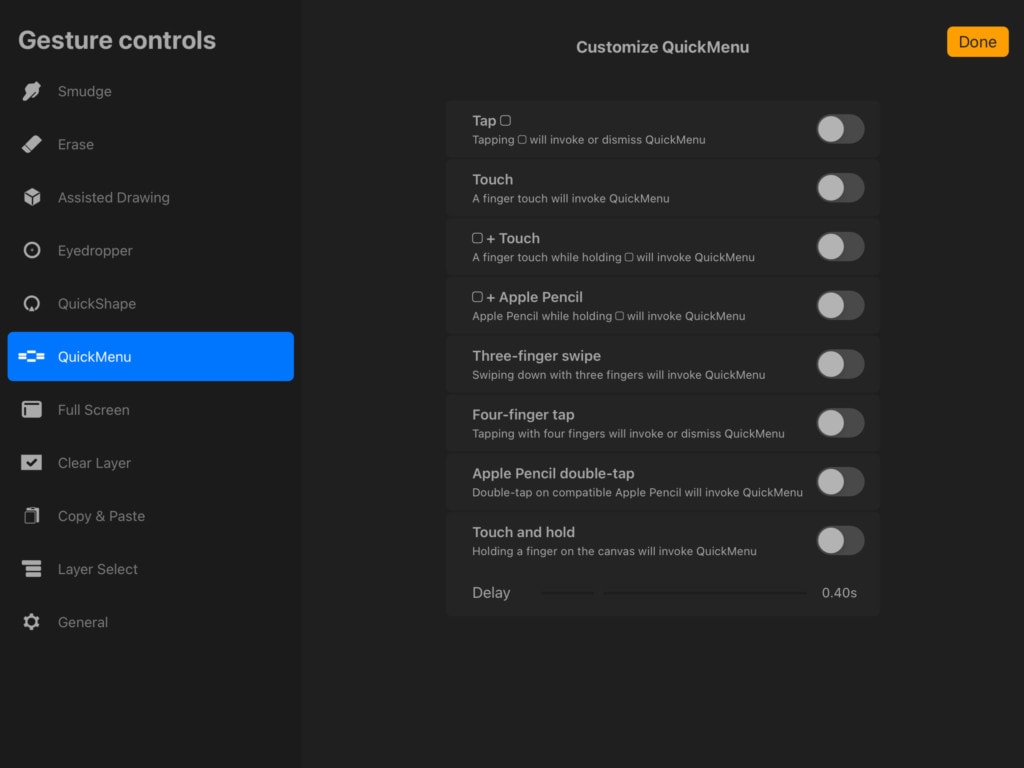
16. Gesture Controls
So, if you had fun experimenting with all the features we just mentioned, but you still haven’t got the hang of it, you can always alter the gestures and what they are assigned to or re-assign them and procreate has a lot of options for you to choose from! All you have to do is head over to the “Actions” menu by pressing the “Wrench” tool. You then select “Prefs” and then select “Gesture Controls” and you can already see the actions that you can create shortcuts for and a list of the shortcuts possible.
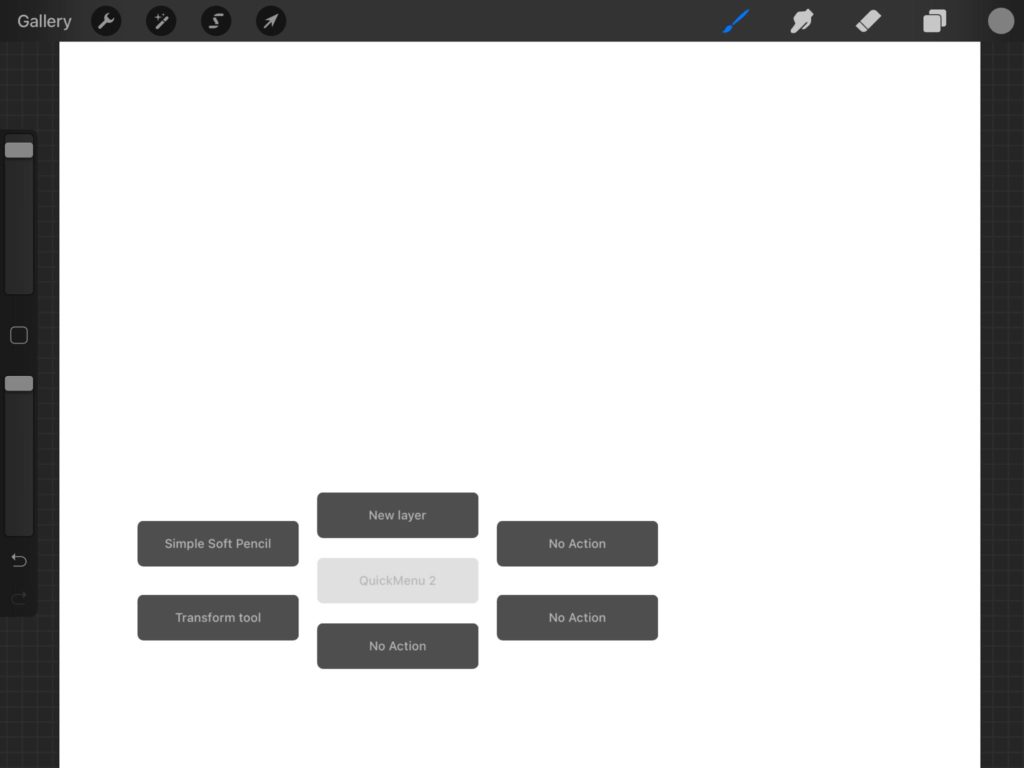
17. Quick Menu
An awesome feature is that even if there is a feature that you would like to have a shortcut to but it is not on that list of “Gesture Controls“, you can choose to launch it from a “QuickMenu” that you get to customize. So how do we access this magical “QuickMenu” you ask? Simple! Head over to gestures control, like we just showed you above.
Select “QuickMenu“, then choose a gesture that you would like for it. For now, we selected that square that is normally assigned for color picking, don’t worry you can color pick using a long tap as we showed you above! That is why procreate showed this exclamation mark.
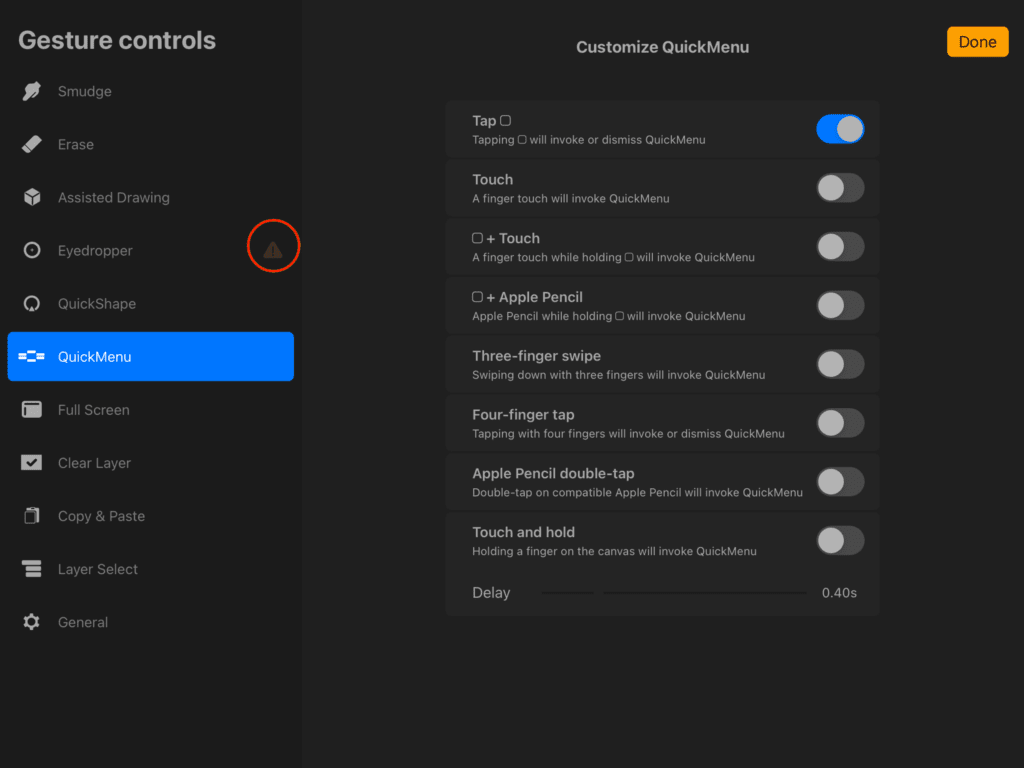
This means that procreate recognized that it is selected for two tasks and canceled the older one. Now that we have set a shortcut for the “QuickMenu“, it’s time we use it, Select that square. And here is your “QuickMenu“. If You haven’t set it up already, you will find that it has no actions.
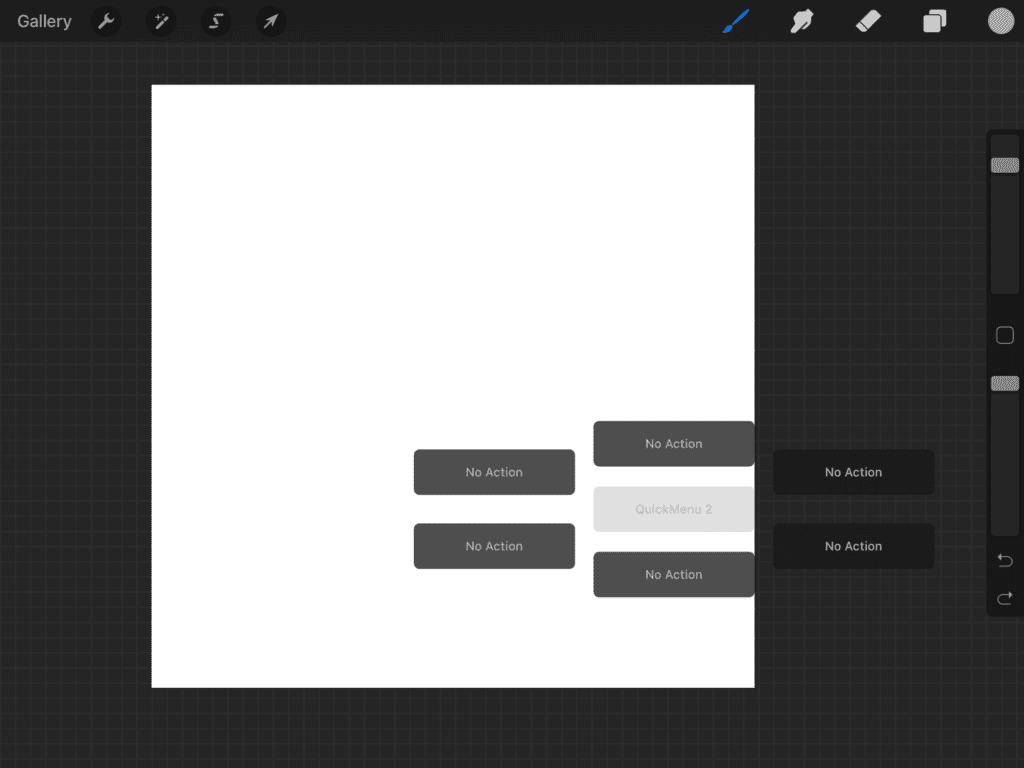
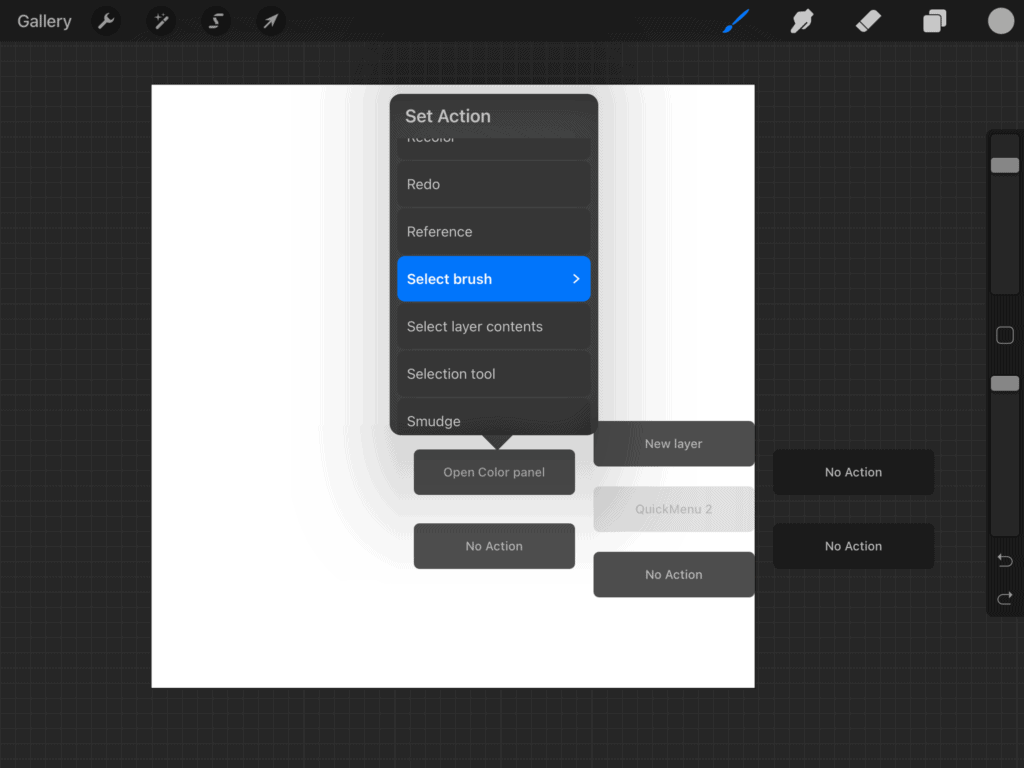
This means it is about time we add our own actions! Long tap any of them, it will come up with a list of tasks that you can get a shortcut to. How cool?!
We chose to use one of them for one of our favorite brushes, the “Simple Soft Pencil” from the “Texture And Grain“. So that we have quick access to it! We love to use it as a shading “Texturey” airbrush.
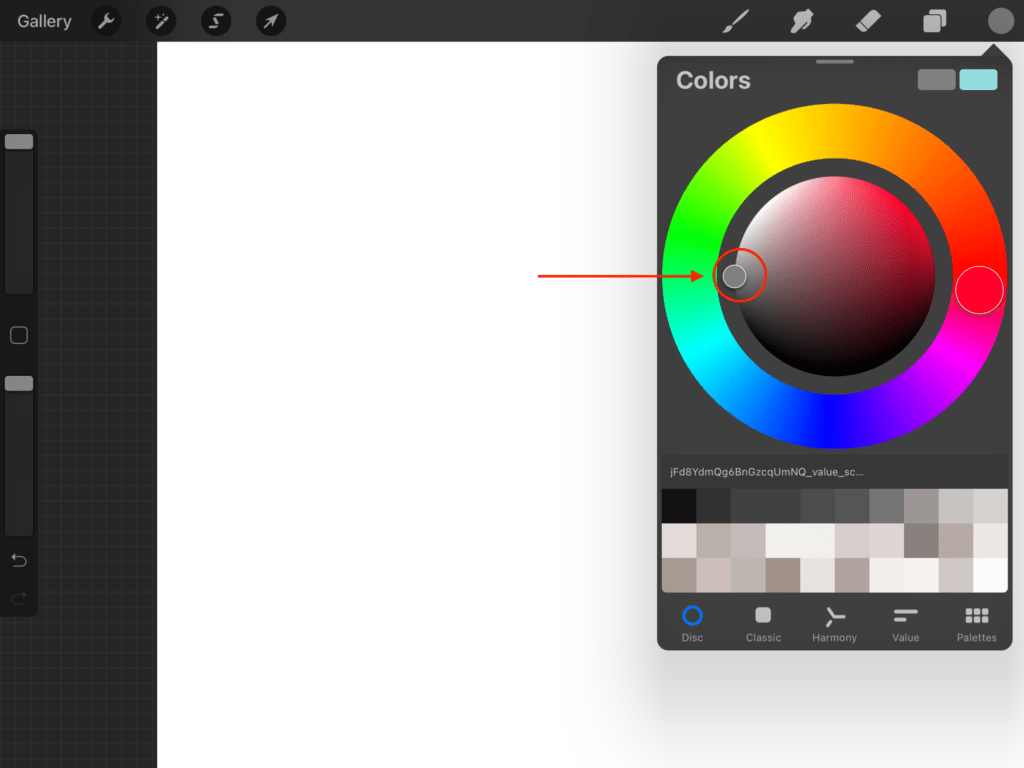
18. Color Wheel Automatic Color Choices
You know how you wanted to go to the color wheel to choose white or black, but always ended up not picking true white, maybe it has a slight greyness to it, also when selecting black you might wind up selecting a very dark color that is not really black? So, this is our next tip! You double-tap areas in the color wheel with your apple pencil to get the exact tone that you would like true white, true black, or a fully saturated color of every tone. You have exactly 8 points that will automatically get selected when you double-tap a color wheel.


19. Nudge Selection To Move
Have you ever wanted to move something on your canvas but just slightly, and you couldn’t just move it by the right amount?! You can select the object that you would like to move and then tap in the direction that you would like it to move in.
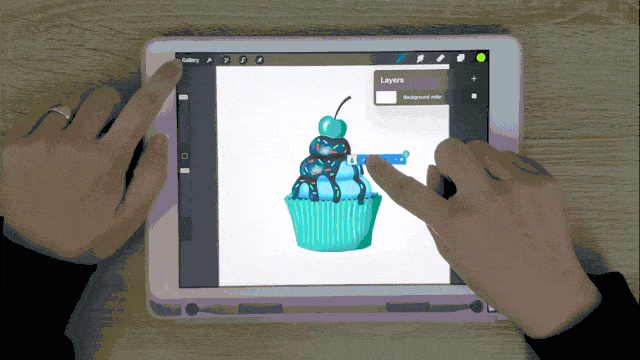
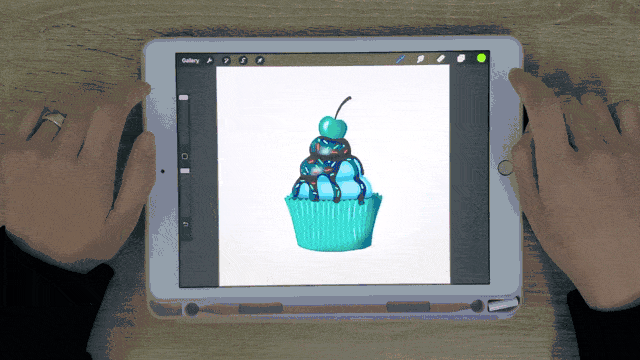
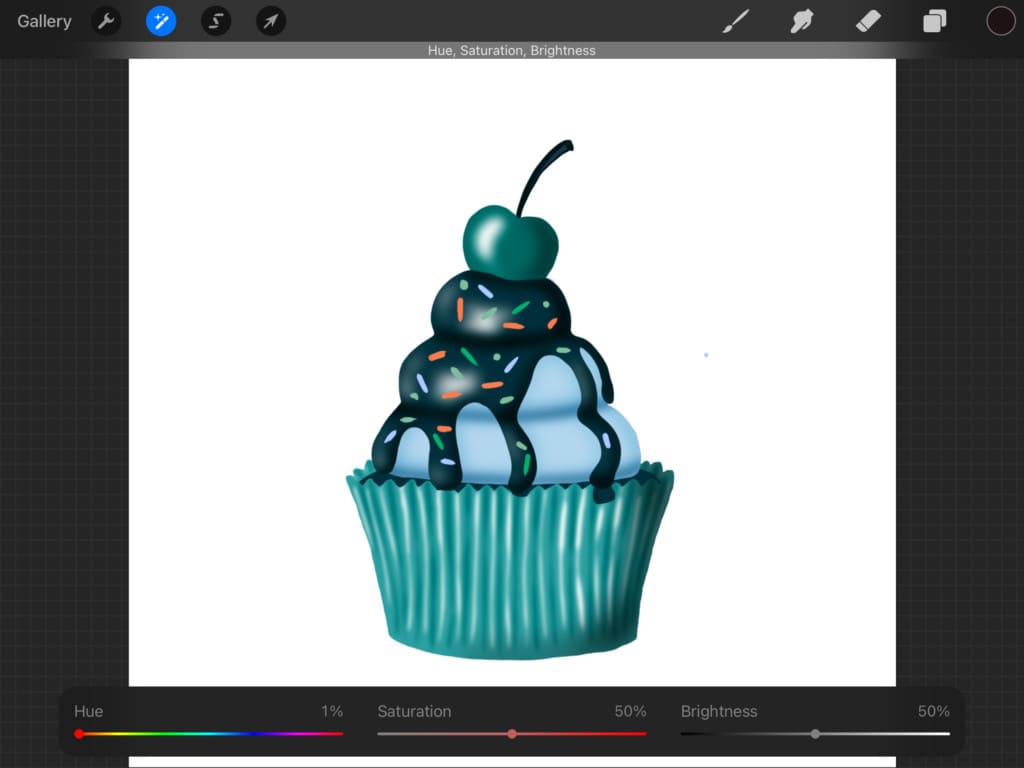
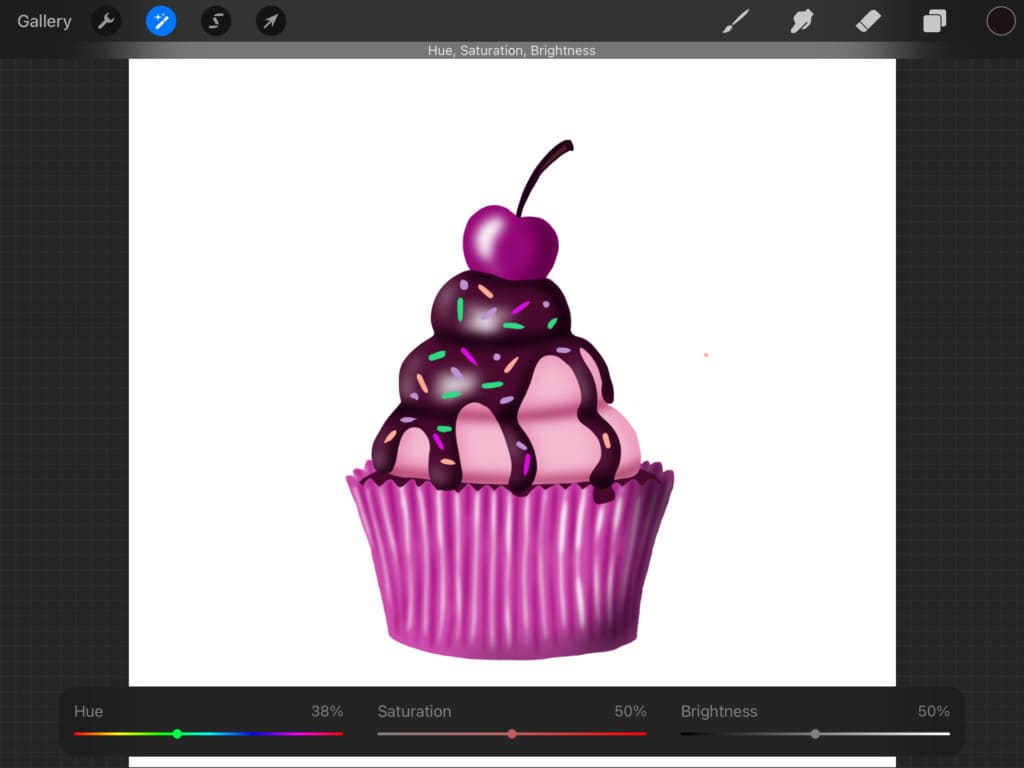
20. Change A Drawing’s Colors
Okay, so this one is something that we have all done at some point, coloring an image and adding shading only to find that we hate the colors! So, do we go in and manually just change everything’s color manually? Good luck with that, LOL. It is like recreating your art piece from scratch!
So, here comes the tip. You can change the color of the whole drawing at once until you find something that you like by heading over to the “Adjustments” menu and then selecting “Hue, Saturation, Brightness“, then “Layer“.
Now you will have three bars showing. The “Hue” one helps you change the color of the image. The “Saturation” allows you to choose how saturated you would like your colors to be whether they are saturated to the point they are super strong or unsaturated to the point that they are black and white. The last one is for “Brightness” and it obviously controls how lit you would like your colors to be. Super cool, right?!
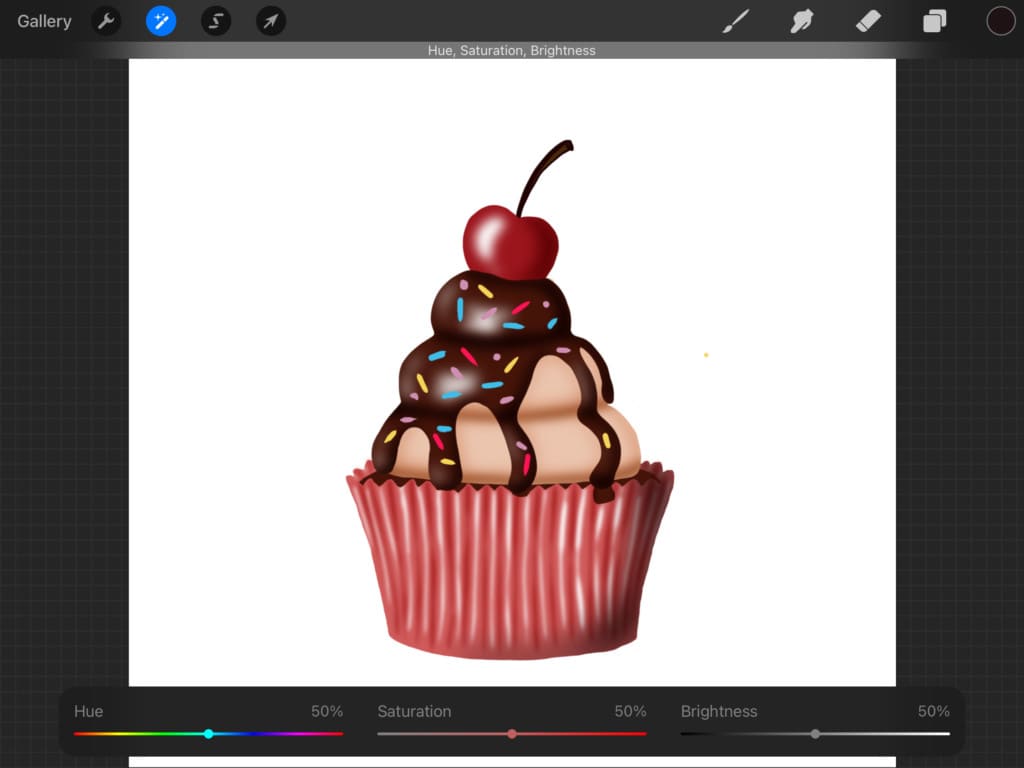
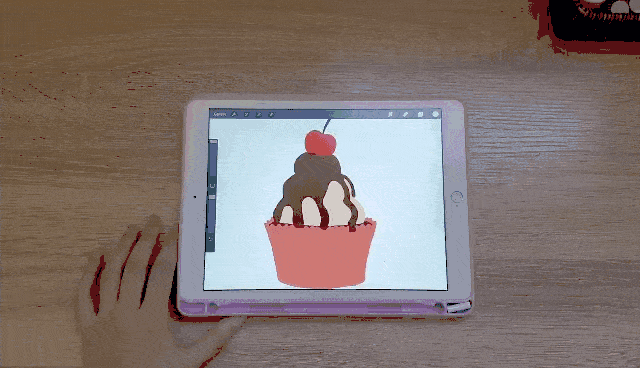
And ooh, we have a tutorial on how to draw and color this cute cupcake right here.
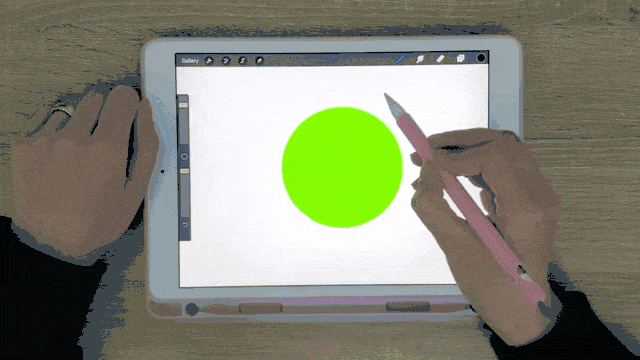
21. Pinch To Fill Screen
And If you ever struggled with your canvas, moved it, and zoomed in and out a lot, that you can’t return it to its original alignment? you can always pinch your canvas to reset it to its original size and position.
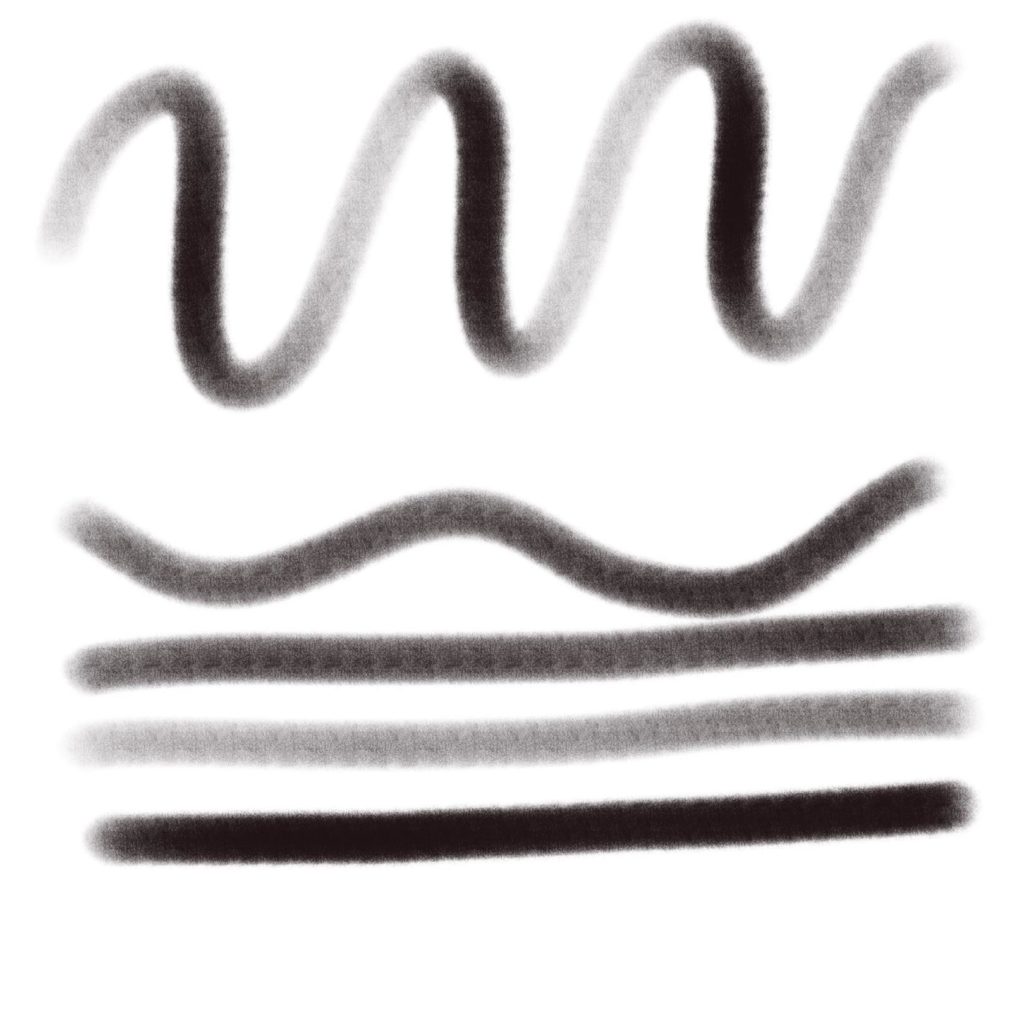
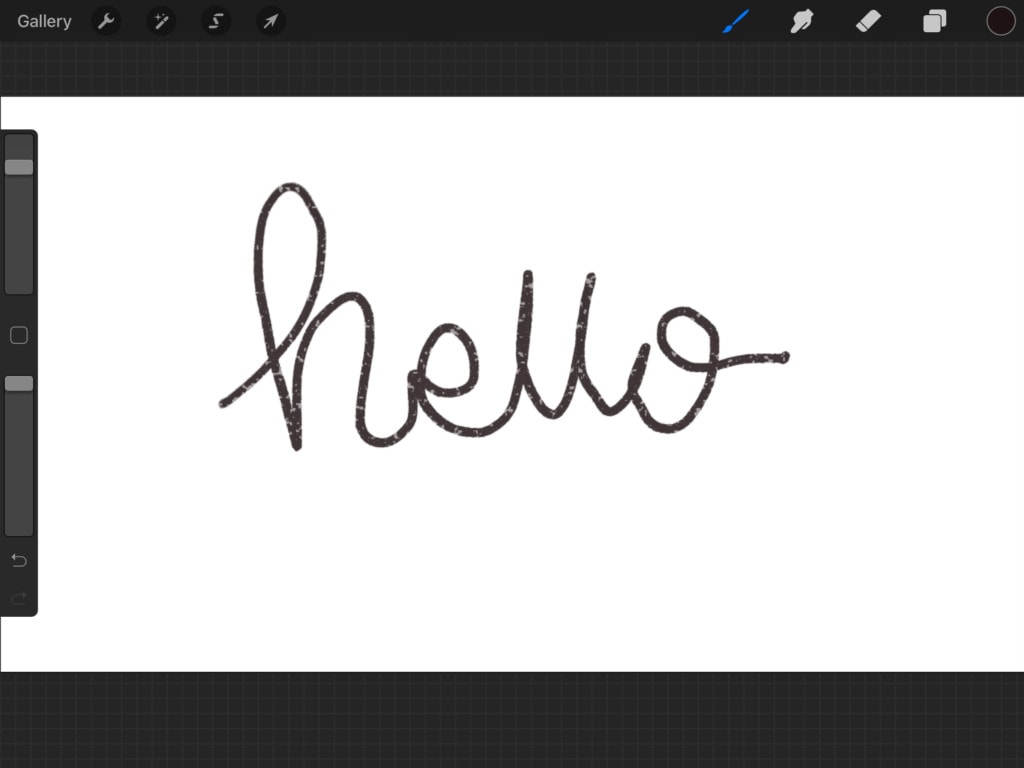
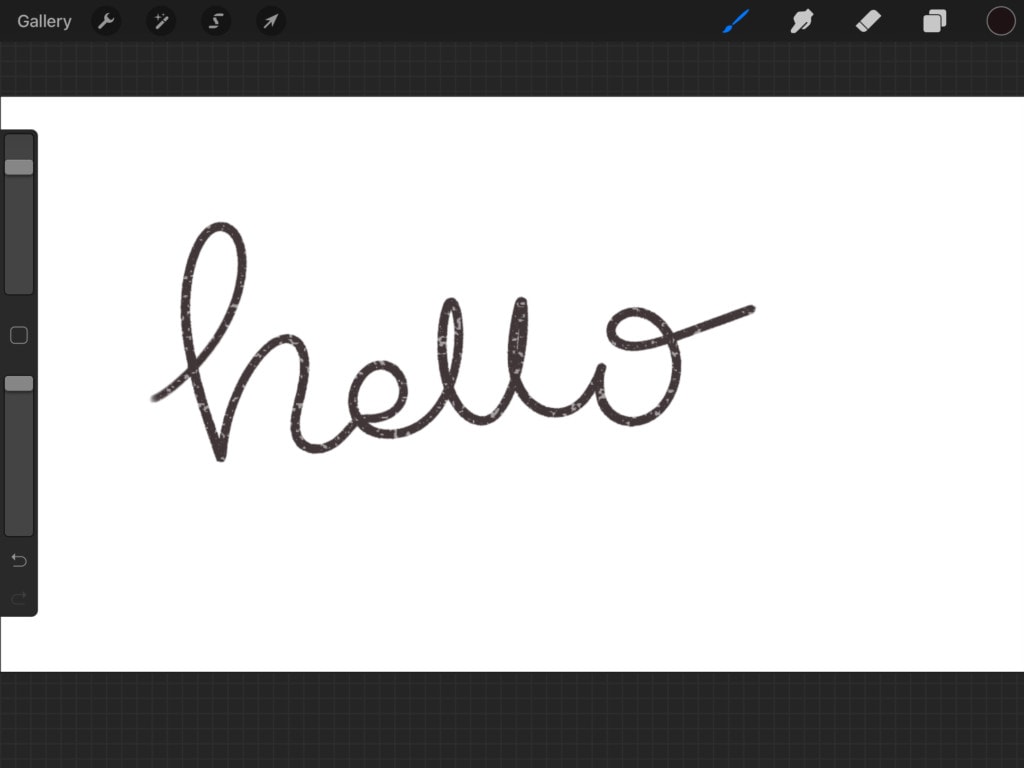
22. Get Flowy Lines
This one might be particularly useful for those who are fond of calligraphy since it makes the lines flow smoothly without capturing a lot of shakiness that may be going on with our hands. So, here is an example do you see both of these “hello” words. Well, one of them sure looks a bit off!
So, let’s get to making the lines smoother! You first select a brush. We are going with a favorite brush of ours which is the “Crumbs Texture JA” from the “watercolor&pencil JA 1” brush set. We like it because of the texture it has. We use it for doing line art as well!
Then after selecting the brush, we tap on it once again, and this opens the “Brush Studio” then we increase the “Streamline”. Now the brush would have a bit more predictiveness to it. It will not use your actual hand motion in order to make the stroke. However, it is going to kind of predict where you want to take it, and then it will place the stroke.

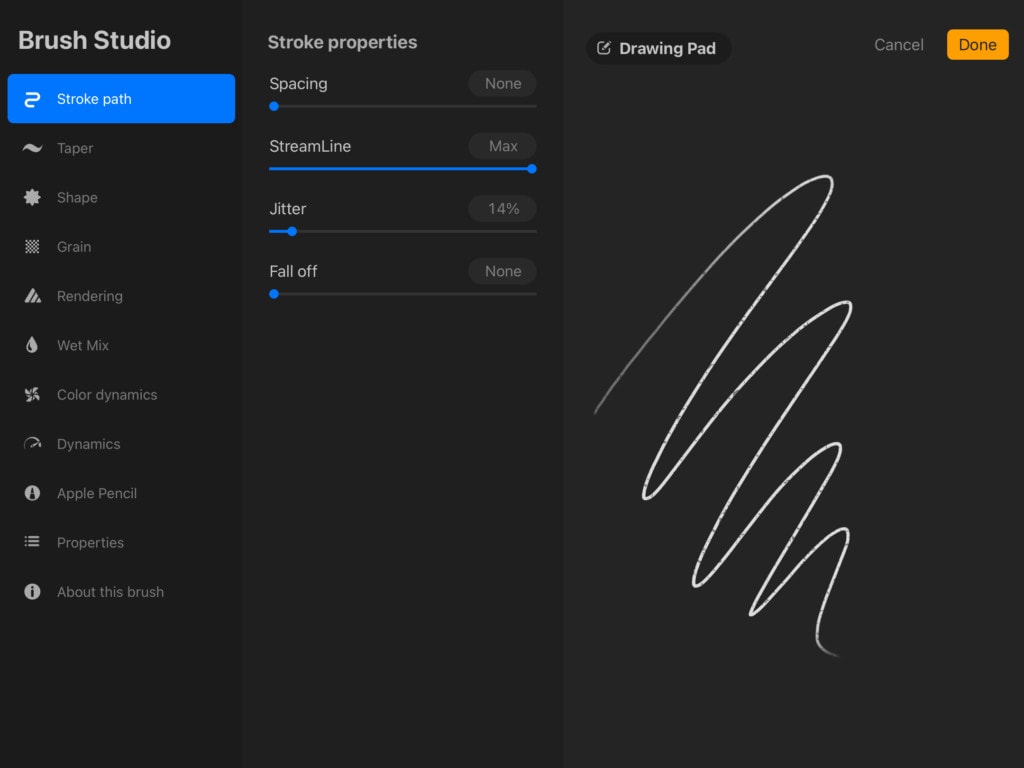
We should warn you though that a high streamline might not be helpful when you are sketching and you might need to lower it again for sketching.
23. Long Tapping Brush Icon
Have you ever been airbrushing something but went too far with it and wanted to erase just a little bit of it so it didn’t seem “intense“? but then you would have to go ahead to the eraser brush menu and choose the same airbrush you are using so it looks like the gradient you were looking for and not just an eraser stroke? We have all been there!
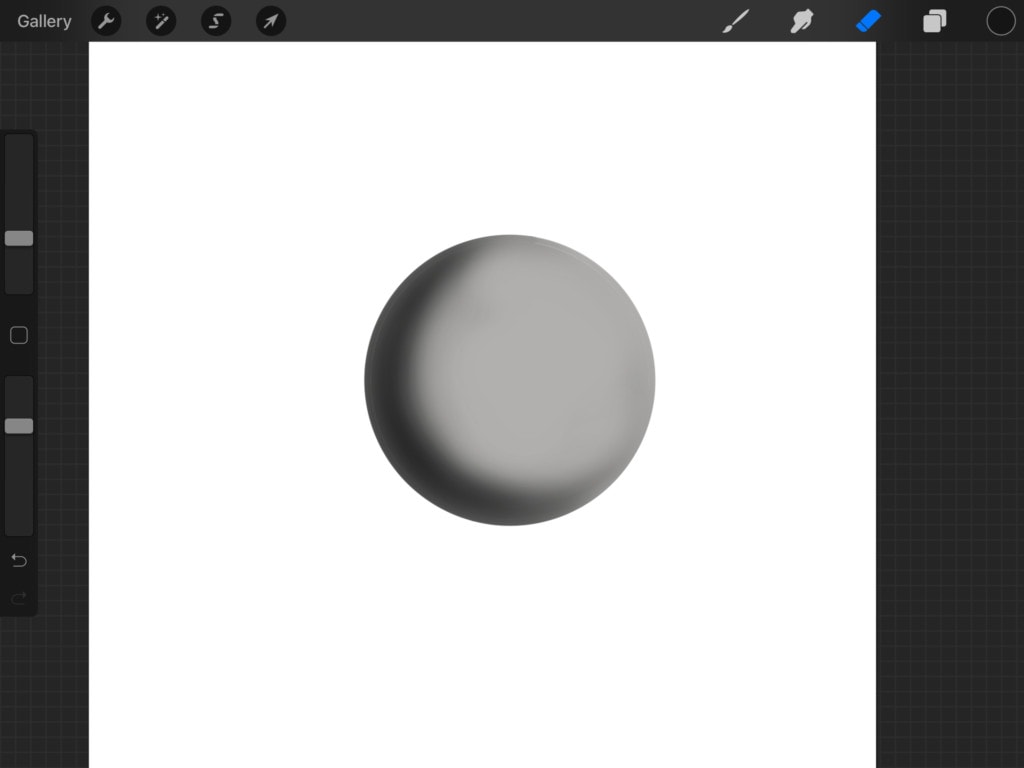
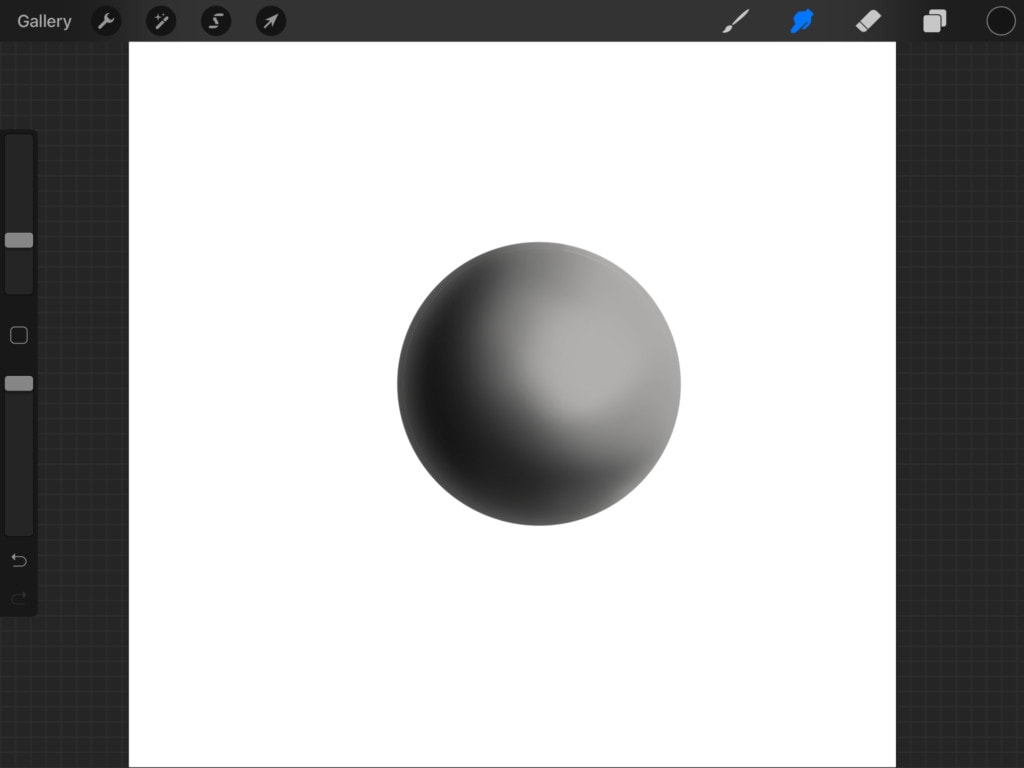
Well, we found a quick way you can choose the same brush that you are painting with as an eraser, after you paint with your airbrush, for example, you would long tap the eraser tool to select the current brush as an eraser. Be careful not to select the eraser first or else it will not work anymore since now your current selected brush will be different, not the same as your painting brush that was selected.
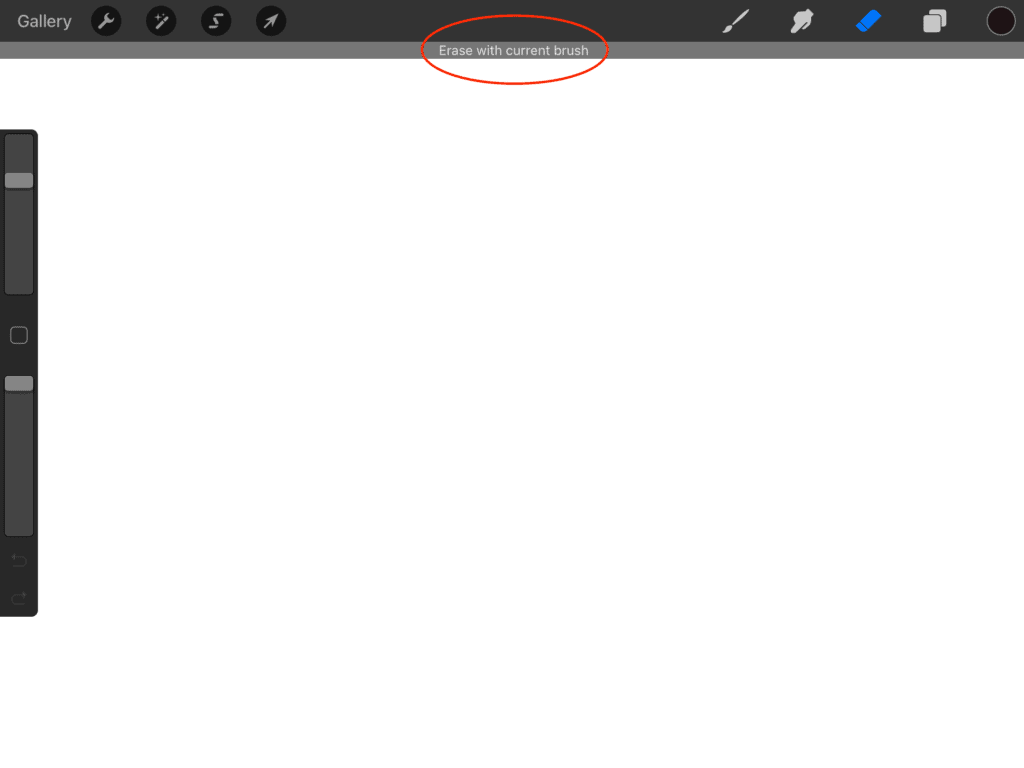
Note that you can do that with the smudge and paintbrush tools. Whenever you have a brush that you like and then you long tap any of those tools (paintbrush, smudge, or eraser) then it will select the current brush that you had selected like a paint, smudge, or eraser brush.
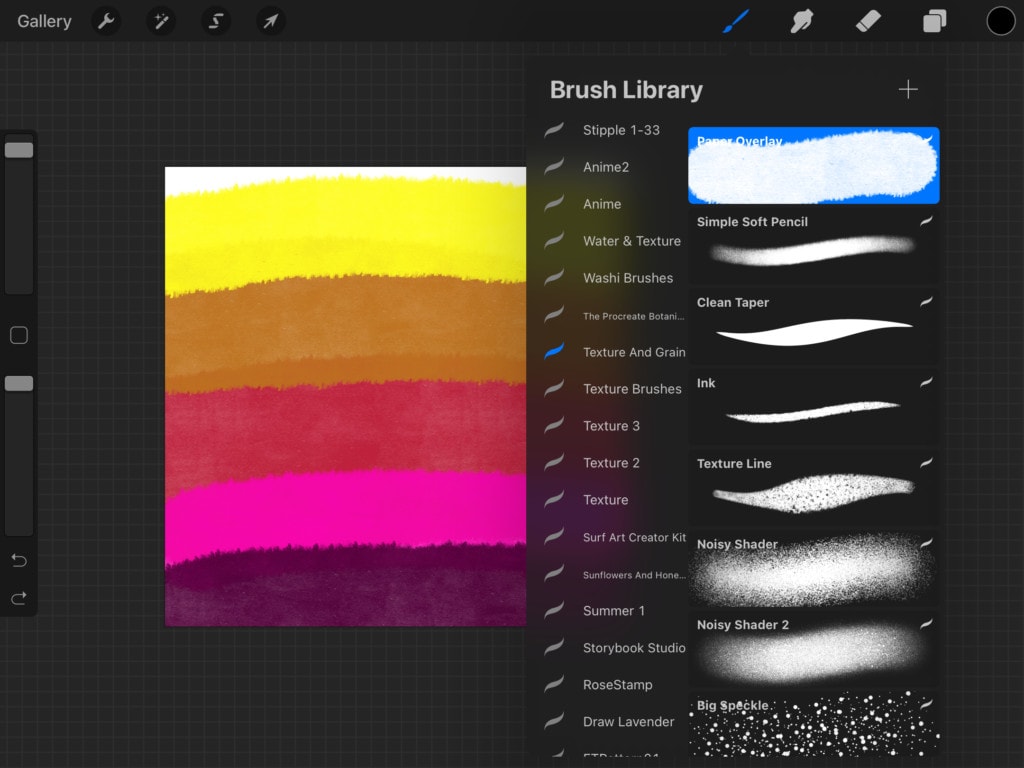
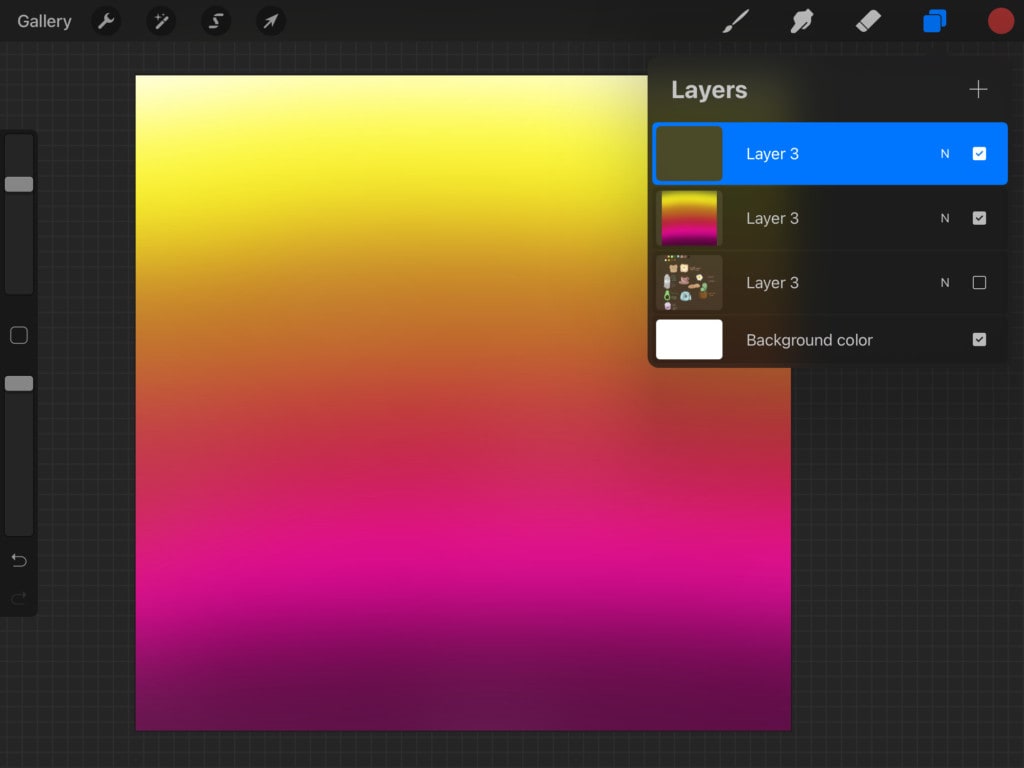
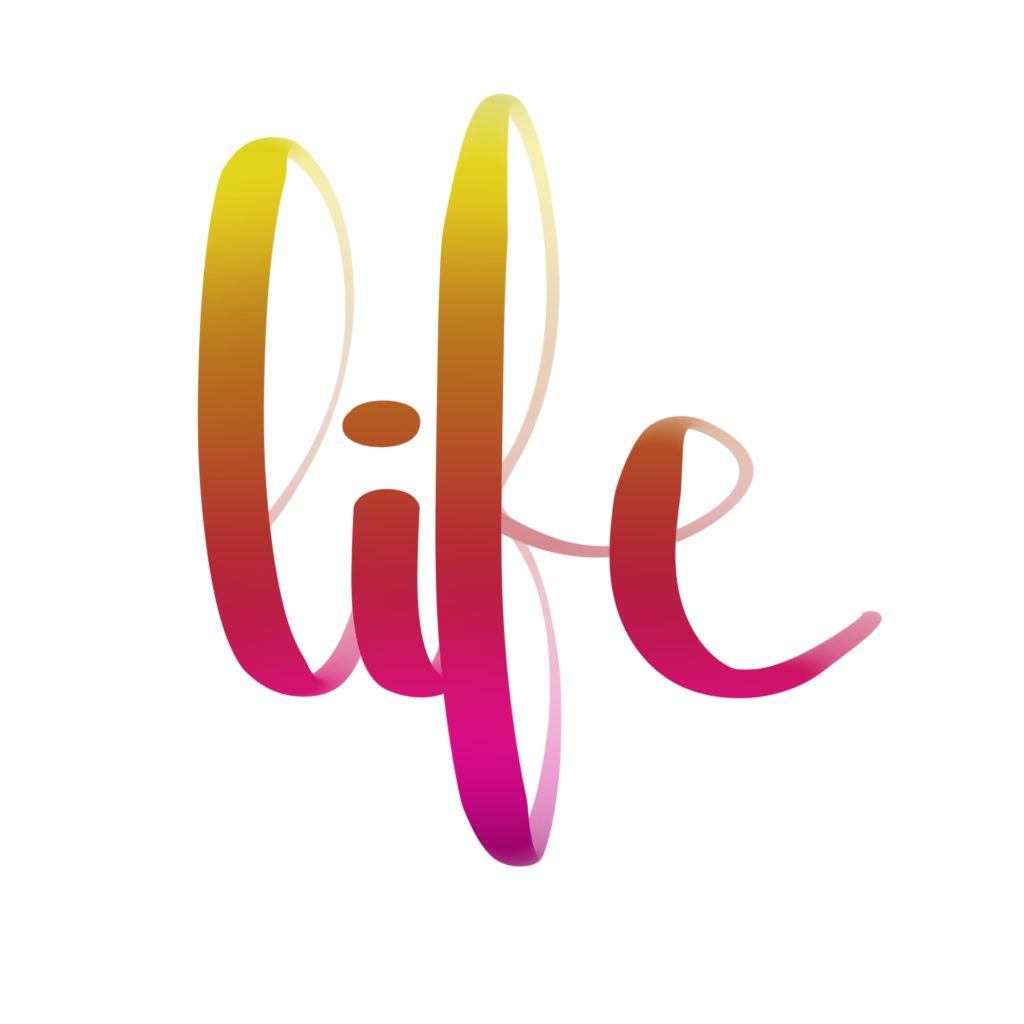
24. Make A Gradient overlay
Now for our last tip we are going to show you something cool! We are going to show you how to create a gradient overlay! For this, we are going to start off with a blank canvas and whatever huge brush you like! Now start layering strips of color. We went for the “Paper Overlay” brush from the “Texture And Grain” brush set.
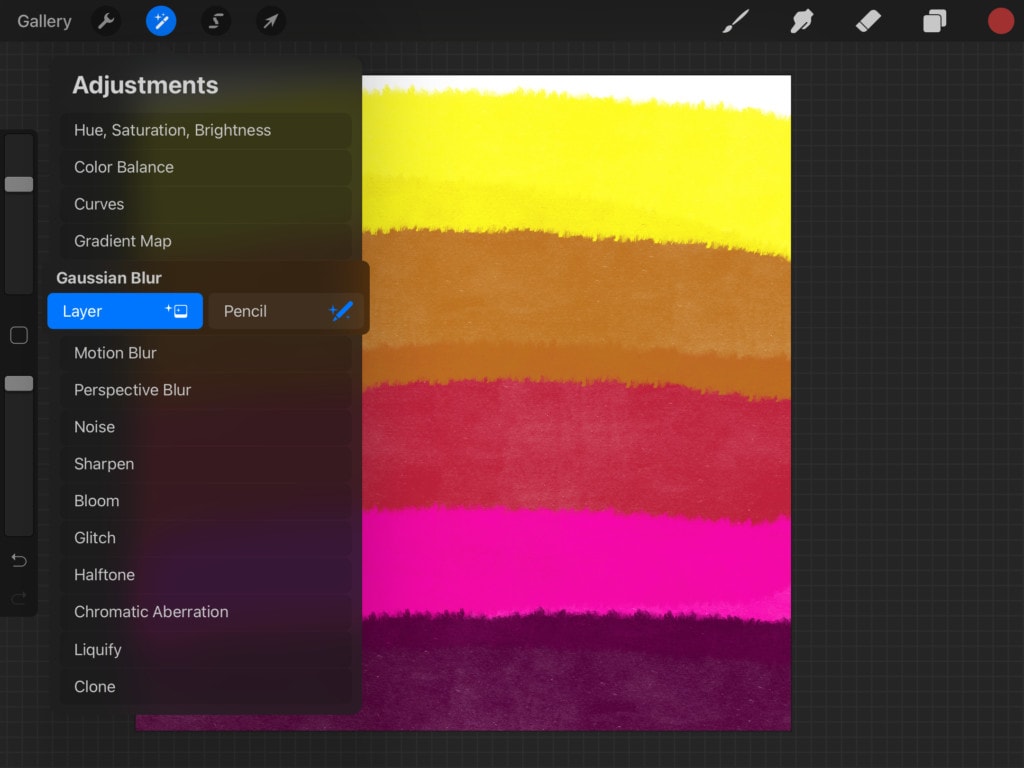
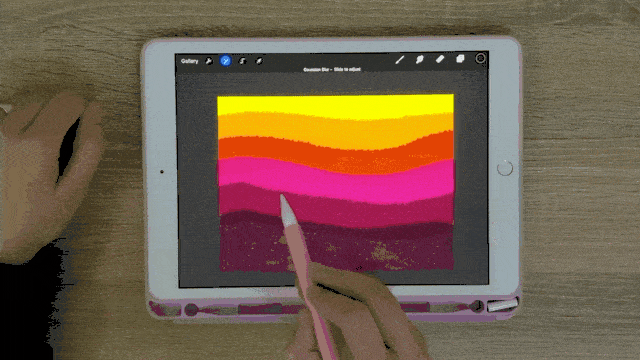
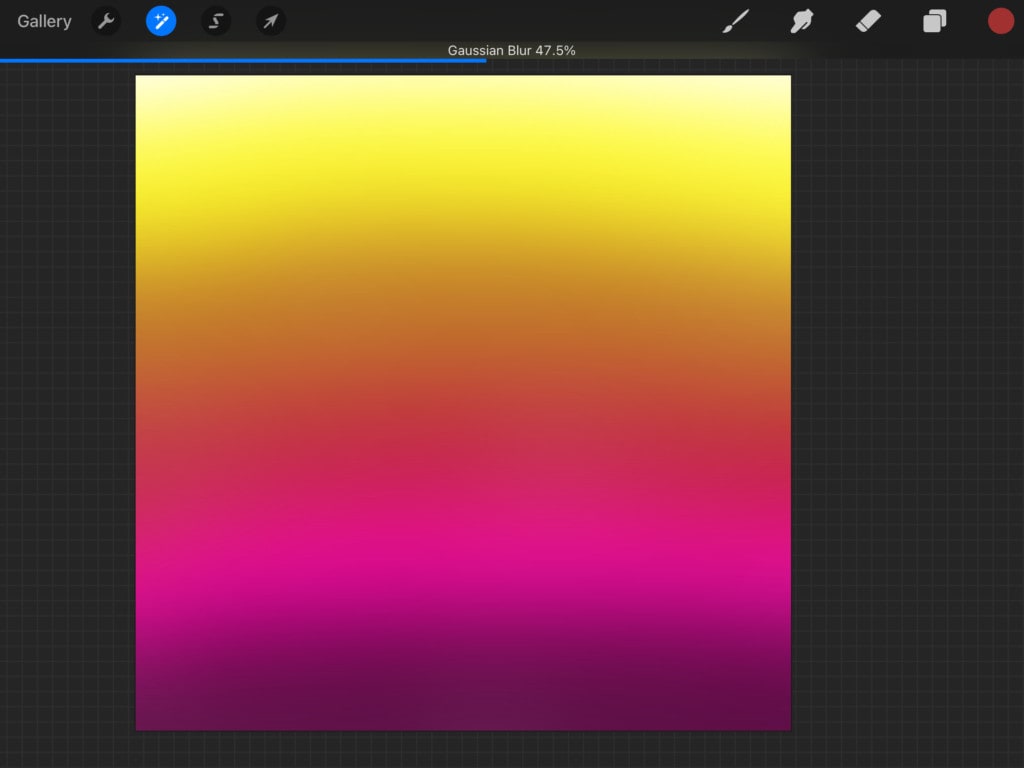
Head over to the “Adjustments” menu, select “Gaussian Blur“, then “Layer“.
Start dragging your pencil to the right and left until you are happy with your gradient!
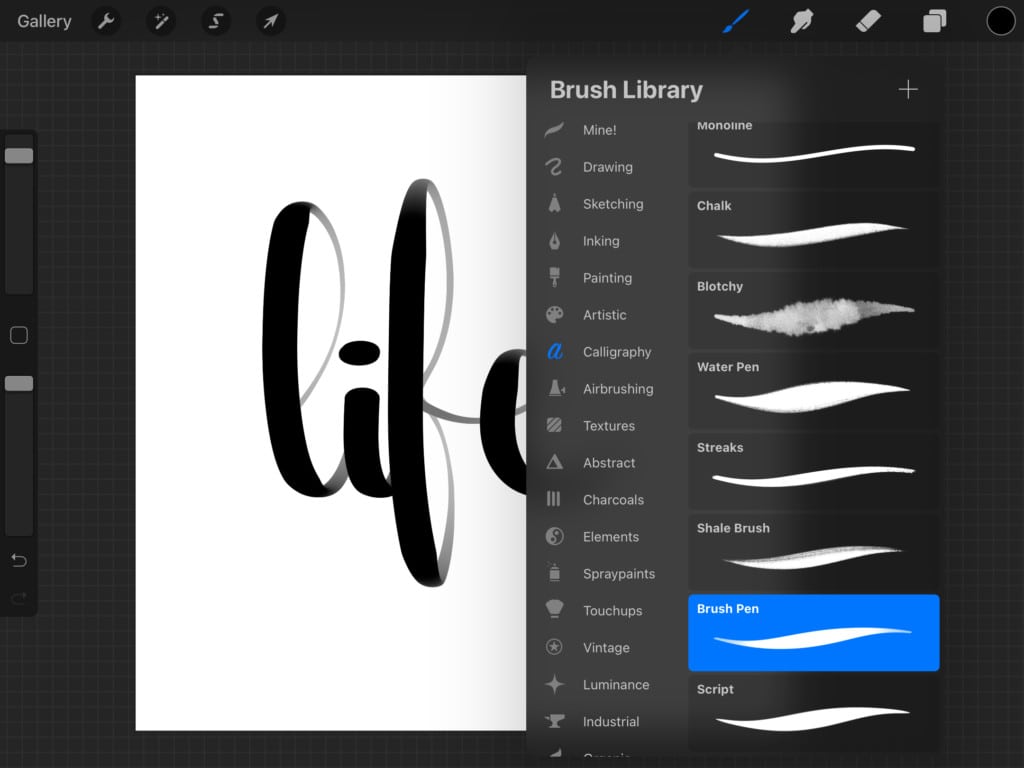
Now let’s create something with that lovely gradient we just created! We are going with calligraphy! Create a new layer.
We chose the “Brush Pen” brush from the “calligraphy” brush set that comes with Procreate. We wrote “Life” on the new layer.
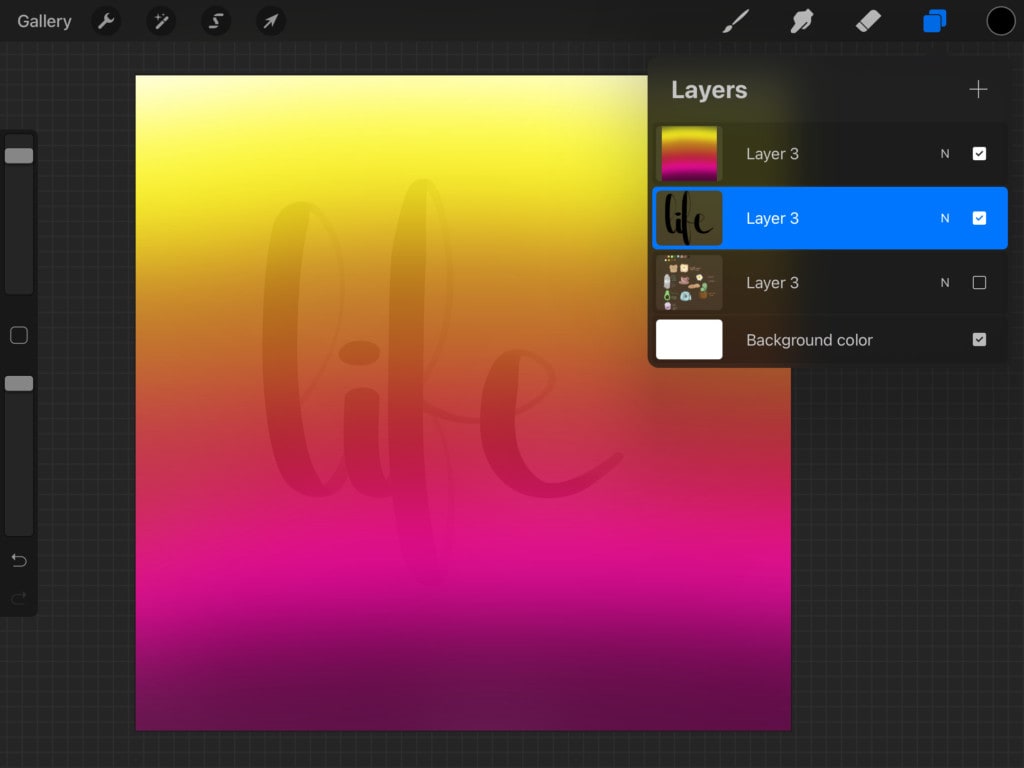
We then got our gradient layer to be on top of the calligraphy layer.
We tapped on the gradient layer once again after selecting it, then set the gradient layer as a “Clipping Mask“.
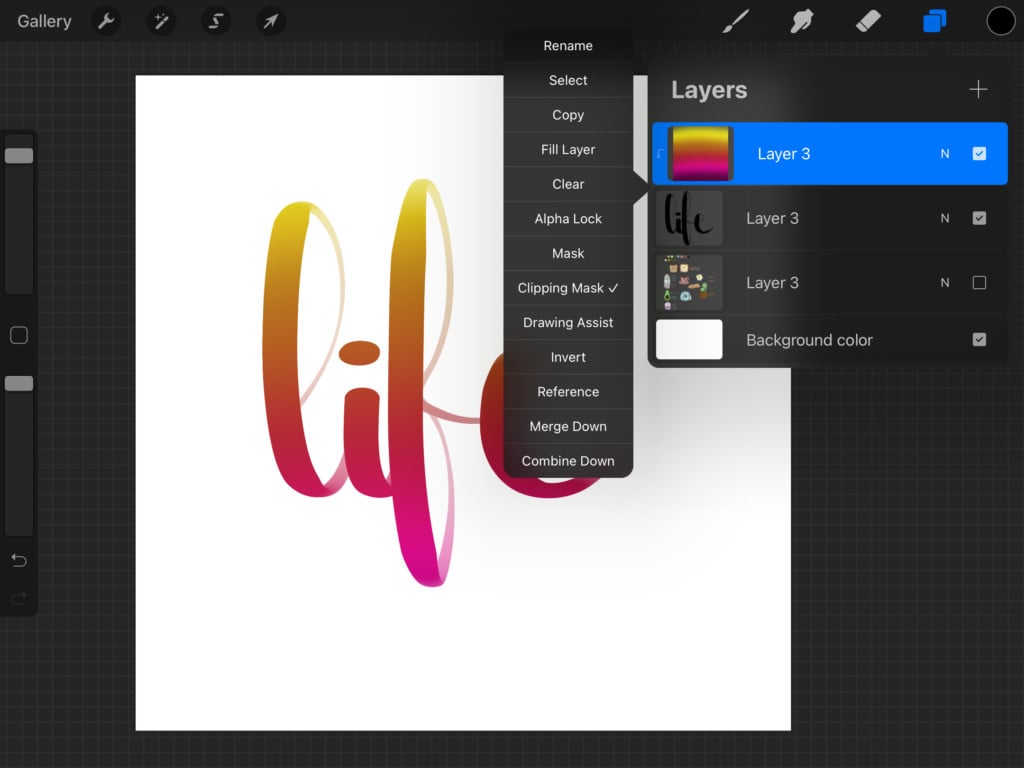
And voila! Now our word is colored in the gradient that we created. Awesome, right?!
And that is it for our tips and tricks! We really hope that you find it helpful and that it takes your art to the next level. 🙂
And if you just can’t live without brushes, feel free to check our collection of more than 50.000 brushes that can help you on your
way to becoming an excellent artist. Keep on creating!


Share this article


